


This post will focus on the unboxing process, showing the product from all sides and any included accessories.
Unboxing


The power supply is packed in an ordinary plain brown cardboard box. If it were not for the labels on one end, I wouldn’t even know what was inside. In our case, it seems that the QPX750SP inside is intended for the UK or European market, but since it was to be shipped out from the US, they also added in a 15A rated US mains lead.
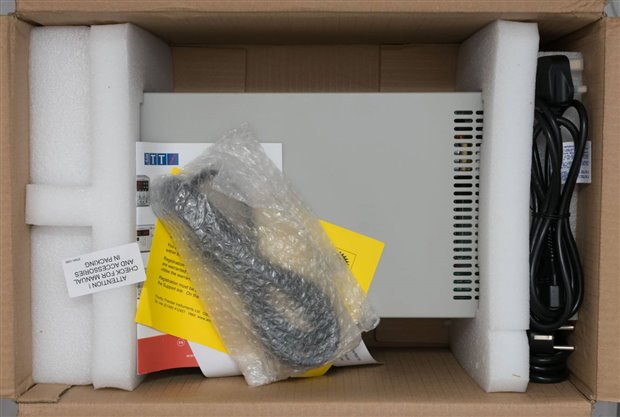
Opening the box, the power supply is packed inside foam ends which keep it securely suspended from all sides to avoid damage and absorb shock. The paper documentation and US mains lead are left to “float” about in the box, which is not ideal, as the power supply is not otherwise protected and harsh shipping could cause some damage to arise. The original UK/European mains leads are tucked into the side and top section of the right foam end-piece – this is a more secure arrangement and cleverly avoids the LCD screen area, but perhaps it would be more ideal if it were in the other foam end-piece instead as that one is holding the rear of the unit.


The paperwork includes a certificate of conformity, an extended three-year warranty notice to register on their website and a small safety documentation booklet. Other documentation and software materials can be downloaded from their website – this to be expected nowadays as it reduces costs, ensures materials are up-to-date and is more environmentally friendly.
The three included mains leads are as expected – note how thick the US lead is compared to the UK and European ones. This is because their lower 120V “nominal” mains voltage requires nearly twice as much current as 230V, so it’s good to see that the appropriate cable is included.
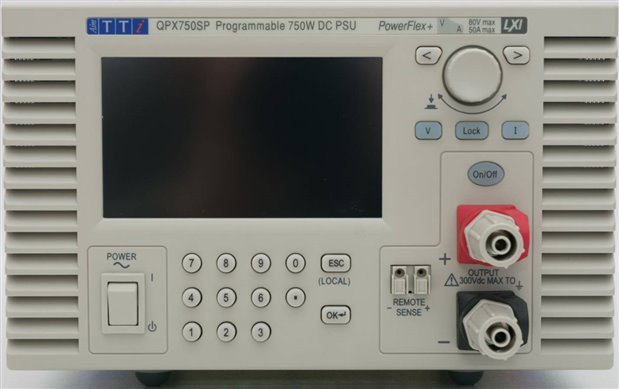
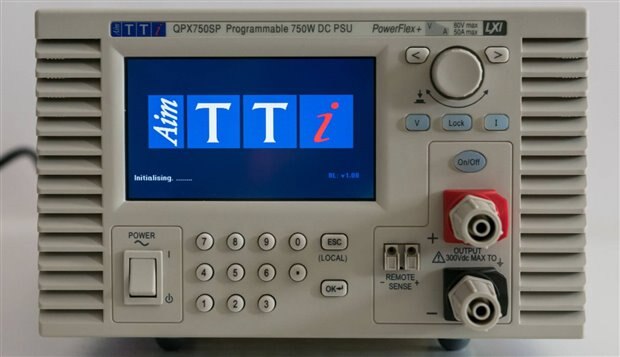
The instrument front panel is decidedly beige-toned with vent grilles flanking both sides. The resistive touch LCD screen occupies most of the area of the front panel. This is flanked on the right with a clicky rotary encoder to change values, arrow buttons to change selections, and light-up buttons for selecting voltage, current and front-panel lock functions. Below the display is a numeric input keypad which has the zero and decimal displaced (which may take some getting used to) and the Escape and OK buttons.
The power switch is in the bottom left, as seems to be convention with many instruments. The casing makes it stand out with a bit of a “moat” engraved around the area. A similar emphasis is given to the front panel outputs which include two of their shrouded binding post terminals, two tool-less terminal block connections for remote sense and a light-up channel on/off button.
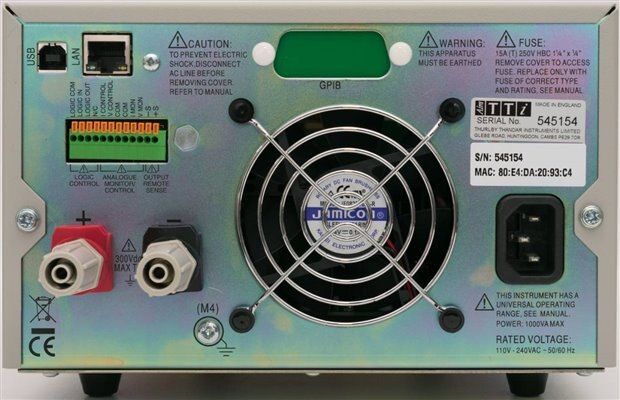
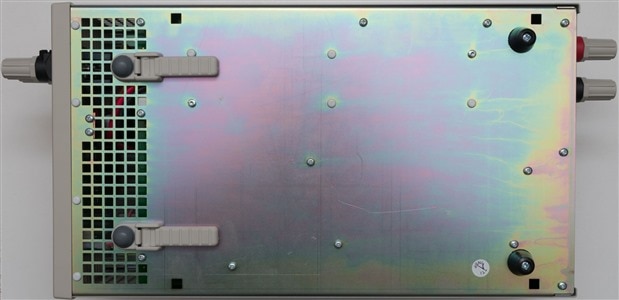
The rear of the unit has a bit of a colourful zinc-plated steel appearance. The same types of shrouded terminals are available on the bottom left of the rear panel to facilitate connections in systems-applications, along with an M4 earthing point. There is a tool-less terminal block above that provides connections for logic control, quasi-analog control and monitoring, and remote sense. In the top-left is the interface connectors for USB and LAN, with a blanking plate in the GPIB cut-out in the top-centre as the option was not fitted to this unit. On the bottom right is the IEC power inlet which is universal, accepting 110-240V AC at 50/60Hz without needing reconfiguration. A Jamicon sleeve-bearing 80mm brushless DC fan occupies the central position, complete with a wire grille. The rear panel is helpfully labelled with all the important connections and safety information. While the instrument is fused, replacing the 15A time-delay high breaking capacity fuse requires opening the cover (although this shouldn’t realistically need to happen unless something bad has happened internally).
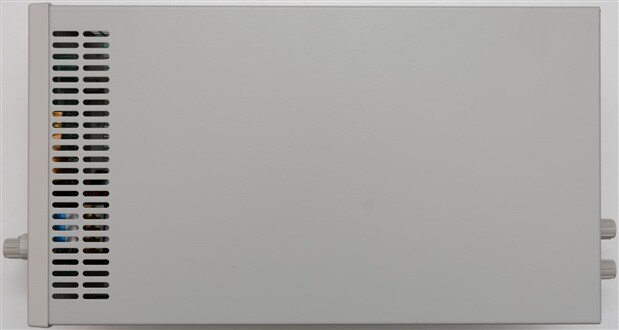
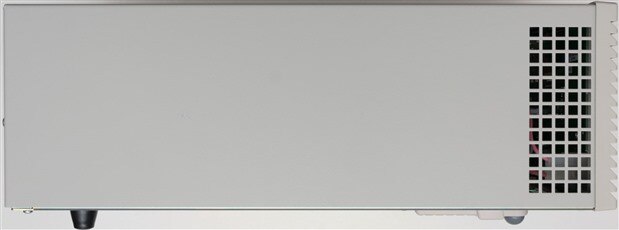
Other views of the unit show that it has been designed with an intentional front-to-back airflow design with relatively large vent holes that ensure low air resistance. These holes continue all the way around the unit, including the bottom. The square vent holes measure 5.7mm across, which makes them the largest that I’ve seen – the risk could be inadvertent entry of items or vermin into the unit. The unit has rubber feet on the bottom with flip-out plastic props which allow the unit to stand up at an angle for better ergonomics.
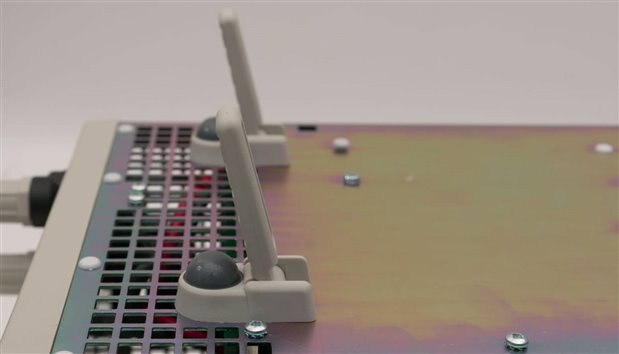
With regards to the plastic props – they are either up or down without any adjustment. I found the height a little higher than I was expecting.

The design of the shrouded terminals deserve a mention since they accept 4mm shrouded banana jacks in their centre for current up to 30A and can handle bare 6mm wire or 6mm/8mm insulated spade terminals for the full 50A. As the supply can generate high voltages outside SELV levels, they are insulated for safety. The design is definitely quite good to accommodate all of these options.


On close inspection of the finish of the unit, I noticed some cosmetic damage on the top cover. I’m not sure if this is a manufacturing defect or perhaps damage which may have occurred with the US mains lead “clattering about” in a thin bubble wrap bag, but at least it does not affect the unit functionally. To allow the unit to operate locally, I decided to lop off the end of one of the leads and fit an Australian mains plug. A simple fix.
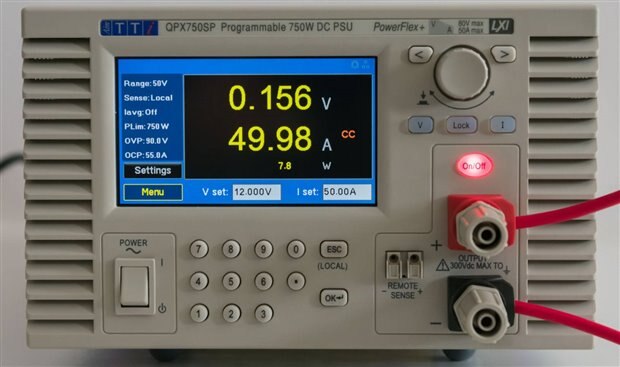
A quick functional test shows the unit is alive and well despite its long journey around the world. This means it’s ready to run the gauntlet of tests that I have prepared for it.
Conclusion
The power supply arrived safely, enduring its long round-the-world journey in a relatively plain-looking brown cardboard box. The supply was suspended in the box with foam end-pieces, although documentation and the extra US mains lead were left to float around in the box without any additional protection for the surface finish of the power supply which could have led to a cosmetic blemish I observed in the paintwork. The included mains leads in my package covered UK, Europe and US as the unit was shipped from the US, so I rewired one of the leads to an Australian plug.
The unit has a beige-coloured front-panel with a very straightforward design incorporating the colour resistive-touch LCD interface with a more traditional numerical keypad and rotary encoder inputs which should satisfy all types of users. The design of the unit has clever shrouded terminals to ensure safety but also accommodate a variety of connections including ordinary 4mm shrouded banana plugs up to 30A and 6mm/8mm insulated spade terminals or bare wire up to 50A. The rear panel of the instrument is well labelled, with an output for system-applications and all remote-control interfaces available. The GPIB option was not fitted to this unit but is available for purchase. The unit has a universal voltage input which is quite convenient. Airflow is also very clearly designed for a front-to-back arrangement which uses an 80mm brushless DC fan as the exhaust, although the square intake holes are rather large at 5.7mm which could lead to inadvertent intrusion of items or vermin. The unit rests on rubber feet with props which allow for the unit to be angled at a fixed angle upward for more comfortable use.
---
This chapter is a part of the Aim-TTi QPX750SP 750W PowerFlex Programmable DC Power Supply RoadTest Review. More detailed chapters are linked from within the main review.