


This chapter will examine the QPX750SP’s user interface and menus, provide some of my thoughts about the bench-top user experience and evaluate the documentation provided by Aim-TTi to support users.
User Interface & Menus

Turning on the unit on, we are greeted a logo splash screen and a loading bar as it boots up. The time from flipping the switch to reaching the home screen is almost exactly ten seconds, which is relatively quick compared to other instruments with graphical displays.
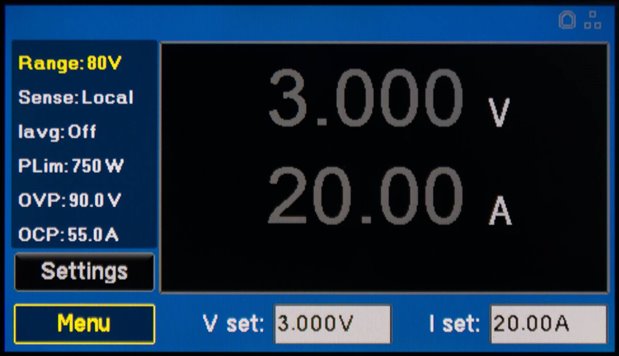
The home screen looks as above with the metered readings being large and dominating most of the display area. When displayed in grey, they read the set-point while the output is off. These turn yellow when the output is on, displaying the measured value with a small indicator showing the mode of operation (e.g. CV, CC, CP), any protection trips (e.g. OVP, OCP) and a warning symbol in case the 80V range is selected. Below that, the operating power is also displayed. When the output is turned off, the displayed figures will be in red, showing the metering as the output discharges (or if voltage is present on the output while the output is off). Entry fields for the voltage and current set-points are below the screen and can be edited by selecting them and entering values on the touch screen or by using the rotary encoder or keypad. This screen also allows you to invoke the main menu and the settings menu.

The settings menu allows for configuration of the range, power limit, OVP, OCP, remote sensing and current averaging features. This display also shows the operational current and voltage in a horizontal fashion, while also showing the power and computed resistance below with the channel active. Unfortunately, the computed resistance is not displayed on the home screen and this screen does not allow for reconfiguring the voltage and current set-points, so I did find myself toggling between the two at times.
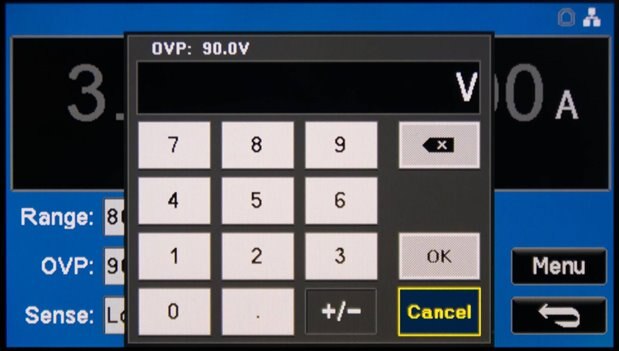
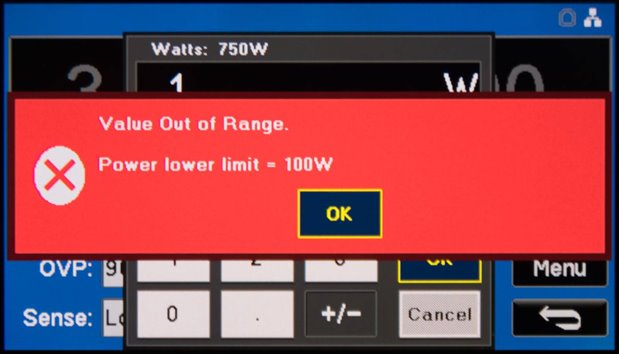
Changing values such as the OVP can be done by the on-screen keypad which looks as below. This is relatively easy to use, although to exit it, you must tap on Cancel as tapping outside the window does not close it. In case critical errors occur, a red pop-up box is shown which indicates the problem. This visual theming is consistent with all errors including OVP/OCP trips, hardware errors, etc.

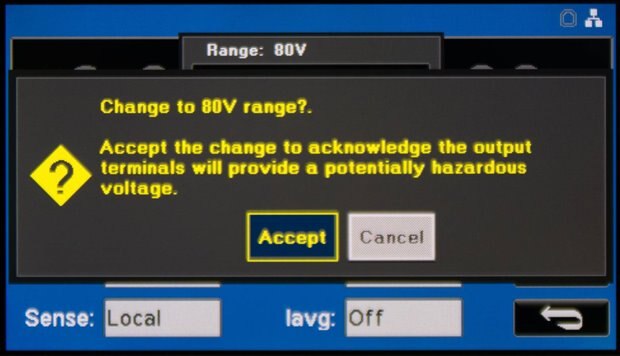
The supply has two voltage ranges, a 50V range which is noted as SELV for safety, and an 80V range which provides the full capability of the power supply. In 80V mode, however, the voltage setting granularity is 2mV and metering accuracy is slightly worse. A warning is displayed when changing to the 80V range via the front panel.
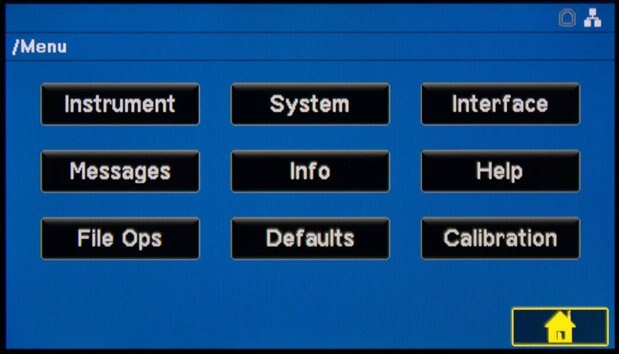
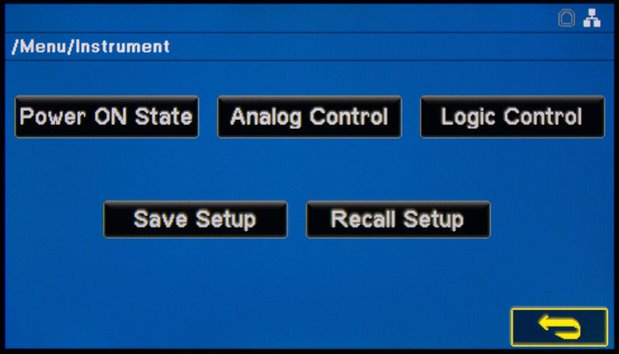
The main menu consists of a grid of nine buttons. Many of these buttons lead to sub-menus which allow for further configuration. As the number of options is relatively small, it doesn’t take long to work out which menus to invoke to get things done even if you have not used the instrument before. It is good to see that there is the capability to configure power-on state for use in unattended applications and the ability to save and recall set-ups.

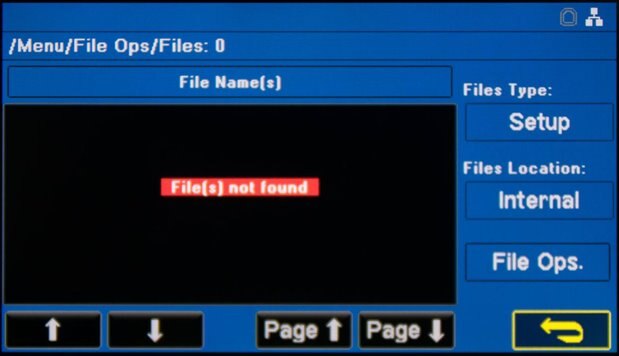
These set-ups are saved to internal storage and can be managed through the File Ops area.
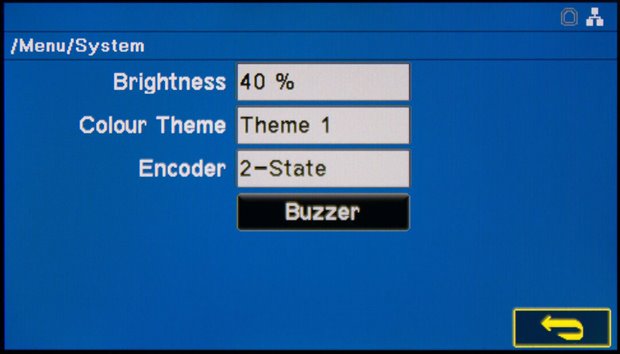
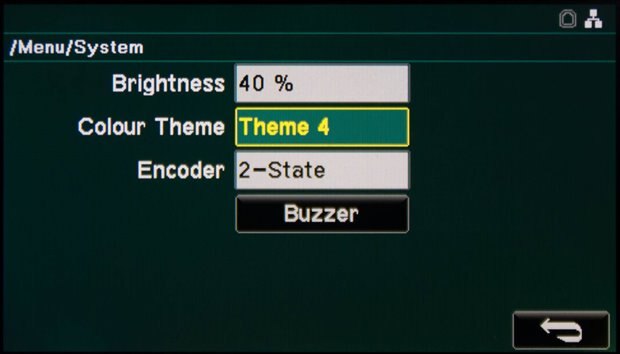
Configurability extends to selection of colour themes, which is a nice touch as some people may prefer slightly different colours, although it is not fully customisable as only pre-set themes can be selected. Rotary encoder operation can also be toggled between two-state and three-state which controls how many pushes are necessary to perform value manipulations (i.e. whether you have an additional step to select the place value to modify). There is no selection for knob reversal (as some users may have preferences in this regard).
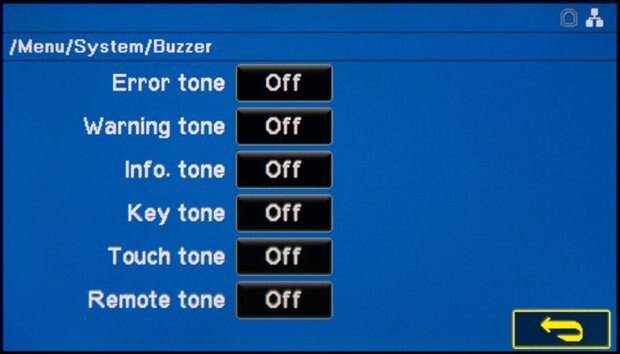
For those who like quiet instruments, the buzzer can be switched off for all categories of notifications. The granularity of selection is definitely appreciated as some users may want certain beeps to still occur while silencing others.
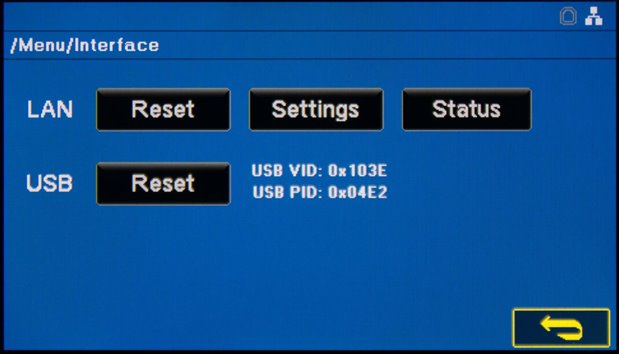
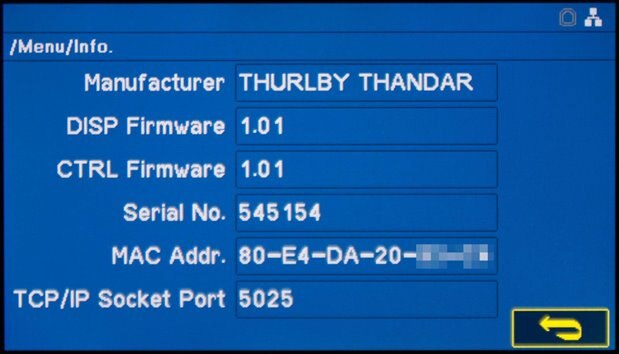
The Interface configuration menu allows for resetting the interfaces, setting the settings for the LAN interface and checking the status. It is noted that the USB connection does not have any configuration applicable. The Info screen allows for viewing the instrument information.

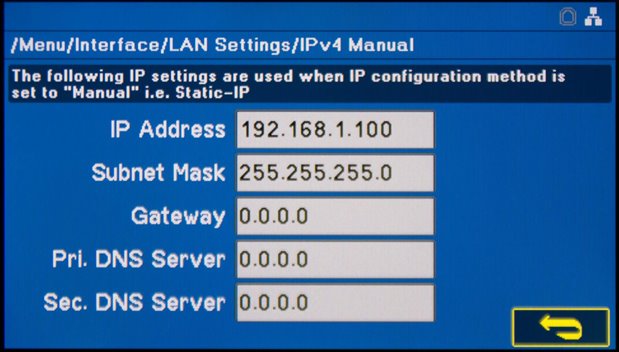
The LAN configuration includes the choice of DHCP or Static IP assignment and editing of the mDNS host and service names.
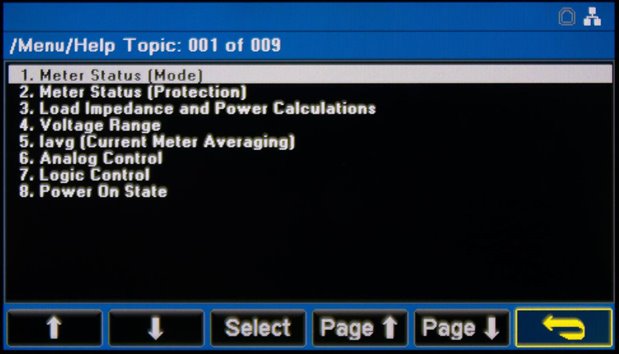
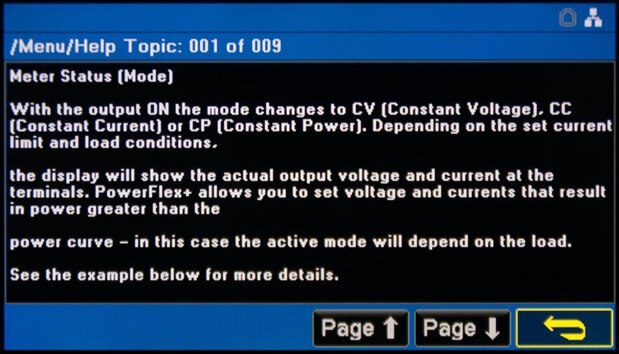
An onboard text help feature is provided, although I don’t see many people using it in reality.

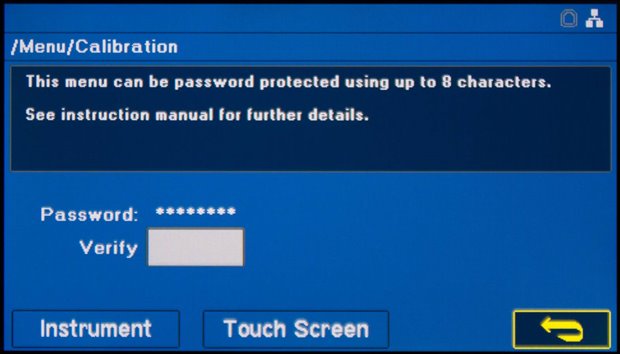
Finally, the Messages section allows you to recall error messages and read the state of the SCPI error queue which is useful in debugging remote-control programs, while the Calibration screen is password protected but allows for accessing calibration of the instrument and touch screen digitiser.
User Experience
The power supply has a similar footprint as most half rack-unit width instruments, making it quite easy to stack, although a bit deep for bench-top use. Because of the higher power rating, this unit is around 50% taller than most two rack-unit high instruments to squeeze all of it in. The unit has plastic feet which can prop the unit up at a fixed angle for more comfortable bench-top use, but I found the feet to be a little taller than I would have liked.
The supply seems suited for both bench-top and systems applications with the output available on both front and rear connections. Remote sensing is available on both front and rear, and must be manually chosen from the menu when required. Both front and rear outputs seem to be connected together as there is no selection necessary to choose which output is being used. The datasheet specification seems to imply the rear output is slightly better on transient response.
The design of the output terminals is quite clever. It is fully shrouded for safety and will accept the industry standard 4mm banana plug in both shielded and unshielded variations for up to 32A operation. It will also accept 6mm2 wire as a binding post, or a 6mm terminal or 8mm spade according to the manual for the full 50A. I found the details in the manual to be somewhat lacking regarding what a 6mm terminal is, and I had no luck acquiring 8mm spade terminals, so I settled on 8mm ring terminals which I “cut” to turn into spades. While there are 50A-capable banana plugs, I did not use them as the supply does not claim compatibility. It is possible that a safety issue would arise if banana plugs were used at a current of 50A which could result in damage or overheating of terminals.
Perhaps the biggest weakness of the terminal set-up is the sensing connections, especially those on the front. The sensing connections employed tool-less terminals which were somewhat fussy as to which types of wire they would grip onto. I tried several types of stranded hook-up wire ranging from 18AWG to 24AWG, stripped to various lengths and all would slip out of the blocks at the front. The rear terminal block was a bit more forgiving and held onto these wires, but the compactness of the connections and the amount of cycling that the sense connections may see suggests to me that it would be better if they had designed the unit using regular 4mm shrouded banana jacks for sense connections even though this would mean that bare wires could not be accepted. I asked the manufacturer for advice as to what they would recommend – it seems that using 1 to 1.25mm wire and tinning the ends would help, or use a 1mm ferrule. This advice will be included in future revisions of the manual.
On the whole, I found the user interface to be quite functional. The LCD screen used is definitely bright and clear with an excellent viewing angle. Being flanked by a rotary knob, selection keys and a numeric keypad opens up all of the input methods one could ever desire from a power supply ensuring everyone is catered for. The resistive touch film does add a minor amount of glare, reducing contrast slightly. Using the resistive touch interface was not difficult, although in contrast to capacitive touch screens, use of a hard part of the finger rather than the fleshy bits tends to result in the most accurate response. The concern is down to potentially damaging the resistive touch film due to an accident or wear-out over time and calibration alignment issues. A capacitive touch screen would be more in-line with modern expectations, although perhaps the added expense and complexity is not warranted.
The user interface has a good variety of entry options including selection buttons and virtual keypads which were well sized for ease of use. Perhaps the only niggle, and a minor one at that, is that you are not allowed to exit from these entry boxes just by tapping outside of them as you might expect from a modern mobile interface. You must select the cancel button instead which did catch me out a few times, but it is an easy adjustment to make. I was thankful to see that the instrument had a lot of customisability with regards to its beeper – I prefer silent instruments, so I set all of mine to off. The theme option to change between pre-selected colour combinations is also good as some people may have a preference for different colours.
The V, I, Lock and Output buttons are illuminated which allows easy, at-a-glance assessment of the activated function. The LEDs are single-colour, unlike Rohde & Schwarz supplies which also use the colour to convey whether the channel is operating in CC or CV mode. In fact, the LCD screen has a CV, CC or CP annunciator next to the value to indicate the mode, while the coloured digits reflect either the metered value with the output on (yellow), output off (grey) or while discharging (red). This arrangement is perhaps less “at-a-glance” compared to both Keithley and R&S units I have which use colours and text to indicate CC or CV mode.
Where the output is to be enabled or disabled by digital logic input, the output must first be enabled and “lit up” before the logic input can have effect. However, the button remains lit even when disabled by the logic input, which could lead to some confusion at first. Testing of protections showed that overvoltage and overcurrent protections were both latching events and would display an error on the screen and an indicator which must be cleared using the ESC key before the supply would allow the output to be re-enabled. This is a good safety feature to have.
While testing the user interface and the onboard help feature which allows for accessing some limited text documentation through the touch screen, it was discovered that certain help chapters were not working as expected. They would display just one letter, then an error message of “Help not installed !!”.
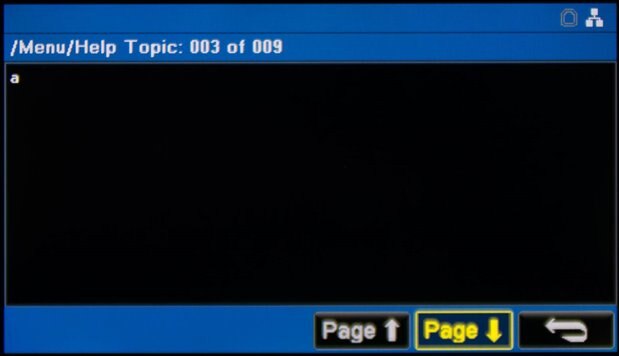

My gut feeling was that this would be a Unicode UTF-16 issue where every second byte is 0x00 and in many languages, this is considered a string-terminator. I reported this issue to Aim-TTi who have indicated that it will be fixed for the next firmware revision.
Compared to the higher-end, but lower-powered touch-capable power supplies I have used, the QPX750SP has one key omission – the lack of a USB Host port. Usually such a port would be used to interface to a USB memory device for recording screenshots, taking data logs, loading arbitrary waveform sequences or exporting settings files for back-ups. Likewise, some take this to a higher level and make good use of the LCD screen to display graphical trend plots of the values being measured by the supply. The QPX750SP has none of these features, which did complicate the preparation of this review, but the ability to log and run sequences can be done via the Test Bridge software which is better than nothing. However, compared to the other power supplies in this power class which are quite dated in design, these capabilities are still very uncommon, as such supplies are probably more likely to be used via automation in a rack-mount system application rather than as a bench-top unit. This would make the front-panel touch LCD a little superfluous, but it is still a nice feature to have.
With regards to the acoustics, I would have to say that the QPX750SP performs rather averagely. While the unit does have a thermostatically controlled fan, as promised, the behaviour and tone of the fan does leave a little to be desired.
Upon plugging in the unit in standby, the fan does come on for a short period, probably for a self-test and goes off. When the unit is started up, even idling at the main screen with the outputs turned off, the fan is running audibly at a moderate pace. I would describe the sound as a relatively constant, low, resonant, blowing noise. I suspect it is generated by the turbulence between the rear fan grille and the cut-out in the rear plate of the unit, as if I cup my hand around the edge of the grille, the noise becomes much softer. Switching off the unit results in the fan running up to a higher speed for a few seconds, presumably to cool-off the internals before it shuts off. This is a technique perhaps more commonly seen in microwave ovens.
On loading, the fan speeds up as the unit heats up resulting in a louder, whinier characteristic emerging. While not as loud as my noisiest power supplies under full load, the noise is appreciable and the thermostatic control leads to a noticeable “hee-haw” oscillation of fan note, occurring in unpredictable intervals. This can be somewhat distracting if working in close proximity. However, thermally speaking, it seems the fan and extensive intake grille arrangement is very much sufficient in keeping the unit within operating temperature requirements.
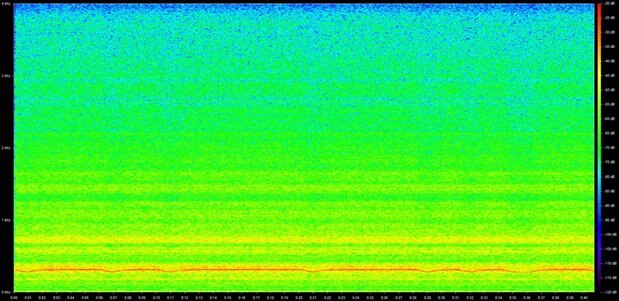
Like other switching power supplies, some unavoidable acoustic emission also occurs from the supply, most notably on switching on loads which results in a high frequency “chirp”, or on cyclical hard-keyed loads which result in a noticeable “ticking” from the unit in-synchronisation with load changes. Under some light loads, sometimes a soft audible “hissing” is heard from the unit, but is relatively in keeping with the behaviour of other purely switch-mode power supplies I have used and owned.
Documentation
The documentation for the QPX750SP can be downloaded from Aim-TTi’s website and comprises of a brochure-datasheet, instruction manual and user guide for the Test Bridge software.
In general, I found the documentation provided by Aim-TTi to be quite brief, with the instruction manual being all of about 50 pages in total. In fact, the sum total of this review may be the same length as the instruction manual! The brochure-datasheet was well laid-out with a detailed breakdown of specifications, although some were notably missing (e.g. digital logic input/output response time, meter sampling rate). However, despite the brevity, it seems they have focused on the practical operational aspects, illustrated with screenshots, and their SCPI command listing is done in a very abbreviated manner. While it is not entirely comprehensive or explicit and leaves some things to the user to explore, I felt it was still just adequate for my needs and served to be a valuable read to acquaint myself with some of the special features of the QPX750SP and Test Bridge software.
Software is also available for download, which includes a specific firmware updater tool for this model and the Test Bridge software which I cover in the next chapter.
Conclusion
The Aim-TTi QPX750SP is a little bigger than the average bench power supply, following the same footprint as a half-rack-unit-width device but being three rack units tall. The unit is designed with both bench-top and systems applications in mind with both front and rear terminal connections. The LCD screen is bright, sharp and has a great viewing angle. The user interface accommodates users which prefer touch, rotary knob or button inputs through the front keypad. Feedback is provided with some buttons being backlit by LEDs in addition to the information on the LCD. It is very configurable, offering options including changing the colour theme of the interface, buzzer tones for many different categories of alerts and power-on behaviour to name a few. It also allows for save and recall of settings.
When in use, I found the ten-second boot-up time to be decidedly swift compared to other graphical instruments and the design of the main terminals to be quite flexible in allowing for use of both shrouded and unshrouded 4mm banana plugs for up to 32A and bare wire or spade terminals for the full 50A current. Unfortunately, the sense terminals were not as forgiving in terms of the wires they would hold onto, and I was not convinced of their longevity under frequent connection or disconnection. It is my opinion that ordinary shrouded 4mm banana sockets be preferable despite eliminating the possibility of bare-wire connections.
The unit, when propped up on its feet, stands a little taller than I would expect. On the whole, the user interface is intuitive and easy to use, save for exiting dialogue boxes which requires the push of the cancel button as tapping outside the window does not dismiss it. This has caught me out a few times, but I’m sure I will adapt. I feel that full advantage of the colour LCD may not have been taken, as other supplies I have used will colour-code the digits to indicate operational mode which can be perceived at-a-glance compared to the smaller indicators on this model. Similarly, other supplies have also back-lit their output buttons to indicate operational mode as well, while this unit uses the LED to indicate channel state only. This can be confusing when digital logic input is used, as the channel state may appear on but is disabled by the digital logic input.
Functionally, while uncommon amongst supplies in this power envelope, the omission of the USB Host port is unfortunate, as it means this supply is unable to export its settings or record data, take screen-shots or load sequencing data from an external USB memory device. As this unit lacks these features on-board, it relies on a host (either running bespoke software or using Test Bridge) to command it via the remote-control interface to achieve some of these functions. Some more sophisticated power supplies also take advantage of the LCD to produce graphical trend plots of values over time. However, given that a colour LCD is relatively uncommon amongst supplies of this power class and the likelihood that many units are going to be used in systems applications where the user interface is relatively unimportant, this omission is perhaps not a major issue especially considering the price.
Perhaps the biggest annoyance for bench-top use is the acoustics of the unit. The thermostatically controlled fan runs at a low but definitely audible resonant blowing noise even when the unit is unloaded. Under heavy load, the fan speed does increase and the noise is even more pronounced with a whiny character. The thermostatic control results in a seemingly random “hee-haw” oscillation of fan speed that can be quite distracting. Similar to other switching power supplies, the QPX750SP also has some minor acoustic noise related to the load including a soft “chirp” on start-up, noticeable “ticking” on step load changes and a soft “hissing” under light loads. This is not unusual for switching power supplies.
Documentation available from their website was quite brief but sufficient for most purposes with a focus on practical aspects and screenshot illustrations throughout. An issue was identified with the help functionality which was reported to the manufacturer for rectification in the next firmware release. Similarly updates to the user manuals will more clearly specify the recommended terminals and ferrules to be used with the terminals on the supply for safety and compatibility.
---
This chapter is a part of the Aim-TTi QPX750SP 750W PowerFlex Programmable DC Power Supply RoadTest Review. More detailed chapters are linked from within the main review.