


It's been a while since I last wrote here but I was busy developing my project!
I set up the Arduino Yún and it's fantastic. The Linux side is very handy, but I nearly ran out of memory on the Atmega chip (LCD driving libraries and fonts are resource-heavy!).
While I'm still working on the different clients, I am nearly finished developing the web interface and the Arduino communication code.
The Web Interface
It’s coded in Python (CherryPy as backend) and Javascript and is hosted on the linux-side of the Yún. It can connect to any of the lights so that you can control them as you want. Here's a screenshot:

It’s pretty basic and I plan on adding more features. It’s also my first experience with Javascript. On the upper right, there is a button you can use to choose which client to connect to: it turns green if the connection is successful, red otherwise.
I found the color picker on Google and tweaked it a little bit: unfortunately, I don’t remember who made it as it was a few weeks ago.
The Web Interface is sending commands in the following form, which will then be read by the Arduinos: MODE,R,G,B$. For example, if you want to set the orange color, the command would be “M,255,128,0$”, with ‘$’ as the terminating character. This is a Python test server running on my desktop, receiving commands from the web interface.

The ‘F’ stands for fade and the following numbers are the starting and ending values for each color. The last one, ‘5’ in this case, is the delay between each fade step in milliseconds.
‘S’ is strobe mode, and ‘100’ is the delay between each color change in milliseconds.
As you can see, the code is now opening a new connection for each command sent. This is quite bad practice, so I’ll need to fix it.
Python server and script (+ Arduino communication).
These are running on the Linux side of the Yún and they are called and started by the setup() function in the Arduino sketch. There is a set of useful commands from the Bridge and Process classes which can be used to run Linux commands from the Arduino.
In this case, I’m using runShellCommandAsynchronously() to start a non-blocking Python process (i.e. the Arduino sketches continues to run, without waiting for its completion).
I’m calling it twice, to run both the webUI application and the script that connects to the various clients and sends the needed strings.
Here’s the file that sends commands to the various clients. It sends the string received from the Arduino only if it’s different from the previous one.
import socket
import string
import sys
sys.path.insert(0, '/usr/lib/python2.7/bridge/')
from bridgeclient import BridgeClient


def send(host, port, command):
  sock = socket.socket(socket.AF_INET, socket.SOCK_STREAM)


  if(sock.connect_ex((host, port)) == 0): #if connection is successful
  print ("Connected to %s:%d") % (host, port)
  print ("Sending command %s") % command
  sock.send(command) #send the string
  sock.close() #and close the socket
  return 0
  else:
  print ("Connection failed :(")
  return 1


bridge = BridgeClient()
last_command = "0"


while 1:
  if(bridge.get("status") != "0"): #check if we need to update
  IP = bridge.get("IP") #get the IP
  port = int(bridge.get("port")) #get the port and convert it to an integer
  command = bridge.get("data") #get the string we need to send
  if(command != last_command): #if it's different than the previous one...
  if(send(IP, port, command) == 0): #...send it and check the result
  last_command = command #the string we just sent becomes the last sent
  bridge.put("response", "0")
  else:
  bridge.put("response", "1")
That’s how it works: when you call the Bridge.put(“destination”, “value”) function in the Arduino sketch, it puts your value into a “destination” variable. This value can then be retrieved from the Python script after declaring a BridgeClient object and using the command bridge.get(“destination”).
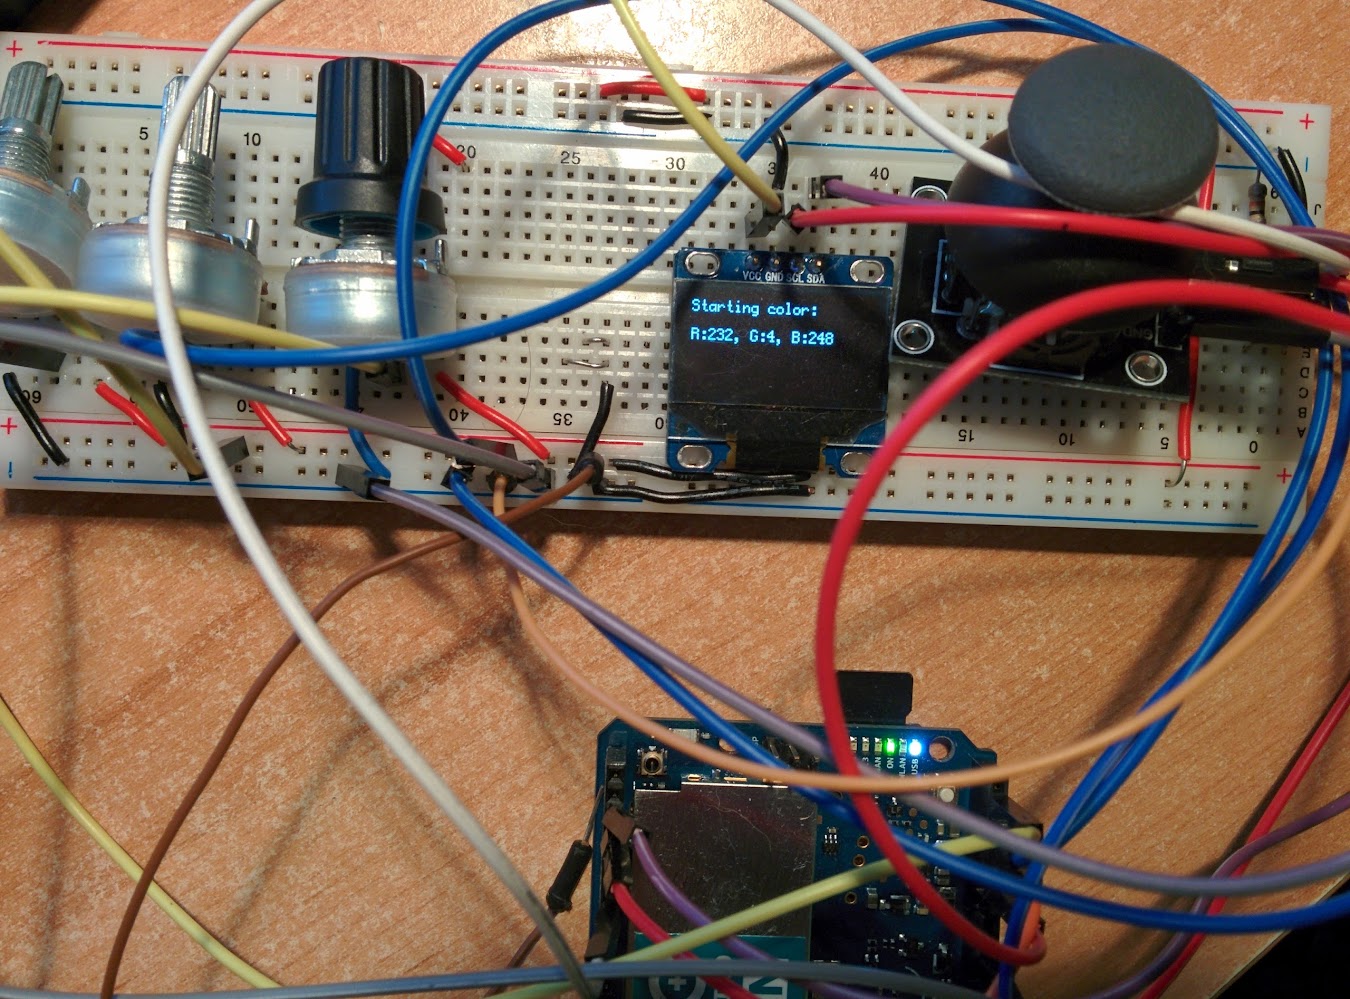
I'm now working on the Yún controller, and here's a (very messy) picture!
Also, tomorrow I will setup the Uno and the Infineon shield, and maybe share the clients code (which receives the commands and controls the lights accordingly).