TinyML: Slope control for Robots with Arduino Pro
Building an inclination estimator system with Arduino Nicla Sense ME and Neuton TinyML
Introduction
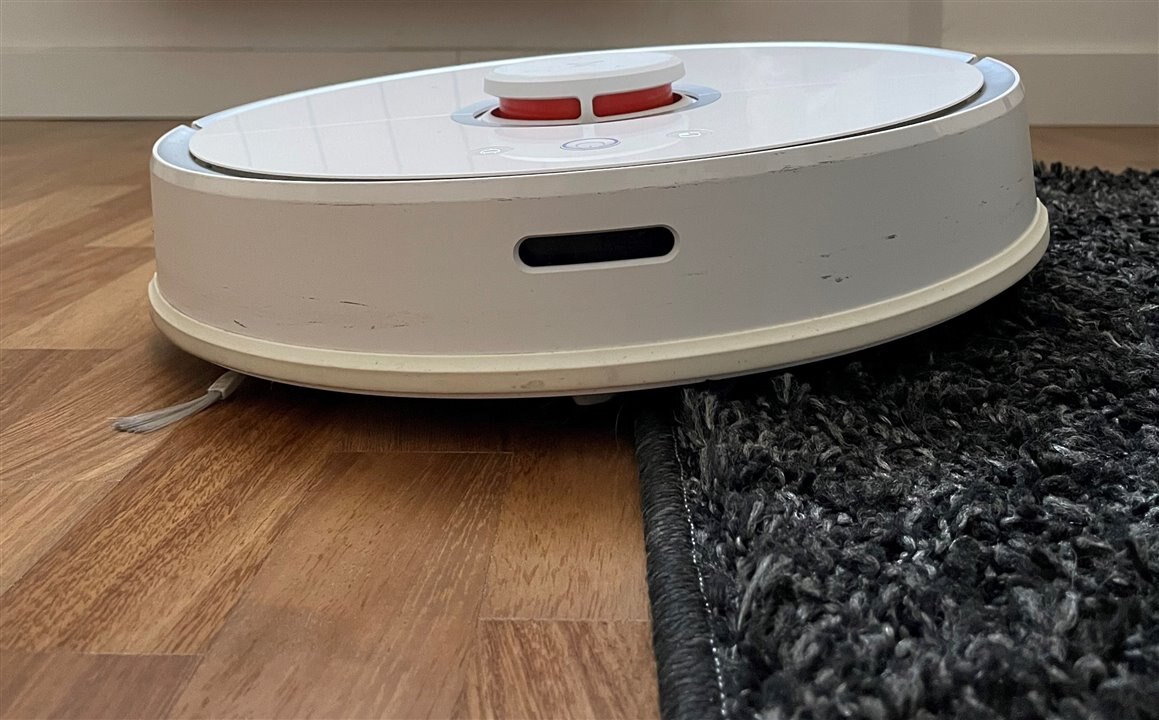
The vacuum cleaner robot is one of the most useful inventions of the last decade and anyone who says differently means that he does not have one! This fantastic household appliance is a concentration of technology: a complex embedded system composed of some microcontrollers, many sensors, and a lot of… software!

But how many times do you get the feeling that your robot is stupid? In particular, in situations when your little helper blocks itself over an obstacle like a home carpet, a drying rack, etc. How to recognize this before it’s too late?
A hack to avoid this annoying situation is to calculate the robot’s path in real-time with respect to the floor and perform decisions according to its current position. For instance, if the slope is over 4° degrees, the robot stops itself and goes back.
In this tutorial, I will approach this problem using a data-based technique, Machine Learning, and show how to implement an inclination estimator system based on an accelerometer using an ML model on an Arduino Pro board. To train and deploy this model on a microcontroller, I’ll use Neuton, a TinyML framework that allows to automatically build neural networks without any machine learning experience and embed them into small computing devices.
The microcontroller: Nicla Sense ME
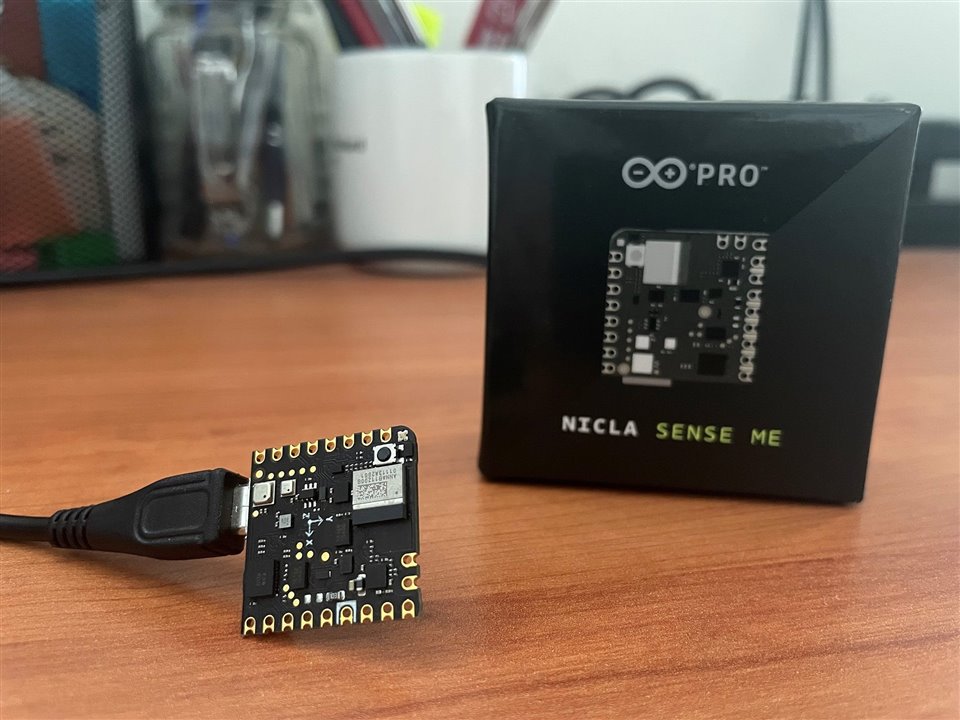
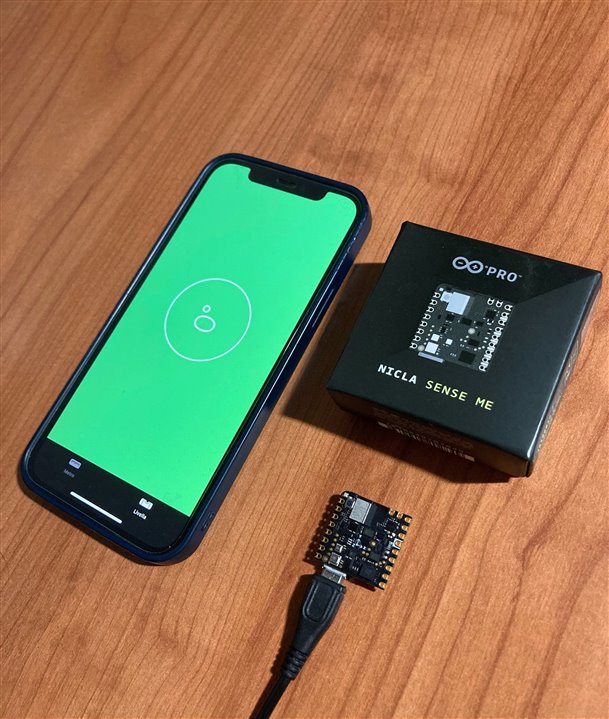
The ML model will be deployed on the Arduino Nicla Sense ME board, a tiny and low-consumption Arduino board with strong computational power. It is based on a 32-bit microcontroller with 4 sensors: motion, magnetometer, pressure, and gas sensor. It is suitable for projects that need to combine sensor measurements and AI tasks on a small device. The perfect match for this experiment!
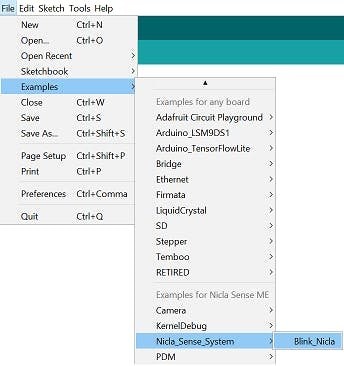
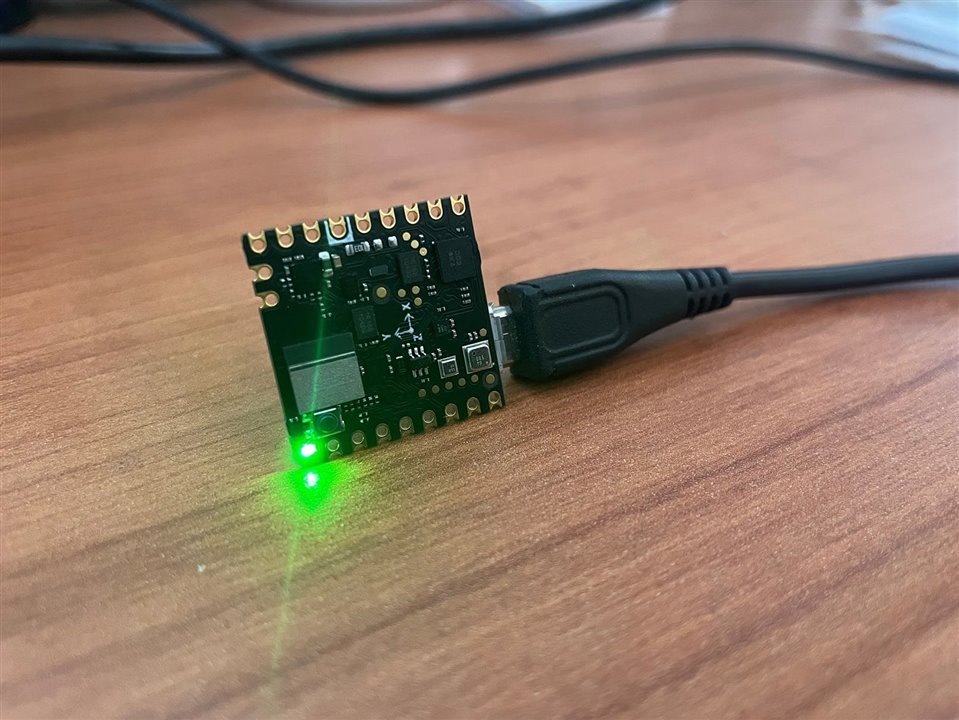
Before “getting your hands dirty” with Machine Learning, check if Nicla works correctly: open the “Nicla_Blink” sketch inside “Nicla_Sense_System” examples and upload it. The LED mounted on your Nicla will start to blink green.

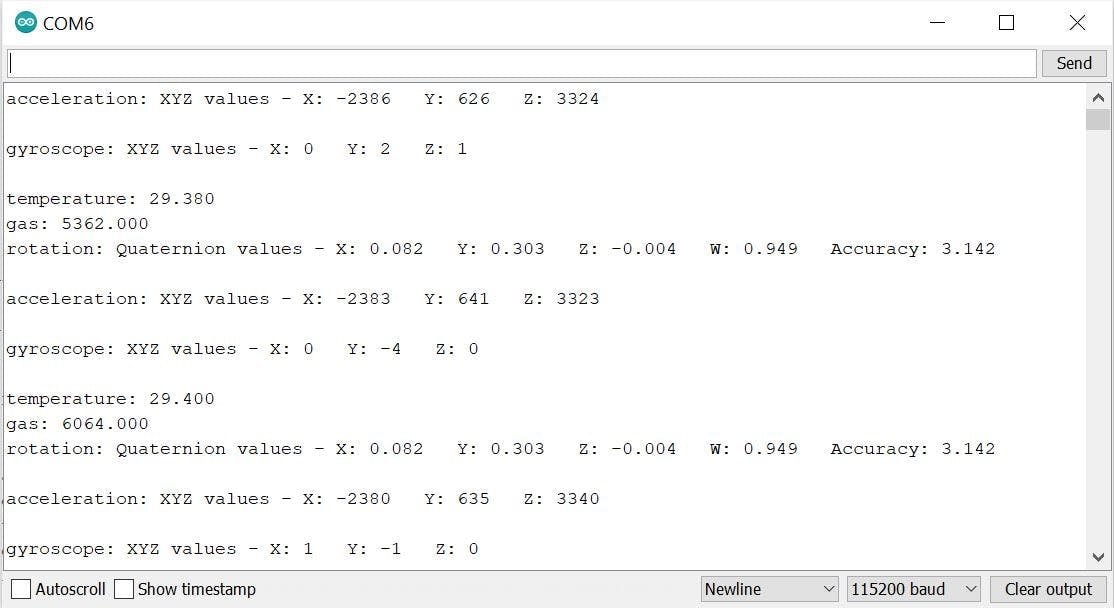
Upload this example on the Arduino board and see the results on the Serial plotter. This sketch configures and reads all sensors data (acceleration, temperature, gas, etc…).
Now, the Nicla is really ready!
Model building
The system is designed to estimate inclination only along one axis and the slope value is expressed in degrees within the [0°; 5°] range.The model takes as input a dataset composed of 50 acceleration and 50 gyroscope measures sampled in a 1-second time window (Sampling time: 20ms — 50Hz).
In the Machine Learning context, this task can be approached in two ways:
- Regression: is the problem to predict a continuous numeric value. The model calculates the inclination as a continuous value between 0° and 5° (e.g., 2.54°).
- Multiclass classification: is the problem of classifying inputs into one of three or more discrete classes.The model identifies 6 classes: 0°, 1°, 2°, 3°, 4°, and 5°.
We will use both approaches and compare them.
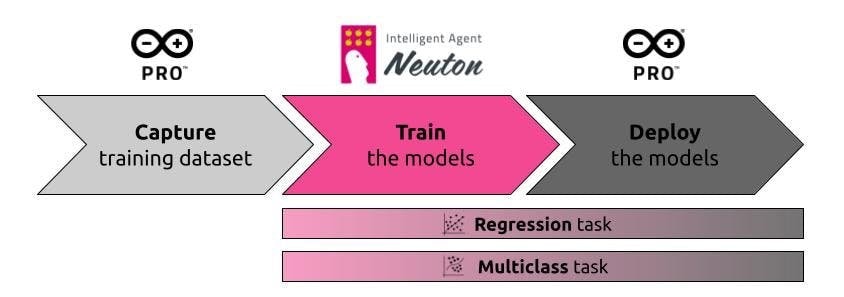
The experiment consists of three stages:
- Capture the training dataset
- Train the model using Neuton
- Deploy the model on Nicla
1. Capture the training dataset
The first stage is to create the training dataset that will be used to train the neural network.For each inclination degree, 10 measurements will be captured and stored in a CSV file. Each measurement will be composed of 50 accelerometer and 50 gyroscope readings.
An Arduino sketch is designed to create the dataset according to Neuton requirements. The program will acquire the measurements of each inclination degree and will print the sensor data on the serial port console. Each degree value to be captured will be inserted by the user through the input serial port.
To create an accurate dataset, it will be necessary to perform the measurements by placing the Nicla board above the agent (in this case, the vacuum cleaner robot) and using a precise instrument to measure the real slope, such as, a digital inclinometer. If you don’t have it, you can use your smartphone and one of the many inclinometer apps available in the Android and iOS stores. In this project, I use the Measure iPhone app.
Below, the Arduino program:
- Include headers, define project parameters and variables
#include “Arduino.h”
#include “Arduino_BHY2.h”

#define NUM_SAMPLES 50
#define SAMPLE_TIME_MS 20

// IMU sensor handlers
SensorXYZ acc(SENSOR_ID_ACC);
SensorXYZ gyro(SENSOR_ID_GYRO);- Setup serial port, IMU sensor and CSV header
void setup() {
 // init serial port
 Serial.begin(115200);
 while (!Serial) {
    delay(10);
 }

 // init IMU sensor
 BHY2.begin();
 acc.begin();
 gyro.begin();

 // print the CSV header (ax0,ay0,az0,…,gx49,gy49,gz49,target)
 for (int i=0; i<NUM_SAMPLES; i++) {
    Serial.print(“aX”);
    Serial.print(i);
    Serial.print(“,aY”);
    Serial.print(i);
    Serial.print(“,aZ”);
    Serial.print(i);
    Serial.print(“,gX”);
    Serial.print(i);
    Serial.print(“,gY”);
    Serial.print(i);
    Serial.print(“,gZ”);
    Serial.print(i);
    Serial.print(“,”);
  }
 Serial.println(“target”);
}- Wait for user input to perform the measurement
void loop() {
 static int    samplesRead = 0;
 static String target;

 // wait for user input (degree target value)
 while(Serial.available() == 0) {}
 target = Serial.readStringUntil(‘\n’);
 samplesRead = 0;

 // read samples of the requested input orientation
 while (samplesRead < NUM_SAMPLES) {
    // read the acceleration and gyroscope data
    BHY2.update();

    samplesRead++;

    // print the sensor data in CSV format
    Serial.print(acc.x());
    Serial.print(‘,’);
    Serial.print(acc.y());
    Serial.print(‘,’);
    Serial.print(acc.z());
    Serial.print(‘,’);
    Serial.print(gyro.x());
    Serial.print(‘,’);
    Serial.print(gyro.y());
    Serial.print(‘,’);
    Serial.print(gyro.z());
    Serial.print(‘,’);

    // print target at the end of samples acquisition
    if (samplesRead == NUM_SAMPLES) {
       Serial.println(target);
    }

    delay(SAMPLE_TIME_MS);
 }
}
Upload and run the sketch, open the serial monitor and incline your Nicla in the target position (verify it with the inclinometer or with the app). After that, you type the degree value in the input field of the serial interface and press enter: the program will perform the measurement… Do not move your board during it!Repeat this for each degree to measure. In this experiment, I measure from 0° to 5° in steps of one degree (0°, 1°, 2°, 3°, 4°, and 5°).
2. Train the model with Neuton
In this stage, you will train 2 different models using the same dataset: one with the Regression task type and the other with the Multiclass type.
2a. Uploading dataset
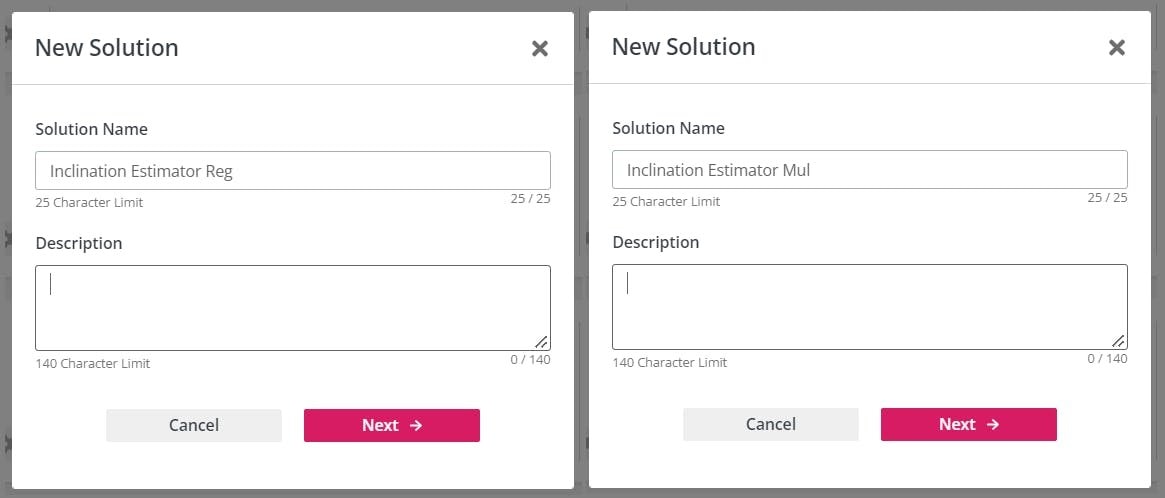
- Create two new solutions with the name: “Inclination estimator Reg” and “Inclination estimator Mul”.
For each solution:
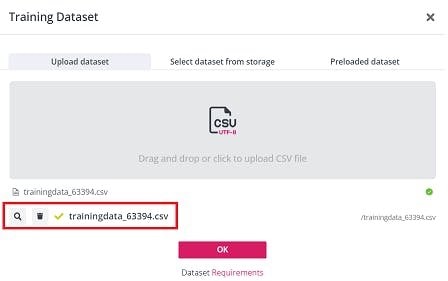
- Upload the training dataset file and verify if meets the Neuton requirements (a green check will appear next to the file name). Then, click “Ok”.
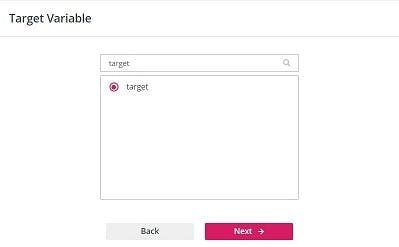
- In the target variable section, select the column name containing the value of the degrees (e.g., target) and click “Next”.
2b. Let’s train!
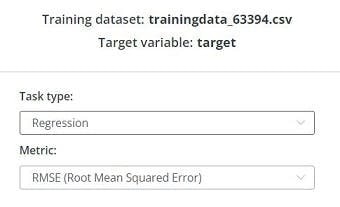
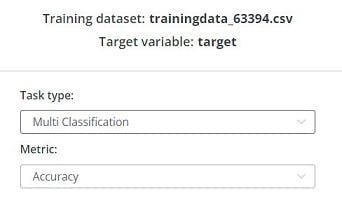
- Once the dataset is successfully validated, Neuton automatically provides the available ML task types. In the first solution select “Regression” and in the second one “Multi Classification”.
- As the model will be run on a microcontroller, enable the TinyML option in both solutions.
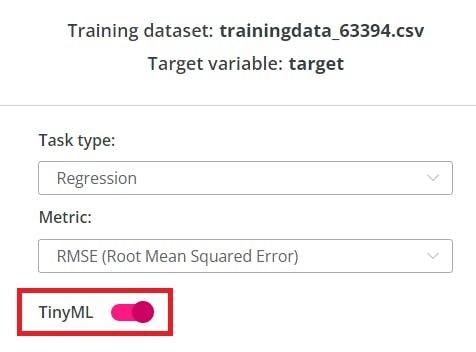
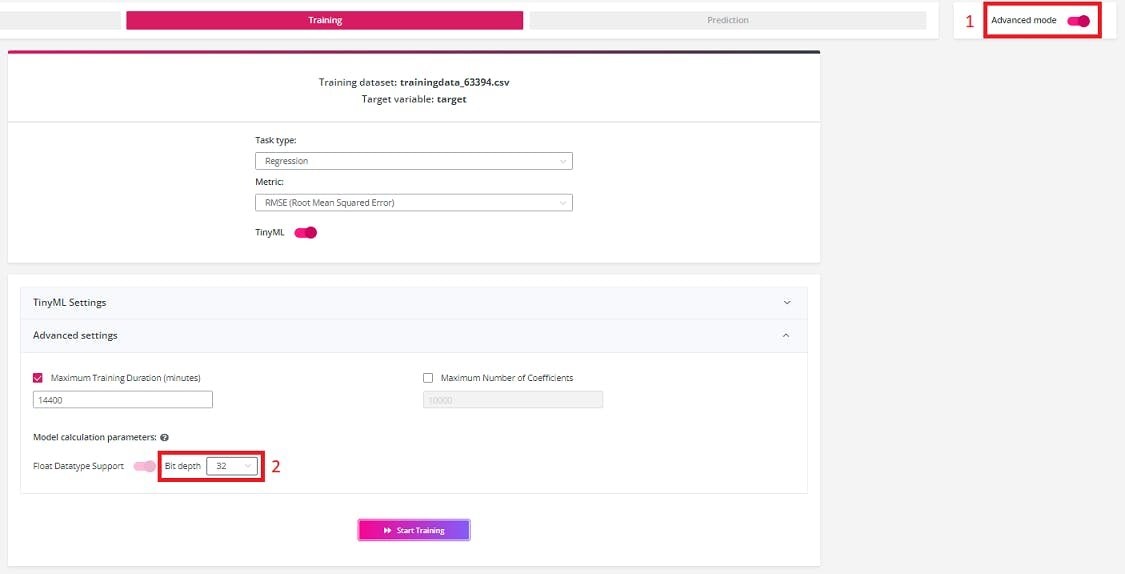
- Turn on the “Advanced mode”, go to the “Advanced settings” and select 32 in the Bit depth dropdown menu. By doing so, you will take full advantage of the power of the 32-bit Nicla microcontroller.
- And now… press “Start Training”: training procedure will start, and progress will be shown step by step.
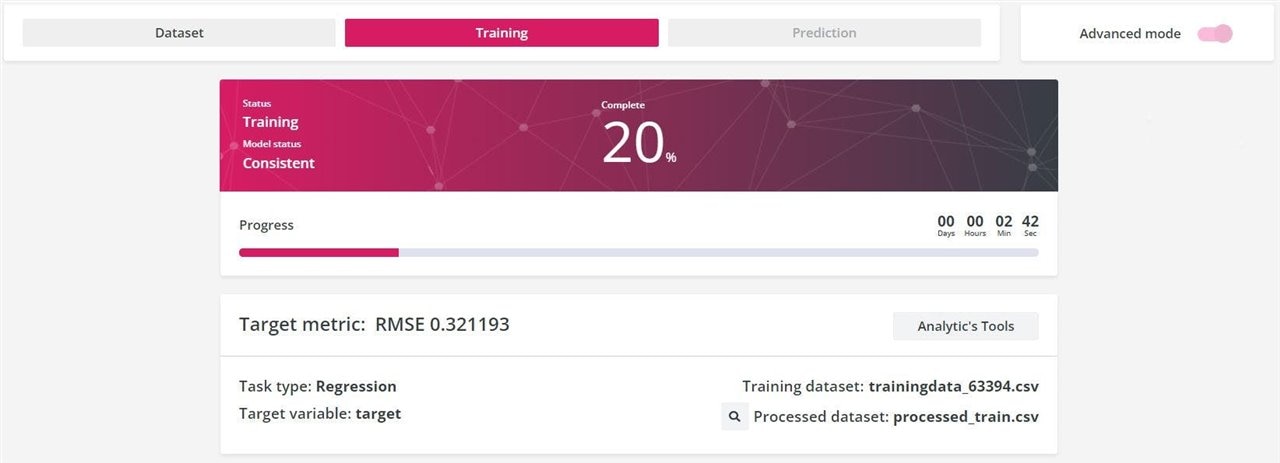
- When the “Status” changes to “Training completed” means that training is over, and the model has reached the best predictive power.
2c. Model is ready
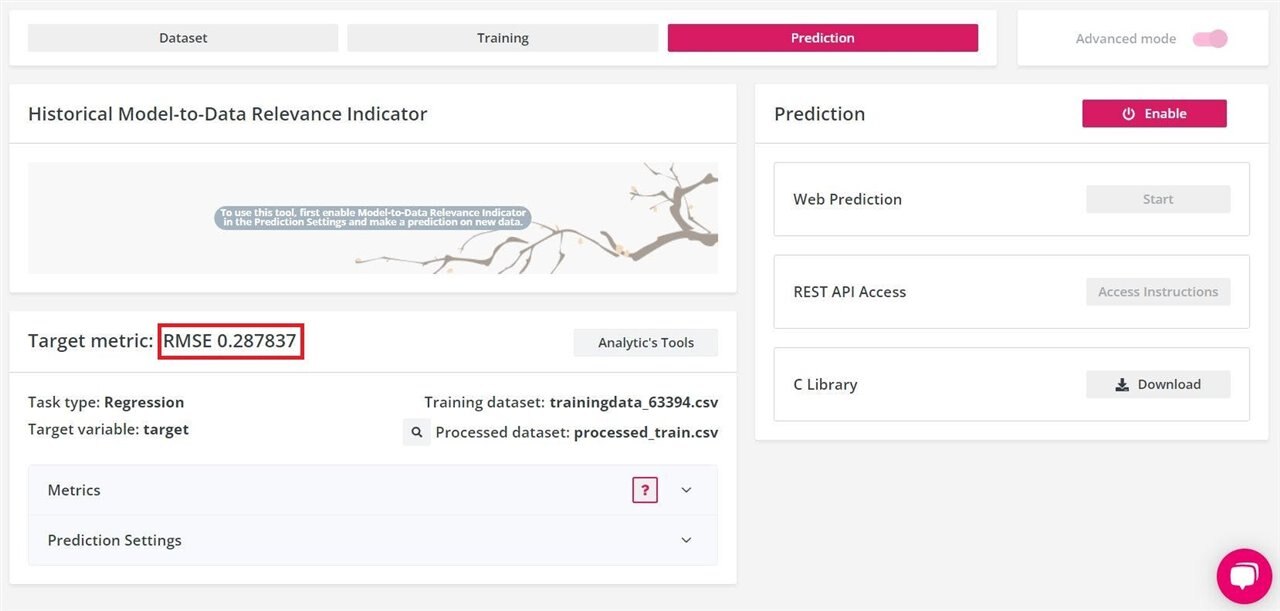
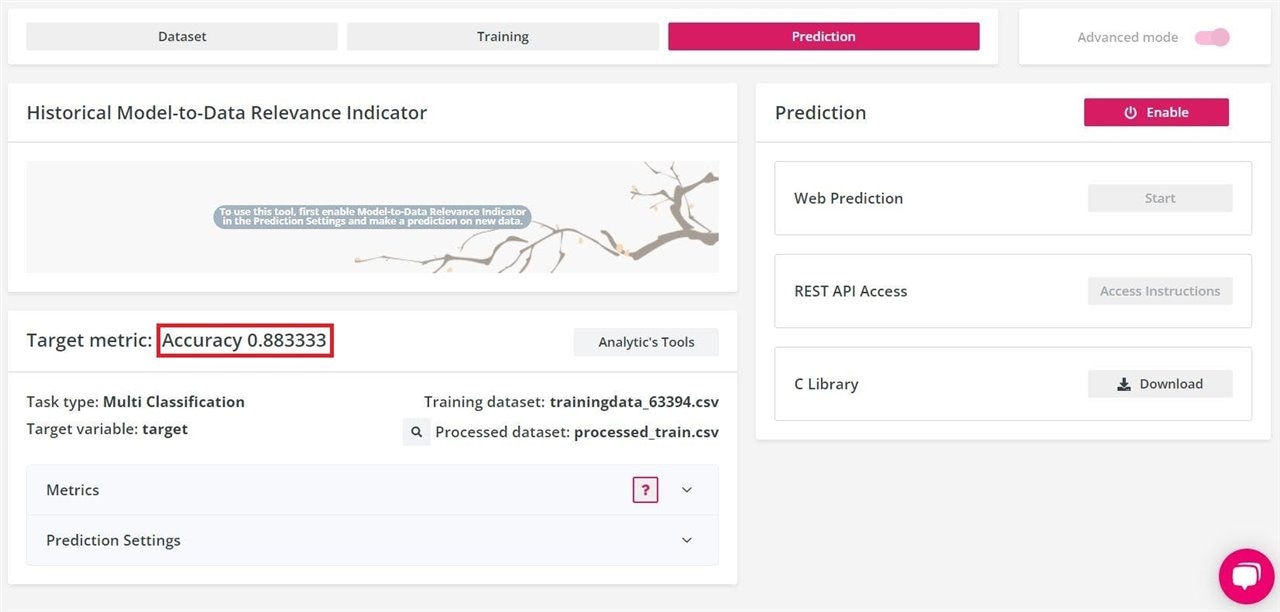
The “Prediction” tab shows the result of the training phase.
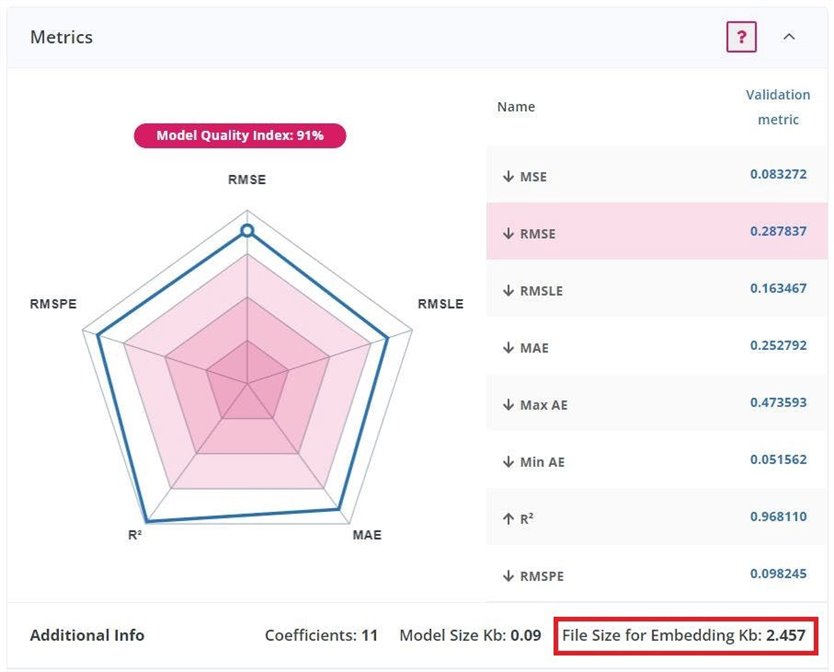
The Regression solution has reached an RMSE of 0.29. RMSE stands for Root Mean Square Error and it is a standard way to measure the error of a model.Low values indicate that the model predicts the data accurately. A good value is between 0.2 and 0.5.
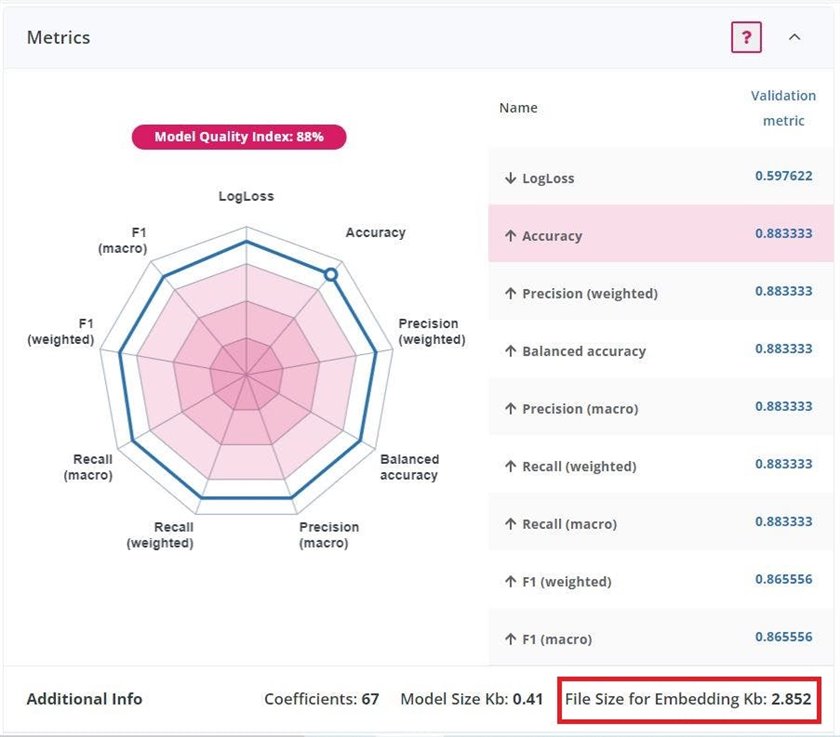
The Multiclass solution has reached an accuracy of 88%. It means that from 100 predicted records, 88had been assigned to the correct class. High values indicate better model fit.
In both solutions, the size of the model for embedding is less than 3KB. It is a very small size compared to the microcontroller’s (Nordic nRF52832) memory size which is 512KB.
3. Deploy the model on Nicla
To generate the C libraries of the two models, click on the “Download” button of each solution.
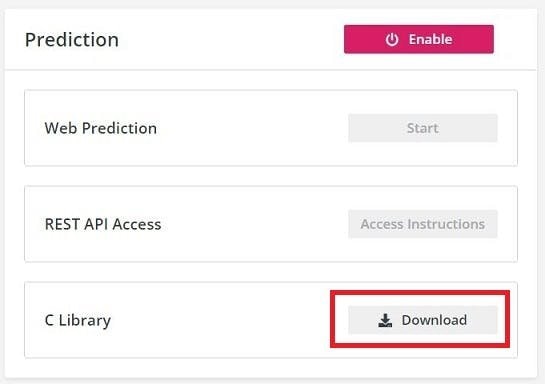
The Neuton C-Library consists of:
- /model: the neural network model
- /preprocessing: a set of functions used to perform pre-processing operations: data manipulation, data filtering, etc.
- neuton.c — neuton.h: a set of functions used by the application logic to execute model and read prediction results.
Library integration is simple and consists of 3 steps:
1. Include Neuton library
#include "neuton.h"2. Declare input variable and set input values
float inputs[300] = {
    aX0,
    aY0,
    // ...
    gZ49
};
neuton_model_set_inputs(inputs);
3. Run prediction
neuton_model_run_inference(…);The main application will be the same for both models, but each solution will include its respective library files. Application is developed to compute the inclination value in degree every 1 second.
#define REGRESSION 0
#define MULTICLASS 1
#define TASK_TYPE  /* Choose task type: REGRESSION or MULTICLASS */

#include "Arduino.h"
#include "Arduino_BHY2.h"

#if (TASK_TYPE == REGRESSION)
   #include "src/regression/neuton.h"
#elif (TASK_TYPE == MULTICLASS)
   #include "src/multiclass/neuton.h"
#endif
[...]
Below, the Arduino program of the inclination estimator system:
float inputs[NUM_SAMPLES*6] = { 0 };

void setup() {
  // init serial port
  [...]

  // init IMU sensor
  [...]

  Serial.println(“Neuton ANN model: Inclination estimator system”);
}

void loop() {
  int samplesRead = 0;

  // perform IMU measurement
  while (samplesRead < NUM_SAMPLES) {
     // read the acceleration and gyroscope data
     BHY2.update();

     // fill sensor data array (model input)
     inputs[0+samplesRead*6] = (float) acc.x();
     inputs[1+samplesRead*6] = (float) acc.y();
     inputs[2+samplesRead*6] = (float) acc.z();
     inputs[3+samplesRead*6] = (float) gyro.x();
     inputs[4+samplesRead*6] = (float) gyro.y();
     inputs[5+samplesRead*6] = (float) gyro.z();

     samplesRead++;

     delay(SAMPLE_TIME_MS);
  }

  // provide inputs to Neuton neural network model
  if (neuton_model_set_inputs(inputs) == 0) {
     uint16_t  predictedClass;
     float*    probabilities;

     // run model inference
     if (neuton_model_run_inference
                           (&predictedClass, &probabilities) == 0) {
        Serial.print("Estimated slope: ");
        #if (TASK_TYPE == MULTICLASS)
          Serial.print(predictedClass);
          Serial.print("°");
          // show class probabilities
          Serial.print(" - Probabilities [ ");
          for (int i=0; i<neuton_model_outputs_count(); i++) {
             Serial.print(probabilities[i]);
             Serial.print(" ");
          }
          Serial.println("]");
        #elif (TASK_TYPE == REGRESSION)
          Serial.print(probabilities[0]);
          Serial.println("°");
        #endif
     }
     [...]
  }
  [...]
}
Let’s predict!
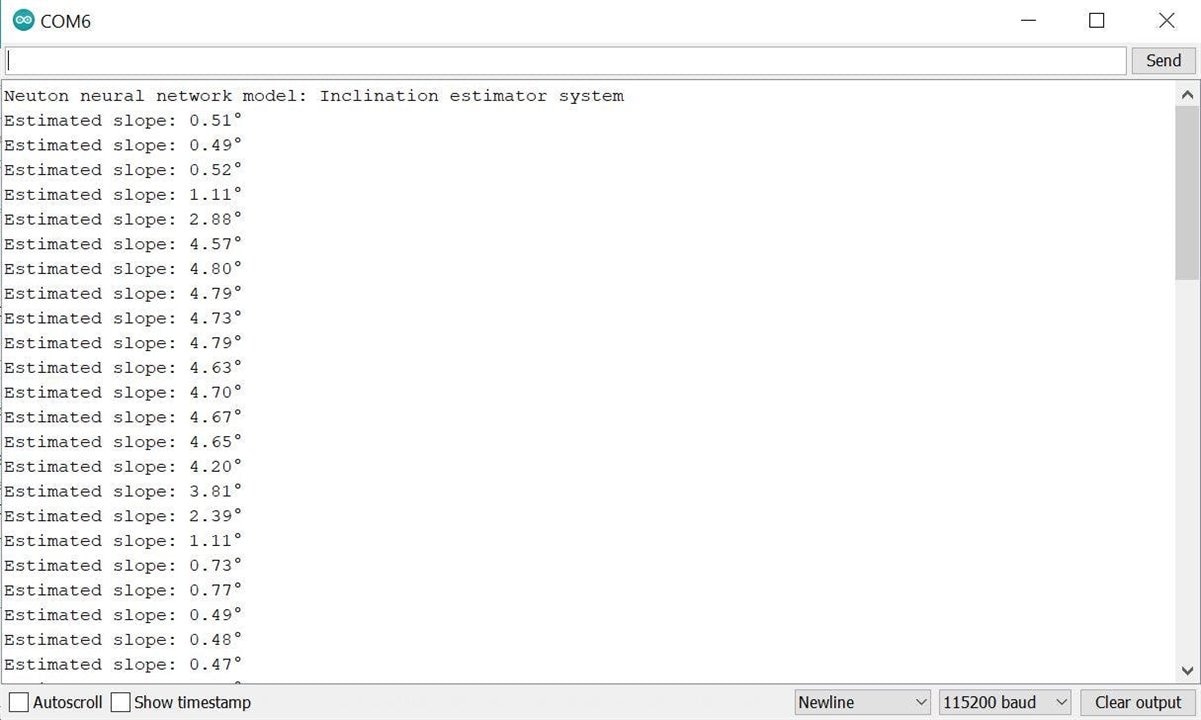
…It’s time to run the inference on Nicla!Let’s verify and upload the application on the board, incline the system and look at the estimated inclination degree value in the Serial monitor. It will be computed and printed in real-time every 1 second.
Regression solution
#define TASK_TYPE REGRESSIONFor the regression task, the degree value will be outputted as a continuous value in position 0 of the probabilities array.
Below is an example of the regression solution serial output:
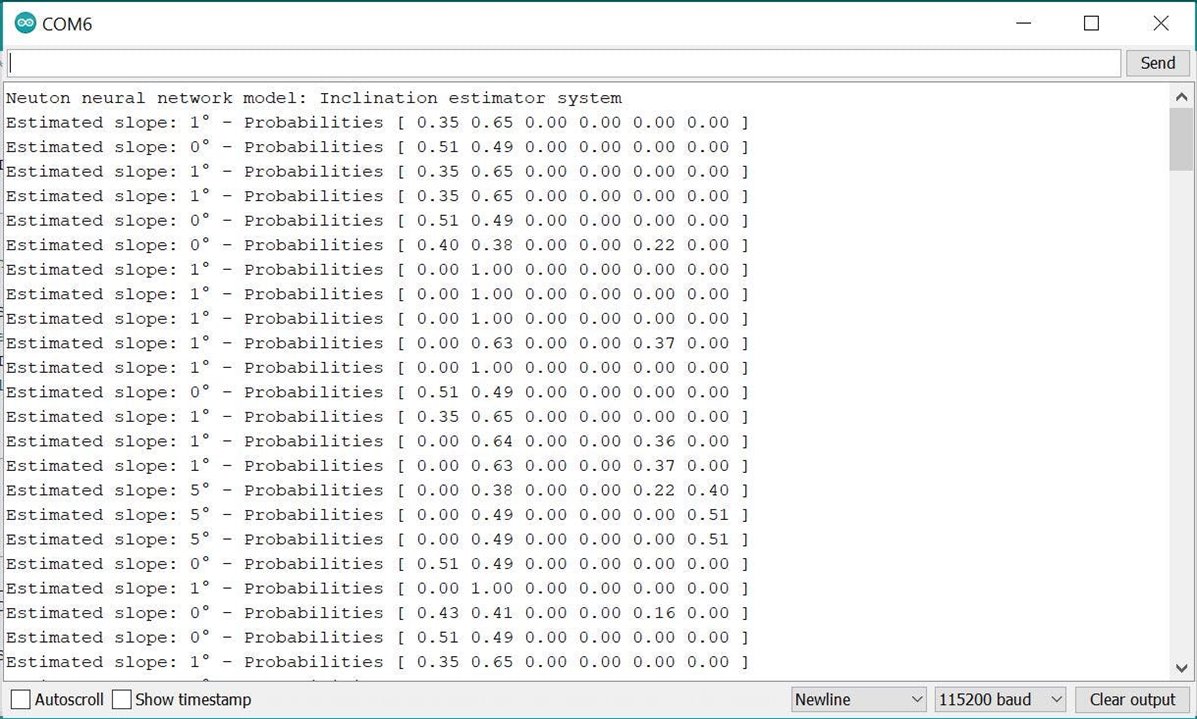
Multiclass solution
#define TASK_TYPE MULTICLASSFor the multiclass task, predictedClass variable will contain the class index of the estimated degree value.The probabilities array will contain the probabilities of the 6 classes. The accuracy of the predicted class will be stored at the position predictedClass of the array.
Below is an example of the multiclass solution serial output:
Let’s get in action!
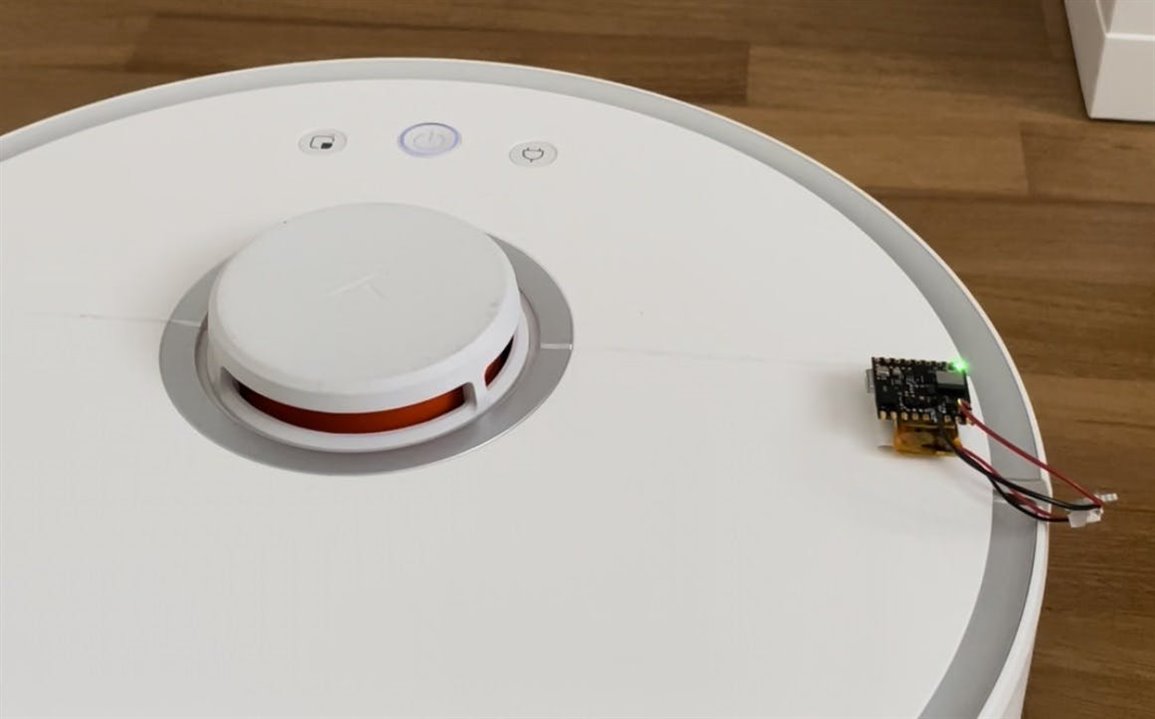
To show the inclination estimate in action, I put the Nicla powered with a small battery on the vacuum robot.The Nicla indicates slope value with led color:
- Green: if the inclination is less than 4°
- Red: if it is over 4°