element14 Community
element14 Community
    Register Log In
  • Site
  • Search
  • Log In Register
  • Community Hub
    Community Hub
    • What's New on element14
    • Feedback and Support
    • Benefits of Membership
    • Personal Blogs
    • Members Area
    • Achievement Levels
  • Learn
    Learn
    • Ask an Expert
    • eBooks
    • element14 presents
    • Learning Center
    • Tech Spotlight
    • STEM Academy
    • Webinars, Training and Events
    • Learning Groups
  • Technologies
    Technologies
    • 3D Printing
    • FPGA
    • Industrial Automation
    • Internet of Things
    • Power & Energy
    • Sensors
    • Technology Groups
  • Challenges & Projects
    Challenges & Projects
    • Design Challenges
    • element14 presents Projects
    • Project14
    • Arduino Projects
    • Raspberry Pi Projects
    • Project Groups
  • Products
    Products
    • Arduino
    • Avnet & Tria Boards Community
    • Dev Tools
    • Manufacturers
    • Multicomp Pro
    • Product Groups
    • Raspberry Pi
    • RoadTests & Reviews
  • About Us
  • Store
    Store
    • Visit Your Store
    • Choose another store...
      • Europe
      •  Austria (German)
      •  Belgium (Dutch, French)
      •  Bulgaria (Bulgarian)
      •  Czech Republic (Czech)
      •  Denmark (Danish)
      •  Estonia (Estonian)
      •  Finland (Finnish)
      •  France (French)
      •  Germany (German)
      •  Hungary (Hungarian)
      •  Ireland
      •  Israel
      •  Italy (Italian)
      •  Latvia (Latvian)
      •  
      •  Lithuania (Lithuanian)
      •  Netherlands (Dutch)
      •  Norway (Norwegian)
      •  Poland (Polish)
      •  Portugal (Portuguese)
      •  Romania (Romanian)
      •  Russia (Russian)
      •  Slovakia (Slovak)
      •  Slovenia (Slovenian)
      •  Spain (Spanish)
      •  Sweden (Swedish)
      •  Switzerland(German, French)
      •  Turkey (Turkish)
      •  United Kingdom
      • Asia Pacific
      •  Australia
      •  China
      •  Hong Kong
      •  India
      •  Korea (Korean)
      •  Malaysia
      •  New Zealand
      •  Philippines
      •  Singapore
      •  Taiwan
      •  Thailand (Thai)
      • Americas
      •  Brazil (Portuguese)
      •  Canada
      •  Mexico (Spanish)
      •  United States
      Can't find the country/region you're looking for? Visit our export site or find a local distributor.
  • Translate
  • Profile
  • Settings
Arduino
  • Products
  • More
Arduino
Blog Using the TVout Library with a Modified Video Cable.
  • Blog
  • Forum
  • Documents
  • Quiz
  • Events
  • Polls
  • Files
  • Members
  • Mentions
  • Sub-Groups
  • Tags
  • More
  • Cancel
  • New
Join Arduino to participate - click to join for free!
  • Share
  • More
  • Cancel
Group Actions
  • Group RSS
  • More
  • Cancel
Engagement
  • Author Author: Former Member
  • Date Created: 28 Feb 2015 9:33 PM Date Created
  • Views 2854 views
  • Likes 1 like
  • Comments 1 comment
  • tv
  • hack
  • monitor
  • tvout
  • display
  • arduino
Related
Recommended

Using the TVout Library with a Modified Video Cable.

Former Member
Former Member
28 Feb 2015

    Bored to death. Sick of waiting for robot parts and WiFi modules. I decided to break something. So I started searching around for ways to display data from the Arduino to a monitor.


I found this video: https://www.youtube.com/watch?v=WlBXiZpuncg

And this instructable: http://www.instructables.com/id/TV-Out-with-Arduino/


I suggest you guys check it out and I will do my best to teach you here.


Here's a demo of how it worked out for me:


You don't have permission to edit metadata of this video.
Edit media
x
image
Upload Preview
image

(Hope you don't mind my phone camera image)


Let's get started!

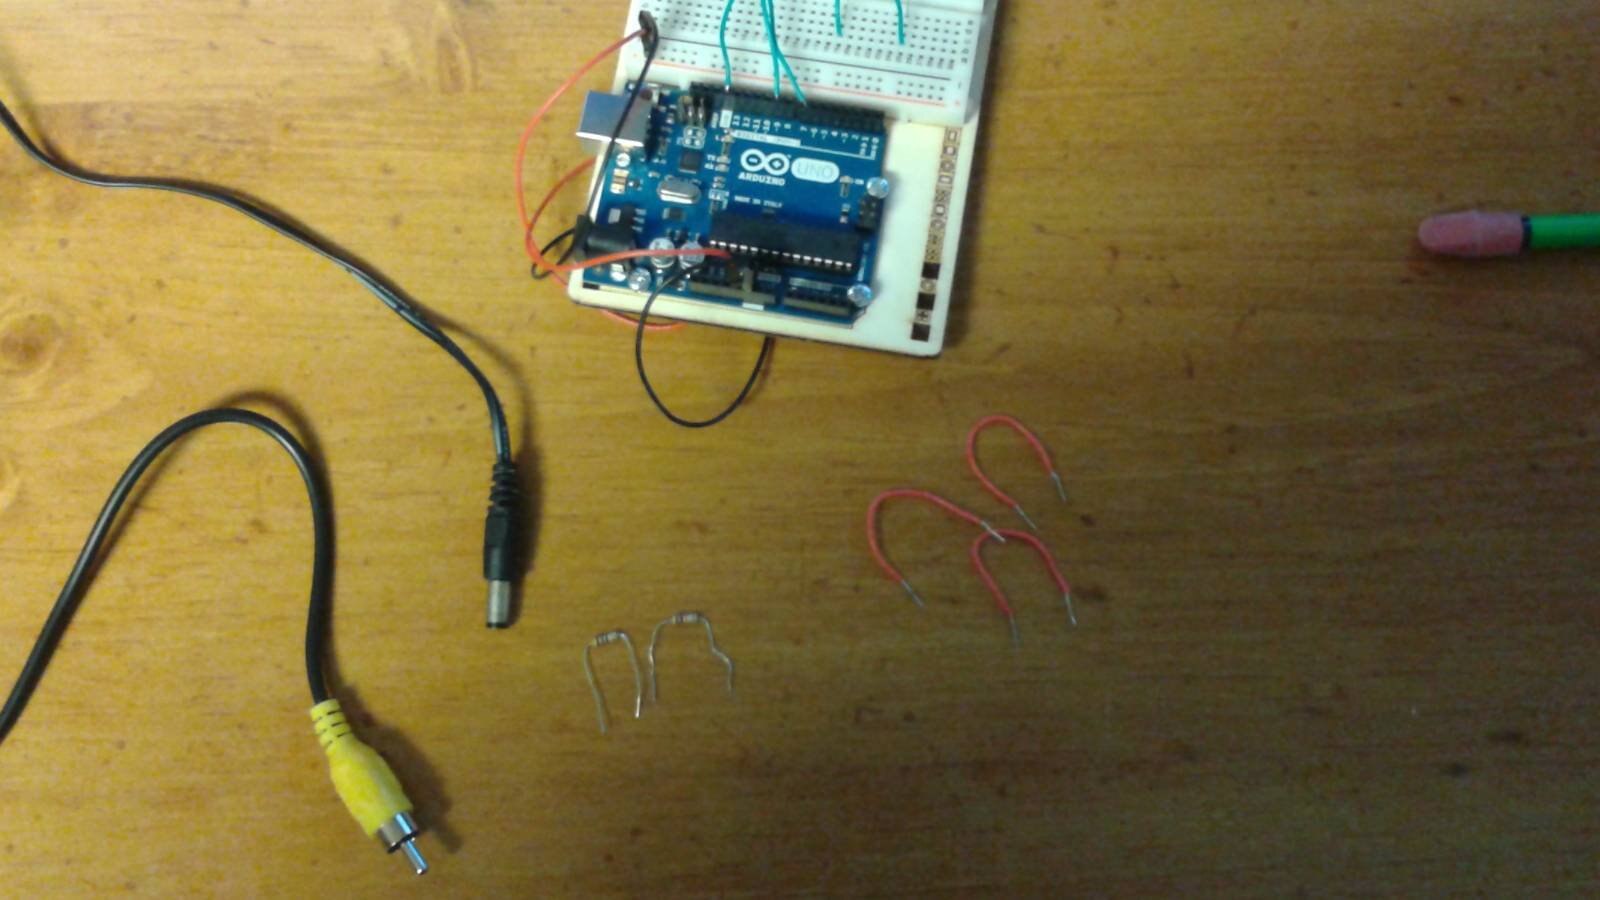
Here's what you need:

  • A Yellow Video Cable (I don't exactly know what they are called)
  • An Arduino Uno R3
  • 4 Jumper Wires (I used 3 jumpers and 1 breadboard wire. It doesn't matter)
  • A 10kΩ resistor and a 560Ω resistor (A brown, black, orange one (10k) and a green, blue, brown one (560))
  • (Optional, but recommended) a wall power source for your Arduino. It makes the thing a bit more mobile so you don't have to carry around a laptop


image


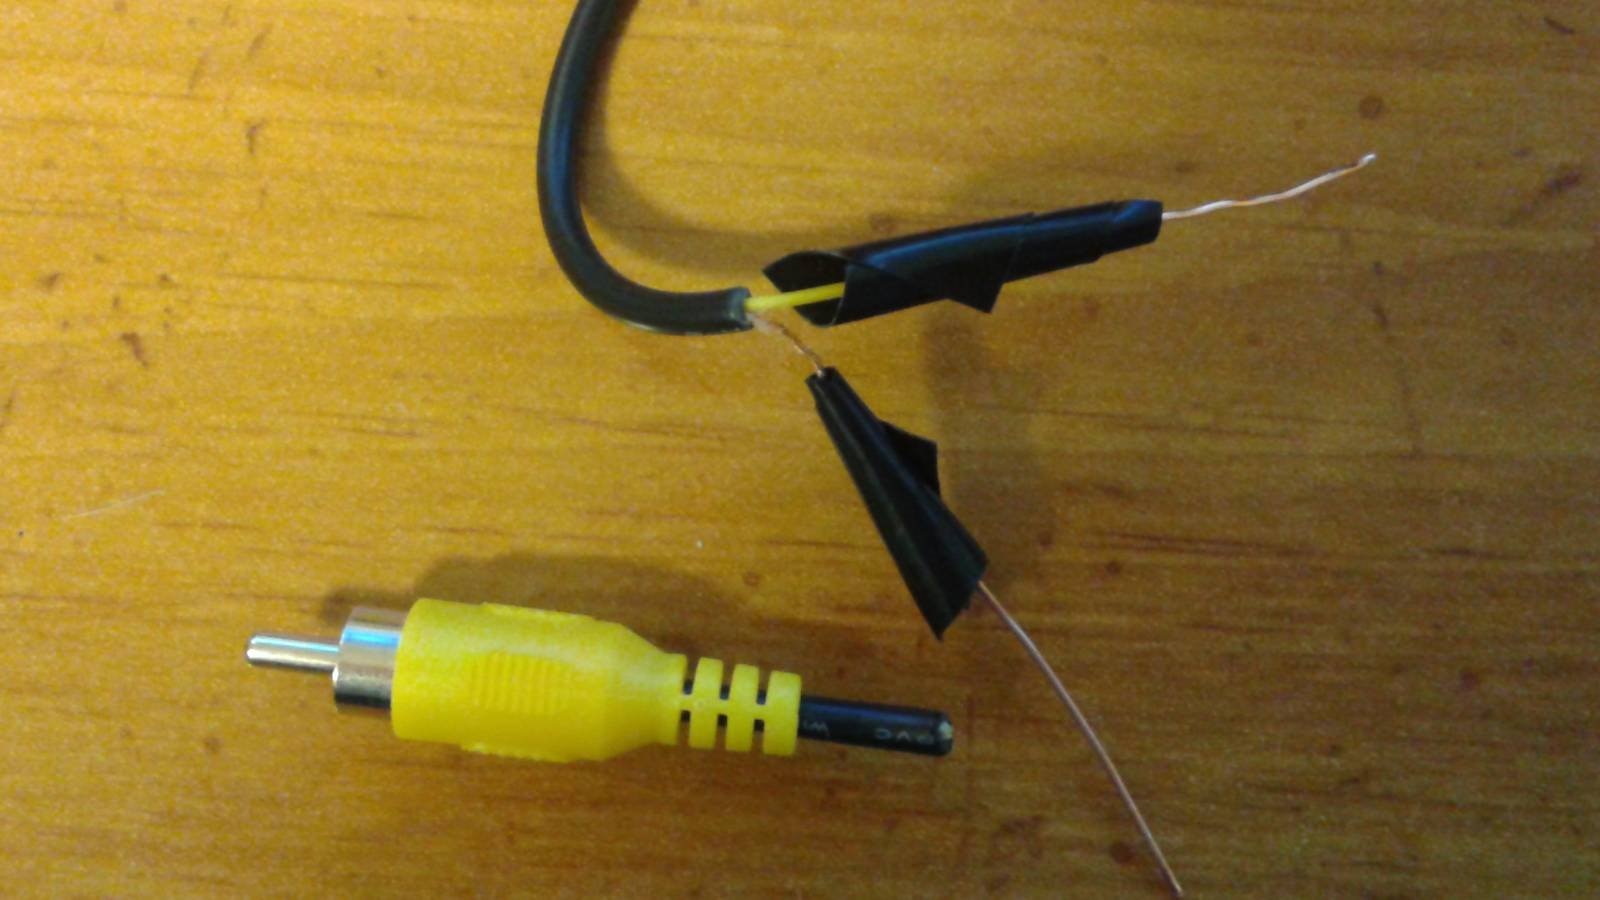
Step 1: Chop up some cables!

    What I did here was take my lovely video cable and cut off one end. From there it exposes 2 wires and a little bit of white insulation. One wire will be insulated with yellow rubber and one is just stranded copper wire. From there I stripped both wires and then soldered some solid copper wires that I cut to the end to make it work better with my solderless-breadbaord.


image


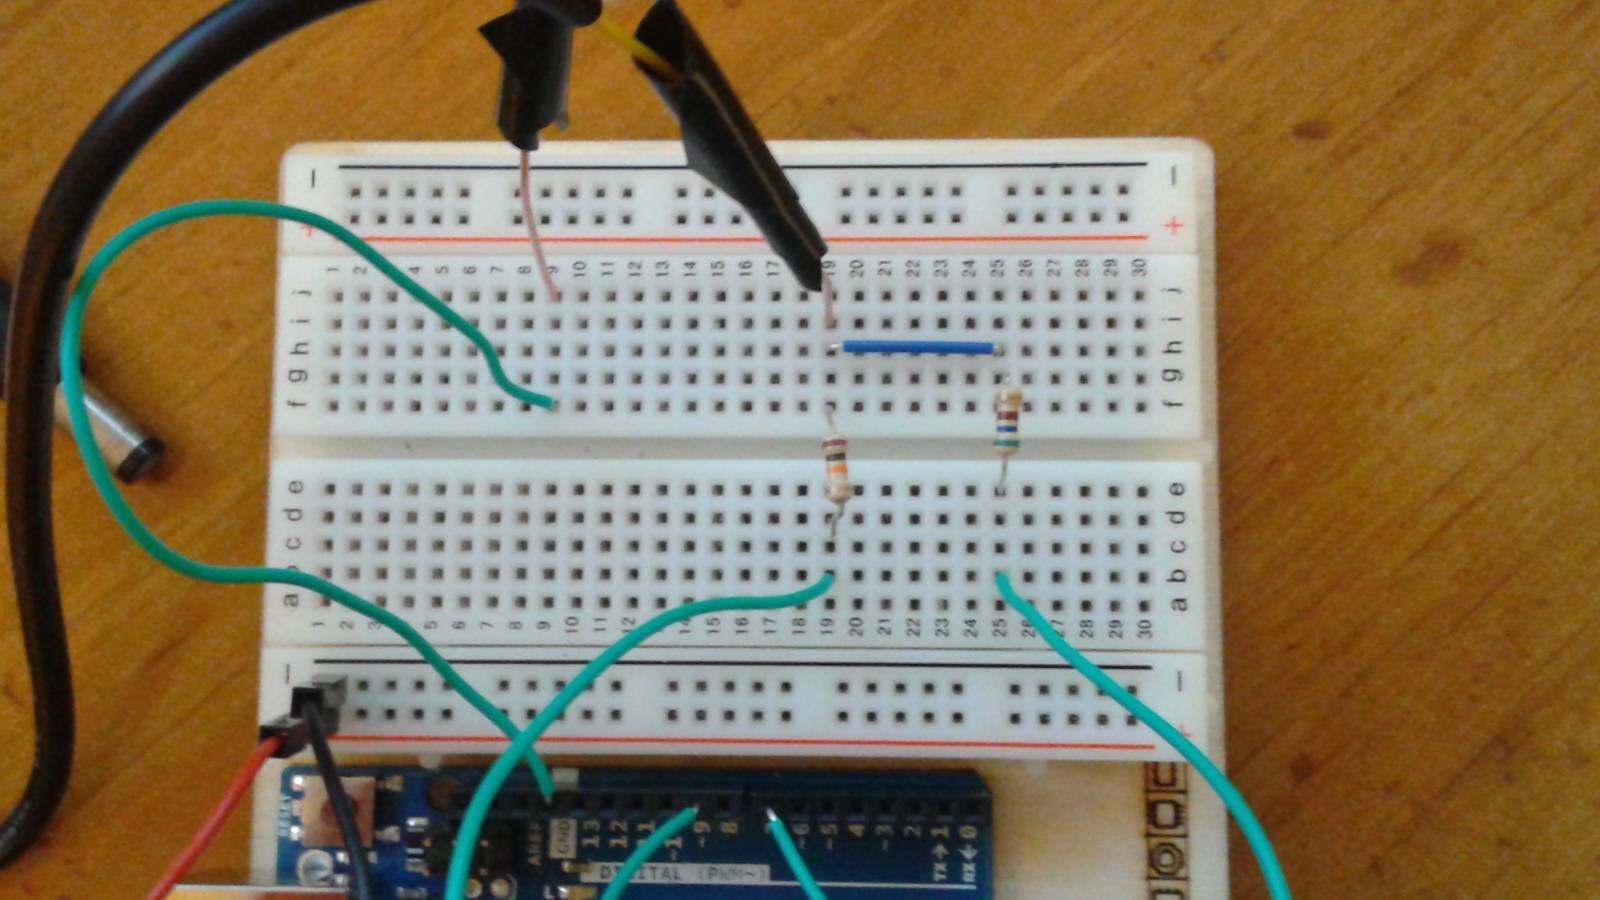
Step 2: Breadboard set-up

    Now we need to setup the breadboard. This circuit is courtesy of the youtube video I listed above. It works just fine. Basically put the stranded copper wire into the breadboard and wire it to ground. Then put the yellow wire into the breadboard and then have that run into the 10kΩ and the 560Ω resistor then take those two leads and wire them to pins 7 and 9 with the jumpers. Now I know that made absolutely no sense so here is a diagram in Fritzing and then I have a picture of my actual breadboard:


image

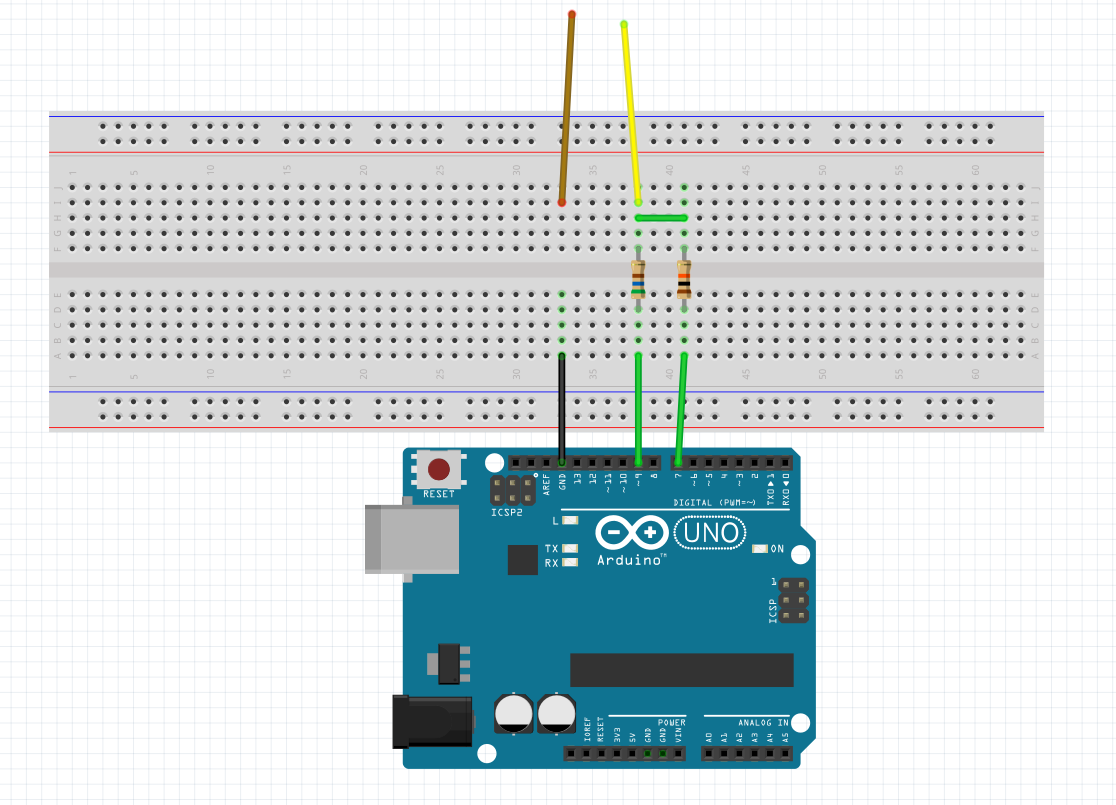
The gold wire being the copper stranded and the yellow being the well, yellow wire.


image


Step 3: Time for code!

Here comes the hard part. Or well, the super easy part. Kinda a bit of both.


Install the TVout library for Arduino here: https://code.google.com/p/arduino-tvout/downloads/detail?name=TVoutBeta1.zip&can=2&q=

Don't know how to install libraries on Arduino? Check it out here: http://arduino.cc/en/Guide/Libraries


Now the TVout library comes with a few examples that I recommend you look at but if not, here is my example:


image

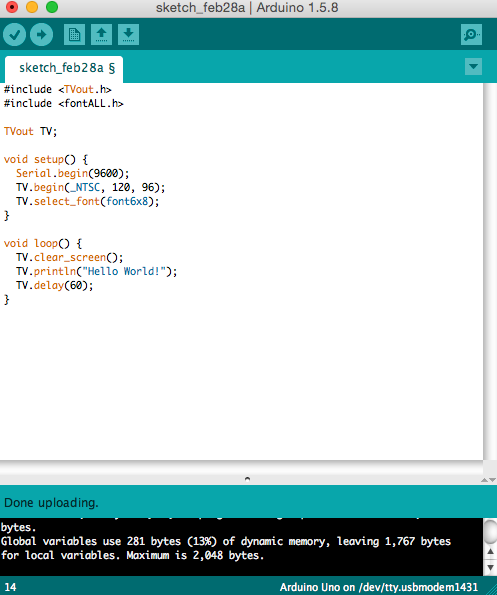
Just upload that baby to the Arduino and your ready for the next step.


(Here is all the commands for the entire library if you want to learn more: https://code.google.com/p/arduino-tvout/wiki/FunctionalDescription)


Your done!

     Alright guys, we're all done. Time to try it out! All you have to do is supply power to the Arduino and then plug the yellow video cable into the yellow video jack on your TV. Set the TV's source to video and enjoy the action.


     There is a lot you can do with this. I hope this helped some of you out and I'd love for you guys to show me your creations right here on element14. I'd also love some feedback on my tutorial as this is my first one. Have fun guys! Happy Hacking.

  • Sign in to reply
  • dtsartsanis
    dtsartsanis over 10 years ago

    Good tutorial, thank u

    • Cancel
    • Vote Up 0 Vote Down
    • Sign in to reply
    • More
    • Cancel
element14 Community

element14 is the first online community specifically for engineers. Connect with your peers and get expert answers to your questions.

  • Members
  • Learn
  • Technologies
  • Challenges & Projects
  • Products
  • Store
  • About Us
  • Feedback & Support
  • FAQs
  • Terms of Use
  • Privacy Policy
  • Legal and Copyright Notices
  • Sitemap
  • Cookies

An Avnet Company © 2025 Premier Farnell Limited. All Rights Reserved.

Premier Farnell Ltd, registered in England and Wales (no 00876412), registered office: Farnell House, Forge Lane, Leeds LS12 2NE.

ICP 备案号 10220084.

Follow element14

  • X
  • Facebook
  • linkedin
  • YouTube