element14 Community
element14 Community
    Register Log In
  • Site
  • Search
  • Log In Register
  • About Us
  • Community Hub
    Community Hub
    • What's New on element14
    • Feedback and Support
    • Benefits of Membership
    • Personal Blogs
    • Members Area
    • Achievement Levels
  • Learn
    Learn
    • Ask an Expert
    • eBooks
    • element14 presents
    • Learning Center
    • Tech Spotlight
    • STEM Academy
    • Webinars, Training and Events
    • Learning Groups
  • Technologies
    Technologies
    • 3D Printing
    • FPGA
    • Industrial Automation
    • Internet of Things
    • Power & Energy
    • Sensors
    • Technology Groups
  • Challenges & Projects
    Challenges & Projects
    • Design Challenges
    • element14 presents Projects
    • Project14
    • Arduino Projects
    • Raspberry Pi Projects
    • Project Groups
  • Products
    Products
    • Arduino
    • Avnet Boards Community
    • Dev Tools
    • Manufacturers
    • Multicomp Pro
    • Product Groups
    • Raspberry Pi
    • RoadTests & Reviews
  • Store
    Store
    • Visit Your Store
    • Choose another store...
      • Europe
      •  Austria (German)
      •  Belgium (Dutch, French)
      •  Bulgaria (Bulgarian)
      •  Czech Republic (Czech)
      •  Denmark (Danish)
      •  Estonia (Estonian)
      •  Finland (Finnish)
      •  France (French)
      •  Germany (German)
      •  Hungary (Hungarian)
      •  Ireland
      •  Israel
      •  Italy (Italian)
      •  Latvia (Latvian)
      •  
      •  Lithuania (Lithuanian)
      •  Netherlands (Dutch)
      •  Norway (Norwegian)
      •  Poland (Polish)
      •  Portugal (Portuguese)
      •  Romania (Romanian)
      •  Russia (Russian)
      •  Slovakia (Slovak)
      •  Slovenia (Slovenian)
      •  Spain (Spanish)
      •  Sweden (Swedish)
      •  Switzerland(German, French)
      •  Turkey (Turkish)
      •  United Kingdom
      • Asia Pacific
      •  Australia
      •  China
      •  Hong Kong
      •  India
      •  Korea (Korean)
      •  Malaysia
      •  New Zealand
      •  Philippines
      •  Singapore
      •  Taiwan
      •  Thailand (Thai)
      • Americas
      •  Brazil (Portuguese)
      •  Canada
      •  Mexico (Spanish)
      •  United States
      Can't find the country/region you're looking for? Visit our export site or find a local distributor.
  • Translate
  • Profile
  • Settings
Arduino
  • Products
  • More
Arduino
Arduino Forum How to upload code in nRF52840 DK using Arduino IDE?
  • Blog
  • Forum
  • Documents
  • Quiz
  • Events
  • Polls
  • Files
  • Members
  • Mentions
  • Sub-Groups
  • Tags
  • More
  • Cancel
  • New
Join Arduino to participate - click to join for free!
Actions
  • Share
  • More
  • Cancel
Forum Thread Details
  • Replies 16 replies
  • Subscribers 385 subscribers
  • Views 6355 views
  • Users 0 members are here
  • flash programmer
  • pin
  • arduino ide
  • nrf
Related

How to upload code in nRF52840 DK using Arduino IDE?

KKaushik
KKaushik over 2 years ago

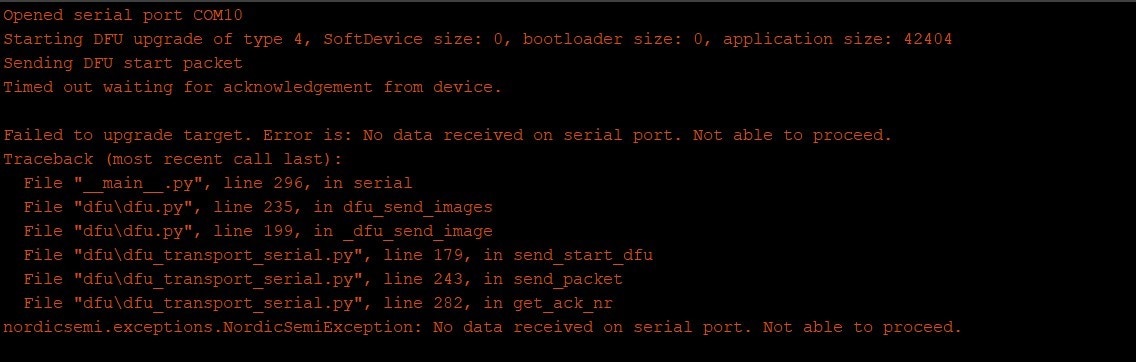
I'm trying to flash code in nRF52840 DK through Arduino IDE, but it kept failing.

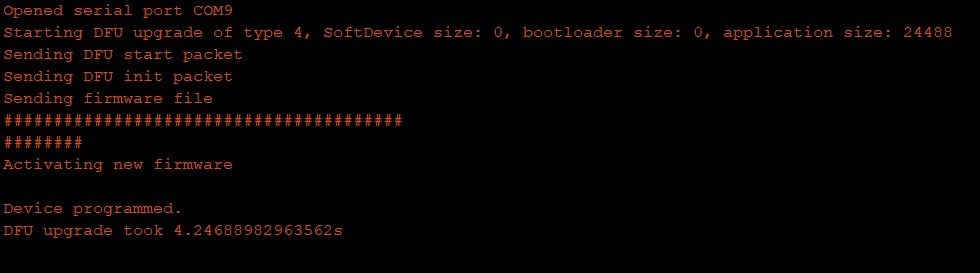
I could only burn the bootloader with Arduino IDE.

image

image

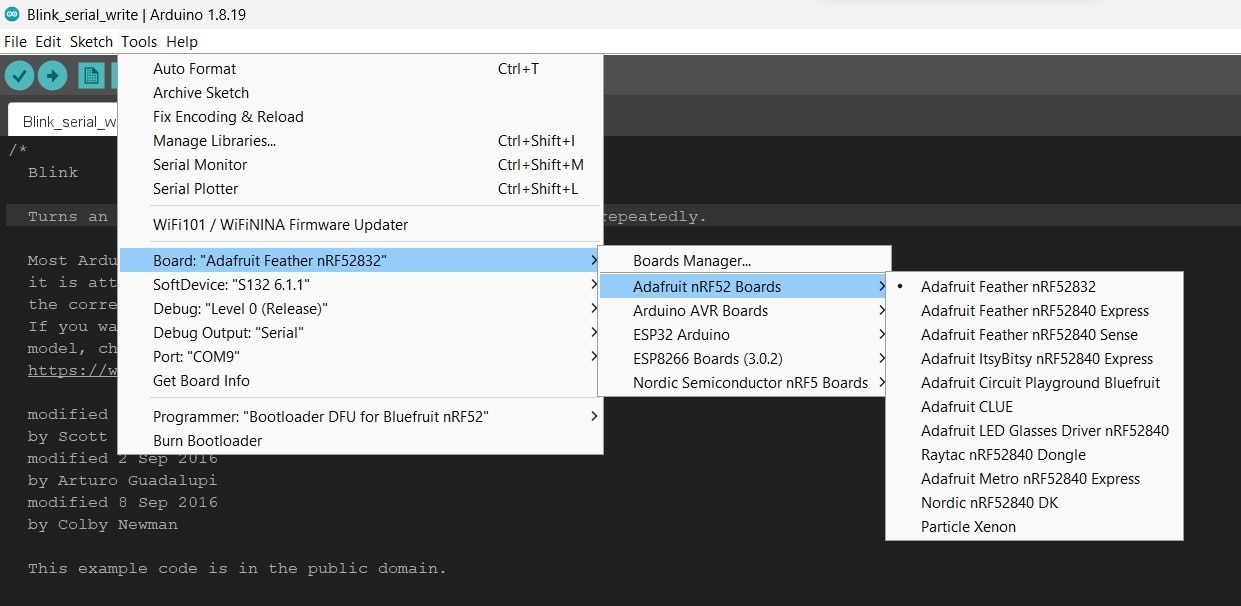
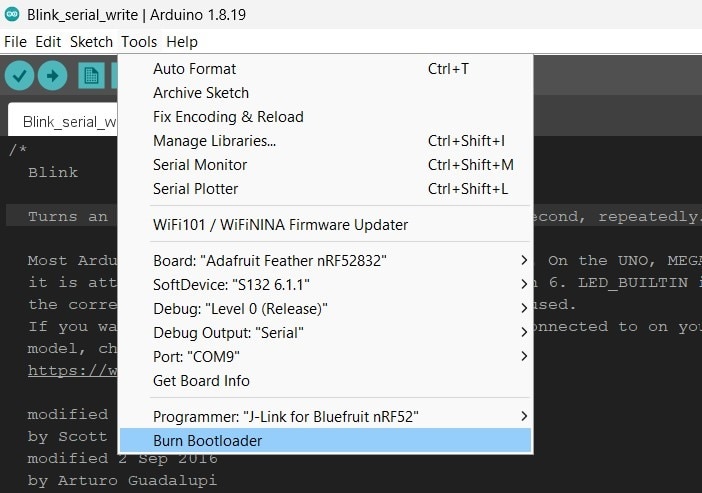
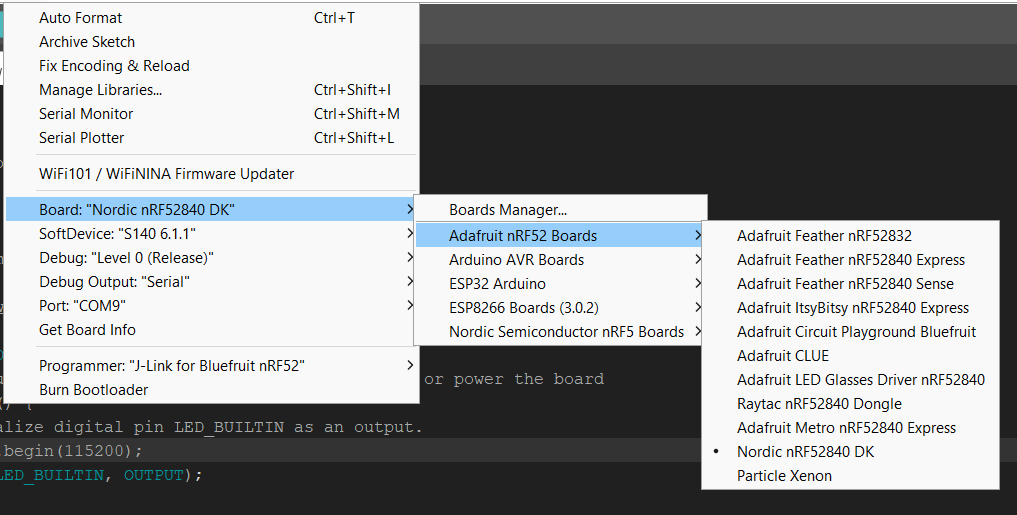
Setting of board here:

image

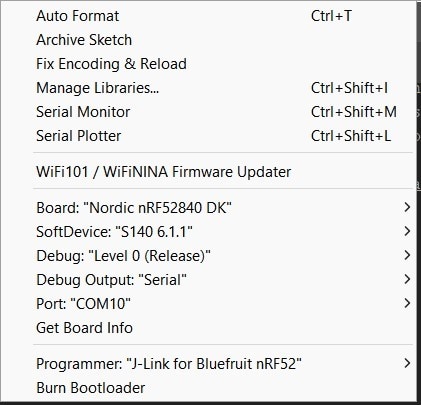
Can anyone help me with this? Am I missing something in the setting to flash code to nRF52840 DK using Arduino IDE?

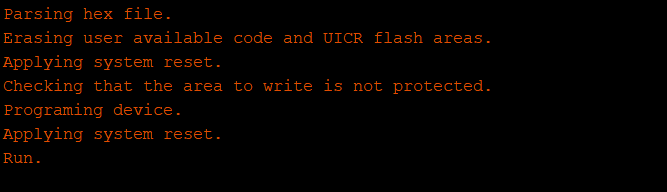
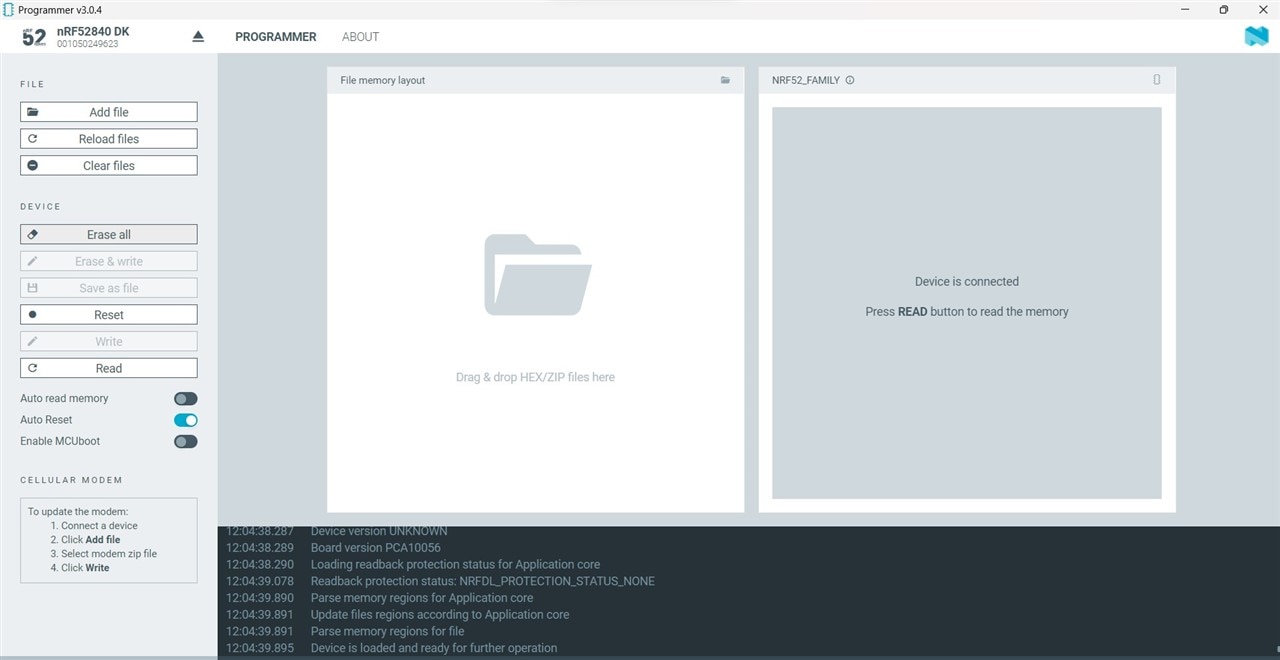
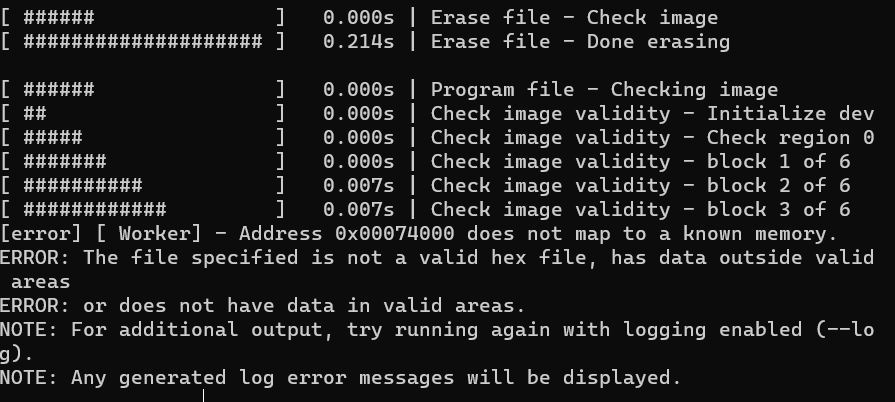
I can do it successfully with nRF52 Programmer, using the HEX file but the code has no effect on the nRF52DK. The below-mentioned Blink Code:

/*
  Blink
  Turns on an LED on for one second, then off for one second, repeatedly.

  Most Arduinos have an on-board LED you can control. On the UNO, MEGA and ZERO 
  it is attached to digital pin 13, on MKR1000 on pin 6. LED_BUILTIN takes care 
  of use the correct LED pin whatever is the board used.
  If you want to know what pin the on-board LED is conn
  ected to on your Arduino model, check
  the Technical Specs of your board  at https://www.arduino.cc/en/Main/Products
  
  This example code is in the public domain.

  modified 8 May 2014
  by Scott Fitzgerald
  
  modified 2 Sep 2016
  by Arturo Guadalupi
*/

#include <Arduino.h>
#include <Adafruit_TinyUSB.h> // for Serial

#define LED_BUILTIN PIN_LED2
// the setup function runs once when you press reset or power the board
void setup() {
  // initialize digital pin LED_BUILTIN as an output.
  pinMode(LED_BUILTIN, OUTPUT);
}
     
// the loop function runs over and over again forever
void loop() {
  digitalToggle(LED_BUILTIN); // turn the LED on (HIGH is the voltage level)
  delay(1000);                // wait for a second
}

How to access nRF52840DK pins in Arduino IDE, direct pin number doesn't work clearly?

  • Sign in to reply
  • Cancel

Top Replies

  • KKaushik
    KKaushik over 2 years ago in reply to BigG +2
    After your above-detailed answer, I tried to follow exactly the same. Using the bottom right USB, hold Button1 then press/release Reset, then release button1. Still no detection of the serial port. I…
  • BigG
    BigG over 2 years ago +1
    Do you have the correct bootloader: https://github.com/adafruit/Adafruit_nRF52_Bootloader/releases Was the board in DFU mode... according to github page: https://github.com/adafruit/Adafruit_nRF52_Bootloader…
  • mayermakes
    mayermakes over 2 years ago in reply to KKaushik +1
    not while setting code, you have to keep the button pressed during reset.
Parents
  • BigG
    BigG over 2 years ago

    Do you have the correct bootloader: https://github.com/adafruit/Adafruit_nRF52_Bootloader/releases

    Was the board in DFU mode... according to github page: https://github.com/adafruit/Adafruit_nRF52_Bootloader

    On the Nordic PCA10056 DK board, DFU is connected to Button1, and FRST is connected to Button2. So holding down Button1 while clicking RESET will put the board into USB bootloader mode, with UF2 and CDC support. Holding down Button2 while clicking RESET will put the board into OTA (over-the-air) bootloader mode.

    • Cancel
    • Vote Up +1 Vote Down
    • Sign in to reply
    • Cancel
  • KKaushik
    KKaushik over 2 years ago in reply to BigG

    I have tried the points you mentioned in your comment. I changed the bootloader thou it was already latest. And also tried pressing Button1 while flashing code. But it still doesn't set to DFU Mode.

    • Cancel
    • Vote Up -1 Vote Down
    • Sign in to reply
    • Cancel
  • mayermakes
    mayermakes over 2 years ago in reply to KKaushik

    not while setting code, you have to keep the button pressed during reset.

    • Cancel
    • Vote Up +1 Vote Down
    • Sign in to reply
    • Cancel
  • BigG
    BigG over 2 years ago in reply to mayermakes

    ... or similarly hold button down before plugging in the USB cable, then release after power up (although above suggestion is easier).

    • Cancel
    • Vote Up +1 Vote Down
    • Sign in to reply
    • Cancel
  • BigG
    BigG over 2 years ago in reply to KKaushik

    I just tried this using a PAN1780 dev kit, which has a similar configuration to the nRF52840 DK board, and had the same problem. It kept displaying the same error.

    I then discovered that I was using the wrong USB port.

    Once I changed this, I was able to flash the board using the Arduino IDE.

    Maybe you have a similar issue.

    • Cancel
    • Vote Up +1 Vote Down
    • Sign in to reply
    • Cancel
  • BigG
    BigG over 2 years ago in reply to BigG

    I missed one thing to look out for, i.e. when you enter DFU mode you need to make sure that the Arduino serial port description shows "Adafruit nRF52840 Express".

    Hope that helps.

    • Cancel
    • Vote Up 0 Vote Down
    • Sign in to reply
    • Cancel
  • KKaushik
    KKaushik over 2 years ago in reply to BigG

    Hello,
    With these board settings : 

    image

    imaget

    Can burn the bootloader successfully.

    image

    But while flashing the code, I have tried below options:
    1. While flashing code I kept pressing Reset button with Button 1

    2. Pressed Reset with Button 1, before connecting USB

    PORT 9 gave the same error as above but PORT 10 is different

    PORT 10 showed this

    image

    As you said it would show "Adafruit nRF52840 Express", but it wasn't showing in serial port.

    • Cancel
    • Vote Up 0 Vote Down
    • Sign in to reply
    • Cancel
  • mayermakes
    mayermakes over 2 years ago in reply to KKaushik

    Again, you have to set the board into DFU mode BEFORE you start flashing it.
    during the flash you don´t have to press anything. When the board is in DFU mode it should show up on the Serial port identifying itself.
    the error messages indicate there is no board on the Port that answers, indicating it is not in DFU mode.

    Also the error can be more prevalent with Windows machines than on linux as windows tends to reenumerate ports o nrandom occasions.

    • Cancel
    • Vote Up 0 Vote Down
    • Sign in to reply
    • Cancel
  • BigG
    BigG over 2 years ago in reply to KKaushik

    How have you plugged in your nRF52840 DK board correctly?

    image

    As you can see there are 2 USB ports. You need to use the nRFUSB port (shown on bottom edge). If there is no power then plug in another USB cable into the port shown on the left.

    Then, if you have the right bootloader, enter DFU bootloader mode by holding Button 1 down, then press and release the boot/reset button, then release Button 1. You do not do this when uploading your sketch because you will not have the correct serial port selected.

    If the bootloader was flashed correctly, you should see the file manager open with a virtual drive from the board. You can close this.

    Now go back to the Arduino IDE. Go to the Tools menu and select Programmer option and select the "Bootloader DFU for Bluefruit nRF52" option.

    Now go to the Port menu option and select the new Serial port, which will only be revealed when you are correctly in DFU mode. Select this Serial Port.

    Now you can upload your sketch.

    • Cancel
    • Vote Up 0 Vote Down
    • Sign in to reply
    • Cancel
  • KKaushik
    KKaushik over 2 years ago in reply to BigG

    When I connect to the right bottom USB one, there is no port detection.

    • Cancel
    • Vote Up 0 Vote Down
    • Sign in to reply
    • Cancel
Reply
  • KKaushik
    KKaushik over 2 years ago in reply to BigG

    When I connect to the right bottom USB one, there is no port detection.

    • Cancel
    • Vote Up 0 Vote Down
    • Sign in to reply
    • Cancel
Children
  • KKaushik
    KKaushik over 2 years ago in reply to KKaushik

    Though it runs blinky code which I flashed through VS Code using nRF Connect. So it's getting power with the right one too. Just not the J-link port is visible, which is visible only with the left USB.

    • Cancel
    • Vote Up 0 Vote Down
    • Sign in to reply
    • Cancel
  • BigG
    BigG over 2 years ago in reply to KKaushik

    Yes that is correct. You will get no port detection until you correctly enter DFU mode.

    • Cancel
    • Vote Up 0 Vote Down
    • Sign in to reply
    • Cancel
  • KKaushik
    KKaushik over 2 years ago in reply to BigG

    After your above-detailed answer, I tried to follow exactly the same. Using the bottom right USB, hold Button1 then press/release Reset, then release button1. Still no detection of the serial port.

    I tried even pressing Button1 while power-off and turning power-on then releasing Button1, but still no detection using Bottom Right USB

    Then I went back to using Left Serial Port: I tried the same procedure but after a successful Bootloader Burn, while uploading code showed the same error.

    Timed out waiting for acknowledgement from device.
    Sending DFU init packet


    So, I have started using the bootloader for Adafruit Bluefruit nRF52, as I have written all code on the basis of that.

    I found one way which works 100%, here how it goes

    1. "Erase ALL" using nRF Programmer

    image

    2. Select board: Adafruit Feather nRF52832 & Burn Bootloader

    image

    image

    3. Upload Code

    image

    And it works just fine 

    image

    #define LED_BUILTIN1          2
    // the setup function runs once when you press reset or power the board
    void setup() {
      // initialize digital pin LED_BUILTIN as an output.
      Serial.begin(115200);
      pinMode(LED_BUILTIN1, OUTPUT);
    }
    
    // the loop function runs over and over again forever
    void loop() {
      digitalWrite(LED_BUILTIN1, HIGH);   // turn the LED on (HIGH is the voltage level)
      delay(1000);                       // wait for a second
      digitalWrite(LED_BUILTIN1, LOW);    // turn the LED off by making the voltage LOW
      delay(1000);                       // wait for a second
      
      //Serial.println(Serial.read());
      Serial.println("Hellow4");
    }

    The only issue with this use on nRF52DK is pin mapping.

    When I checked the variant.h for Nordic nRF52DK, LED1 connected to pin 13. So I changed LED-BUILTIN to 13 and it works fine.

    I tried the same just with the board: Nordic nRF52 DK, bootloader burn successfully but the uploading code gives the same timeout error. 

    So I'll stick to this. Now I need help with how can I upload the same bootloader to my custom PCB based on nRF52810.

    Using nRF52DK as J-Link connected to my custom PCB (SWD Connector), I tried to upload the bootloader after "Erase All", but it shows this error

    image

    Is there any solution to this? So I can upload Adafruit Feather nRf52832 Bootloader to nRF52810?

    • Cancel
    • Vote Up +2 Vote Down
    • Sign in to reply
    • Cancel
  • BigG
    BigG over 2 years ago in reply to KKaushik
    KKaushik said:
    So I'll stick to this. Now I need help with how can I upload the same bootloader to my custom PCB based on nRF52810.

    Yes, the bootloader should be ok, but then for your sketch you should probably use a new board definition which defines the correct flash and memory sizes for the nRF52810.

    • Cancel
    • Vote Up 0 Vote Down
    • Sign in to reply
    • Cancel
  • KKaushik
    KKaushik over 2 years ago in reply to BigG
    BigG said:
    Yes, the bootloader should be ok

    No, it shows an error while uploading the bootloader using nrfjprog.

    image

    Tried with the latest bootloader: feather_nrf52832_bootloader-0.7.0_s132_6.1.1.hex from https://github.com/adafruit/Adafruit_nRF52_Bootloader/releases

    But the address 0x00074000 does not map to a known memory. I think the issue is with the bootloader.

    How can I define a new board definition using the nRF52832 board?

    • Cancel
    • Vote Up 0 Vote Down
    • Sign in to reply
    • Cancel
element14 Community

element14 is the first online community specifically for engineers. Connect with your peers and get expert answers to your questions.

  • Members
  • Learn
  • Technologies
  • Challenges & Projects
  • Products
  • Store
  • About Us
  • Feedback & Support
  • FAQs
  • Terms of Use
  • Privacy Policy
  • Legal and Copyright Notices
  • Sitemap
  • Cookies

An Avnet Company © 2025 Premier Farnell Limited. All Rights Reserved.

Premier Farnell Ltd, registered in England and Wales (no 00876412), registered office: Farnell House, Forge Lane, Leeds LS12 2NE.

ICP 备案号 10220084.

Follow element14

  • X
  • Facebook
  • linkedin
  • YouTube