element14 Community
element14 Community
    Register Log In
  • Site
  • Search
  • Log In Register
  • About Us
  • Community Hub
    Community Hub
    • What's New on element14
    • Feedback and Support
    • Benefits of Membership
    • Personal Blogs
    • Members Area
    • Achievement Levels
  • Learn
    Learn
    • Ask an Expert
    • eBooks
    • element14 presents
    • Learning Center
    • Tech Spotlight
    • STEM Academy
    • Webinars, Training and Events
    • Learning Groups
  • Technologies
    Technologies
    • 3D Printing
    • FPGA
    • Industrial Automation
    • Internet of Things
    • Power & Energy
    • Sensors
    • Technology Groups
  • Challenges & Projects
    Challenges & Projects
    • Design Challenges
    • element14 presents Projects
    • Project14
    • Arduino Projects
    • Raspberry Pi Projects
    • Project Groups
  • Products
    Products
    • Arduino
    • Avnet Boards Community
    • Dev Tools
    • Manufacturers
    • Multicomp Pro
    • Product Groups
    • Raspberry Pi
    • RoadTests & Reviews
  • Store
    Store
    • Visit Your Store
    • Choose another store...
      • Europe
      •  Austria (German)
      •  Belgium (Dutch, French)
      •  Bulgaria (Bulgarian)
      •  Czech Republic (Czech)
      •  Denmark (Danish)
      •  Estonia (Estonian)
      •  Finland (Finnish)
      •  France (French)
      •  Germany (German)
      •  Hungary (Hungarian)
      •  Ireland
      •  Israel
      •  Italy (Italian)
      •  Latvia (Latvian)
      •  
      •  Lithuania (Lithuanian)
      •  Netherlands (Dutch)
      •  Norway (Norwegian)
      •  Poland (Polish)
      •  Portugal (Portuguese)
      •  Romania (Romanian)
      •  Russia (Russian)
      •  Slovakia (Slovak)
      •  Slovenia (Slovenian)
      •  Spain (Spanish)
      •  Sweden (Swedish)
      •  Switzerland(German, French)
      •  Turkey (Turkish)
      •  United Kingdom
      • Asia Pacific
      •  Australia
      •  China
      •  Hong Kong
      •  India
      •  Korea (Korean)
      •  Malaysia
      •  New Zealand
      •  Philippines
      •  Singapore
      •  Taiwan
      •  Thailand (Thai)
      • Americas
      •  Brazil (Portuguese)
      •  Canada
      •  Mexico (Spanish)
      •  United States
      Can't find the country/region you're looking for? Visit our export site or find a local distributor.
  • Translate
  • Profile
  • Settings
Arduino
  • Products
  • More
Arduino
Arduino Forum Rate my arduino code
  • Blog
  • Forum
  • Documents
  • Quiz
  • Events
  • Polls
  • Files
  • Members
  • Mentions
  • Sub-Groups
  • Tags
  • More
  • Cancel
  • New
Join Arduino to participate - click to join for free!
Actions
  • Share
  • More
  • Cancel
Forum Thread Details
  • Replies 26 replies
  • Subscribers 384 subscribers
  • Views 4293 views
  • Users 0 members are here
Related

Rate my arduino code

scottiebabe
scottiebabe over 2 years ago

I have never used an actual arduino board and have only tried the arduino framework on non-arduino hardware a few times.

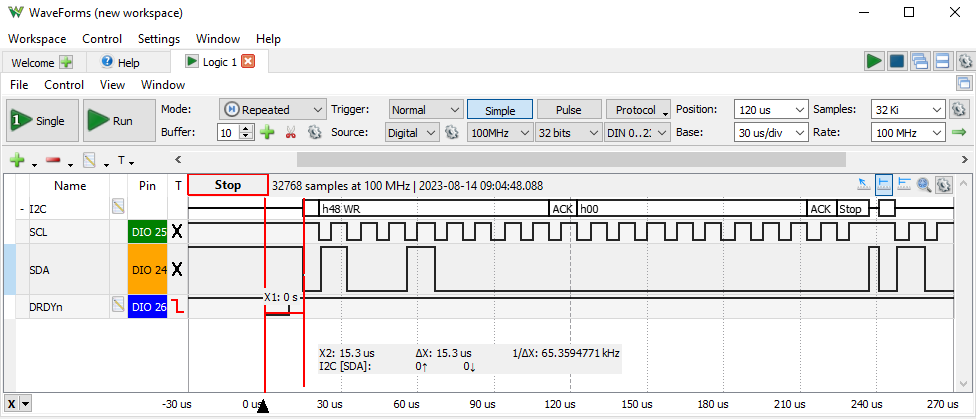
I am putting together a little test box for an ADS1115 ADC module (or clone of  New clone on the block  ) 

Quite stuff inside the box, noisy stuff outside the diecast box, nothing fancy.

image

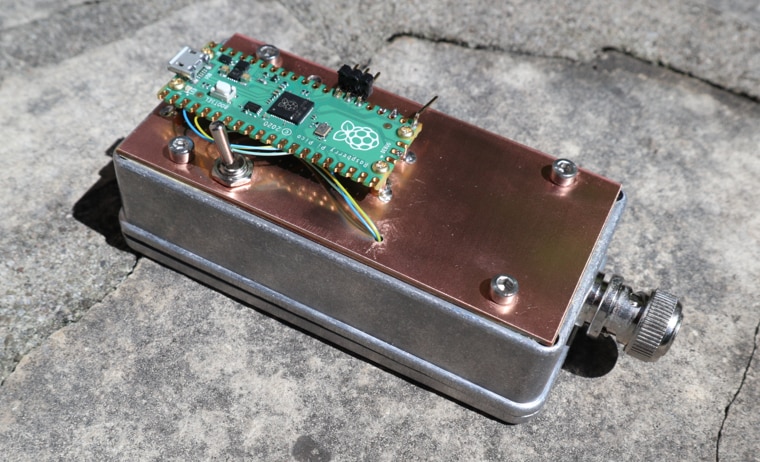
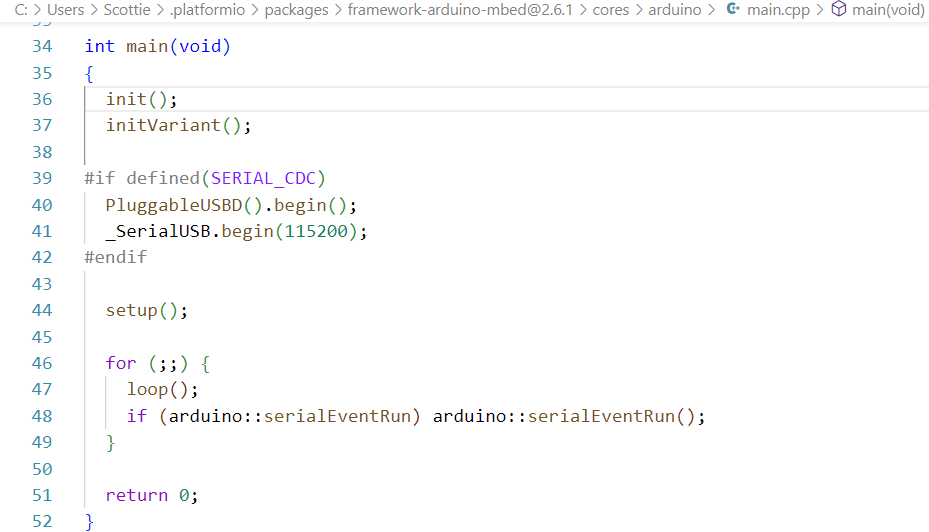
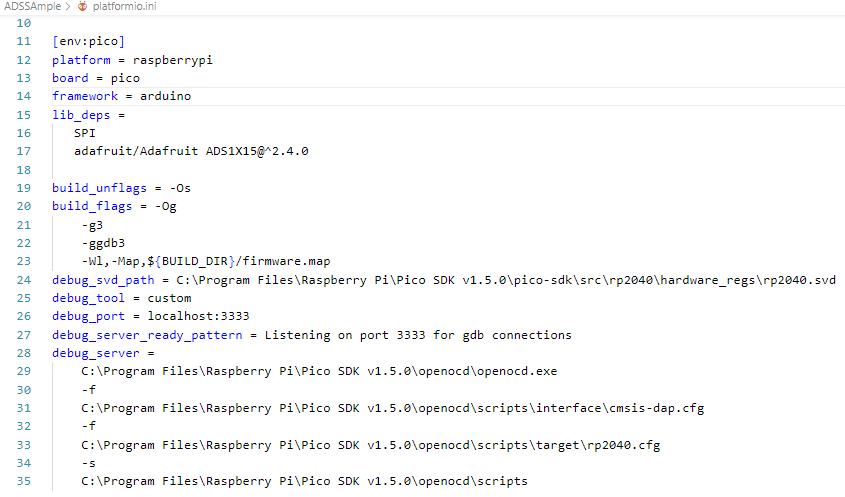
I am using a RPI Pico running the arduino framework using platformio

image

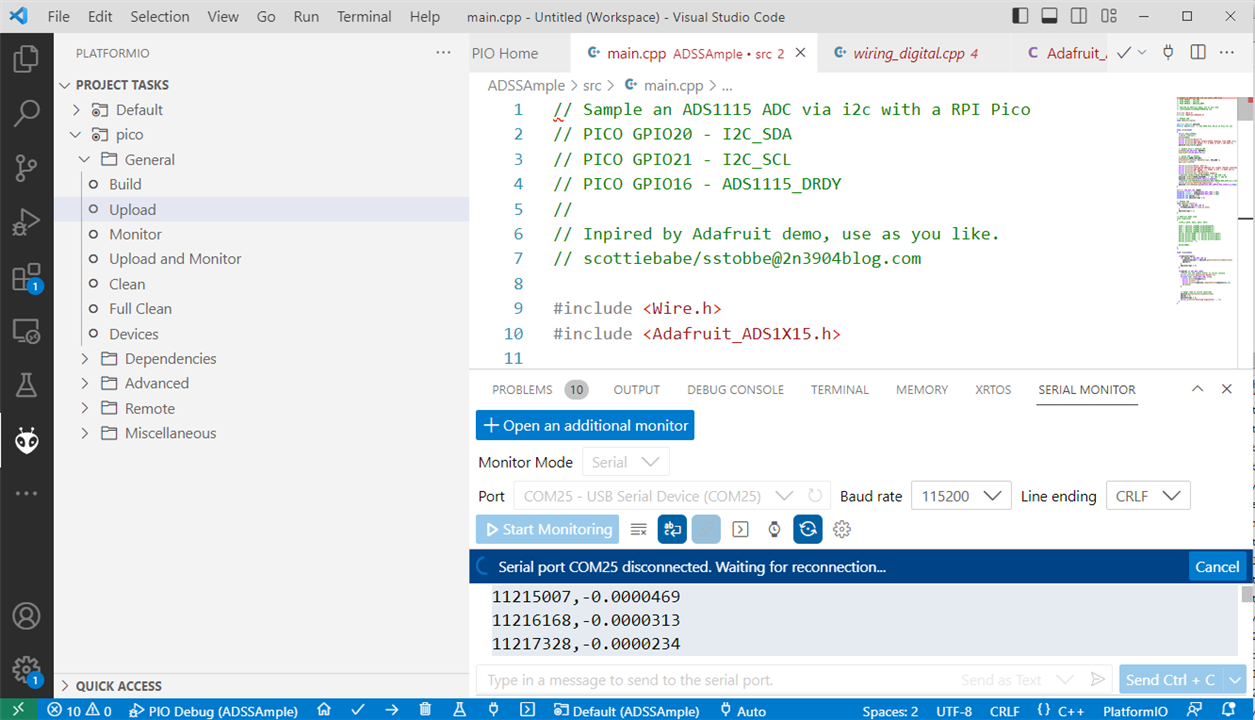
Here is the code I put together using Adafruits arduino library for the ADS1115

// Sample an ADS1115 ADC via i2c with a RPI Pico
// PICO GPIO20 - I2C_SDA
// PICO GPIO21 - I2C_SCL
// PICO GPIO16 - ADS1115_DRDY
//
// Inspired by Adafruit demo, use as you like.
// scottiebabe/sstobbe@2n3904blog.com

#include <Wire.h>
#include <Adafruit_ADS1X15.h>

// GPIO16 ISR
void ADSInterrupt();

Adafruit_ADS1115 ads1115;
MbedI2C i2c(20,21);  // Use GPIO Pins 20,21 on Pico for i2c

void setup(void)
{
  Serial.begin(9600);
  //while (!Serial);
  delay(1000);
  Serial.println("Hello!");
  Serial.println("Getting single-ended readings from AIN0..3");
  Serial.println("ADC Range: +/- 6.144V (1 bit = 187.5uV)");
  ads1115.begin(0x48,&i2c);

  // Enable Pico's onboard LED
  pinMode(LED_BUILTIN, OUTPUT);
  digitalWrite(LED_BUILTIN,1);

  // Setup ISR on GPIO16
  pinMode(16,INPUT_PULLUP);
  attachInterrupt(16, ADSInterrupt, FALLING );
  gpio_pull_up(16);

  Serial.println("Hello, pt2!");
  Serial.println("Configured ADS1115 for single channel continuous conversion.");
  Serial.println("ADC Range: +/- 256mV (1 bit = 7.8125 uV)");
  Serial.println("Fs: 860 Sa/s");
  Serial.println("Ain: Ain0-single ended");
  //ads1115.setGain(GAIN_TWOTHIRDS); // SET FSR +-6V
  ads1115.setGain(GAIN_SIXTEEN); // Set FSR +- 256 mV
  ads1115.setDataRate(RATE_ADS1115_860SPS);
  //ads1115.startADCReading(ADS1X15_REG_CONFIG_MUX_DIFF_0_1,true);
  Serial.println("Starting Acquisition! ...");
  ads1115.startADCReading(ADS1X15_REG_CONFIG_MUX_SINGLE_0,true);
}

#define ADS_BUF_LEN (4096)
volatile int16_t  samples[ADS_BUF_LEN] = {0};
volatile uint32_t tstamps[ADS_BUF_LEN] = {0};
volatile int adsidx = 0;
volatile int adsinterrupt = 0;

// GPIO16 ISR
void ADSInterrupt() {
  if( adsidx < ADS_BUF_LEN ){
    tstamps[adsidx] = time_us_32();
  }
  adsinterrupt = 1;
}

/* Adafruit Demo Loop
void loop(void)
{
  int16_t adc0, adc1, adc2, adc3;

  adc0 = ads1115.readADC_SingleEnded(0);
  adc1 = ads1115.readADC_SingleEnded(1);
  adc2 = ads1115.readADC_SingleEnded(2);
  adc3 = ads1115.readADC_SingleEnded(3);
  Serial.print("AIN0: "); Serial.println(adc0);
  Serial.print("AIN1: "); Serial.println(adc1);
  Serial.print("AIN2: "); Serial.println(adc2);
  Serial.print("AIN3: "); Serial.println(adc3);
  Serial.println(" ");
  
  delay(1000);
}
*/

void loop(void){

  if(adsinterrupt){
    if( adsidx < ADS_BUF_LEN ){
      samples[adsidx] = ads1115.getLastConversionResults();
      adsidx++;
    }
    adsinterrupt = 0;
  }

  if(adsidx >= ADS_BUF_LEN){
    //Print out the sample buffer to serial console
    Serial.println("Acquisition Buffer:");
    for(int i=0; i<ADS_BUF_LEN; i++){
      Serial.print(tstamps[i]);
      Serial.print(",");
      Serial.println(ads1115.computeVolts(samples[i]),7);
      delay(1);
    }

    
    // dummy read to re-arm interrupt
    ads1115.getLastConversionResults();
    adsidx = 0;
    adsinterrupt = 0;
    Serial.println("Starting Acquisition! ...");
  }
}

Thumbsup / Thumbsdown

  • Sign in to reply
  • Cancel

Top Replies

  • Jan Cumps
    Jan Cumps over 2 years ago +4
    I'd move the defines and global variables to the begin, under the includes. That's the only nitpick.
  • kmikemoo
    kmikemoo over 2 years ago +3
    Not that this will help any at all but... if it runs, it's always a .
  • scottiebabe
    scottiebabe over 2 years ago in reply to Jan Cumps +3
    Using this decorator puts my function in sram
  • Jan Cumps
    Jan Cumps over 2 years ago in reply to phoenixcomm

     > always put globals, in my headers

    Noooooooooooooooooooo Slight smile

    • Cancel
    • Vote Up +2 Vote Down
    • Sign in to reply
    • Cancel
  • Jan Cumps
    Jan Cumps over 2 years ago in reply to scottiebabe
    scottiebabe said:
    Using this decorator

    Excellent. And it should still allow to use that code on a non-Pico Arduino with some slight modification. For those other controllers, _not_in_flash_function could be defined as empty, so it translates to nothing. Your function will show as void (ADSInterrupt)() for those, and compile just fine.

    • Cancel
    • Vote Up +1 Vote Down
    • Sign in to reply
    • Cancel
  • scottiebabe
    scottiebabe over 2 years ago in reply to phoenixcomm

    Thanks for the kind words :) I'm not an arduino expert, so I don't know much about how to best structure a program with the loop function. It appears quite similar to other Microcontrollers where I would run an endless for loop in main, so I don't know...

    image

    I have nothing against the arduino IDE, its a great place to start. I am using platformio in VScode, so no cmake, make, linker scripts, etc to deal with just KISS.

    image

    I had to setup the picoprobe on my own, but hopefully that will work out of the box eventually...

    I hope arduino does the same as RPI and sell a debug probe for their new arm boards

    • Cancel
    • Vote Up +1 Vote Down
    • Sign in to reply
    • Cancel
  • scottiebabe
    scottiebabe over 2 years ago in reply to Jan Cumps

    It takes about 15 uS to from start an i2c transaction after the ADS1115 asserts DRDYn. That's includes the Adafruit driver, Pico I2C driver, arduino environment, etc... compared to the i2c transaction time its no big deal...

    image

    • Cancel
    • Vote Up 0 Vote Down
    • Sign in to reply
    • Cancel
  • Jan Cumps
    Jan Cumps over 2 years ago in reply to scottiebabe
    scottiebabe said:
    best structure a program with the loop function. It appears quite similar to other Microcontrollers where I would run an endless for loop in main, so I don't know...

    It is virtually the same. The Arduino lib implements main(), and:

    • first calls setup() - this will run your setup() code
    • then loops for ever and calls loop() in that loop - this will run your loop() code

    image

    source: https://forum.arduino.cc/t/why-there-is-no-main-function/284675/3

    • Cancel
    • Vote Up +2 Vote Down
    • Sign in to reply
    • Cancel
  • Soura_123
    Soura_123 over 2 years ago

    You can do to in either of the two ways:-

    1)Either run the Arduino Runtime environment whilst changing the serial i/p commands for DI/DO or,AI/AO & further modifications

             OR,

    2)You can use the chip & burn the bootloader(Internal Memory )& then put the IC on any the non-arduino board for any IOT applications.

    • Cancel
    • Vote Up +1 Vote Down
    • Sign in to reply
    • Cancel
<
element14 Community

element14 is the first online community specifically for engineers. Connect with your peers and get expert answers to your questions.

  • Members
  • Learn
  • Technologies
  • Challenges & Projects
  • Products
  • Store
  • About Us
  • Feedback & Support
  • FAQs
  • Terms of Use
  • Privacy Policy
  • Legal and Copyright Notices
  • Sitemap
  • Cookies

An Avnet Company © 2025 Premier Farnell Limited. All Rights Reserved.

Premier Farnell Ltd, registered in England and Wales (no 00876412), registered office: Farnell House, Forge Lane, Leeds LS12 2NE.

ICP 备案号 10220084.

Follow element14

  • X
  • Facebook
  • linkedin
  • YouTube