

I'm going to guide you through the process of making Tushar's Webserver a single aesthetically pleasing html page that works every time straight from boot.
Like This...

Preamble
So before we start I would like to say thanks to Tushar for doing all the complicated C code and php for this project, You can see how to set that up in his 4 part blog, here.
In this blog we are going to bring the web server sections all together into one neat webpage and get everything to start properly on boot, so it runs completely headless every time you boot it up, no issues.
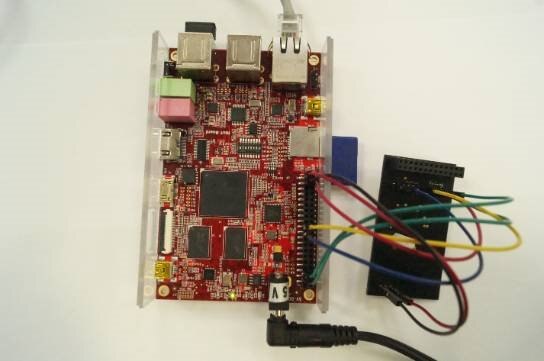
For this project you will need a working version of Tushar's RIoT Board and Xtrinsic webserver, if you do not have it you can go to Tushar's blog and follow that.
Note: All of the files I have used here are in the .zip at the bottom. Simply unzip it and copy the www folder to /var and the start.sh script to /etc/init.d then run the necassary linux code (about 15 lines up) for the start script and you are done.
If you want to make it yourself, or simply want to know the changes I have made here they are.
So you should start with something looking like this.
and a few webpages that look fairly basic.
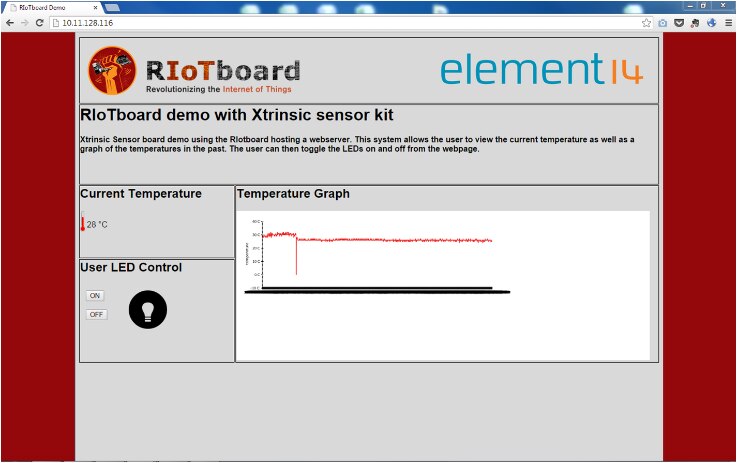
But we want them to look like this
So there are two parts to this. Firstly getting the html page up and running to get the single webpage that does everything, and secondly to get it to run automatically on boot.
The All-in-One HTML page
Being the easiest and most straightforward of the two, we'll start with this. Basically we will have an HTML page with a frame for each php page and a few extra things to make it look good.
The design for the page is a basic 2x4 table with the logos and the description going across both columns and the graph going across across two rows, and a css script to make it more eye catching and exciting. If you don't want to write your own html page I have included my script below, if you do want to write your own script below I strongly recommend using a table for the layout of your page and use iframes to display the php pages, this will allow you to write you page far faster and also make it easier to find the relevant piece of code if something goes wrong.
<HTML class='main'>
<body>
<title>RIoTboard Demo</title>
  <link rel="stylesheet" type="text/css" href="css.css">
  <table class="main">
  <tr class="logo">
  <td colspan=2 class="logo">
  <img src="images/riotlogo.png" class="riotlogo">
  <img src="images/e14logo.png" class="e14logo">
  </td>
  </tr>
  <tr class="header">
  <td colspan=2>
  <h1>RIoTboard demo with Xtrinsic sensor kit</h1>
  <h4>Xtrinsic Sensor board demo using the RIotboard hosting a webserver. This system allows the user to view the current temperature as well as a graph of the temperatures in the past. The user can then toggle the LEDs on and off from the webpage.</h4>
  <br><br>
  </td>
  </tr>
  <tr class="main1">
  <td class="main11">
  <h2>Current Temperature</h2>
  <img src="images/therm.png" height=40 class="therm">
  <iframe class="currenttemp" src="current_temper.php" frameborder=0 scrolling="no"></iframe>
  </td>
  <td class="main12" rowspan=2>
  <h2>Temperature Graph</h2>
  <iframe src="line_graph.php" class="linegraph" frameborder=0 scrolling="no"></iframe>
  </td>
  </tr>
  <tr class="main2">
  <td class="main21">
  <h2>User LED Control</h2>
  <iframe src="led_blink.php"class="led_control" frameborder=0></iframe>
  </td>
  </tr>
  <tr class="inf">
  </tr>
  </table>
</body>
</HTML>
and the css script which is named css.css
html.main {
  background-image:url("/images/background.png");
  background-size:100% 100%;
  font-family:Arial, Helvetica, sans-serif;
  }
table.main{
  border:0;
  width:80%;
  margin-left:auto;
  margin-right:auto;
  }
td{
  border:1px solid black;
  }
img.riotlogo{
  width:40%;
  float:left;
  }
img.e14logo{
  width:40%;
  float:right;
  }
td.main11{
  width:20%;
  height:75px;
  }
td[class*='main']{
  vertical-align:top;
  }
iframe.currenttemp{
  position: relative;
  height:50px;
  top:-30px;
  right:-5px;
  }
iframe.linegraph{
  width:98%;
  height:85%;
  }
div.ledindicator{
  background-color:#000000;
  position:absolute;
  text-decoration:overline;
  right:100px;
  width:100px;
  }
img.therm{
  z-index:-1;
  height:40px;
  }
span.temp{
  font-family:Arial, Helvetica, sans-serif;
  display:block;
  }
so that that's pretty much it, I slightly edited the php pages as well.
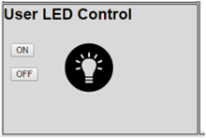
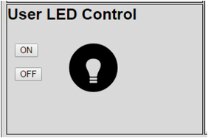
LED Control
on.php and off.php (which run when you press the on or off button for the LED) now change the led.png image (which is the light bulb) so that the it shows whether the LED is on/off. Also I changed led_blink.php, which displays the buttons and runs the on and off scripts, so that it displays the led.png image next to the buttons.
Current temp
The current_temp.php file I changed so that it showed the °C symbol and the font is the same as the rest of the page by reference css.css
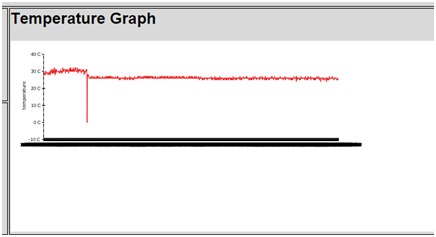
Line Graph
Line_graph.php has been changed a fair bit. I got rid of the title and the box to make it more simple and cleaner. I put a SQL query in that deletes all data that is older than 15 mins, so that the Pchart library doesn't get overwhelmed by data (I left it running when I went to lunch, came back refreshed and the php just didn't load, took me ages to work out that the pchart library has a 30s time-out for drawing the graph), you can change the kill time for data but bear in mind that data is taken every second so 15 mins of data is still 900 points of data being plotted. As you can see I have had a little problem with the X-Axis of the graph, the pchart library prints the label from every data point, and I haven't yet found a way to make it tell that the label is a time and then label the axis neatly without overlaps.
The PHP SQL query I used was mysql_query( "delete from sensordata where time<date_add(now(),interval -15 minute)");
Images
I have added a few images all in a folder called images, keeps it neat. the first one is the background, I have set it to be used in the main html page and to be stretched so that the borders are 10% of the page each. I have also added a picture of the logos that are at the top of the page. There is also therm.png which is the thermometer for the current temperature. Finally there is BI, and led.png. on.png and off.png are fixed images of the bulb on and the bulb off. Everytime the on or off button is pressed then the necessary image of on or off.png is copied into led.png to be displayed. Probably not the neatest or most efficient way to do it, but it's easy and simple.
Start the server properly
One of the main problems I had when I first did Tushar's server was that a lot of the permissions reset every boot meaning that you had to enter a few lines of code every time you rebooted. So that had to change. My preferred method for stuff like this is to make a custom script that runs on boot and in it are the commands that I need. To do this you need to make a script in start.sh I always call mine start.sh so it is easy to find, and in it I put all the chmod commands I needed.
make the script
sudo vi /etc/init.d/start.sh
In the script type
#!/bin/bash
sudo chmod -R 755 /var/www/
sudo chmod 777 /var/www/images/led.png
sudo chmod 777 /sys/class/leds/user_led/brightness
this allows everything in the www folder to be read and executed by Apache but not written, exactly what we need.
It also then allows Apache to change led.png so that the led indicator works properly.
Finally and most importantly it allows Apache to change the brightness file for the user LED allowing them to run it on and off. THIS NEEDS TO HAPPEN EVERY BOOT ELSE IT DOES RESET.
The chmod commands other than the brightness one simply ensure that the settings are correct on boot.
one of the other problems I was having was getting the c code to run on boot, if it doesn't then the Xtrinsic temperature isn't read and nothing is updated. I had a problem compiling the c code I edited to make it run without asking whether you wanted to debug or not so the command here just passes the value 0 for the user input, this disables debugging. "yes 0 | sudo /var/www/xtrinsic_current_temp &"
I also put in a command that reset led.png back to the off image every boot to be accurate to the led.
the final start.sh script should look like this
#!/bin/bash
sudo chmod -R 755 /var/www/
sudo chmod 777 /var/www/images/led.png
sudo chmod 777 /sys/class/leds/user_led/brightness
sudo cp /var/www/images/off.png /var/www/images/led.png
yes 0 | sudo /var/www/xtrinsic_current_temp &
save the file with ESC+SHIFT+: then type wq enter
so now we need to tell the board to run our script on boot.This is very simple, and only needs two lines of code.
Sudo schmod +x /etc/init.d/start.sh
makes the script executable
and then
sudo update-rc.d start.sh defaults 99
tells the board to run the script on boot.
The second line will throw up a couple of errors as it isn't actually headed correctly, but it will still run just as we need it to. If you want to header it correctly you can find the info in /etc/init.d/README
That should be everything. Just reboot the board and load up your internet browser on your PC and load your boards I.P. address. You should now have a fully working single html page. Test out the features by heating the xtrinsic with you hands or clicking the led buttons. The graph will refresh every time you load your page.
If I manage to get the graph to auto reload every minute or get the graph's x-axis looking ok then I will update the blog.
Or you can download the Full image, with everything pre configured, by clicking the button below.

Any problems? Just ask.
Any suggestions? Please please please comment and share.