


I will build a iot gateway which will log sensor data of grove shield to Azure IOT Hub together with a visualization dashboard using Power BI.

This is guide about using Intel Edison to send data to Azure IoT hub and those data will be retrieved and stored in Azure Storage. With Power BI connecting to the Azure Storage, a visualization dashboard will be created.
Prerequisites
- An Azure account
- Azure CLI installed
- Visual Studio Code
- node, npm and gulp
- A Power BI account
- Azure Storage Explorer
- Power BI Desktop
Configure Intel Edison
Follow this resource to setup and configure your Intel Edison.
Get the Tools
Download the development tools and the software for the first sample application for Intel Edison. Depending on the platform you are developing with, follow one of the following links:
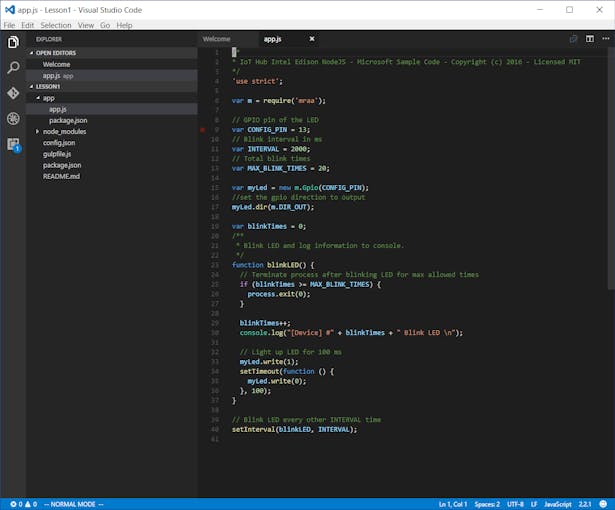
Create and deploy blink application
1. Clone this sample repository from GitHub.
git clone https://github.com/Azure-Samples/iot-hub-node-edison-getting-started.git
2. Open the sample app (Lesson1) in Visual Studio code.
cd iot-hub-node-edison-getting-started
cd Lesson1
code .
3. Install the libraries and other module for the sample app.
npm install
4. Generate the device configuration file.
gulp init
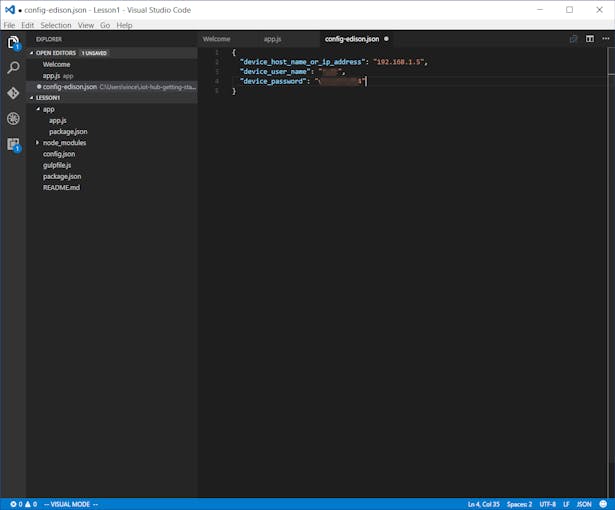
5. Update configuration file config-edison.json in Visual Studio Code.
# For Windows command prompt
code %USERPROFILE%\.iot-hub-getting-started\config-edison.json
# For MacOS or Ubuntu
code ~/.iot-hub-getting-started/config-edison.json
6. Update the placeholder device hostname or IP address and device password with the IP address and password that you marked down in the section Configure Intel Edison above.
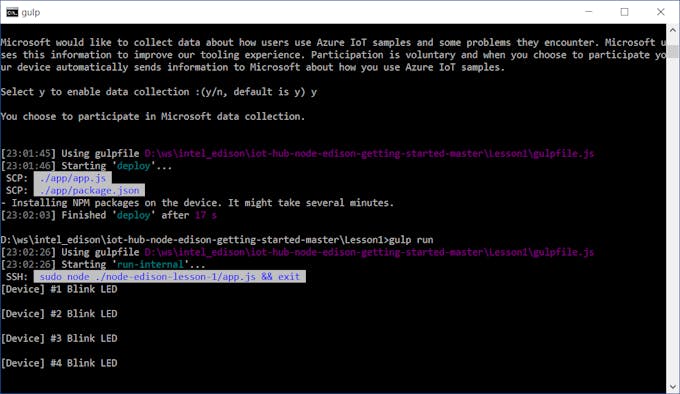
7. Deploy and run the sample application. Verify that the app works.
gulp deploy && gulp run
Create IoT hub
1. Sign in to Azure account.
az login
2. Set the default subscription that you want to use.
az account set --subscription {subscription id or name}
3. Register the provider "Microsoft.Devices"
az provider register "Microsoft.Devices"
4. Create a resource group named iotsampleRG in the in South East Asia region.
az group create --name iotsampleRG --location southeastasia
5. Create an IoT hub in the iotsampleRG resource group.
az iot hub create --name {hub name} --resource-group iotsampleRG
Register Intel Edison
1. Register Edison device in IoT hub.
az iot device create --device inteledison01 --hub-name {hub name}
Create Azure function app and Azure storage account
Use an Azure Resource Manager template to create an Azure function app and an Azure storage account. The Azure function app listens to Azure IoT hub events, processes incoming messages, and writes them to Azure Table storage. The storage account is used for reading the persisted copies of messages from Azure table.
Follow this link and this resource to create the function app and storage account.
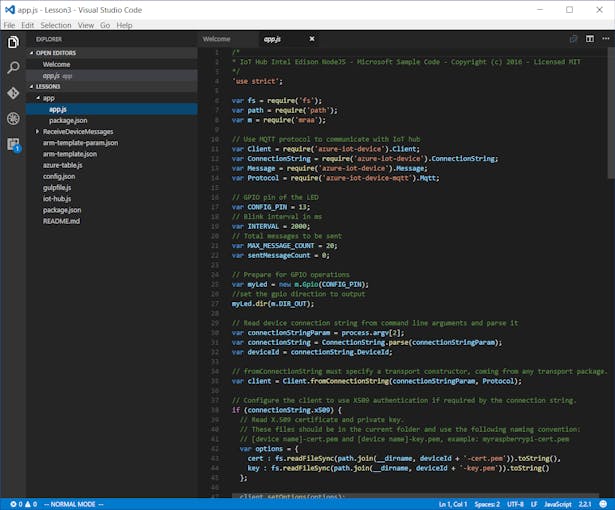
1. Open the sample project's Lesson3 in Visual Studio Code.
cd Lesson3
code .
2. Update the arm-template-param.json file.
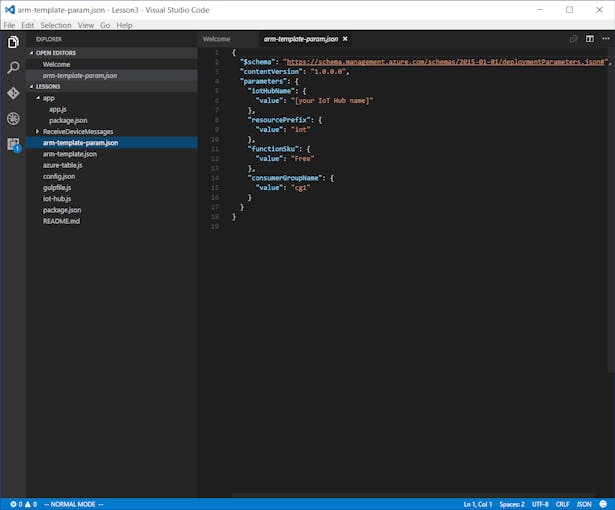
3. Create and deploy resources in Azure
az group deployment create --template-file arm-template.json --parameters @arm-template-param.json -g {resource group name}
Get IoT hub and device connection string
1. Get the IoT hub connection string.
az iot hub show-connection-string --name {hub name}
2. Get the device connection string.
az iot device show-connection-string --hub-name {hub name} --device-id inteledison01
Configure device connection
1. Initialize configuration file.
npm intall gulp init
2. Update configuration file config-edison.json in Visual Studio Code.
# For Windows command prompt
code %USERPROFILE%\.iot-hub-getting-started\config-edison.json
# For MacOS or Ubuntu
code ~/.iot-hub-getting-started/config-edison.json
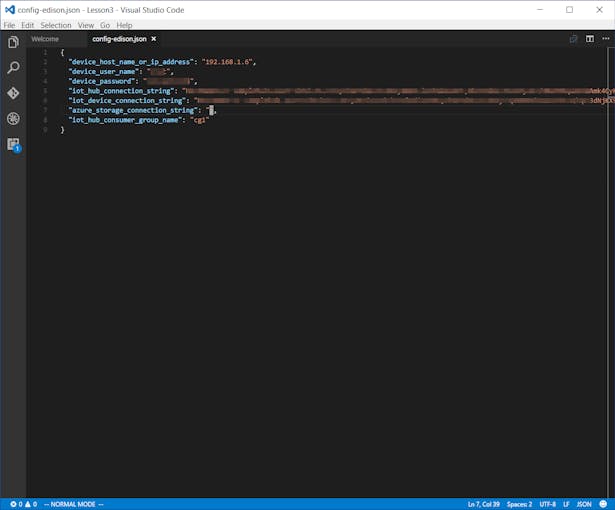
3. Make these changes in the configuration file:
- Replace [device hostname or IP address] with the device IP address you marked down when you configured your device.
- Replace [IoT device connection string] with the
device connection string - Replace [IoT hub connection string] with the
iot hub connection string
Deploy and run sample application
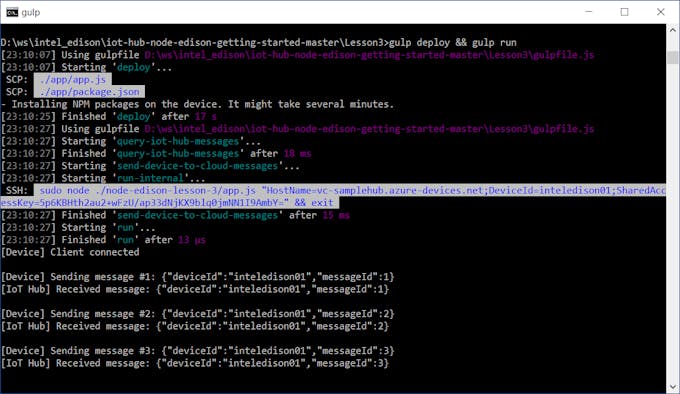
1. Deploy and run the sample application on Edison.
gulp deploy && gulp run
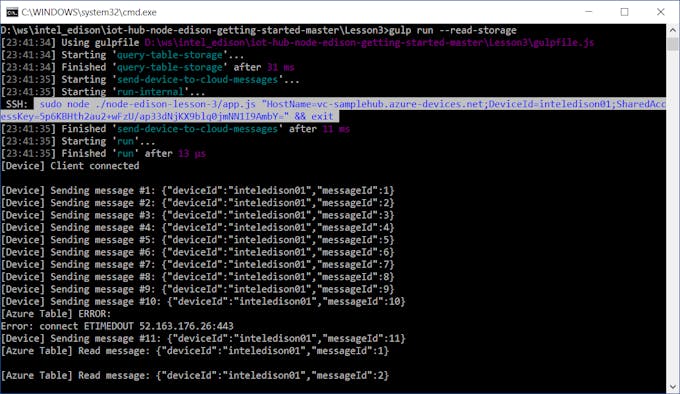
Verify sample application works
You should see the LED that is connected to Edison blinking every two seconds. Every time the LED blinks, the sample application sends a message to your IoT hub and verifies that the message has been successfully sent to your IoT hub. In addition, each message received by the IoT hub is printed in the console window. The sample application terminates automatically after sending 20 messages.
Read new messages persisted in Azure Storage
The messages sent to IoT hub are stored into Azure Table storage via the Azure function app. You need the Azure storage connection string to read messages from Azure Table storage.
1. Get connection string.
az storage account list -g iotsampleRG --query [].name
az storage account show-connection-string -g iotsampleRG -n {storage name}
3. Replace [Azure storage connection string] with the connection string.
4. Send messages and read them from your Azure Table storage.
gulp run --read-storage
Adding Grove Kit sensors to Intel Edison
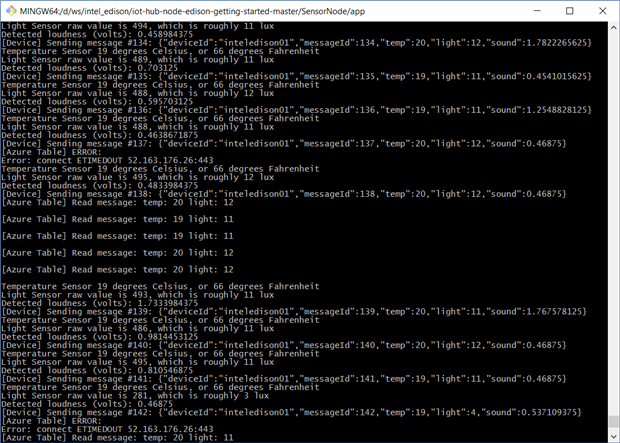
Follow this link to setup Grove Kit with Intel Edison. I am using three sensors in this project. These sensors are temperature, light and sound sensors. Light sensor connects to A0, sound sensor connects to A1 and temperature sensor connects to A2.

Getting the sensor node code
Clone this repository to get the codes which send sensors data to Azure IOT Hub. These codes are based on the codes from Lesson3 above. To continue with the project, you are required to complete all the above steps.
And you need to make the some changes to the function app using the Azure management portal. Instead of sending those sensors' data as a single JSON string, the sensors' data are being sent individually, as shown in the image below.

1. Open the sensor-node-element14 project in Visual Studio Code.
cd sensor-node-element14
code .
Follow the instructions in Lesson3 above to complete the setup. You may copy those configuration files from Lesson3.
gulp deploy && gulp run
3. Send messages and read them from your Azure Table storage.
gulp run --read-storage
4. [Optional] View the sensors' data with Azure Storage Explorer

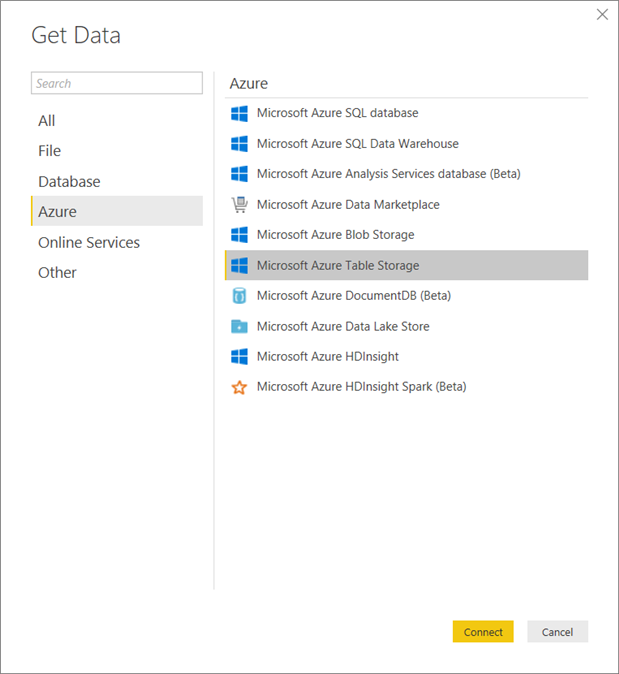
Connect Power BI to Azure Storage
1. Using Power BI account, login to Power BI portal.

2. Connec to Azure Table Storage
3. Select your Storage Account and navigate to the DeviceData table.

4. Build a Line chart for the temperature, light and sound sensors.
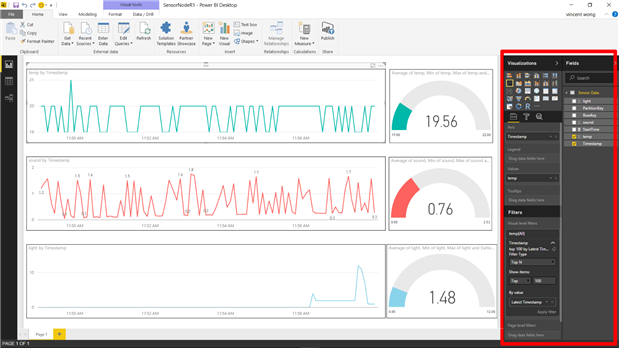
5. Make a Gauge widget for the temperature, light and sound sensors.

6. [Optional] You can publish and share the Power BI report.

The Power BI Dashboard
1. Power BI dashboard on Desktop.

2. Power BI dashboard on Web.


