


It's not often it happens, but a little while back, I had a package arrive for me thanks to element14, with a little treat for me inside.
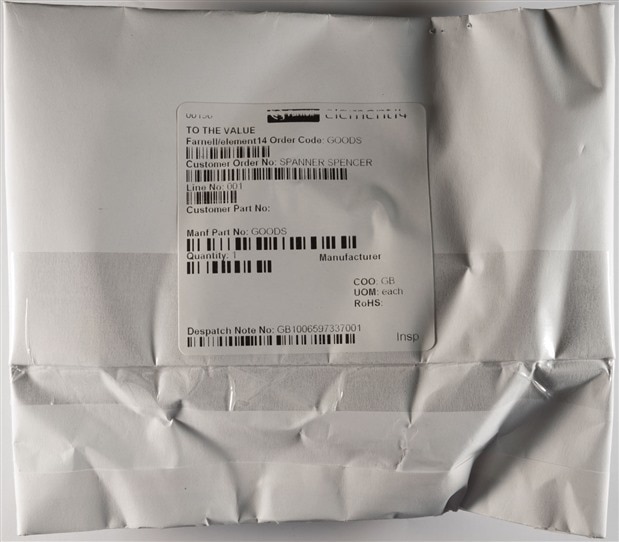
Unboxing
As you would have guessed from the title - it was a Genuino 101, one of Arduino/Genuino's latest offerings. It came a little squashed, but otherwise internally unscathed.


For those who haven't realized, the Arduino name has been the subject of a dispute. As a result, within the USA, products are known as Arduino, whereas outside the USA, they are branded Genuino. Aside from this, the products are functionally identical.
The Genuino 101 is a bit of an odd board - for one thing, it eschews the Arduino's traditionally ATMEL AVR roots for an Intel Curie SoC, containing an ARC and a Quark (x86) core running at 32Mhz. This runs an RTOS and the load is shared between cores autonomously as decided by the compiler at build time. The same layout as the Uno is retained with the same I/O pins, but the I/O is 3.3V natively but 5V tolerant, and the board incorporates a much more hefty USB power supply regulation scheme. The core also brings an Inertial Measurement Unit (IMU) with Accelerometer and Gyroscope, as well as an integrated Bluetooth Low-Energy radio and printed antenna for wireless communication. In many ways, it's a very powerful package, and supposedly costs just about the same as the original Uno while consuming similar or less power. Some consider this a sensor-packed replacement for the original Uno, which is big praise. I suppose this might be part of Intel's strategy to crack the IoT market, given that their attempt at the mobile sector hasn't gone too well.
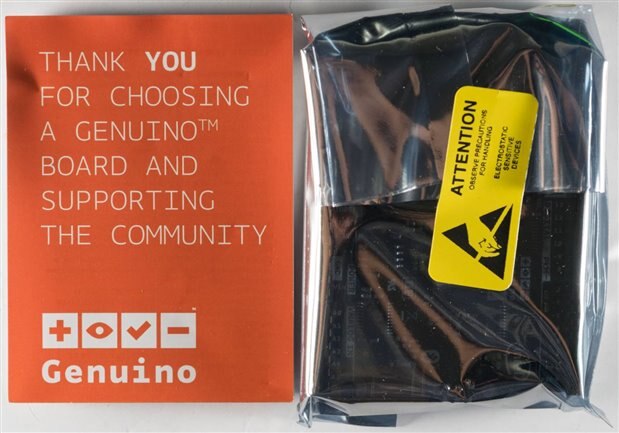
Inside, there is a little leaflet and the board in an ESD shielding bag. No more stickers, unfortunately, but I'm not complaining. Who needs them anyway?
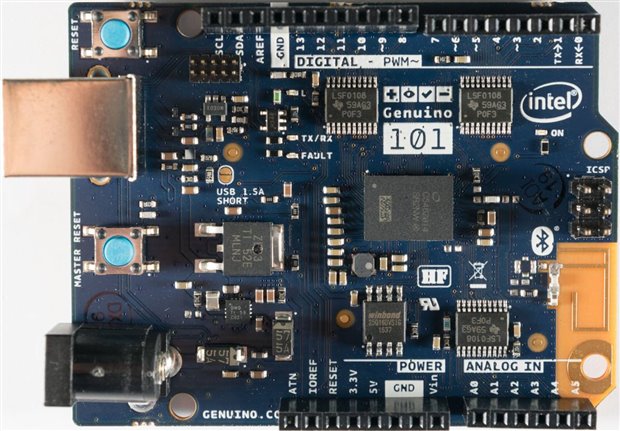
From the top, we can see the board is physically different from many older Arduinos. First of all, it has a deep-blue solder resist layer and a PCB substrate that's opaque and sort of "paper type" as you normally find in high voltage power supply PCBs. There is a clearing on the corner of the solder resist and power planes, for the BLE antenna as well. The full schematics are shown here. The board has sky-blue coloured push buttons for reset and master reset (connected directly to SoC), and line drivers on all I/O pins that give it the 5V tolerance. The power regulation side of things has been improved too with an FPF2496 OCP load switch with adjustable current limit replacing the simpler polyfuse protection on the older board. With the configuration pads, the board can be set to deliver up to 1.5A from USB making powering hefty 5V peripherals from the board a possibility. It seems the switch itself might be a small bare-die type mounted on the board just near the USB connector, so maybe it's affected by photographic flashes similarly to the Raspberry Pi was in the past (but I didn't test). Another difference is the pin next to IOREF which was unused in the old Uno is labelled ATN, and is connected to UART1_CTS through the level conversion. This is a flow-control pin for the UART, but I'm guessing it can probably be addressed as an I/O as well. Pins retain a 20mA drive capability, which is good, as most more advanced microcontrollers typically have very small drive currents making simple prototyping difficult. Four PWM pins, and six 10-bit ADC channels are retained as well, and the UART is also available, not shared with USB communications. Arduino claims the unit to have 196kB shared flash between the two cores that can be used by the user, along with 24kB SRAM.
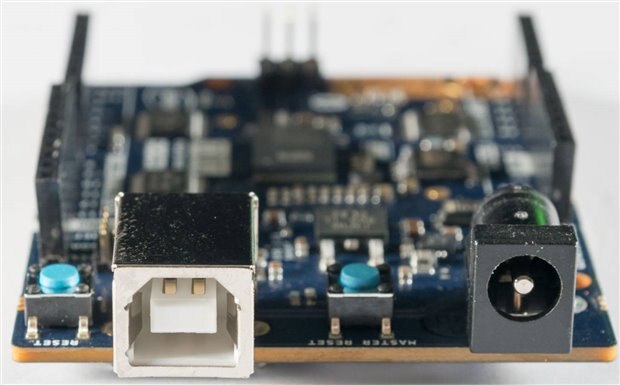
The board retains its full-size USB B connector, and a barrel jack input where the Uno had it. It's rather old fashioned, but at least it's robust and compatible.
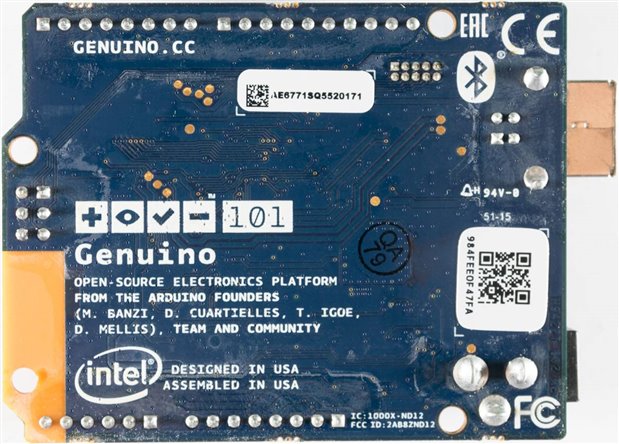
One key point of difference seems to be that this unit is Designed and Assembled in the USA rather than the Made in Italy of the "real" Arduino boards. As a result, I'd have to say that the build quality is slightly disappointing. There is quite a bit of residue on the underside of the board, but more importantly, the header socket alignments are pretty poor making plugging in shields a little difficult on first try, requiring careful manipulation to get it in.
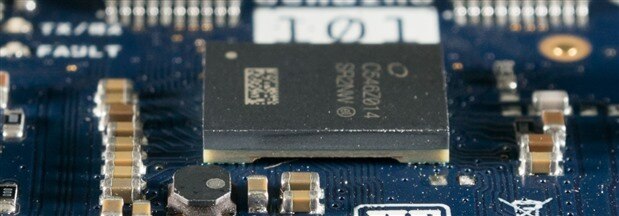
The SoC itself proved fascinating as well, as it seems to have a plastic package on an interposer of sorts, and this is BGA soldered to the board with a strange pattern that makes it look like it's on stilts.
Plugging In
Getting started with the Genuino 101 takes a little more work compared to the Uno. The first prerequisite is to have Arduino 1.6.7 or later installed. Just plugging the board in will bring you no joy though ...
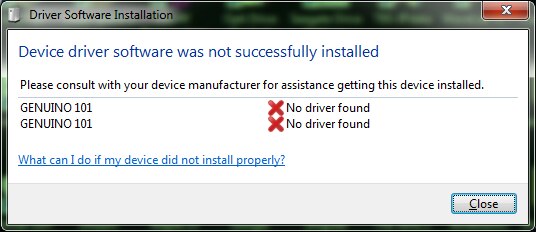
The reason is that this board needs very specific drivers. As a result, you have to fire up Arduino and go to the Boards Manager, where you need to download the specific "core" to support this board. A warning, the download of the Intel Curie core is about the same size as Arduino IDE itself, so you're probably going to use up about 400Mb getting the IDE and the support package.


Once it has been downloaded, the package will run its installation and install its drivers.


From there, you can use the IDE as per usual, with Arduino/Genuino 101 selected as the board type and with its corresponding COM port. To access the Curie specific features, you should reference the library pages on Curie Timer One, Curie IMU and Curie BLE. For someone like myself who has never developed with the Curie before, or with Arduino for a while, it was a lot to process, and I found it easier to leaf-through the example code instead of going through the library reference.
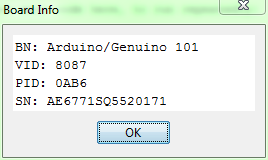
From the IDE, you can also read board info. Arduino mentioned a facility to update the firmware on the board, although I couldn't find it. No matter, since I tried to load a few "simple" Uno programs just to check if they worked.

One frustration that I had encountered was a very slow build and load process, and partly it seems, due to issues with the way the download script attempts to reset the board. On my machine, it's very hit-and-miss with a 20% "first time" success rate. However, if you follow and press the MASTER_RESET when instructed, it loads fine. To make things quicker, I note that it often hangs at the "Uploading" prompt - pressing MASTER_RESET right then actually will allow the download script to start and load the program first time.
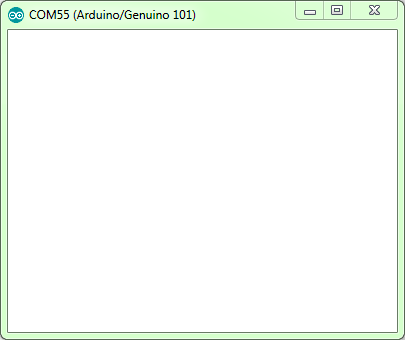
Another problem I came across was a stuck non-functioning serial monitor, which makes debugging frustrating. What I seemed to find was that even when using Hyperterminal, the serial port just hangs on opening a lot of the time. But after a few plug/unplug cycles, you can get it to open and print as expected, but after that, it gets stuck again once the board is reset. I don't know what the cause is, but it makes frustrating work of the emulated Serial connection.
First Project
I suppose I better put the board to work. A long time ago, I was supposed to build some IoT light-based thing in another off-RoadTest using the Arduno Yun. Unfortunately, I never got the time to do it because I was too busy finishing my PhD, and the Infineon Shield didn't fit onto the Yun due to the Ethernet connector, and the Yun had a strange "Bridge" class to co-ordinate control between Wi-Fi SoC and the MCU. In all, it was a lot of time investment needed which I didn't have at the time, and the parts have been sitting on my desk making me feel guilty.
So instead of letting the Infineon shield sit, I decided to employ it with the 101 instead for a BLE controlled solution. This would not need the Yun (which I might find a purpose for later - it's expensive, complex and really capable) at all. Because the 101 is 5V "tolerant" and the I2C communication is all about "pulling down to ground" anyway, I had confidence that this would be a "snap and go" solution, provided the board actually fit. I ported my old code and borrowed library across, and made the necessary modifications. These included de-optimizing the LED ripple to reduce annoying acoustic noise, and the inclusion of the CurieBLE library, specifically characteristics to control power ON/OFF, R/G/B channel value, random mode, random cycle time and dimming level. As all characteristics are typed, I chose Int to ensure enough range (need 12-bits). Unfortunately, despite the documentation for BLEBoolCharacteristic type, I couldn't make it work as it wouldn't recognize or compile. The handler changes the necessary parameters when an update is received, and the main loop polls for updates, and changes the colour for random. The code is very basic, relatively ugly, but it seems to work and is attached.

Once compiled, the code consumes 22% of storage, the majority is BLE related. This shows there's really a lot more that the unit can do - maybe in future, I'll make it a light that responds to vibrations sensed on the floor.
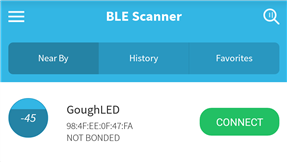
On my phone, I use an app called BLE Scanner to look for and talk to the board, as I am no app developer and really have no time to learn to write a BLE application. The board is easily found, and tapping on connect allows me to view the device services and characteristics. As implemented, I haven't put any security in, although it could be as simple as having a characteristic used as a "PIN" or "security" and if that isn't written with the appropriate value, all requests are ignored.


The labels are relatively cryptic UUIDs which are difficult to memorize, but ultimately, it's in order Power status, red, green, blue channel values, random mode toggle, random mode time, and dimming level. To actually change the values, one has to click on the W button, change type to Byte Array, and then enter the value LSB to MSB.
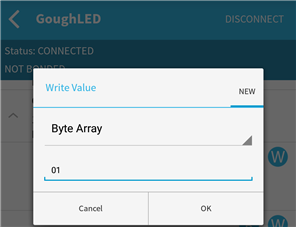
Because the shield accepts values up to 4095 for each channel, corresponding to 12-bits, the maximum value is 0xFFF. To send this to the board, we need to type in FF (lsb) followed by 0F (msb). Likewise, if we want to set value 0x123, then we need to send 2301 as the byte array. It's a little confusing until I realized there was this endianness mismatch, but once you realize this, it works just fine.
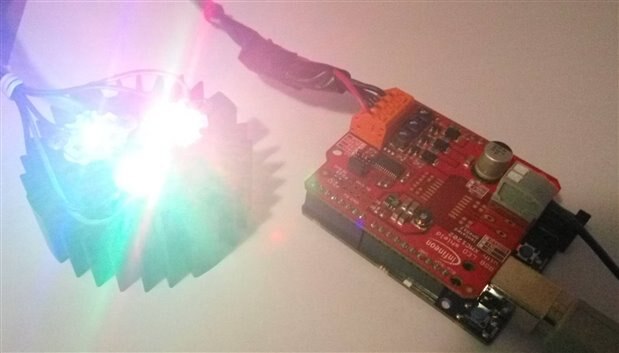
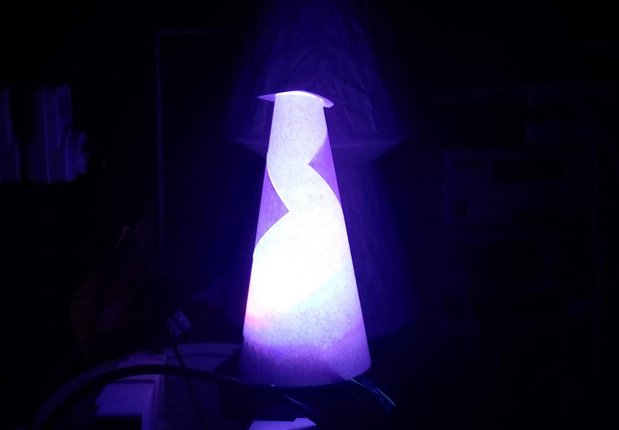
Once desktop prototyping was completed, I chucked the stack of boards into the lid of an old Raspberry Pi 1 case, taped it in there, used a barrel jack lead to hook it up to the same 12v supply powering the LED shield, and then sat the LED heatsink on top of the contraption with a paper cone for diffusing. It's not that pretty but it works very well and gives me nice and deep colours (due to the LEDs chosen) at the command from my smartphone (after going through BLE Scanner). I noticed that the heatsink I had was already sufficient, so I ditched the fan from my earlier experiments with no negative consequences.
Conclusion
The Genuino 101 is quite a unique board, owing to the use of an Intel Curie SoC. It brings an IMU with Accelerometer and Gyroscope, along with Bluetooth Low-Energy radio as the stand-out features of the board, and uses a dual-core ARC + Quark (x86) design clocked at 32Mhz. This, in theory, makes it look like a much more capable board for a similar price, and similar power envelope and should make it a hit. However, because it has 3.3V I/O, that is 5V tolerant, it may not work as a drop-in replacement for older shields as some pins used were Uno-specific. It also might not run some of the libraries which you might be using, which may be "hardware specific". Of course, with a soldered down SoC, there's no real room for mistakes either, as you can't just pull out the chip and plug another one in. However, it's still a good deal cheaper than many alternatives, and does give you some more toys to play with. This may be a true successor to the Uno in a way the Leonardo just didn't quite achieve.
It's not quite flawless, and it's still got some "teething" frustrations as with new generation products. Slow project build and load times were experienced, with loading not very reliable without human intervention. The biggest issue was a non-responsive serial monitor that could be coaxed to work with a lot of effort, but not reliably. I suspect that might be fixed in later versions of firmware or IDE, but they weren't entirely show-stopping.
If this interests you, and you have some time to do a full test of the unit, why not apply for the upcoming Genuino 101 RoadTest where there are 10 being given away. Otherwise, you can always purchase one from your "regular" electronics retailer - I hear they sell for roughly the same price as an old Uno does, so if you're interested in having an accelerometer/gyroscope, or having Bluetooth Low-Energy, then it could be the thing you need and it won't break an arm or a leg.
Top Comments