element14 Community
element14 Community
    Register Log In
  • Site
  • Search
  • Log In Register
  • About Us
  • Community Hub
    Community Hub
    • What's New on element14
    • Feedback and Support
    • Benefits of Membership
    • Personal Blogs
    • Members Area
    • Achievement Levels
  • Learn
    Learn
    • Ask an Expert
    • eBooks
    • element14 presents
    • Learning Center
    • Tech Spotlight
    • STEM Academy
    • Webinars, Training and Events
    • Learning Groups
  • Technologies
    Technologies
    • 3D Printing
    • FPGA
    • Industrial Automation
    • Internet of Things
    • Power & Energy
    • Sensors
    • Technology Groups
  • Challenges & Projects
    Challenges & Projects
    • Design Challenges
    • element14 presents Projects
    • Project14
    • Arduino Projects
    • Raspberry Pi Projects
    • Project Groups
  • Products
    Products
    • Arduino
    • Avnet Boards Community
    • Dev Tools
    • Manufacturers
    • Multicomp Pro
    • Product Groups
    • Raspberry Pi
    • RoadTests & Reviews
  • Store
    Store
    • Visit Your Store
    • Choose another store...
      • Europe
      •  Austria (German)
      •  Belgium (Dutch, French)
      •  Bulgaria (Bulgarian)
      •  Czech Republic (Czech)
      •  Denmark (Danish)
      •  Estonia (Estonian)
      •  Finland (Finnish)
      •  France (French)
      •  Germany (German)
      •  Hungary (Hungarian)
      •  Ireland
      •  Israel
      •  Italy (Italian)
      •  Latvia (Latvian)
      •  
      •  Lithuania (Lithuanian)
      •  Netherlands (Dutch)
      •  Norway (Norwegian)
      •  Poland (Polish)
      •  Portugal (Portuguese)
      •  Romania (Romanian)
      •  Russia (Russian)
      •  Slovakia (Slovak)
      •  Slovenia (Slovenian)
      •  Spain (Spanish)
      •  Sweden (Swedish)
      •  Switzerland(German, French)
      •  Turkey (Turkish)
      •  United Kingdom
      • Asia Pacific
      •  Australia
      •  China
      •  Hong Kong
      •  India
      •  Korea (Korean)
      •  Malaysia
      •  New Zealand
      •  Philippines
      •  Singapore
      •  Taiwan
      •  Thailand (Thai)
      • Americas
      •  Brazil (Portuguese)
      •  Canada
      •  Mexico (Spanish)
      •  United States
      Can't find the country/region you're looking for? Visit our export site or find a local distributor.
  • Translate
  • Profile
  • Settings
Raspberry Pi Projects
  • Products
  • Raspberry Pi
  • Raspberry Pi Projects
  • More
  • Cancel
Raspberry Pi Projects
Blog Assembly Part 1: Building the Foginator 2000
  • Blog
  • Documents
  • Events
  • Polls
  • Members
  • Mentions
  • Sub-Groups
  • Tags
  • More
  • Cancel
  • New
Join Raspberry Pi Projects to participate - click to join for free!
  • Share
  • More
  • Cancel
Group Actions
  • Group RSS
  • More
  • Cancel
Engagement
  • Author Author: pettitda
  • Date Created: 2 Nov 2015 3:56 AM Date Created
  • Views 725 views
  • Likes 1 like
  • Comments 4 comments
  • raspberry_pi_projects
  • pumpkinpi2015
Related
Recommended

Assembly Part 1: Building the Foginator 2000

pettitda
pettitda
2 Nov 2015

As I went about thinking on how to assemble the circuitry together to make a presentable project, I wasn't too happy with the idea of using the extended pin header for attaching the sensor board.  However, I found that the GPIO connector on the Pi will happily take an old computer disk cable.  Luckily, I had one of these hanging around. 


image

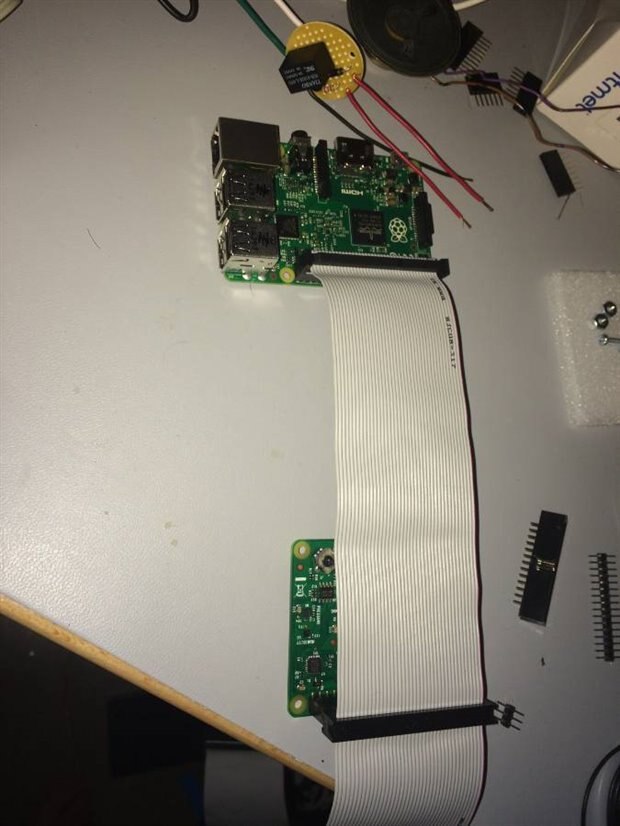
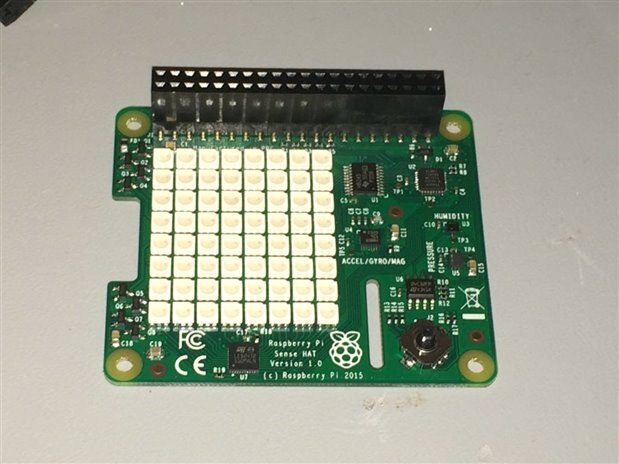
The only gotcha with this technique is that the connector rows end up swapped around if you connect the sensor board with the connector mounted as it comes originally.  However, apparently the creators thought of this.  The connector that comes with the sensor board can be turned around and installed on the top side of the board without any soldering!  In this case, the pins make the right connections with a simple male-male pin header like the one seen off to the right in the picture above.

image

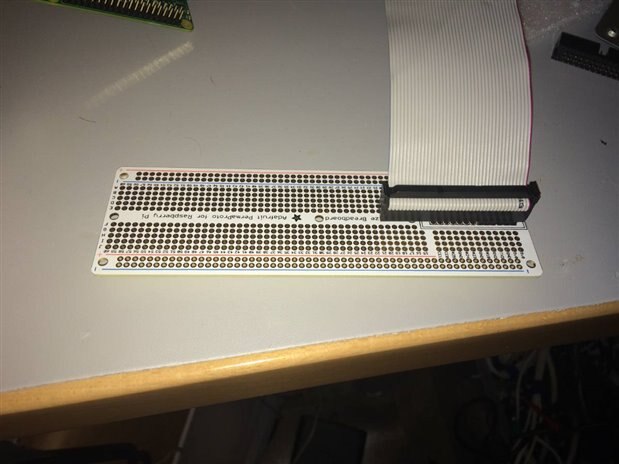
To make things organized and presentable, I decided to use an Adafruit PermaProto board for the original Raspberry Pi that I had laying around.  It doesn't allow for connecting any of the higher numbered pins, but luckily all I need are included.

image

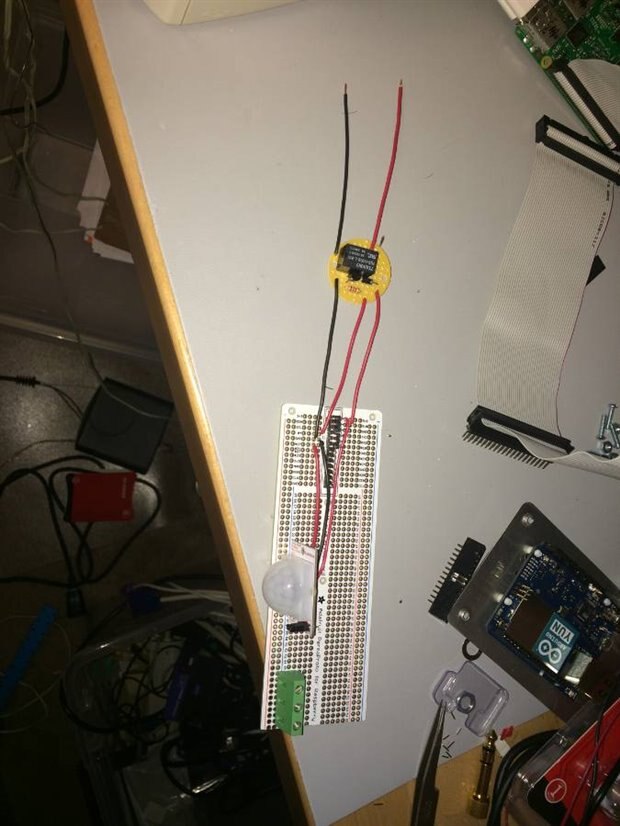
Working with what I had at hand, I installed the left over single row male pin header to cover the needed pins.  To make things foolproof, I soldered the PIR sensor onto the proto board with the idea of drilling a hole in the side of the enclosure to allow the PIR to peak through.  To make things fit in the desired enclosure, I cut a few rows off one end of the proto board.

image

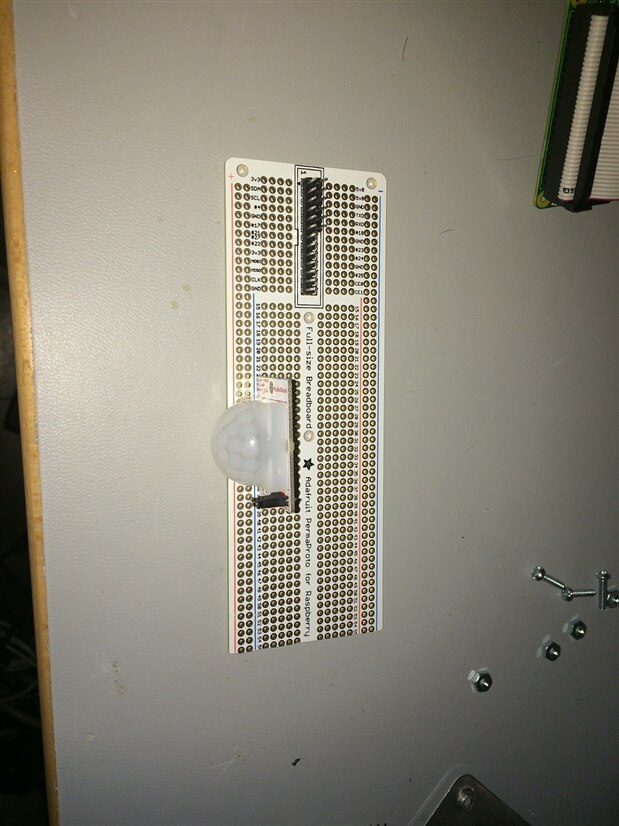
I installed a screw-down type connector on the proto board to handle the connections with the fog machine remote control and added wire to connect the PIR sensor to the Raspberry Pi header.

image

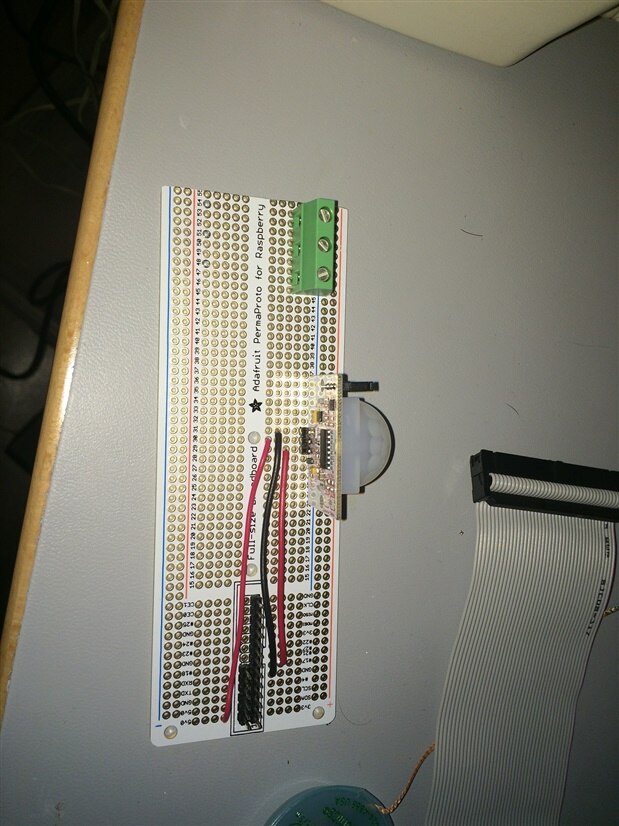
Finally, I soldered on the relay board that I built before.  At this point I'm wishing I had just waited and installed the relay directly on the main proto board.  However, I might as well go with what I have already. 

image

In the next installment, I will finish up the build of the Foginator 2000. 

  • Sign in to reply

Top Comments

  • DAB
    DAB over 9 years ago +3
    Nice reuse of your flat cable. I recently used an old disk cable to make some flat cables for my neopixel devices. DAB
  • jkutzsch
    jkutzsch over 9 years ago +1
    I like the implementation of cable to bypass needing longer GPIO pins. Doesn't quite work as a Hat but I would have preferred your process as part of the testing. Great idea!
  • CharlesGantt
    CharlesGantt over 9 years ago +1
    Nice job!
  • balearicdynamics
    balearicdynamics over 9 years ago

    Well done, David. This is the first time I see the permaproto too. Interesting alternative to the breadboard.


    Enrico

    • Cancel
    • Vote Up 0 Vote Down
    • Sign in to reply
    • More
    • Cancel
  • CharlesGantt
    CharlesGantt over 9 years ago

    Nice job!

    • Cancel
    • Vote Up +1 Vote Down
    • Sign in to reply
    • More
    • Cancel
  • jkutzsch
    jkutzsch over 9 years ago

    I like the implementation of cable to bypass needing longer GPIO pins.  Doesn't quite work as a Hat but I would have preferred your process as part of the testing.  Great idea!

    • Cancel
    • Vote Up +1 Vote Down
    • Sign in to reply
    • More
    • Cancel
  • DAB
    DAB over 9 years ago

    Nice reuse of your flat cable.


    I recently used an old disk cable to make some flat cables for my neopixel devices.


    DAB

    • Cancel
    • Vote Up +3 Vote Down
    • Sign in to reply
    • More
    • Cancel
element14 Community

element14 is the first online community specifically for engineers. Connect with your peers and get expert answers to your questions.

  • Members
  • Learn
  • Technologies
  • Challenges & Projects
  • Products
  • Store
  • About Us
  • Feedback & Support
  • FAQs
  • Terms of Use
  • Privacy Policy
  • Legal and Copyright Notices
  • Sitemap
  • Cookies

An Avnet Company © 2025 Premier Farnell Limited. All Rights Reserved.

Premier Farnell Ltd, registered in England and Wales (no 00876412), registered office: Farnell House, Forge Lane, Leeds LS12 2NE.

ICP 备案号 10220084.

Follow element14

  • X
  • Facebook
  • linkedin
  • YouTube