 | Raspberry Pi Projects - How does your IoT garden grow? Join Les Pounder as he works on his IoT Garden! Watch him integrate technology into his garden and maintain the health of his favorite plants. Check out our other Raspberry Pi Projects on the projects homepage | Previous Part |
| All Raspberry Pi Projects | ||
| Next Part |
Can our garden water itself?
In this project we continue our search to keep our garden well watered, but this time we start fresh with a new project...A self watering garden!
Re-using some of the kit from Project 1, in this project we introduce relays, 12V circuits and peristaltic pumps that will water our garden based on the soil moisture sensor from Project 1. All we need to do is keep a water butt full of water, either through rain or grey water collection!
For this project you will need
- Pi Zero W
- Rasp.IO Analog Zero board
- Vellemen Soil Moisture Sensor
- A waterproof box
- USB battery
- Jumper jerky (Dupont connections)
- Relay Board
- 12V Peristaltic Pump
- Plastic Hose to match diameter of pump
- 12V power supply (for outdoor use)
- Barrel Jack to terminal (for the 12V power supply)
- Waterproof boxes to contain the 12V power supply and pump
- Water Butt / Storage
- Wago 221 Connector (For 12V GND)
Building the hardware
Aside from our Pi Zero W, the main player in this project is the Rasp.IO Analog Zero board, which provides us with an analog to digital converter, the MCP3008. Yes you can buy the chip on its own for only a few dollars / pounds, but the Analog Zero board is a convenient form factor that offers a “less wires” alternative.
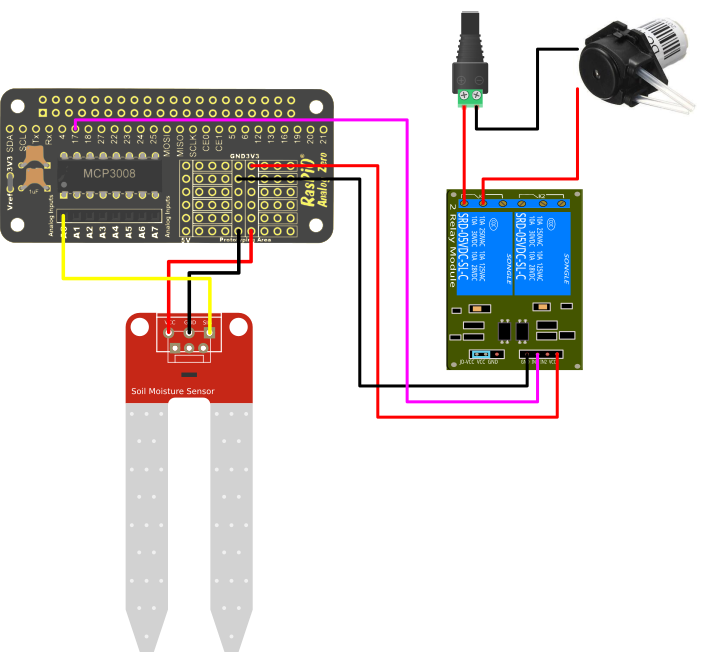
The main sensor we are using is a simple soil moisture sensor from Velleman. The moisture sensor is a simple analog sensor which connects to the 3V and GND pins on the Analog Zero and the output of the sensor is connected to A0. The output from the sensor is in the form of a voltage from 0V to 3.3V (as we are using the 3.3V power from the Pi Zero GPIO) if there is no conductivity, i.e the soil is dry then no voltage is conducted, if the soil is wet then the soil will most likely conduct all of the voltage.
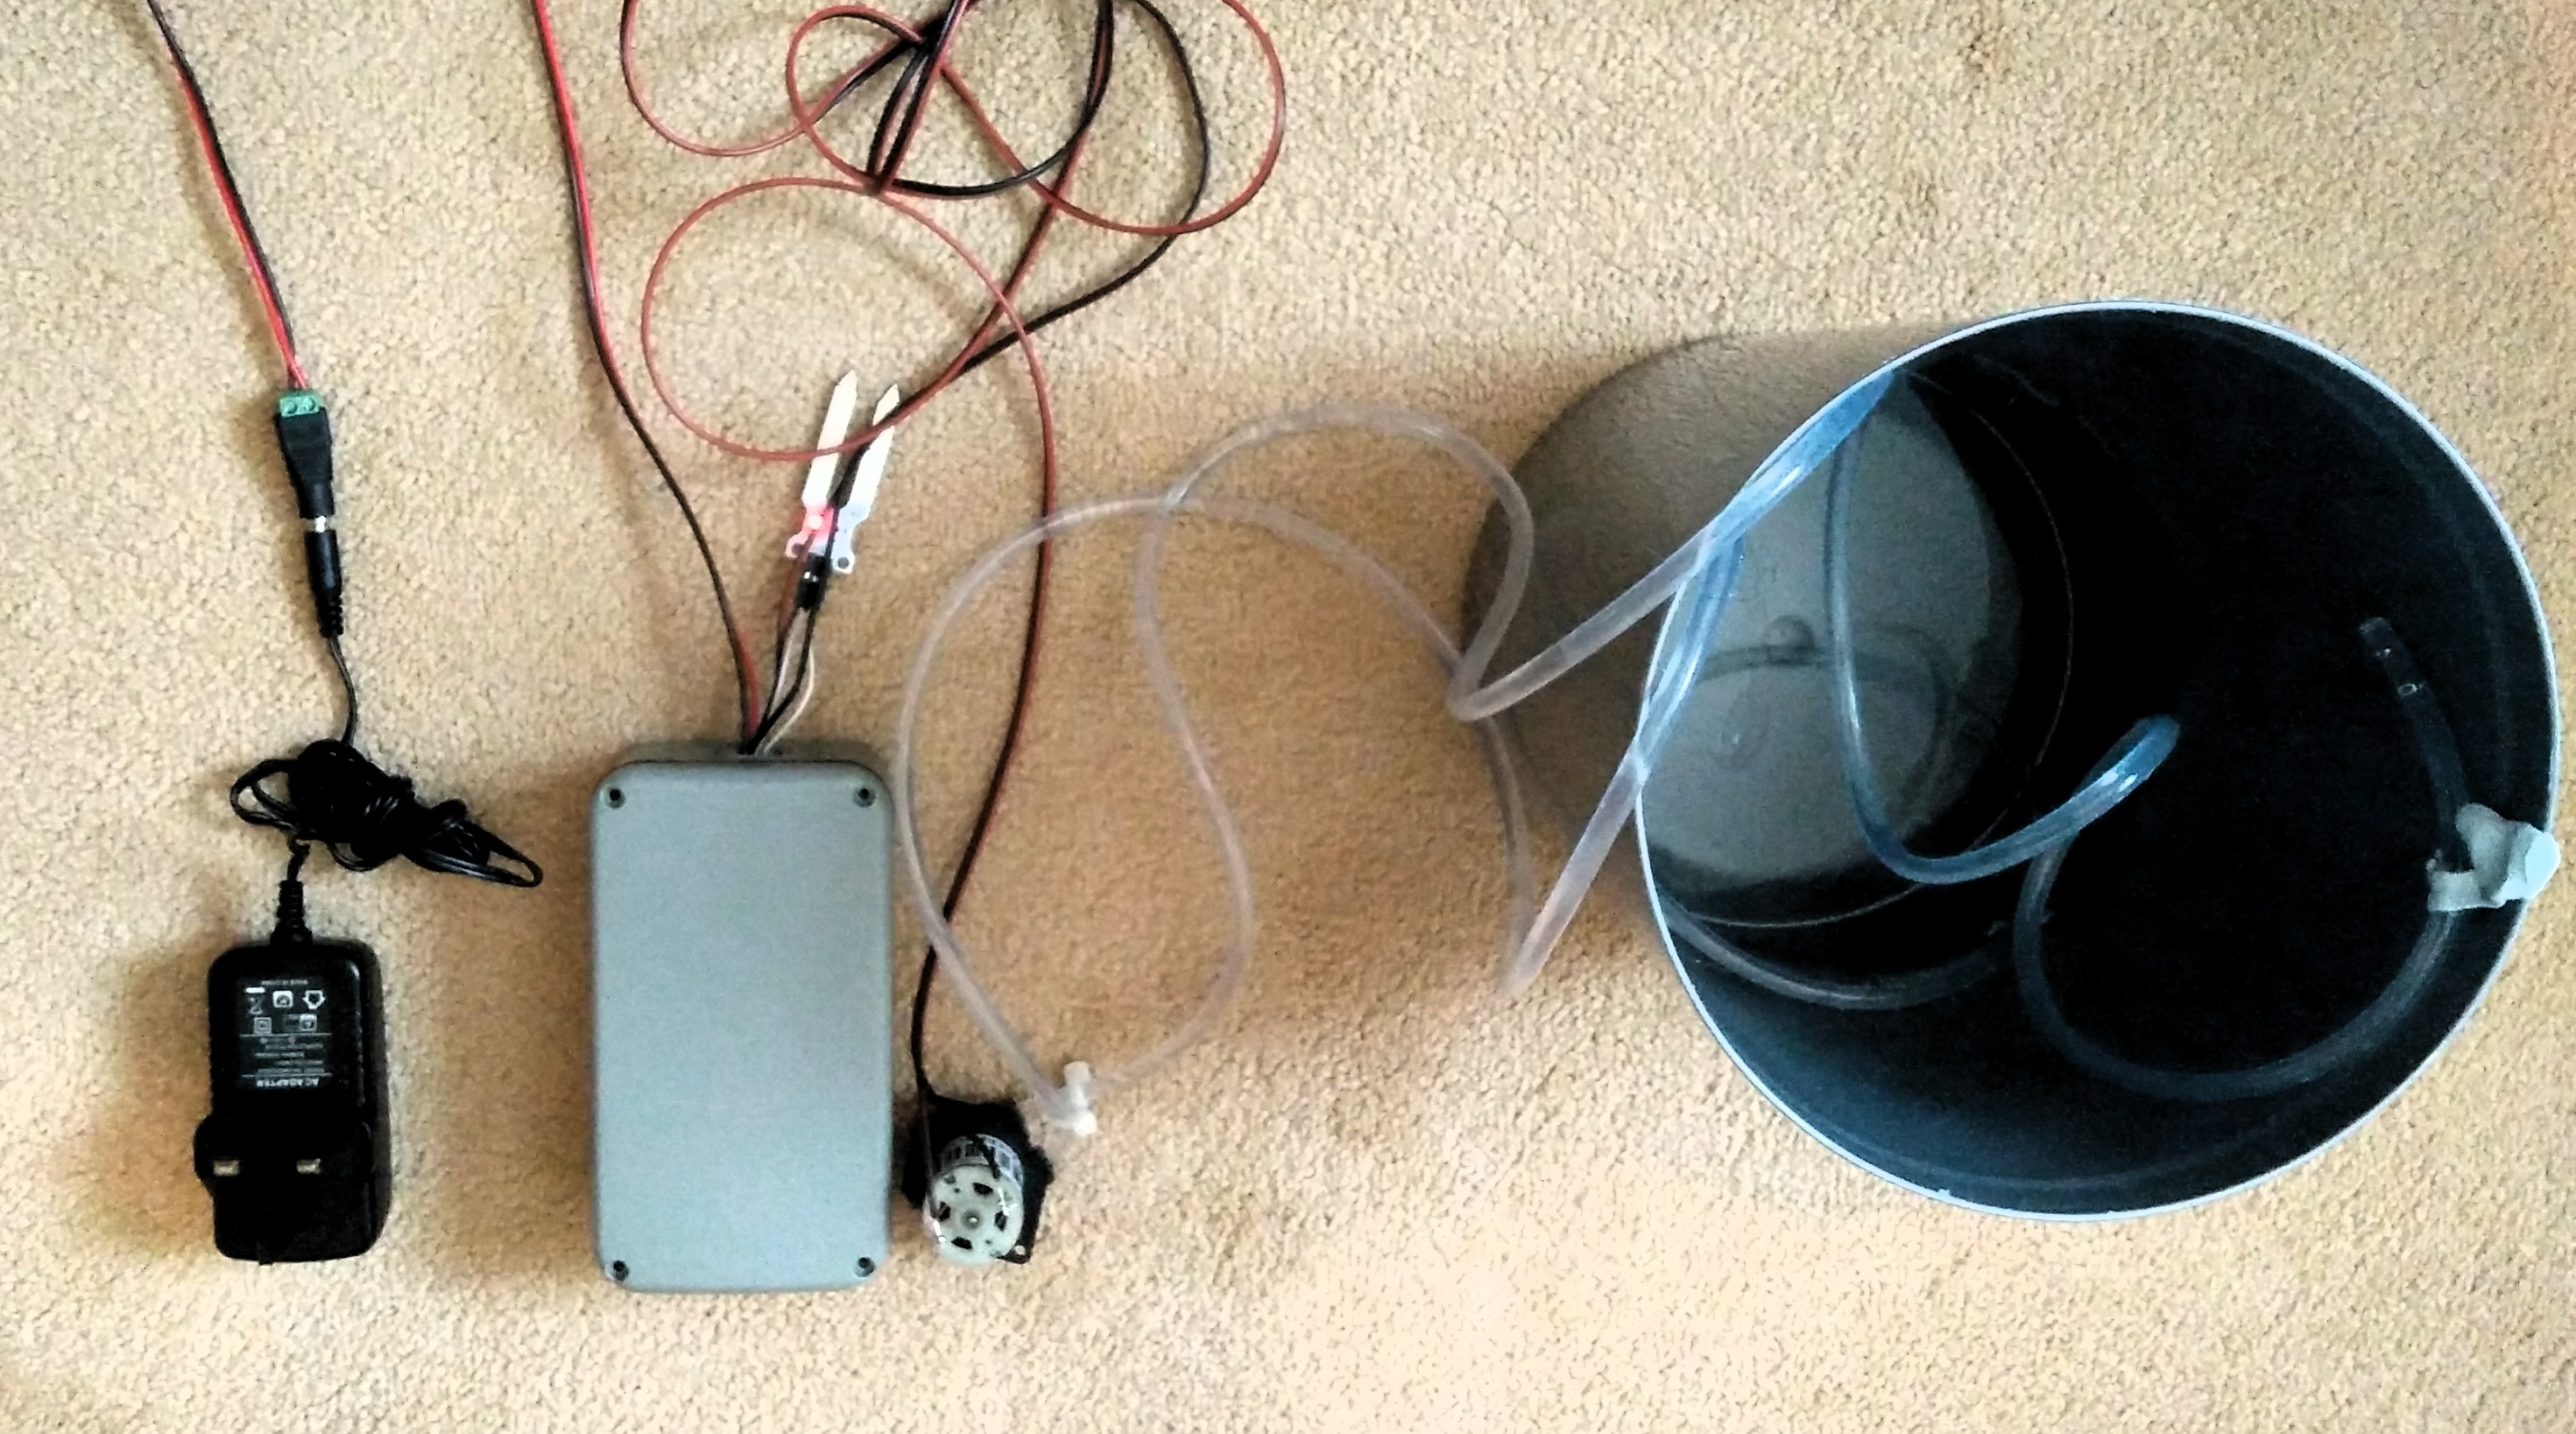
The other part of the project is a relay, used to control the 12V circuit for our peristaltic pump which will pump water from a water butt to our plants using a rotating motion to “squeeze” the water through the connected plastic hose. The relay is controlled from the GPIO of our Pi. In this case we connect the relay to 3V, GND and the Input of the relay to GPIO17.
The Analog Zero will take a little time to solder, and we shall also need to solder the pins for I2C and solder the 3V and GND pins for later. Once soldered, attach the Analog Zero to all 40 pins of the GPIO and then connect the sensor and relay board as per the diagram. You will also need to provide the 12V power supply to the peristaltic pump. The + connection from the 12V supply goes to the relay, via the normally open connection, the icon looks like an open switch.
Build the project so that the wiring is as follows.
Now connect up your keyboard, mouse, HDMI, micro SD card, and finally power up the Pi Zero W to the desktop. You will need to setup WiFi on your Pi Zero W, and make a note of the IP address for future use. Now open a terminal and enter the following command to configure SPI connection.
sudo raspi-config
Yes we can use the GUI “Raspberry Pi Configuration” tool found in the Preferences menu, but having raspi-config available to us over an SSH connection is rather handy should we need it.
Once inside raspi-config, we need to navigate to “Interfacing Options” then once inside this new menu go to the SPI option and press Enter, then select “Yes” to enable SPI. While not strictly necessary, now would be a great time to reboot to ensure that the changes have been made correctly. Then return to the Raspbian desktop. With the hardware installed and configured, we can now move on to writing the code for this project.
Writing the code
To write the code for this project we have used the latest Python editor, Thonny. Of course you are free to use whatever editor you see fit. You will find Thonny in the Main Menu, under the Programming sub-menu.
We start the code for this project by importing two libraries. The first is the GPIO Zero library, used for simple connections to electronic components. In this case we import the MCP3008 class for our Analog Zero board and then we import DigitalOutputDevice, a generic class to create our own output device.
from gpiozero import MCP3008, DigitalOutputDeviceimport time
Now lets create two objects, the first, soil is used to connect our code to the Velleman soil moisture sensor, connected to A0 on the Analog Zero board, which is channel 0 on the MCP3008 ADC. Our second object is a connection to the relay, which is triggered by an output device, on GPIO17.
soil = MCP3008(channel=0)relay = DigitalOutputDevice(17)
Moving on to the main part of the code we create a loop that will constantly run the code within it. Inside the loop the first line of code creates a variable, soil_check. This variable will store the value passed to it by the MCP3008, which is handled via the soil object. As this value is extremely precise we use the round function to round the returned value to two decimal places.
while True: soil_check = round(soil.value,2)
Next we print the value stored in the variable to advise the user on the soil moisture level, handy for debugging the code! Then the code waits for one second.
print('The wetness of the soil is',soil_check) time.sleep(1)
To check the soil moisture level we use an if conditional test. This will test the value stored in the soil_check variable against a hard coded value. In this case 0.1 was found to be very dry soil, but of course you are free to tinker and find the value right for your soil. If the soil is too dry then the condition is passed and the code is executed.
if soil_check <= 0.1:
So what is the code that will be run if the condition is met? Well remember the relay object that we created earlier? We are going to use that object to turn on the relay, effectively closing the open switch and enabling the 12V circuit to be completed. This will trigger the peristaltic pump to life and pump water into the plants. Now for testing we set the time to two seconds, but in reality this will be much longer, depending on the length of hose that the water needs to pass through. So when enough water has been passed we need to turn off the relay, cutting the 12V circuit. The code then waits for 10 seconds before the loop repeats. Again these times are in seconds for test purposes, but in reality they would be in minutes.
relay.on() time.sleep(2) relay.off() time.sleep(10)
So that’s it, we have now built and coded the project and it is ready to be tested. To test the code in Thonny, click on the “play” button located in the menu, or press F5. Now as there is no conductivity between the prongs of the soil moisture sensor the code will trigger and start to water the plants, obviously be careful with this!
Once checked, place something conductive between the two prongs and you will see that the output is just printed to the Python shell and no watering is triggered. When you are finished press the red stop button to halt the code.
So now that we have code, how can we make it executable? In order to do this there are two steps to take. First we need to add a line to the top of our Python code which instructs Python where to find the interpreter.
#!/usr/bin/python3
With that complete, we now need to go back to the terminal, and we need to issue a command to make the Python file executable from the terminal. The command is.
sudo chmod +x self_watering.py
Now in the same terminal, launch the project by typing
./self_watering.py
Now the project will run in the terminal, checking our soil moisture levels and watering as necessary!
So how can we have the code run on boot? Well this is quite easy really. In the terminal we need to issue a command to edit our crontab, a file that contains a list of applications to be run at a specific time/date/occasion. To edit the crontab, issue the following command in the terminal.
sudo crontab -e
If this is the first time that you have used the crontab, then it will ask you to select a text editor, for this tutorial we used nano, but everyone has their favourite editor!
With crontab open, navigate to the bottom of the file and add the following line.
@reboot /home/pi/self_watering.py
Then press Ctrl + X to exit, you will be asked to save the file, select Yes.
Now reboot the Pi Zero W and for now ensure the soil moisture sensor has no connection between the prongs. After a about a minute, the project should be running, and your pump should start pumping water into the plants.
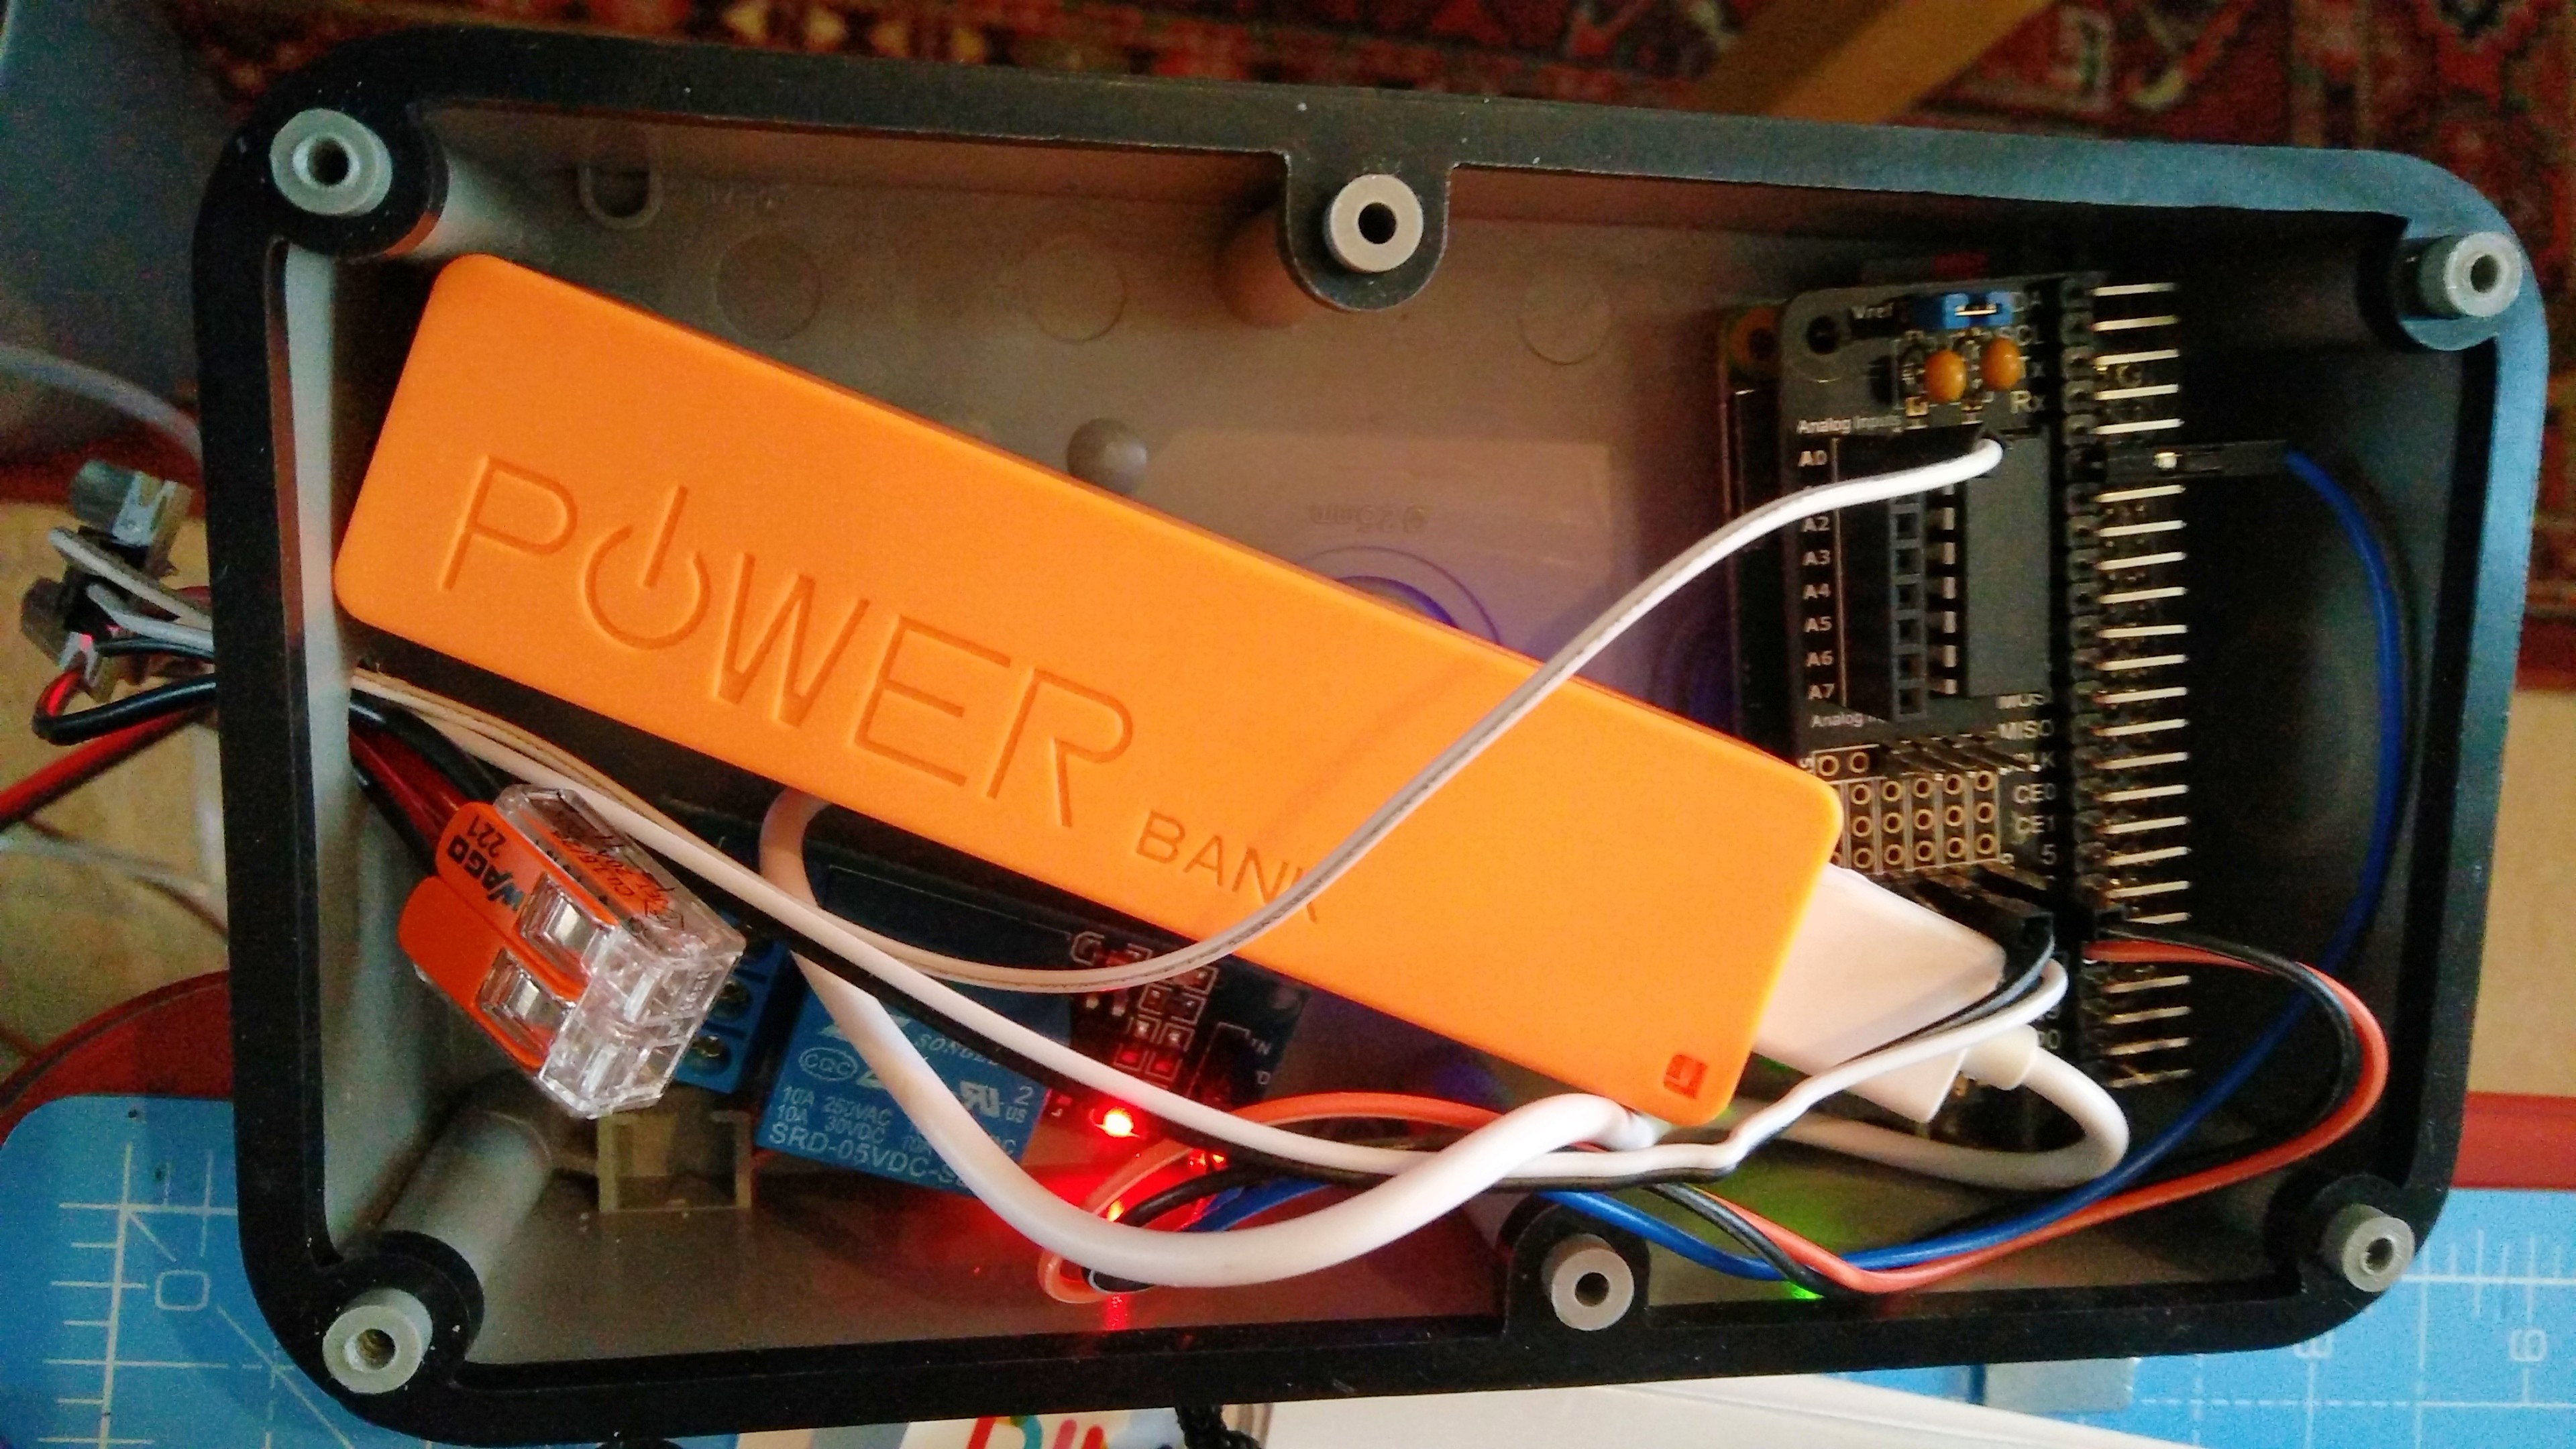
Power down the Pi Zero W, place it in a waterproof container along with a USB battery power source, ensure the soil sensor is out of the box. Place the project in your garden, and make sure the soil moisture sensor is firmly in the ground. Power up the Pi Zero W, and now your garden can now water itself!


