element14 Community
element14 Community
    Register Log In
  • Site
  • Search
  • Log In Register
  • Community Hub
    Community Hub
    • What's New on element14
    • Feedback and Support
    • Benefits of Membership
    • Personal Blogs
    • Members Area
    • Achievement Levels
  • Learn
    Learn
    • Ask an Expert
    • eBooks
    • element14 presents
    • Learning Center
    • Tech Spotlight
    • STEM Academy
    • Webinars, Training and Events
    • Learning Groups
  • Technologies
    Technologies
    • 3D Printing
    • FPGA
    • Industrial Automation
    • Internet of Things
    • Power & Energy
    • Sensors
    • Technology Groups
  • Challenges & Projects
    Challenges & Projects
    • Design Challenges
    • element14 presents Projects
    • Project14
    • Arduino Projects
    • Raspberry Pi Projects
    • Project Groups
  • Products
    Products
    • Arduino
    • Avnet & Tria Boards Community
    • Dev Tools
    • Manufacturers
    • Multicomp Pro
    • Product Groups
    • Raspberry Pi
    • RoadTests & Reviews
  • About Us
  • Store
    Store
    • Visit Your Store
    • Choose another store...
      • Europe
      •  Austria (German)
      •  Belgium (Dutch, French)
      •  Bulgaria (Bulgarian)
      •  Czech Republic (Czech)
      •  Denmark (Danish)
      •  Estonia (Estonian)
      •  Finland (Finnish)
      •  France (French)
      •  Germany (German)
      •  Hungary (Hungarian)
      •  Ireland
      •  Israel
      •  Italy (Italian)
      •  Latvia (Latvian)
      •  
      •  Lithuania (Lithuanian)
      •  Netherlands (Dutch)
      •  Norway (Norwegian)
      •  Poland (Polish)
      •  Portugal (Portuguese)
      •  Romania (Romanian)
      •  Russia (Russian)
      •  Slovakia (Slovak)
      •  Slovenia (Slovenian)
      •  Spain (Spanish)
      •  Sweden (Swedish)
      •  Switzerland(German, French)
      •  Turkey (Turkish)
      •  United Kingdom
      • Asia Pacific
      •  Australia
      •  China
      •  Hong Kong
      •  India
      • Japan
      •  Korea (Korean)
      •  Malaysia
      •  New Zealand
      •  Philippines
      •  Singapore
      •  Taiwan
      •  Thailand (Thai)
      • Vietnam
      • Americas
      •  Brazil (Portuguese)
      •  Canada
      •  Mexico (Spanish)
      •  United States
      Can't find the country/region you're looking for? Visit our export site or find a local distributor.
  • Translate
  • Profile
  • Settings
Raspberry Pi Projects
  • Products
  • Raspberry Pi
  • Raspberry Pi Projects
  • More
  • Cancel
Raspberry Pi Projects
Blog Raspberry Pi3: 30C OFF Ultimate Cooling Mod
  • Blog
  • Documents
  • Events
  • Polls
  • Members
  • Mentions
  • Sub-Groups
  • Tags
  • More
  • Cancel
  • New
Join Raspberry Pi Projects to participate - click to join for free!
  • Share
  • More
  • Cancel
Group Actions
  • Group RSS
  • More
  • Cancel
Engagement
  • Author Author: Former Member
  • Date Created: 8 Jun 2016 3:52 PM Date Created
  • Views 985 views
  • Likes 2 likes
  • Comments 3 comments
  • raspberry_pi_projects
Related
Recommended

Raspberry Pi3: 30C OFF Ultimate Cooling Mod

Former Member
Former Member
8 Jun 2016

Hello,

Just finished modding my new Pi3. Before modding I gave it a stress test for 20 mins using Sysbench prime calucation. I was getting 78~81C on ARM CPU. So I decided to do something about it before the hot summer arrives.

image

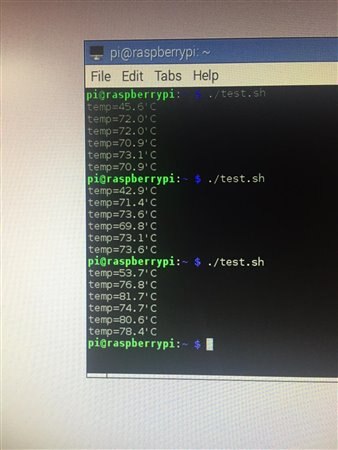
The codes I used for the stress test... you can download sysbench by typying "sudo apt-get install sysbench"

image

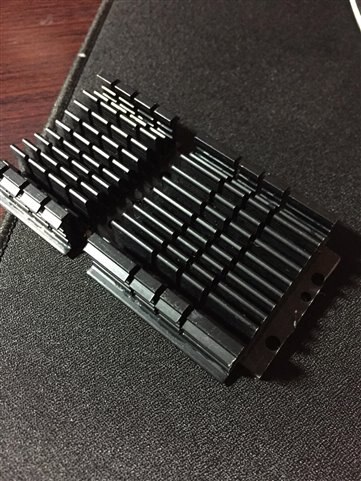
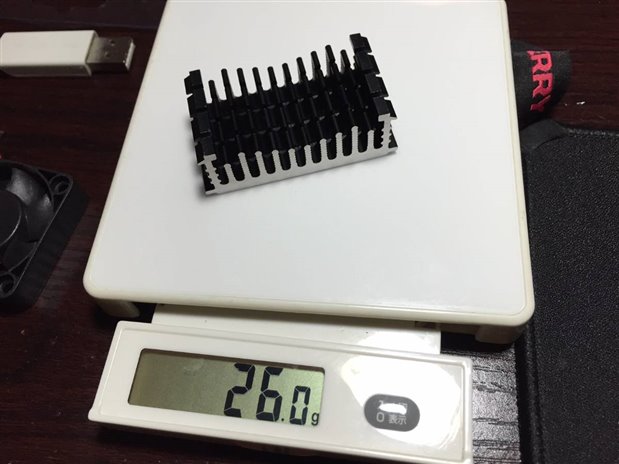
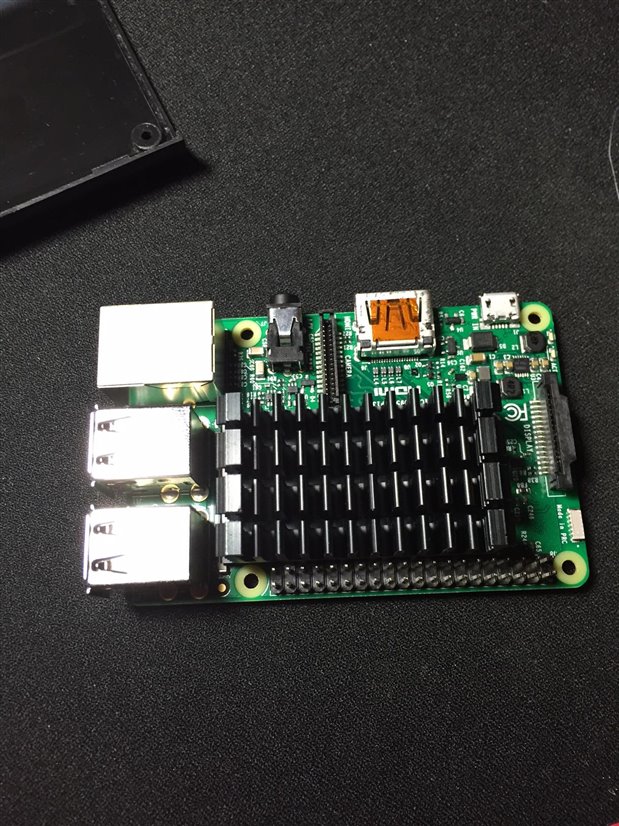
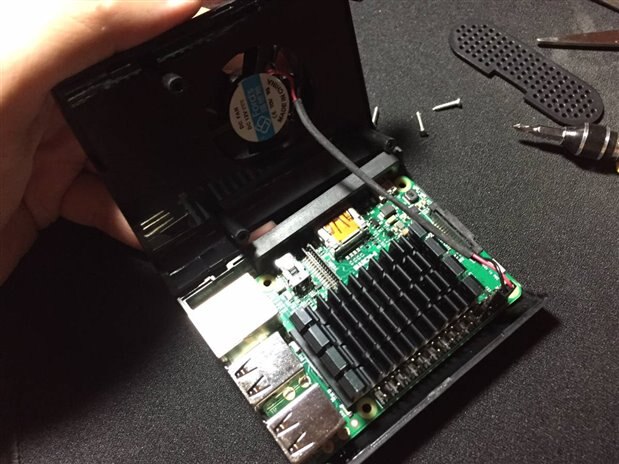
I dug out some Pentium II heat sink and started hacking away using dremel. I tried to mod as large piece of heatsink as possible in an slim aftermarket Pi case;  I had to sand for 2 hours using 180 grid sand paper to get the heatsink down to perfect size.

imageimage


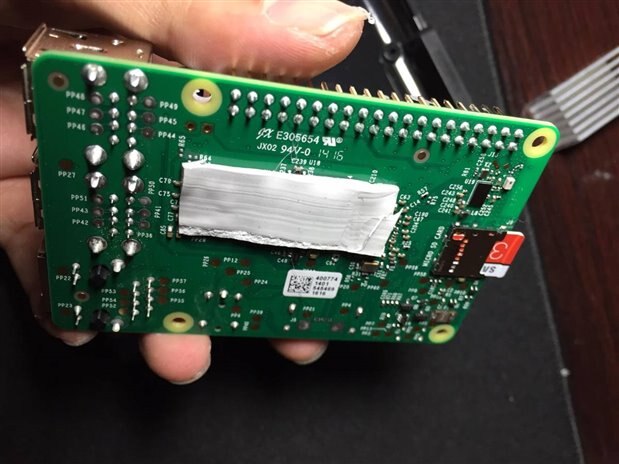
I used Laird thermal pad (those used on GTX 980Ti GDDR5 rams) for TIM between heatsink and CPU. Larid thermal pads are  petty expensive little sucker at 1USD a pop...since they have 5W/m.k. thermal conductivity it's all good. Also used some electrical tape for protecting those taller IC components around the chips. Note that I didn't use thermal paste because I want to create more distance between the heatsink and IC components on board.

image

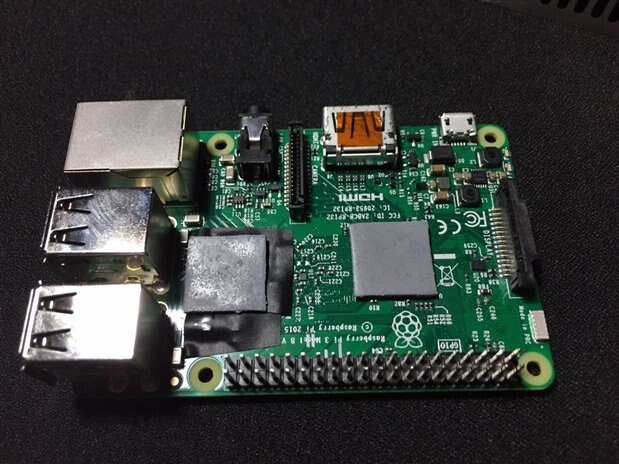
I slapped on the heatsink on using a little bit of glue gun make to make sure heat sink is firmly installed on the board. (Press down hard while the glue cures). I used glue gun because it makes it easier to remove in the future.

image


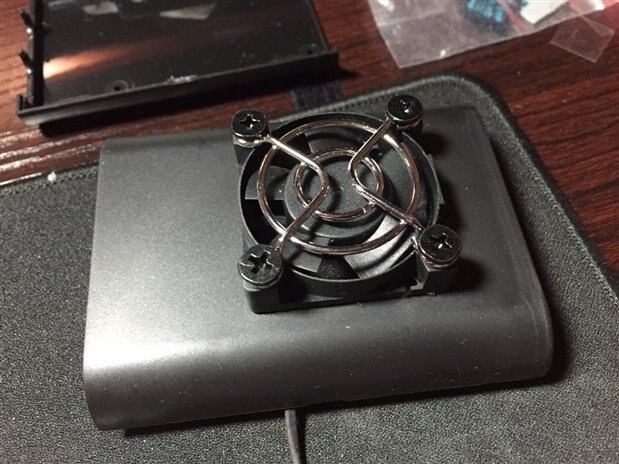
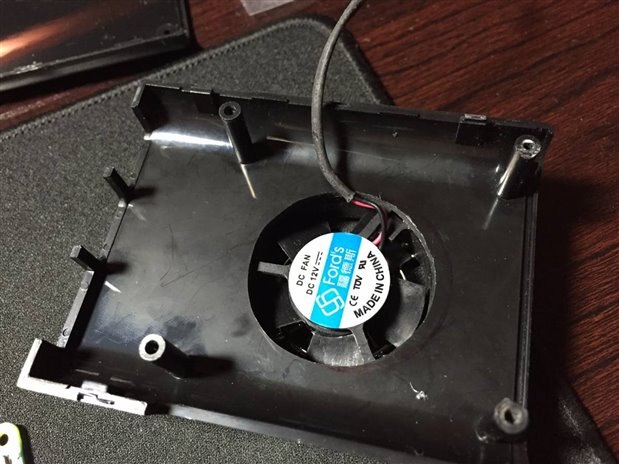
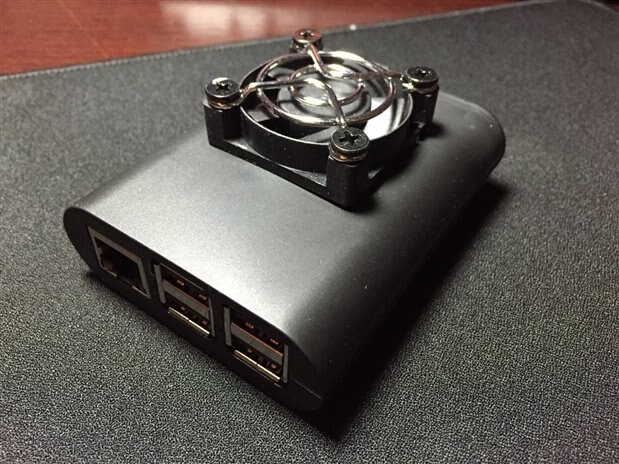
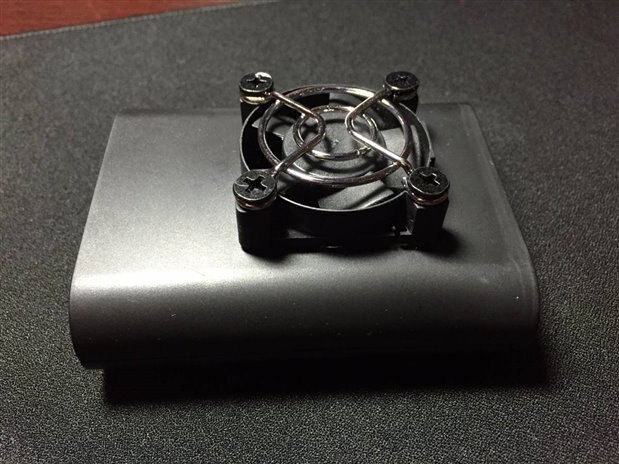
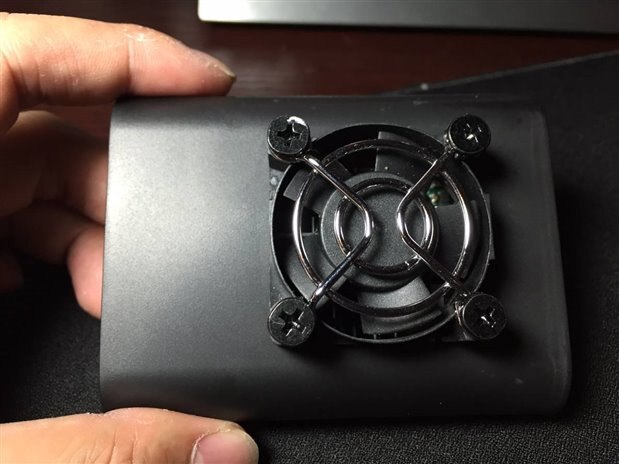
I dremel a perfect round hole on top of the case for a 12V 4cm Fan, which I will be running at 5V. This makes the fan so quiet I have to stick my ear to it to hear it. Put some shinny fan grill to make it good look image

image

image

For the DDR2 ram, I used Silicon cooling pad to spread the heat and transfer some heat the case (every little bit helps!). The pad was too thick so I sliced it in half, but still thick enough to touch the bottom of the case with some pressure.

image

Putting everything together and run the same stress test for 30 mins~~~

imageimageimage

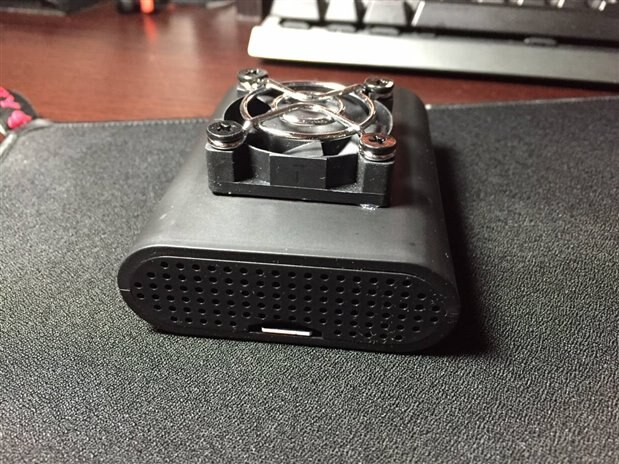
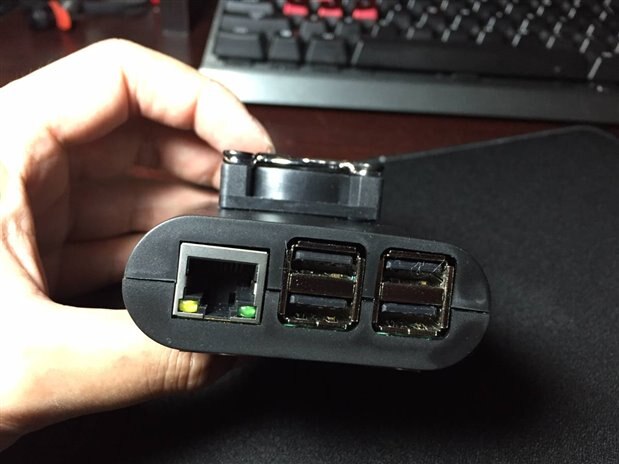
Check out those sexy exhaust ports in the back~

imageimageimage

The result I got was 49~51C!!! Bang! feels good for three hours of work!

image

  • Sign in to reply
  • crocodile_dondii
    crocodile_dondii over 8 years ago

    Nice work on that, plus the detail & good photos.  Thanks. Where did you get the power for the fan?  I assume the GPIO, but if i understand correctly, the positive is at one end and negative at the other end?


    Also, how much power does the fan need?  i.e. can the 2½ amp power supply handle the extra load?


    Also, is your case metal?  I see you put a silicon strip between the RAM chip and the floor, but the case supplied in my Canakit is plastic.


    Also, I don't properly understand why you selected the pads over paste.  Could you elaborate on that please?

    • Cancel
    • Vote Up 0 Vote Down
    • Sign in to reply
    • More
    • Cancel
  • Former Member
    Former Member over 9 years ago in reply to DAB

    Thank you for your appreciation! Yes I did try to overclock it. I was able to get 1.375 ghz OC and with sligh temp raise of 5-7C


    however my other pi3 is much better overclocker at 1.5ghz

    • Cancel
    • Vote Up 0 Vote Down
    • Sign in to reply
    • More
    • Cancel
  • DAB
    DAB over 9 years ago

    Nice post,


    I really like people who reuse perfectly good components for new applications.


    Your solution should certainly extend the life of your RPi, plus you can probably overclock it without having undue thermal stresses.


    Well done.

    DAB

    • Cancel
    • Vote Up 0 Vote Down
    • Sign in to reply
    • More
    • Cancel
element14 Community

element14 is the first online community specifically for engineers. Connect with your peers and get expert answers to your questions.

  • Members
  • Learn
  • Technologies
  • Challenges & Projects
  • Products
  • Store
  • About Us
  • Feedback & Support
  • FAQs
  • Terms of Use
  • Privacy Policy
  • Legal and Copyright Notices
  • Sitemap
  • Cookies

An Avnet Company © 2025 Premier Farnell Limited. All Rights Reserved.

Premier Farnell Ltd, registered in England and Wales (no 00876412), registered office: Farnell House, Forge Lane, Leeds LS12 2NE.

ICP 备案号 10220084.

Follow element14

  • X
  • Facebook
  • linkedin
  • YouTube