element14 Community
element14 Community
    Register Log In
  • Site
  • Search
  • Log In Register
  • Community Hub
    Community Hub
    • What's New on element14
    • Feedback and Support
    • Benefits of Membership
    • Personal Blogs
    • Members Area
    • Achievement Levels
  • Learn
    Learn
    • Ask an Expert
    • eBooks
    • element14 presents
    • Learning Center
    • Tech Spotlight
    • STEM Academy
    • Webinars, Training and Events
    • Learning Groups
  • Technologies
    Technologies
    • 3D Printing
    • FPGA
    • Industrial Automation
    • Internet of Things
    • Power & Energy
    • Sensors
    • Technology Groups
  • Challenges & Projects
    Challenges & Projects
    • Design Challenges
    • element14 presents Projects
    • Project14
    • Arduino Projects
    • Raspberry Pi Projects
    • Project Groups
  • Products
    Products
    • Arduino
    • Avnet & Tria Boards Community
    • Dev Tools
    • Manufacturers
    • Multicomp Pro
    • Product Groups
    • Raspberry Pi
    • RoadTests & Reviews
  • About Us
  • Store
    Store
    • Visit Your Store
    • Choose another store...
      • Europe
      •  Austria (German)
      •  Belgium (Dutch, French)
      •  Bulgaria (Bulgarian)
      •  Czech Republic (Czech)
      •  Denmark (Danish)
      •  Estonia (Estonian)
      •  Finland (Finnish)
      •  France (French)
      •  Germany (German)
      •  Hungary (Hungarian)
      •  Ireland
      •  Israel
      •  Italy (Italian)
      •  Latvia (Latvian)
      •  
      •  Lithuania (Lithuanian)
      •  Netherlands (Dutch)
      •  Norway (Norwegian)
      •  Poland (Polish)
      •  Portugal (Portuguese)
      •  Romania (Romanian)
      •  Russia (Russian)
      •  Slovakia (Slovak)
      •  Slovenia (Slovenian)
      •  Spain (Spanish)
      •  Sweden (Swedish)
      •  Switzerland(German, French)
      •  Turkey (Turkish)
      •  United Kingdom
      • Asia Pacific
      •  Australia
      •  China
      •  Hong Kong
      •  India
      • Japan
      •  Korea (Korean)
      •  Malaysia
      •  New Zealand
      •  Philippines
      •  Singapore
      •  Taiwan
      •  Thailand (Thai)
      • Vietnam
      • Americas
      •  Brazil (Portuguese)
      •  Canada
      •  Mexico (Spanish)
      •  United States
      Can't find the country/region you're looking for? Visit our export site or find a local distributor.
  • Translate
  • Profile
  • Settings
Raspberry Pi Projects
  • Products
  • Raspberry Pi
  • Raspberry Pi Projects
  • More
  • Cancel
Raspberry Pi Projects
Blog Step by Step Building the Raspberry Pi 2 GPS Geocaching Kit - Part I: Put Hardware Together
  • Blog
  • Documents
  • Events
  • Polls
  • Members
  • Mentions
  • Sub-Groups
  • Tags
  • More
  • Cancel
  • New
Join Raspberry Pi Projects to participate - click to join for free!
  • Share
  • More
  • Cancel
Group Actions
  • Group RSS
  • More
  • Cancel
Engagement
  • Author Author: cmelement14
  • Date Created: 14 Aug 2015 6:18 PM Date Created
  • Views 1130 views
  • Likes 5 likes
  • Comments 2 comments
  • geocaching
  • raspberry_pi_gps_kit
  • raspberry_pi_2
  • raspberry_pi_geocaching
  • raspberry_pi_projects
  • geo_location
Related
Recommended

Step by Step Building the Raspberry Pi 2 GPS Geocaching Kit - Part I: Put Hardware Together

cmelement14
cmelement14
14 Aug 2015

Thanks to the Geocaching community and cstanton. I am one of the Winners of  10 Raspberry Pi 2 GPS kit. The kit arrived at my front door on Aug. 7th, 2015. Since then, I followed Chris' blog Putting Together the Pieces - Raspberry Pi 2 GPS Geocaching Project and built up my kit. In general, it's a quite smooth process except like many others, I ran into the SHIM connection problem as well. In this blog, I will show my procedure step by step with lots of pictures and screen captures (I don't have a HDMI monitor, so I used my HDTV as the display).


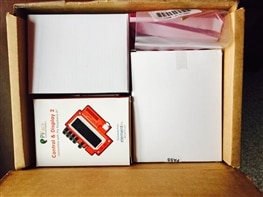
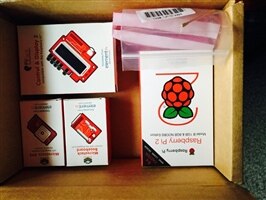
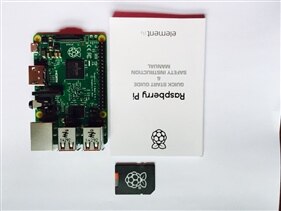
The kit came in within a neat package.

imageimageimage


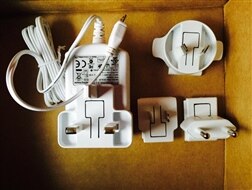
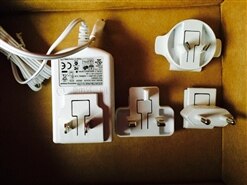
A white 5V 2A output power adapter with changeable world-wide plugs is included. I changed the plug to North American version (push down the cutout section to release the plug from the adapter).

imageimage


Raspberry Pi 2 has a printed manual in 16 different languages.

image


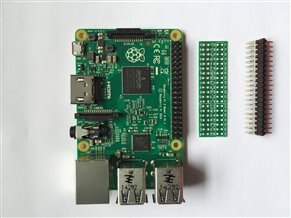
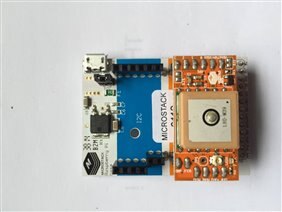
The kit includes a SHIM board which can be used to connect a Microstack GPS module (on top of a Microstack Baseboard) to the GPIO pins with a male-to-male connector.

image


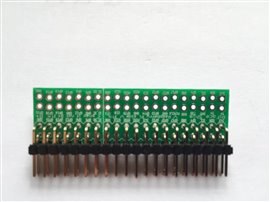
I soldered the male-to-male connector on the SHIM board and plug the SHIM onto GPIO pins. Like other people reported, the connections between SHIM and GPIOs weren't reliable. Keep reading and I will provide a solution.

imageimage


Plug the GPS module on top of Microstack baseboard and plug the baseboard into the male-to-male connector.

imageimage


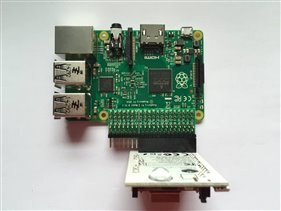
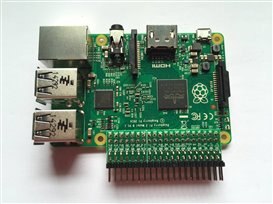
Plug the PiFace on top of Pi 2

imageimage


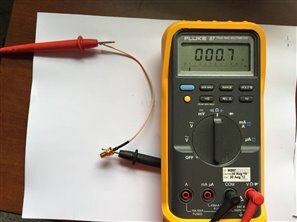
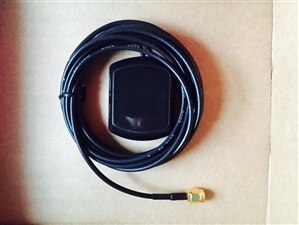
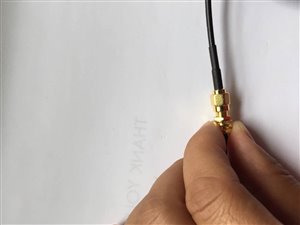
Check the UFL to SMA RF cable - conductivity for both shield and center (I have seen factory problem on this type of cable) and carefully plug the UFL end (UFL connector is very fragile) to the GPS module. Then screw the SMA end to the GPS antenna cable. Please rotate the connectors instead of the wire when you screw two SMA together. Otherwise, too much tension on the wire may damage the UFL connector at the other end.

imageimageimage


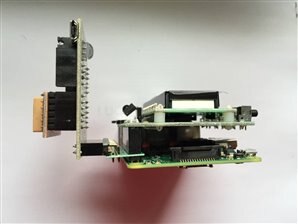
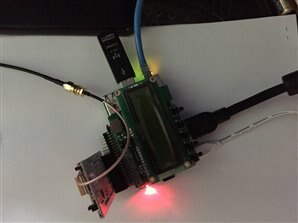
Plug USB adapter for wireless keyboard and mouse, HDMI cable, Ethernet cable and microUSB power plug. Then power it up.

image


Continue on Step by Step Building the Raspberry Pi 2 GPS Geocaching Kit - Part II: OS Configuration and Software Installation & Update

  • Sign in to reply

Top Comments

  • cmelement14
    cmelement14 over 10 years ago in reply to bobalexander +1
    No, it didn't work even with the staggered side sitting on top of the GPIO pins.
  • cmelement14
    cmelement14 over 10 years ago in reply to bobalexander

    No, it didn't work even with the staggered side sitting on top of the GPIO pins.

    • Cancel
    • Vote Up +1 Vote Down
    • Sign in to reply
    • More
    • Cancel
  • bobalexander
    bobalexander over 10 years ago

    Even with the staggered hole pattern the shim was still loose / intermittent?

    I figured mine was loose because I connected the right angle pins to the wrong side.

    • Cancel
    • Vote Up 0 Vote Down
    • Sign in to reply
    • More
    • Cancel
element14 Community

element14 is the first online community specifically for engineers. Connect with your peers and get expert answers to your questions.

  • Members
  • Learn
  • Technologies
  • Challenges & Projects
  • Products
  • Store
  • About Us
  • Feedback & Support
  • FAQs
  • Terms of Use
  • Privacy Policy
  • Legal and Copyright Notices
  • Sitemap
  • Cookies

An Avnet Company © 2025 Premier Farnell Limited. All Rights Reserved.

Premier Farnell Ltd, registered in England and Wales (no 00876412), registered office: Farnell House, Forge Lane, Leeds LS12 2NE.

ICP 备案号 10220084.

Follow element14

  • X
  • Facebook
  • linkedin
  • YouTube