element14 Community
element14 Community
    Register Log In
  • Site
  • Search
  • Log In Register
  • About Us
  • Community Hub
    Community Hub
    • What's New on element14
    • Feedback and Support
    • Benefits of Membership
    • Personal Blogs
    • Members Area
    • Achievement Levels
  • Learn
    Learn
    • Ask an Expert
    • eBooks
    • element14 presents
    • Learning Center
    • Tech Spotlight
    • STEM Academy
    • Webinars, Training and Events
    • Learning Groups
  • Technologies
    Technologies
    • 3D Printing
    • FPGA
    • Industrial Automation
    • Internet of Things
    • Power & Energy
    • Sensors
    • Technology Groups
  • Challenges & Projects
    Challenges & Projects
    • Design Challenges
    • element14 presents Projects
    • Project14
    • Arduino Projects
    • Raspberry Pi Projects
    • Project Groups
  • Products
    Products
    • Arduino
    • Avnet Boards Community
    • Dev Tools
    • Manufacturers
    • Multicomp Pro
    • Product Groups
    • Raspberry Pi
    • RoadTests & Reviews
  • Store
    Store
    • Visit Your Store
    • Choose another store...
      • Europe
      •  Austria (German)
      •  Belgium (Dutch, French)
      •  Bulgaria (Bulgarian)
      •  Czech Republic (Czech)
      •  Denmark (Danish)
      •  Estonia (Estonian)
      •  Finland (Finnish)
      •  France (French)
      •  Germany (German)
      •  Hungary (Hungarian)
      •  Ireland
      •  Israel
      •  Italy (Italian)
      •  Latvia (Latvian)
      •  
      •  Lithuania (Lithuanian)
      •  Netherlands (Dutch)
      •  Norway (Norwegian)
      •  Poland (Polish)
      •  Portugal (Portuguese)
      •  Romania (Romanian)
      •  Russia (Russian)
      •  Slovakia (Slovak)
      •  Slovenia (Slovenian)
      •  Spain (Spanish)
      •  Sweden (Swedish)
      •  Switzerland(German, French)
      •  Turkey (Turkish)
      •  United Kingdom
      • Asia Pacific
      •  Australia
      •  China
      •  Hong Kong
      •  India
      •  Korea (Korean)
      •  Malaysia
      •  New Zealand
      •  Philippines
      •  Singapore
      •  Taiwan
      •  Thailand (Thai)
      • Americas
      •  Brazil (Portuguese)
      •  Canada
      •  Mexico (Spanish)
      •  United States
      Can't find the country/region you're looking for? Visit our export site or find a local distributor.
  • Translate
  • Profile
  • Settings
Raspberry Pi Projects
  • Products
  • Raspberry Pi
  • Raspberry Pi Projects
  • More
  • Cancel
Raspberry Pi Projects
Documents Cheapest Raspberry Pi Arcade Controls Encoder EVER!
  • Blog
  • Documents
  • Events
  • Polls
  • Members
  • Mentions
  • Sub-Groups
  • Tags
  • More
  • Cancel
  • New
Join Raspberry Pi Projects to participate - click to join for free!
Actions
  • Share
  • More
  • Cancel
Engagement
  • Author Author: spannerspencer
  • Date Created: 16 Jun 2016 4:01 PM Date Created
  • Last Updated Last Updated: 10 May 2021 6:52 PM
  • Views 2021 views
  • Likes 4 likes
  • Comments 2 comments
Related
Recommended

Cheapest Raspberry Pi Arcade Controls Encoder EVER!

Okay, long story short, I needed an Arduino board, and the only one I had to hand was buried inside my double-awesome PIK3A Raspberry Pi 3 Retro Gaming Table.


I could rob it from the table, but then how was I supposed to loaf around all evening playing Double Dragon, or Bubble Bobble, or Gradius? As always, necessity proved to be the mother of invention, and I found an option for hacking together an ultra-cheap Raspberry Pi interface for arcade controls that works superbly well.


image

Cheapest. Arcade Controls. EVER!

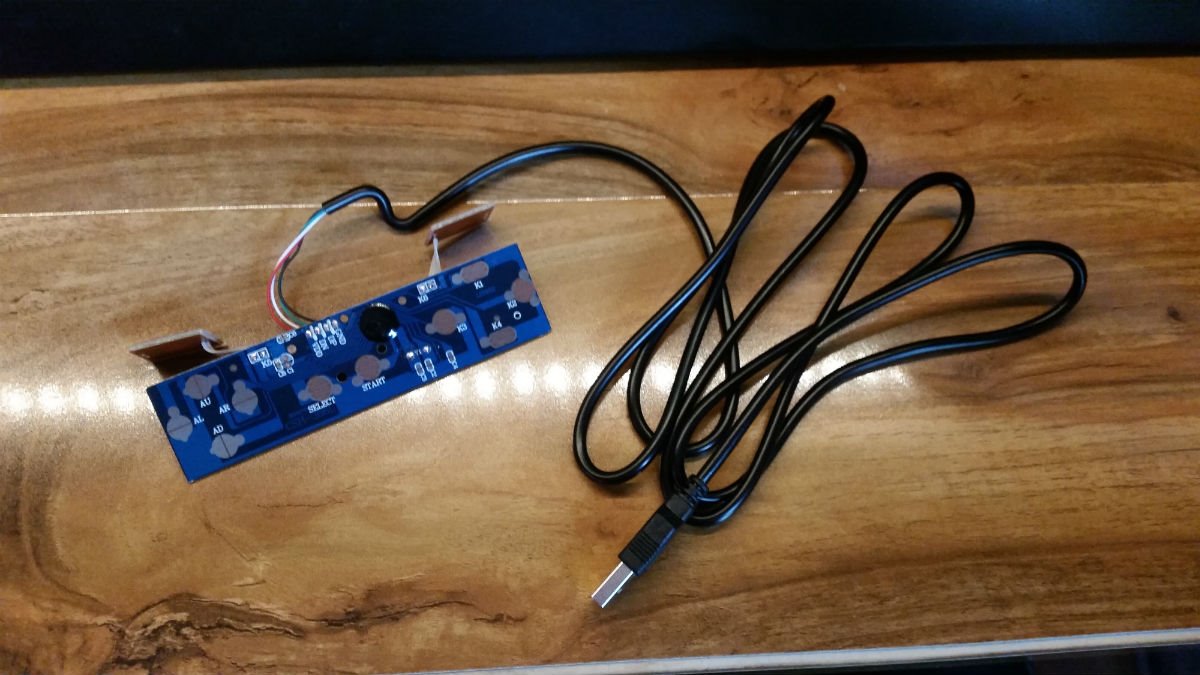
Because of all the cool retro gaming stuff we've been doing lately, I had one of these kicking around the house. It's a knock off SNES-style USB controller for the PC, but it also works (plug 'n' play) on the Raspberry Pi. I ripped out its guts, soldered wires to the button pads, connected the PIK3A table's controls to those wires, and plugged it into the Raspberry Pi.


Note that it's not an original SNES controller. This is a USB joypad -- don't buy the wrong one or it won't work!


It's very responsive (great for button bashing), doesn't require any set up (unless you want to rearrange the buttons, but that's not a necessity), it has six buttons plus START and SELECT/COIN, and it costs less than a fiver. In fact, if you're willing to wait for one to arrive from China, you can build this for less than two quid, making it the cheapest arcade encoder on the entire interwebs.


It'll even work on your PC, and probably your Xbox and Playstation (untested).


Here's a bit more detail.


STEP 1

Take the controller apart, and remove the PCB.

image

STEP 2

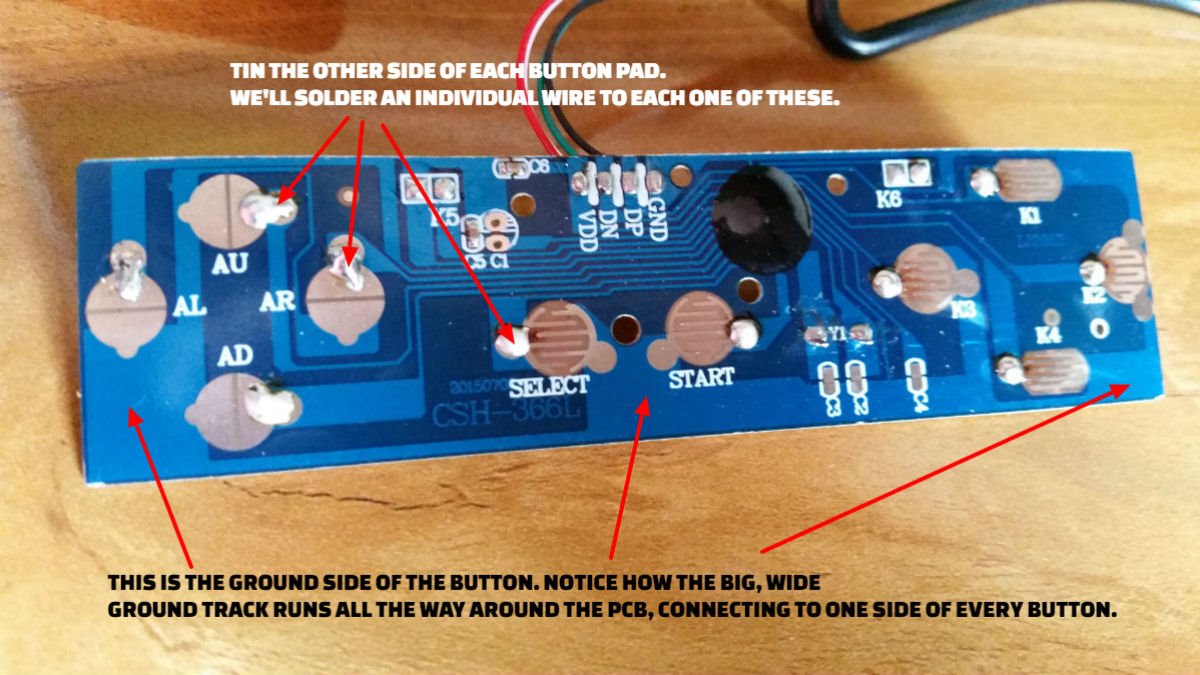
Tin the button pads with solder, being careful not to melt them or lift them off the PCB. Be quick and neat with your tinning.


If you look closely, every pad has two connections, and one side is common to every button. There's a big, wide track that connects one side of all the pads together. This is the ground connection. You only need to tin the side of each that isn't ground. It's the one that isn't connected to the big wide track that loops around all the buttons.


Except, that is, for one of the buttons. You're going to connect a ground wire to that side of one pad, which is then automatically connected to one side of all the other buttons, thanks to the big wide ground track that's running around the PCB. Make sense?

image


STEP 3

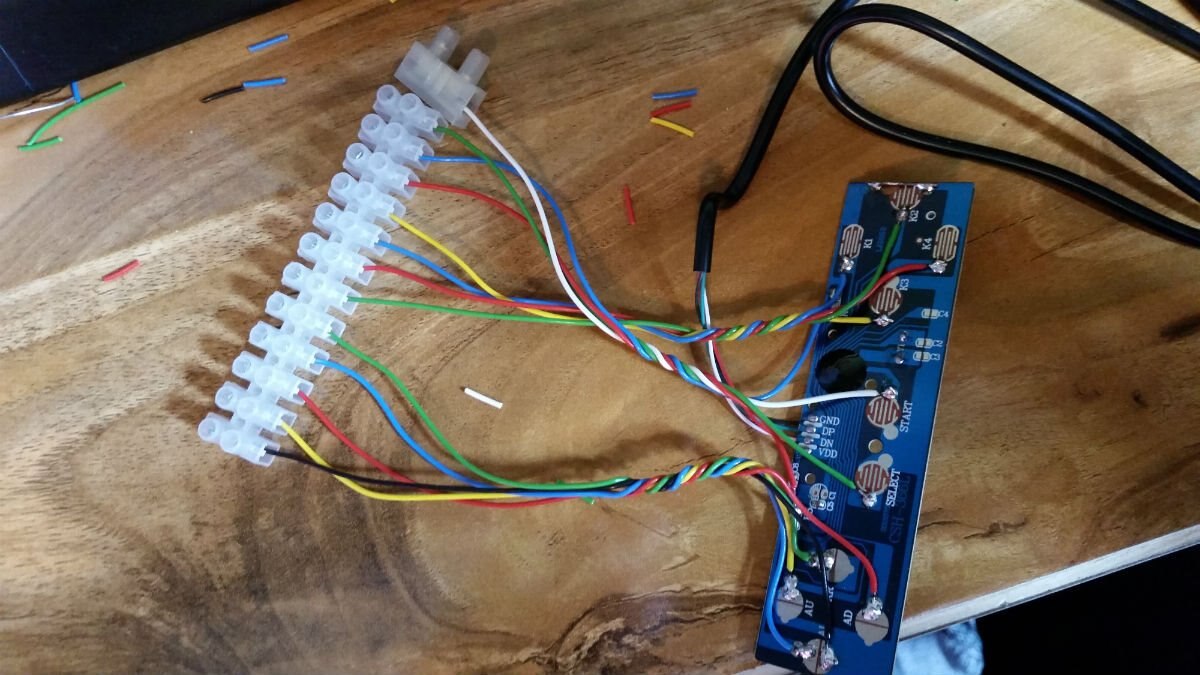
Solder a short wire to each of the button pads you just tinned, including one for the ground side, which will serve all the buttons on the PCB.


You can see my ground wire on the far left hand pad. That's the only button pad that has two wires connected to it.


When soldering your wires, make sure you don't short the two sides of the pad together, or the encoder will think the button is constantly being pressed.

image


STEP 4

Strip the ends of your wires, and stuff them into some chock block. I put mine into the connector block in order; so the wires go GROUND, UP, DOWN, LEFT, RIGHT, BUTTON 1, BUTTON 2, etc.


You don't have to, but it makes it easier when it comes to connecting your arcade controls to the other side of the chock block.

image


STEP 5

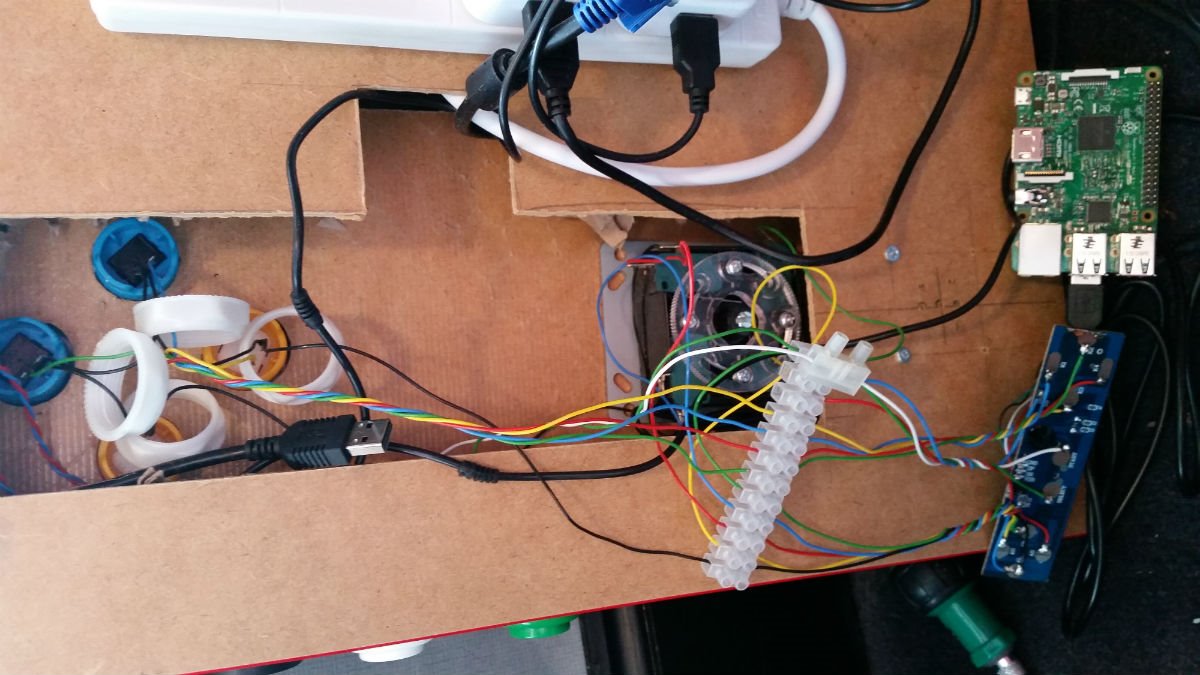
Connect your arcade controls to the other side of the chock block. Your arcade controls now take the place of the buttons that were on the joypad. In the image below, you're looking at the underneath of my arcade buttons (on the left) and joystick (on the right). The wires from those go into the connector block for the encoder PCB. You could hard wire direct to the encoder, but if you ever need to replace it, that'd be a major pain. Better to make it removable.


As with the ground track that runs around one side of all the button pads on the encoder PCB, my arcade controls have a ground wire that runs around one side of all the buttons and joystick microswitches. This way, only one ground wire is needed, reducing the number of wires significantly.


Plug the encoder PCB's USB cable into the Raspberry Pi, and it should work right off the bat!

image


Got your retro gaming blood pumping all over again?

Hacking video game gear is fun, and has a rich tradition.

So go check out our awesome giveaway, where you can win Ben Heck's one-of-a-kind portable Atari 2600 console!

  • retro gaming
  • controller
  • rpibeginner
  • encoder
  • usb
  • arcade
  • pik3a
  • raspberry_pi_projects
  • Share
  • History
  • More
  • Cancel
  • Sign in to reply

Top Comments

  • clem57
    clem57 over 9 years ago +1
    The joys of the toys!
  • tsuni2
    tsuni2 over 7 years ago

    I realize this is stale now, but wondered if anyone else has had trouble with this approach.  I bought a cheap two-pack of controllers so I could use one of the boards for an arcade setup.  It worked fine as a controller with my MAME table, but the Y button didn't work properly once I extracted the board and soldered things up.  I verified that the "signal" side of the Y button wasn't grounded, and that there was continuity between the signal side and ground when the appropriate arcade button was pressed, so it seemed like the board was defective.  Luckily I had a two-pack of controllers, so I carefully substituted the second board in place of the first, and the *exact* same thing happened! 


    Yes, I know, that makes it sound suspiciously like there's a wiring or switch issue, but I've swapped in different switches, and verified continuity between the switch wiring and the contact pads on the controller board.  Could I have gotten too much heat near the on-board IC?  Can anything else fry these boards?


    Thanks!

    • Cancel
    • Vote Up 0 Vote Down
    • Sign in to reply
    • More
    • Cancel
  • clem57
    clem57 over 9 years ago

    The joys of the toys!

    • Cancel
    • Vote Up +1 Vote Down
    • Sign in to reply
    • More
    • Cancel
element14 Community

element14 is the first online community specifically for engineers. Connect with your peers and get expert answers to your questions.

  • Members
  • Learn
  • Technologies
  • Challenges & Projects
  • Products
  • Store
  • About Us
  • Feedback & Support
  • FAQs
  • Terms of Use
  • Privacy Policy
  • Legal and Copyright Notices
  • Sitemap
  • Cookies

An Avnet Company © 2025 Premier Farnell Limited. All Rights Reserved.

Premier Farnell Ltd, registered in England and Wales (no 00876412), registered office: Farnell House, Forge Lane, Leeds LS12 2NE.

ICP 备案号 10220084.

Follow element14

  • X
  • Facebook
  • linkedin
  • YouTube