RoadTest: Sign Up to RoadTest the Weller WXsmart Soldering Platform
Author: gpolder
Creation date:
Evaluation Type: Workshop Tools
Did you receive all parts the manufacturer stated would be included in the package?: True
What other parts do you consider comparable to this product?: Other soldering stations
What were the biggest problems encountered?: getting MQTT to work, and lack of documentation in general.
Detailed Review:
document version history:
In the realm of electronics, there's a fascinating phenomenon occurring before our eyes—a relentless pursuit to make technology smaller, faster, and more efficient. Over the years, electronic components have undergone a remarkable transformation, shrinking in size while exponentially increasing in power. As the world of electronics marches towards unprecedented miniaturization, the demand for soldering skills and tools has never been more compelling.
Mastering the art of soldering is no longer a mere technicality; it has become a gateway to unlocking the full potential of modern electronics. The precision required to work with microscopic components demands steady hands, sharp eyes, and an unwavering attention to detail. As engineers, hobbyists, and makers strive to harness the power of these miniature wonders, the value of soldering skills cannot be overstated.
Furthermore, the tools of the trade have evolved in parallel with the shrinking dimensions of electronics. Advanced soldering stations, precision soldering irons, and specialized equipment have emerged to meet the demands of this miniature revolution. From hot air rework stations to soldering microscope setups, these tools empower enthusiasts and professionals alike to tackle the challenges of assembling ever-shrinking electronic components.
A well known and famous player in this field is Weller, who recently launched the WXsmart platform that next to the advanced soldering capabilities, also offers connectivity and traceability. I want to thank Element14 and Wellerfor giving me the opportunity to review this impressive tool. I am really happy that my applications was selected. This is quite an impressive station, setting new standards for soldering.

There was really a lot of interest for this tool, 94 applicants in total, so I'm happy that my application convinced the jury. To be transparent, and also to inspire other members, for future roadtests, here are the relevant parts of my application:
Given the requested roadtest goals my plan is to:
• Produce an unboxing video, with the goal to precisely describe all contents of the box, and their purpose.
• Do some rework using the hot air module, to fix the microUSB connectors on my monitor board. Also compare the soldering iron with the EC 2002, for some regular jobs.
• I’m rather curious to the connectivity and control features. The smartphone app is one off-course, but I also like to test connections to general systems. I could not find much documentation about protocols and software on internet, but I’m planning to try to export the acquired data to an SQL database as described in one of the leaflets.

First RoadTest goal is a 2-3 minutes unboxing video. Due to the versatility and size of the product it was not possible to put it all in 2-3 minutes, so please find my (almost 10 minutes) unboxing video:
As you can see in the video, the kit came in a very huge box. Th edit itself was stored in a nice suitcase with a detachable handle and wheels. The wheels are there for a reason, the case is heavy, almost 20 kg. After opening open up the case, we see a big sign making clear this is the 230V version, which also was on the outer of the suitcase. Most electronics currently can handle 100-240V, 50 or 60 Hz. This is also the case for the rework module, but not for the power module. I expect it has a large 50 Hz 230V transformer in this European version.
The kit contains some papers:
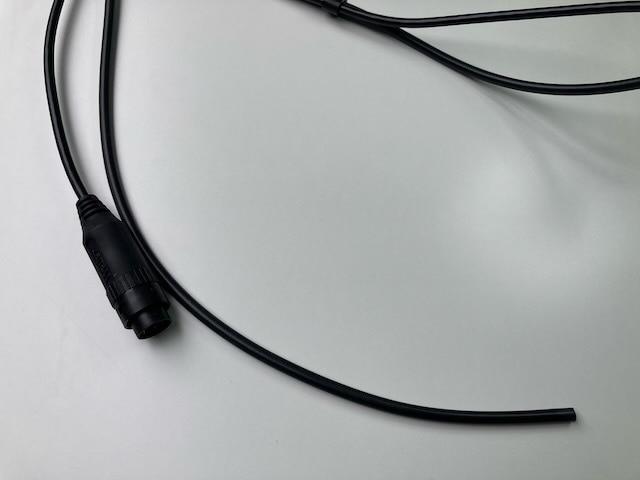
Under the cover we find power cords and four safety rests for the irons. Two power cords are provided for the UK, and two for mainland Europe with an euro connecter. In the centre of the box we find the rework module, with an air and a vacuum channel. Above the rework module is the WXsmart 300 power unit featuring two channels. The power unit fits nicely on the rework station. For proper operation the units needs to be connected with a serial cable. Serial connection is with RJ12 plugs. A lose power cable, connected to a socket on the outer of the case, makes it possible to demo the system literal out of the box.
Four safety rests are provided in the kit. One for the hot air iron, one for the desoldering iron, and two for the normal smart tip irons. Also a pen with the Weller logo, it’s not only merchandise, as it has a soft back that can be used to control the power units touch screen. Although all pictures and the content list shows the WXDP 120 horizontal desoldering iron, the kit came with the WXDV 120 vertical version. Weller already noticed this and sent me also the WXDP 120 a couple of weeks after the start of the roadtest. Furthermore, they sent me some extra tips and a EMC mat also.
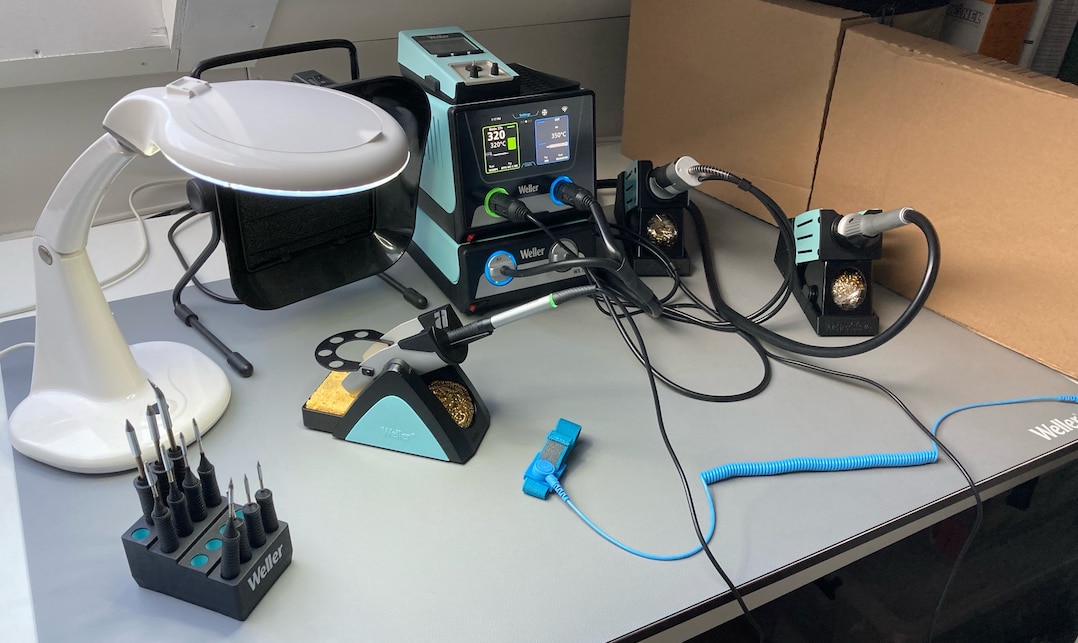
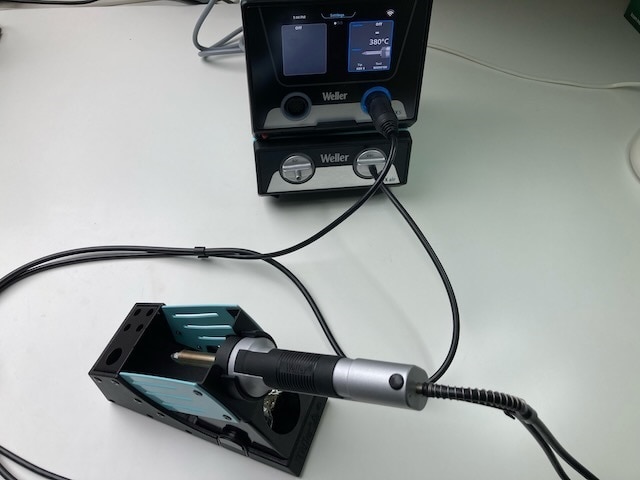
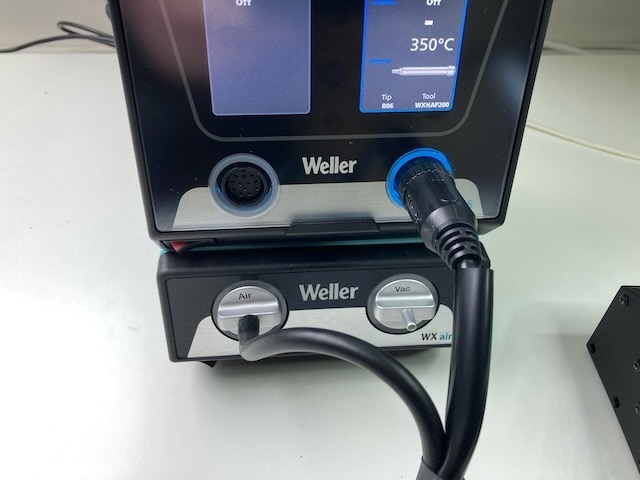
The hot air iron is the WXHAP 200. The way the cable and hose are bundled is remarkable different for the desoldering - and hot-air iron. Where the hot air cable and hose are bundled in a hose covering the two, are the hose and cable for the desoldering iron bundled by a few clamps. Even the length of the hose and cable is different.
Desoldering iron:
Hot air Iron:
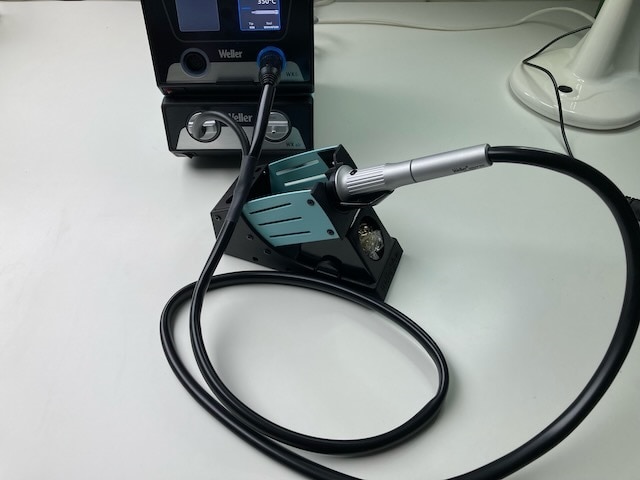
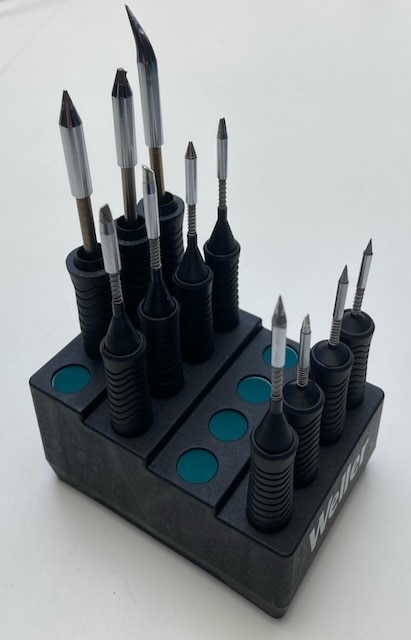
There are two hand pieces for the smart tips, one is 24 V and 150W. The other one is 12V and 40 Watt. The kit comes with 5 smart tips, in different sizes and power ratings a larger one did not fit in the holes intended for this and was therefore put under the lid with the cables. Later Weller sent me additional tips, so I now have 12 tips in total. For me it is not completely clear why there are two hand pieces, since the power is in the tip, and not in the hand piece. The only thing I can think of is that the smaller tips also have a smaller hand piece, but the drawback is that it is more clumsy and you need to change hand pieces more often this way.
A temperature measuring device (WCU) is also provided, it can be used to measure the temperature of the iron, but also to calibrate the system. For the latter the device can be connected to a serial port on the power unit. The device uses thermocrosses to sense the temperature. A bag with 5 thermocrosses is is included.
For calibration the WCU needs to be connected to the power unit with a serial cable. Unfortunately the kit came with just one serial cable while we use one to connect the power unit to the WX-air, and one for connecting the power unit to the WCU. To complete the kit, there is a tip holder, a tweezer, a cutter, 100 gram 0.5 mm lead free solder wire, cleaning tools and air filters for the rework module.
The documentation is a bit sparse, The manuals does not have many text, but mainly contains pictograms on how to connect peripherals, or how to control the menu structure on the touch screen. Weller also provided instruction Videos on YouTube ( https://www.youtube.com/playlist?list=PLsRp37s1aIpg3VjBjPUOHItg1fYkRPoju).
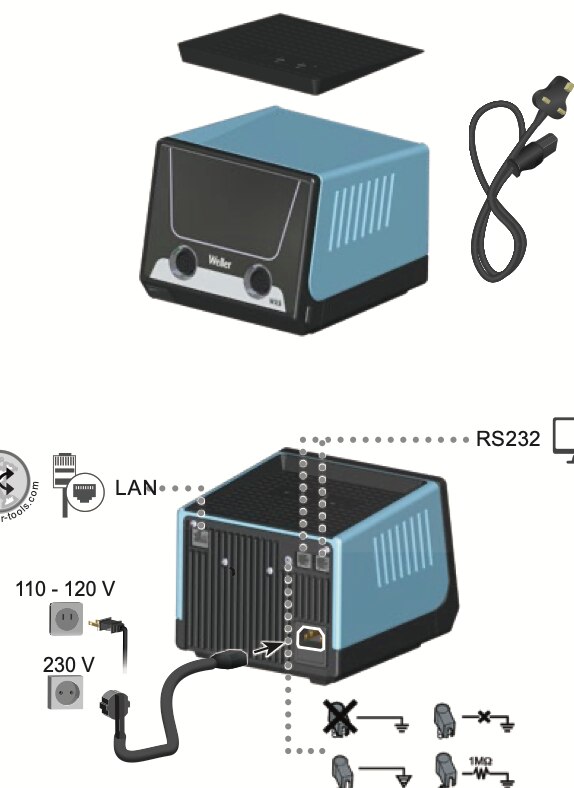
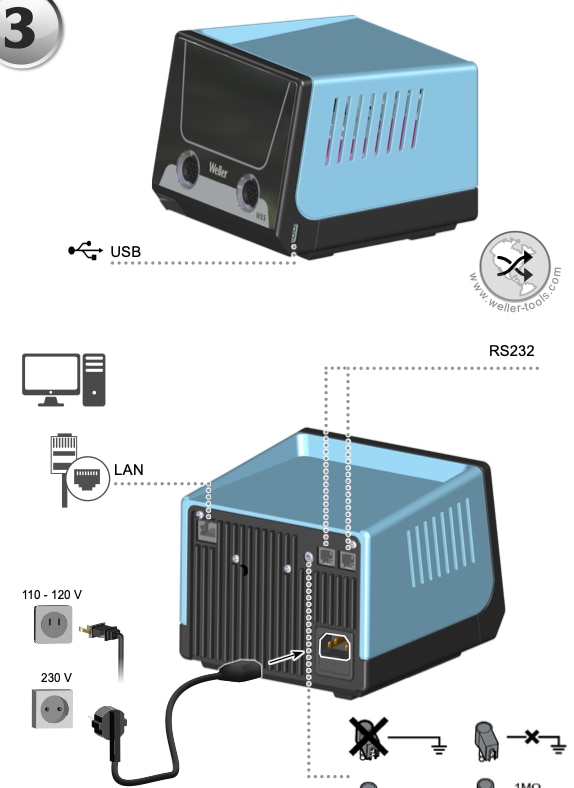
As an example, it took me some time before I found out that the unit is equipped with an USB port. On page 3 of the official hardware manual (https://media-weller.de/weller/data/OI/WEL_WXsmart_Station_Manual.pdf) where ports and connections are shown, the USB port is not mentioned at all. The WXsmart_Menu manual (https://media-weller.de/weller/data/OI/WEL_WXsmart_Menu_DE_EN_2023.pdf) shows the same information, but there the USB port is mentioned.
| First manual | Second manual |
 |
 |
For the advanced functions it was very hard to find information. For instance in my roadtest application I mentioned to work on export of the acquired data to an SQL database as described in the product leaflet: https://www.weller-tools.com/sites/default/files/products/documents/WEL_DATA_WXsmart_%20T0053451299_US.pdf.
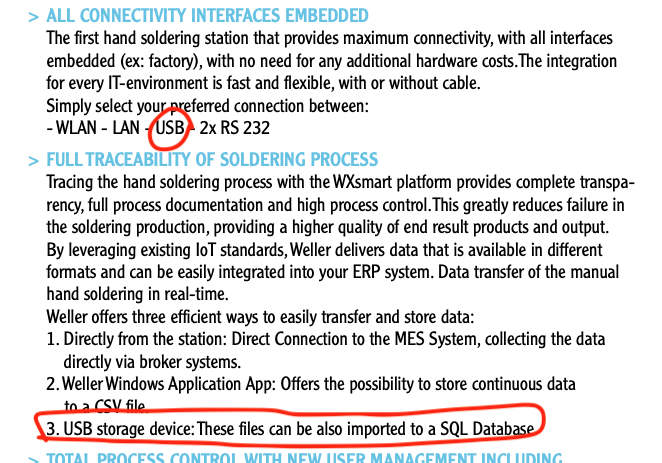
Unfortunately I did not find any information on how to export data to an USB stick.
Now I found the USB port, it was also possible to upgrade the firmware. The station was delivered with V144.6.52.7 On the Weller download center (https://www.weller-tools.com/professional/EUR/en/Top-Menu/Download+Center/Software+Updates) I found WXsmart_firmware_v156_6_58_7. Again the information on how to upgrade is limited, page 44 states: ‘Button turns blue when USB stick with valid firmware update file is inserted -> Confirmations to perform update’. I gave it a try, and indeed the update process went fluently as can be seen in the video below. The full process took about 13 minutes (the video is largely compressed, but the real time is shown), which is way more than the 5 minutes mentioned at the start of the upgrade. After 5 minutes when the white screen was shown, I was a bit worried that I had bricked the station. But luckily that was not the case.
The Video is informative on its own, it shows the many software components of the WXair:
So it looks like it has at least three microcontrollers (STM, ESP and PIC), and separate modules for the graphical user interface (GUI), touch screen and wireless network (WLAN).
Just a week ago the roadtesters got an offer from Weller for a free software update, which sounded a bit weird to me as the updates just can be downloaded from the website. In the end it turned out that after sending the units serial number to Weller, we got an installation file which unlocked extra features of the system. Together with this unlocking file we also got a more recent software version (v156_6_59_7) so I had to do the previous 13 minute procedure over again.
When looking at the Settings, I found a few white coloured icons, which appeared to be no active buttons:

Then I put the upgrade installation file on the USB stick, and started the update:
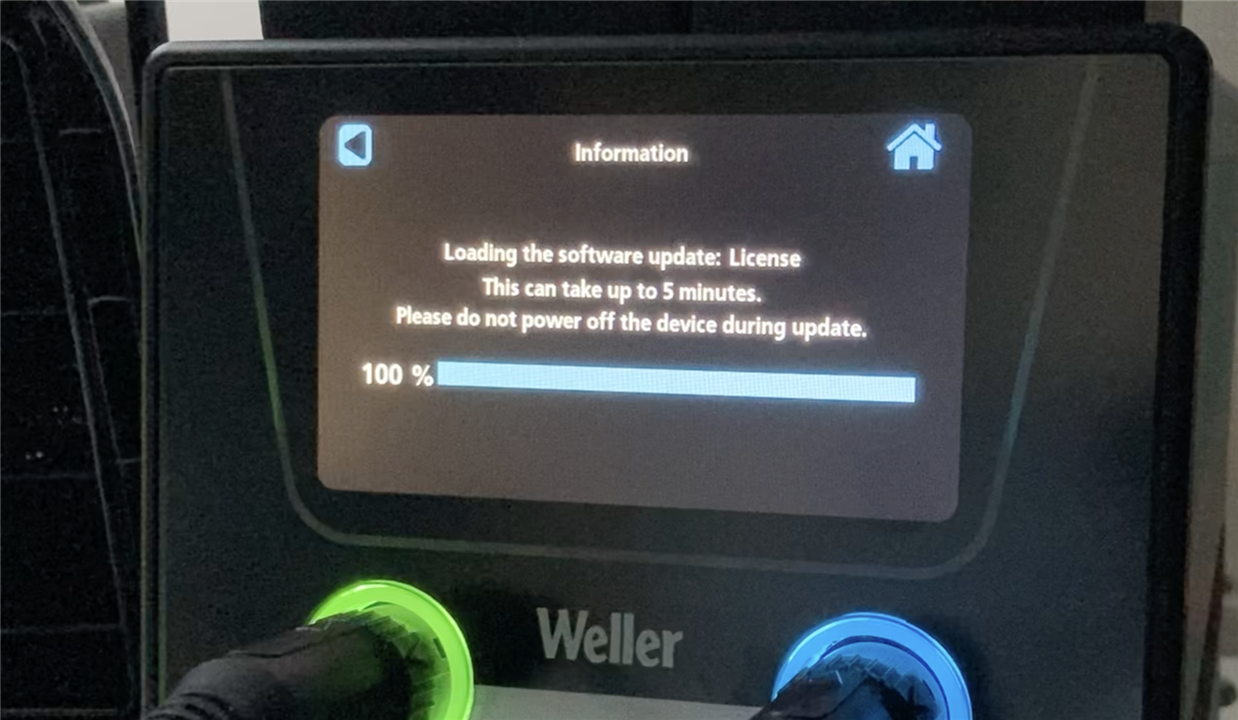
Within a second the bar was at 100%, and I was a bit lost what to do next, as there was no message of successful update, but in the end this was it, so I pressed the button to get back to the menu, and there you go, four of the 5 buttons turned blue and active.
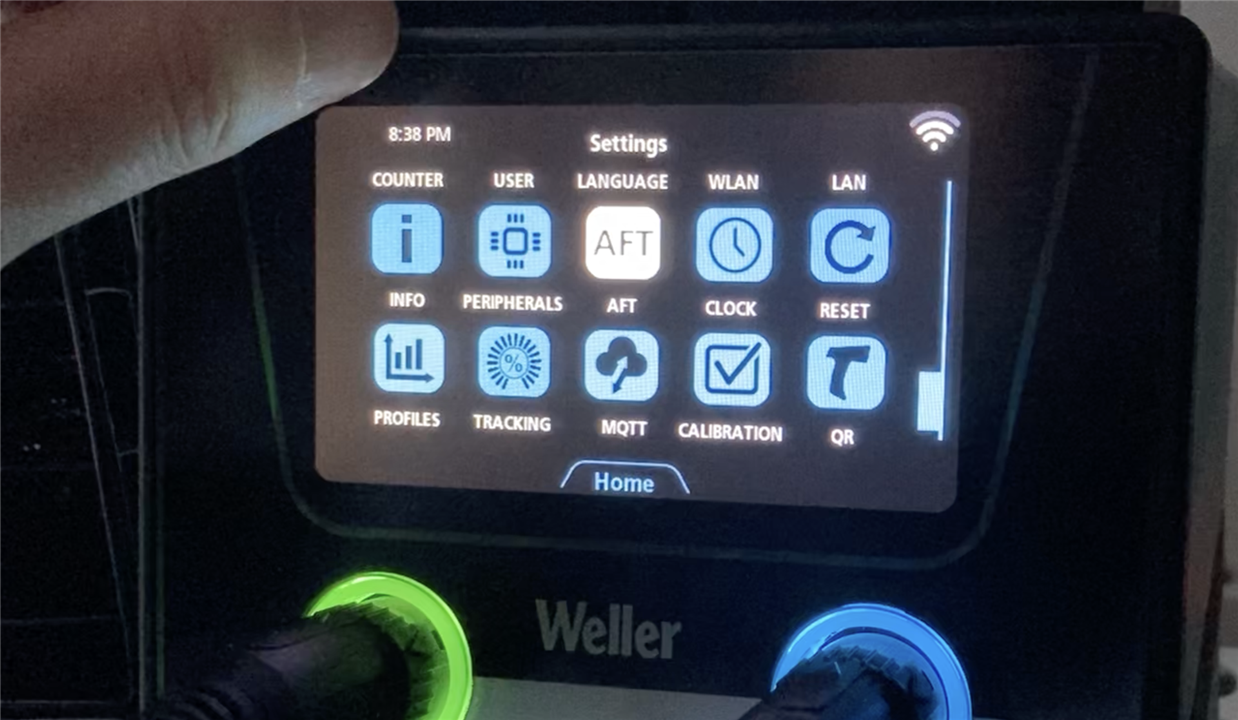
I played a bit with the new functions, but since I could not find any documentation, I left it at that. The AFT button is still inactive, no idea what it is, the manual on page 32 says: 'AFT, Profiles, Tracking: available 2023'.
When checking the website for new updates, I found out that my account was deleted. Also the update link as mentioned above doesn't work anymore. After creating a new account I found the download link at: https://www.weller-tools.com/eu/gb/software-updates and version v156_6_58_7 still the latest one.
The proof of the pudding is the eating, so let's first focus on using the tool for soldering and desoldering tasks. In my application I promised to do some rework using the hot air module, to fix the microUSB connectors, which were accidentally broken off one of my Raspberry Pi monitor boards, as you can see in the picture below, both the power port and the touch-screen port were broken off:
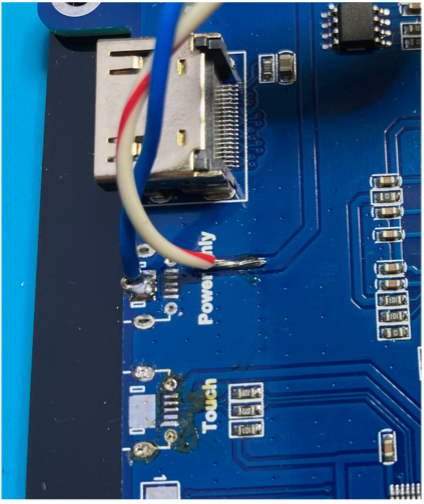
With my old EC 2002 this is a very challenging tasks, as you can see. For now the power port I ignored and soldered wires, for the touch-screen, with small PCB traces that is almost not possible, so I'm very curious how the WXsmart performs.
In order to get some experience, I played a bit with a few usb breakout boards. First I removed the connector with the hot air iron. The very first thing I detected is that I forgot to turn on the WXair, after that was fixed I learned that the station does not allow to connect two 'AIR' units at the same time, so no hot air and desoldering iron together:
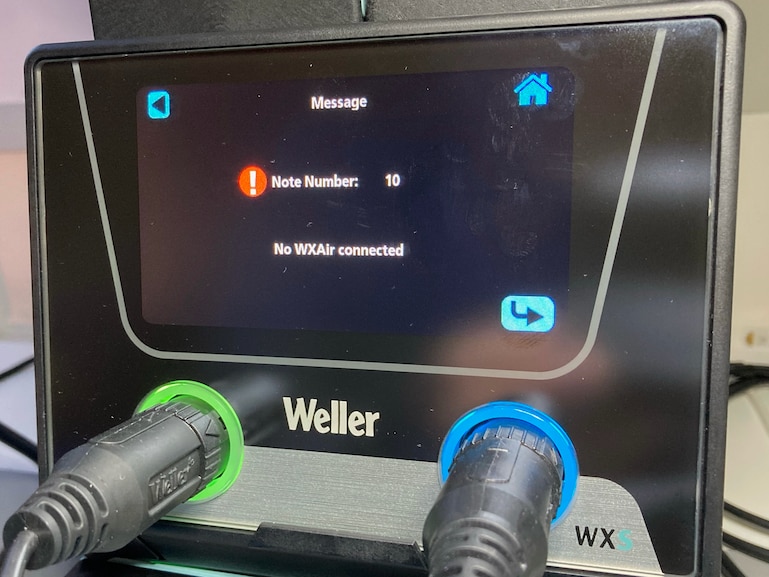
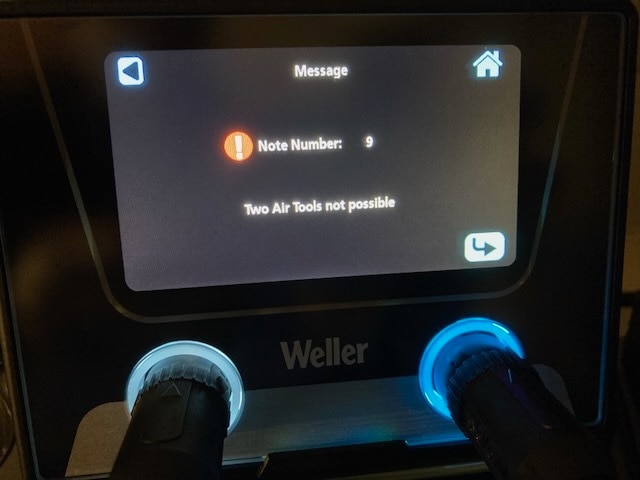
Removing the usb connector with the hot air iron appeared to be quite easy:
I did this for two breakout boards, and next step is soldering them back first with the normal iron, and second with the hot-air iron.
For the normal Iron, I used the very small RTPS 001 C MS tip for the connections, and the larger RTMS 022 S MS for soldering the chassis.
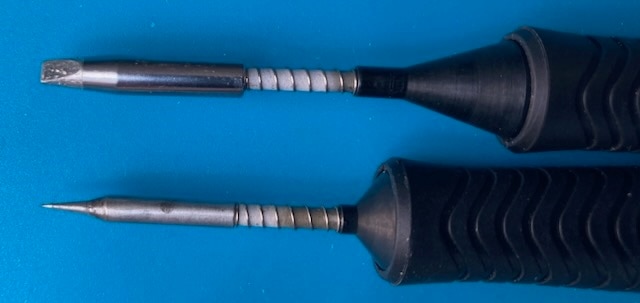
I had to switch tips a couple of times, and once in a while the station did not recognise that a new tip was plugged in. I had to remove and insert the tip again before it was recognised.
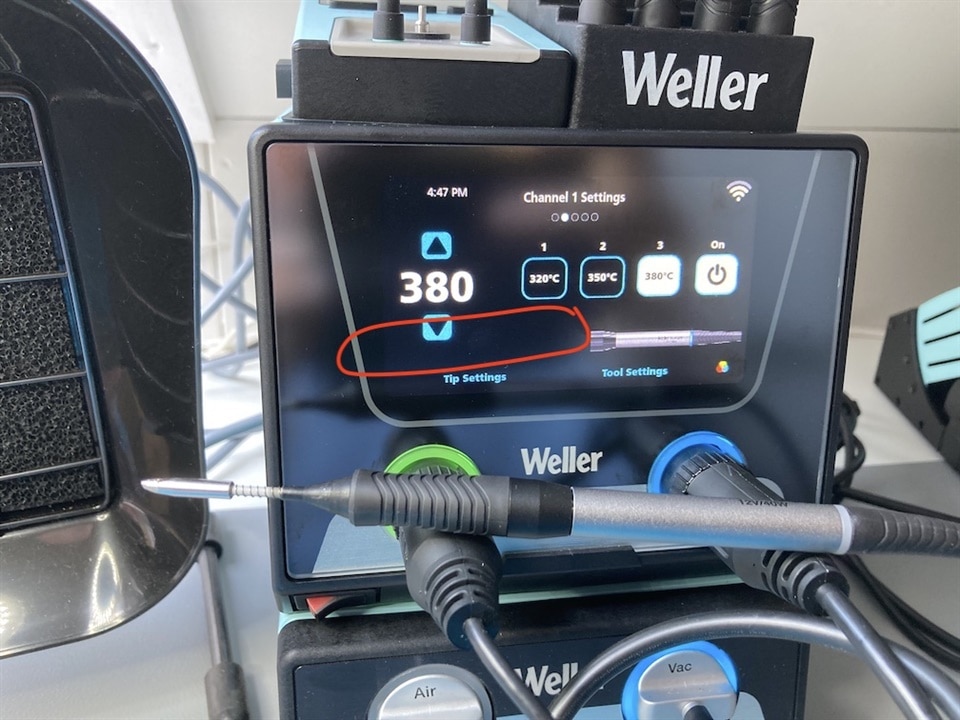
Next test is with the hot air iron. Before soldering I applied som flux:
In the end the connector appeared a bit slanted on the board, and in the end I was a bit more comfortable with the normal tips, specifically since they are so small. Here the two results, left hot air, right the normal tips.
After these trails, it comes to the real work, so lets fix my raspberry pi monitor board.
The connectors were already off, but I needed to remove some left over solder. This worked the best with a normal tip, heating it up, and the desoldering iron to remove it.
Then I placed the connectors, first soldered the wire with the small tip, and then the chassis with the larger tip.
And here the result, difficult to see, but the connections are fine.
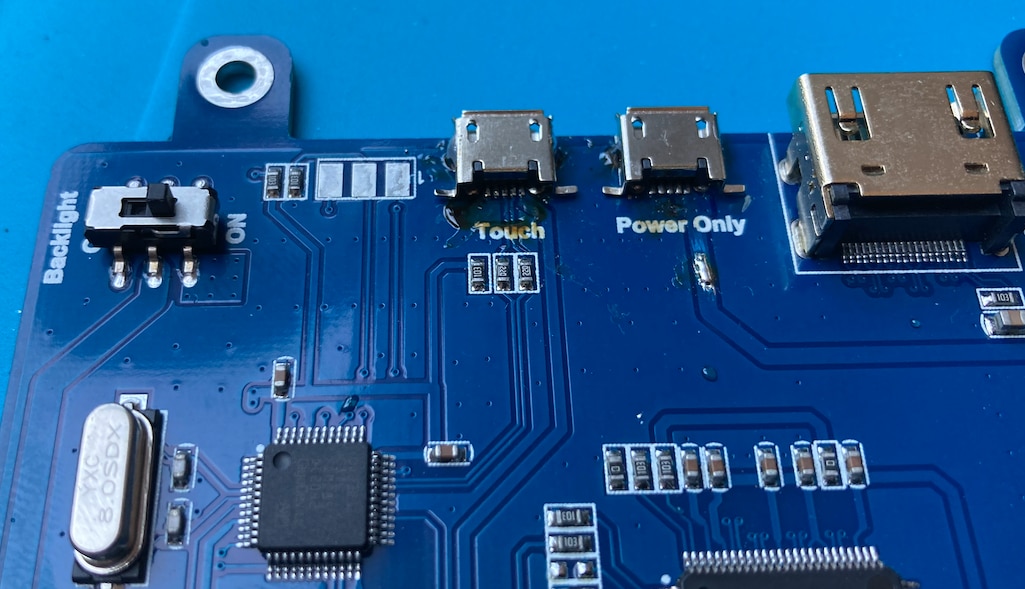
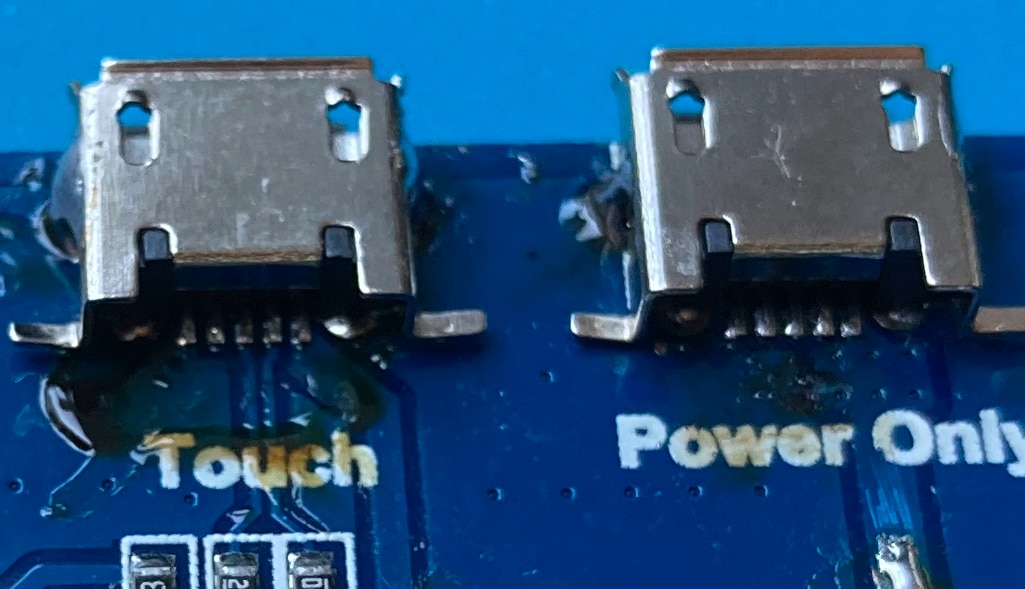
One of the major features of the WXsmart platform is its connectivity and traceability options. Unfortunately this is also one of the worst documented features. As I already explained above, I was planning to test exporting the acquired data to an SQL database through the USB port. Unfortunately I could not find any information how to do this. But in the menu I found a much more attractive option, namely the MQTT button. I quickly set up a MQTT broker on my Raspberry Pi home controller:
pi@rpizolder:~ $ sudo apt install mosquitto mosquitto-clients
Reading package lists... Done
Building dependency tree
Reading state information... Done
mosquitto is already the newest version (1.5.7-1+deb10u1).
mosquitto-clients is already the newest version (1.5.7-1+deb10u1).
0 upgraded, 0 newly installed, 0 to remove and 0 not upgraded.
pi@rpizolder:~ $
pi@rpizolder:~ $ sudo systemctl enable mosquitto
Synchronizing state of mosquitto.service with SysV service script with /lib/systemd/systemd-sysv-install.
Executing: /lib/systemd/systemd-sysv-install enable mosquitto
pi@rpizolder:~ $ sudo systemctl status mosquitto
● mosquitto.service - Mosquitto MQTT v3.1/v3.1.1 Broker
Loaded: loaded (/lib/systemd/system/mosquitto.service; enabled; vendor preset: enabled)
Active: active (running) since Mon 2023-05-08 21:55:38 CEST; 1 weeks 0 days ago
Docs: man:mosquitto.conf(5)
man:mosquitto(8)
Main PID: 485 (mosquitto)
Tasks: 1 (limit: 2059)
CGroup: /system.slice/mosquitto.service
└─485 /usr/sbin/mosquitto -c /etc/mosquitto/mosquitto.conf
May 08 21:55:37 rpizolder systemd[1]: Starting Mosquitto MQTT v3.1/v3.1.1 Broker...
May 08 21:55:38 rpizolder mosquitto[485]: Loading config file /etc/mosquitto/conf.d/gp.conf
May 08 21:55:38 rpizolder systemd[1]: Started Mosquitto MQTT v3.1/v3.1.1 Broker.
pi@rpizolder:~ $
Then on the station I put the IP number of my Raspberry Pi, the Broker port I kept at the default value (1883), but unfortunately I could not connect using these settings.
$ sudo tail -f /var/log/mosquitto/mosquitto.log
1680636801: Socket error on client <unknown>, disconnecting.
1680636816: New connection from 192.168.2.64 on port 1883.
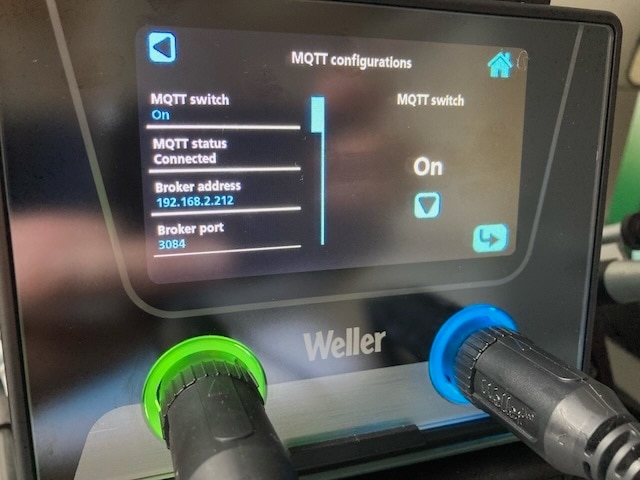
After some trail and error I contacted Weller through Element14. A day later I got an email wit a lot of information. Very valuable information, as wel as confusing stuff. They were stating that just one particular Mosquitto version should work, they also explained how to setup a personal hotspot with a phone to make the connection, and it was all Windows based. But it also told me that the station used the web sockets protocol in stead of the MQTT protocol. This was enough information for me to get it up and running. I set 3084 as the 'Broker port' BTW you need to do a power cycle before this is active!
Then I added web sockets to my configuration file: /etc/mosquitto/conf.d/gp.conf
pi@rpizolder:~ $ cat /etc/mosquitto/conf.d/gp.conf
# Seventax GmbH
# hng
# v0.0.1
###############################################################################
# Network configuration section
###############################################################################
# Default protocol is mqtt
listener 1883
protocol mqtt
# The actual protocol will be used is websocket, on port 8080
listener 3084
protocol websockets
###############################################################################
# Authentication method
###############################################################################
# allow client without authentication method to connect
allow_anonymous true
And voila, the station shows it is connected, and on the raspberry Pi I'm able to log messages:
pi@rpizolder:~ $ mosquitto_sub -v -t WXSMART/serialnumber/#
WXSMART/serialnumber/STATUS/Tip1/ID 2015
WXSMART/serialnumber/STATUS/Tip2/ID 1806
WXSMART/serialnumber/STATUS/Tool1/ID 20
WXSMART/serialnumber/STATUS/Tool1/OperatingHours/Total 18
WXSMART/serialnumber/STATUS/Tool1/Version/Firmware 29
WXSMART/serialnumber/STATUS/Tool2/ID 9
WXSMART/serialnumber/STATUS/Tool2/OperatingHours/Total 5
WXSMART/serialnumber/STATUS/Tool2/Version/Firmware 23
WXSMART/serialnumber/STATUS/Station1/Version/Firmware 156
WXSMART/serialnumber/STATUS/Station1/Version/Bootloader 6
WXSMART/serialnumber/STATUS/ExtUnit1/ID 0
WXSMART/serialnumber/STATUS/ExtUnit2/ID 0
WXSMART/serialnumber/STATUS/Config/System/DeviceName wxs
WXSMART/serialnumber/STATUS/Config/System/NetworkIF 0
WXSMART/serialnumber/STATUS/Config/System/Version/stm32 59
WXSMART/serialnumber/STATUS/Config/System/Version/esp32 7
WXSMART/serialnumber/STATUS/Config/IF0/IPAddress 0 , 0 , 0 , 0
WXSMART/serialnumber/STATUS/Tool1/Counter/Time 65530
WXSMART/serialnumber/STATUS/Tool2/Counter/Time 1072
WXSMART/serialnumber/STATUS/Tool1/Counter/Time 65529
WXSMART/serialnumber/STATUS/Tool2/Counter/Time 1071
WXSMART/serialnumber/STATUS/Tool1/Counter/Time 65528
WXSMART/serialnumber/STATUS/Tool2/Counter/Time 1070
WXSMART/serialnumber/STATUS/Tool1/Counter/Time 65527
WXSMART/serialnumber/STATUS/Tool2/Counter/Time 1069
Note that the actual serial number of the station here is replaced by serialnumber!!!
Now the MQTT broker works, there are a lot of possibilities. For this review I made a quick and dirty Node-Red dashboard. Here is a picture of the flow:
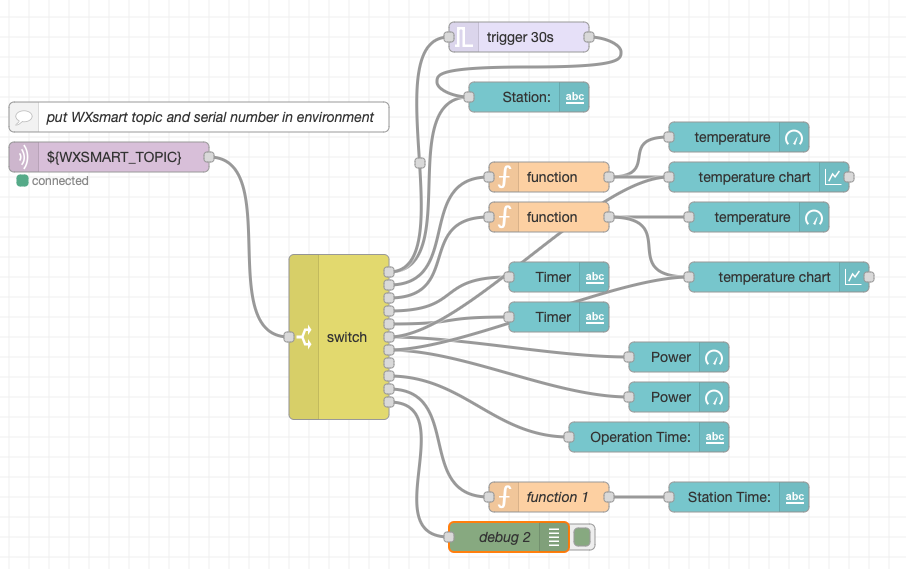
What the flow briefly does is: it listens for WXsmart messages, defined by WXSMART_TOPIC in the environment file in the Node-Red root folder (for serialnumber fill in the real number):
pi@rpizolder:~ $ cat .node-red/environment
WXSMART_TOPIC=WXSMART/serialnumber/STATUS/#
pi@rpizolder:~ $
It filters for specific strings, such as Tool 1 temperature and power, and displays it in a widget on the dashboard. It also checks whether it receives ONLINE from te station, if not it is probably of, and with a watchdog timer the dashboard shows OFFLINE. Here is a picture and video from the dashboard:
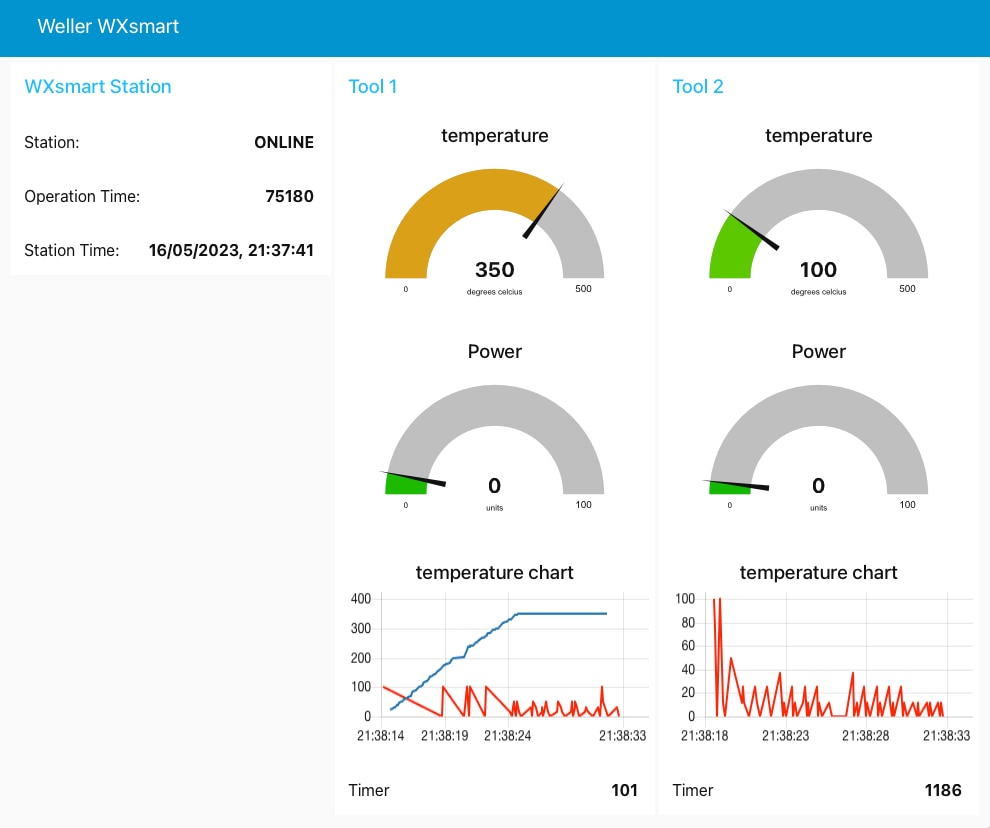
The code is far from ready, but getting it up and running with the setup problems described above took me quite some time.
Anyway, this very brief example gives you enough handles to build upon, you are welcome to Clone or Fork it from my Github repository:
https://github.com/AgriVision/NodeRed_WXsmart_MQTT_Control
This concludes my review for now, I will continue to work on the Node-Red flow, and also update the review if I come along issues or get maybe firmware updates from Weller (still curious to the AFT function).
Please let me know in the comments if there is something missing what you like to know, or specific questions, e.g. on the MQTT setup.
Top Comments
I found you review very informative. I use a similar approach when I have done RoadTests.
You listing of shortcomings, documentation, USB.. I found interesting. I made similar observations when I evaluated…