RoadTest: RoadTest Review a Raspberry Pi 3 Model B !
Author: Former Member
Creation date:
Evaluation Type: Independent Products
Did you receive all parts the manufacturer stated would be included in the package?: True
What other parts do you consider comparable to this product?: null
What were the biggest problems encountered?: null
Detailed Review:
Raspberry Pi and Mobile security
Summary
One of today's big issues is security. In particular, when away from home and connecting to wifi, there is a significant security risk.
This project will address that issue.
Problem
When away from home and connecting your phone or tablet to free (or paid) wifi, there are significant security risks.
You do not know the integrity of the provider, or their technical capabilities.
It is easy for your security to be compromised either by malice or ignorance.
Typical public wifi points
Hotels
Cafes
London underground
Solution
One solution to this problem is to ensure that
All traffic connects to a single known secure point
All traffic is encrypted
Both these requirements are fulfilled with a vpn (virtual private network)
Setting up the Pi3
Hardware
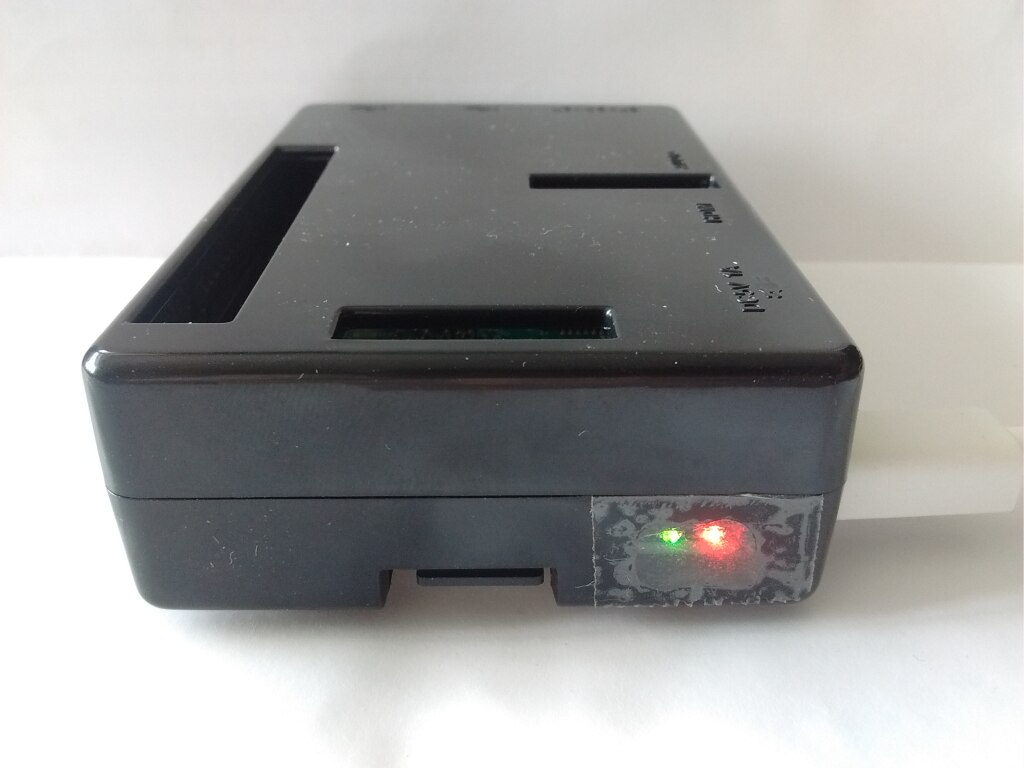
I bought a smart black case from China on eBay for a couple of pounds. Be aware that if you get a Pi2 case (which fits perfectly) the indicator LEDs have moved to the other end of the board and they probably won't be visible unless the case is transparent. Nothing that can't be fixed with a small drill.
Use a good quality USB PSU to power the Pi. Cheaper, poorer quality PSUs have a higher risk of spontaneously combusting. The specs suggest a 1A supply: I tend to go for a 2A so that it's running well below its maximum capacity. In the early days with my first Pi, I used a cheap supply that couldn't deliver the required current peaks. It got through part of the startup process and then stopped with a beautiful coloured image on the screen. It took me a while to figure out what was wrong.
Software
I used a Kingston 64GB class 10 microSD card which claimed 80MB/S read speed.
Format the SDCard. Ideally you will have an SDCard slot in your computer, if not, things get a bit more complicated. I do have one, and I used SDFormatter v4 for Windows. In options, make sure that "Format Size Adjustment" is ON. Give the card a Volume label (I used RASPBERRYPI) and double check that the SDCard is selected, not something else like your USB key. This is the voice of experience speaking here. Click "Format" and when it's done, close SDFormatter to prevent any accidents.
Download Raspbian Jessie (2016-03-18, Kernel version:4.1) from https://www.raspberrypi.org/downloads/raspbian/
Unzip 2016-03-18-raspbian-jessie.zip to give 2016-03-18-raspbian-jessie.img
Using a tool like "Win32 Disk Imager", write this .img file to the SDCard. Note, it is not sufficient to just copy the .img file to the SDCard using windows file explorer.
It may be possible to just use "Win32 Disk Imager" on a brand new SDCard without running "SDFormatter", but I haven't tried.
Using the Windows Disk Management tool, you should see something like this for a 64GB card:

You can see that most of the SDCard is unallocated. We'll deal with that in a bit.
Tell Windows you have finished with the SDCard, eject it and slide it into the Pi. There's no tactile locking, but it's not possible to put it in the wrong way.
Powering up
I will be running my vpn server headless i.e. with no monitor, keyboard or mouse, but these are needed to get through the initial setup, so plug them in.
I also plugged in an ethernet cable connected to my internet router as this made things a little easier before going fully WiFi.
Finally, plug in the power from your USB PSU and it should all start kicking off.
The red power LED should stay permanently on and the green disk LED should flicker as it reads and writes.
Eventually you should get a home screen on your monitor with a "Raspberry" menu button in the top LH corner.
If you need to shut down at any point, follow this sequence to make sure no harm is done to your RPi:
Click the "Raspberry" menu button and select "Shutdown"
Make sure "Shutdown" is selected in the "End Session"dialog box and click <OK>
The green disk LED will flicker a bit and then flash steadily. Finally it will go on permanently.
Give it a few seconds and then remove the power.
Configuration
Now we're going to configure a couple of things.
Hover the mouse over the various icons to the right of the menu button on the top bar and inspect the text. The third icon from the left should say "Terminal".
Click this icon and you should bring up a terminal or console.
Resizing the disk
In the terminal, type
sudo raspi-config
This should bring up the "Raspberry Pi Software Configuration Tool"
Making sure that "1 Expand Filesystem" is selected, hit [Enter]
You should see a message to the effect that the resize will occur at the next reboot.
Hit [Enter] on the <OK> button
More about raspi-config here: http://elinux.org/RPi_raspi-config
More about resizing partitions here: http://elinux.org/RPi_Resize_Flash_Partitions
Setting the computer name
Using the arrow keys, move down to "9 Advanced Options" and hit [Enter]
Using the arrow keys, move down to "A2 Hostname" and hit [Enter]
Read the message about names and hit [Enter] on the <OK> button to accept it.
Change the name to whatever you want. I call mine raspberrypi3
[Down-Arrow] to get to <OK> and hit [Enter]
Allowing remote access
Using the arrow keys, move down to "9 Advanced Options" and hit [Enter]
Using the arrow keys, move down to "A4 SSH" and hit [Enter]
Hit [Enter] on the <Enable> button
Hit [Enter] on the <OK> button
Using the [Tab] key, go to <Finish> and hit [Enter]
Because of the disk resize you should see a message that says "Would you like to reboot now?"
Hit [Enter] on the <Yes> button and the pi will reboot.
Connecting remotely
Find out the IP address of the Rpi:
Bring up a terminal and type
ifconfig
You will probably see several paragraphs. Look for the one called eth0 and then for the entry called "inet addr"
It will probably look something like this:
192.168.0.4
This is the IPv4 address.
v4 is for version 4: you should also see an "inet6 addr" which is the IPv6 address, but you can ignore that.
I'm going to work with text only and use a remote console called Putty.
If you want a graphical remote terminal I suggest MobaXterm. This can also be used for text only, but it is a little more complex to set up.
On your windows computer, download and install Putty from http://www.chiark.greenend.org.uk/~sgtatham/putty/
Start putty up and enter the IP address you discovered.
Also put a name e.g. RaspberryPi3 in the "Saved Sessions" box and click <Save>

Click <Open> to start the session
The first time you do this you will probably see a message like this

This is purely because you have not connected before.
Click <Yes>
You should be presented with a login prompt.
Use pi with a password of raspberry, unless you have already changed these.
Changing the password
The default username/password pair out of the box is pi/raspberry
Because the Rpi will be connected to the internet, this must change. Type
passwd
and follow the instructions. You will need to enter the existing password (raspberry) and then your new one twice.
I'm sure I don't need to remind you to include uppercase, lowercase, numerics and punctuation in your password, and have at least 10 characters, preferably quite a few more.
If you struggle with lots of password, try KeePass or similar.
Check Disk size
To prove that our disk resize has worked, bring up a terminal and type this command
df -h
df is the "disk free" command and shows how much space is available on the disk.
-h means show the result in human-readable format (M for MegaByte, G for GigaByte etc)
The first couple of lines of the result should look like this
Filesystem Size Used Avail Use% Mounted on
/dev/root 58G 3.3G 52G 6% /
The first line is the column headers, the second line shows that our disk is 58GB in size and has 52G available.
These are the results for a 64G SDCard and will vary for other card sizes.
If you are wondering why it says 58G instead of 64G, read this: http://petapixel.com/2012/10/10/why-hard-drives-and-memory-cards-have-less-space-than-advertised/
Get latest software
Start by updating your package list
sudo apt-get update
Then upgrade to all the latest versions
sudo apt-get upgrade
This may take quite a while
Configuring the WiFi
Use this command to list the WiFi access points the Rpi can see:
sudo iwlist wlan0 scan
The access points are listed as cells. Look for your access point name in the ESSID field.
If you are paranoid like me and have hidden your SSID, this field will be blank, but the cell should still show.
If this is the case, and especially if you see more than one blank ESSID field, you probably want to make sure the mac addresses match.
If you can't see your access point, there's a problem, so resolve that before proceeding.
Add your acces point details to the wifi config. Start the editor:
sudo nano /etc/wpa_supplicant/wpa_supplicant.conf
add this paragraph to the end of the file, changing the ssid and psk appropriately
network={
ssid="Your_ESSID"
psk="Your_password"
}
Now, write out the file
[Control]O and hit [Enter]
And exit from Nano
[Control]X
You may need to reboot for this to be picked up.
You can tell remotely if the wifi is working with this command:
ifconfig wlan0
If it isn't working you'll see that
1) You have no IPv4 address, only an IPv6 address on line 2
2) although you are sending packets, all the received ones are being dropped:

Once it starts working, you will see
1) an IPv4 address on line 2
2) that only some of the receive packets are being dropped (I don't yet know why so many are being dropped - everything seems to work OK)

Assuming you are going to be running remotely over the wifi, you can now remove your ethernet and keyboard and mouse, but be prepared to replace at least the ethernet in case you mess up the VPN config and lose the wifi connection.
Remember that putty will now need to connect to a different ip address - the wlan0 one.
Shutting down
If and when you need to shut down remotely, follow this sequence to make sure no harm is done to your RPi:
sudo shutdown -h now
Wait for the Rpi green disk LED to go steady before removing power. If you can't see it, give it at least 30 seconds to be sure.
If you want to restart, rather than shutdown, use this command (the -h above means halt, the -r below means restart):
sudo shutdown -r now
Putty will show that it has been disconnected: with a message box
Server unexpectedly closed network connection
Click OK.
Note that if you restart the Rpi, you can also restart the Putty SSL client connection by clicking the icon in the TLH corner and selecting "Restart Connection" (assuming the Rpi is back up).
Here's the RPi3 talking over wifi with nothing but a power cable attached.
Note the custom LED viewing panel made from sellotape.
Selecting a VPN
Given the requirement to connect securely via an unspecified wifi access point, there are two ways to go here.
Use an existing VPN service.
Set up a personal service using the Rpi.
There has been quite a lot of negative publicity recently about free VPN services.
The main criticisms are
Selling on of personal data
Unwanted advertising, sometimes targeted based on observation of client traffic
Usage of clients as bots
Insufficient attention to in-depth security
The paid-for services are probably better, but personally, I'm not happy to use a third-party service in this sort of scenario.
This article, from Mar 2015, looks at common VPN services and anonymity: https://torrentfreak.com/anonymous-vpn-service-provider-review-2015-150228/
Which leaves us with the task of setting up a VPN server on the Rpi.
The next decision is which server to use.
There are limited options here and in the end I chose OpenVPN, just because it seems to be the one that most people are using, and I have a friend who has it up and running successfully.
Installing the OpenVPN server
Note that many of the subsequent commands are prefixed with "sudo". This means "run the following command as root". You could switch to root for the duration of the session with "sudo su" but it is probably safer to use sudo for each command.
Start by updating your package list, if you haven't already done that recently
sudo apt-get update
Then install the server and Easy-RSA which is a tool for managing certificates
sudo apt-get install openvpn easy-rsa
Configure packet forwarding
We need to tell the server to send out what it receives to the internet. Without this, the traffic arriving from your remote device would just stop and would not be forwarded on.
Start the editor with sudo as it is a system file. Without sudo, we would be unable to write the file back after editing
sudo nano /etc/sysctl.conf
Find the paragraph marked
# Uncomment the next line to enable packet forwarding for IPv4
And remove the # at the start of the next line so that it looks like this
net.ipv4.ip_forward=1
Write out the file
[Control]O and hit [Enter]
And exit from Nano
[Control]X
Activate the packet forwarding by typing this
sudo sysctl -p
You will see that it returns the changed line as confirmation
Setting a fixed IP address
You need now to make sure that the Rpi has a fixed IP address
This is so that the VPN clients, such as your phone, know where to send their tunnelled traffic.
The two options are
A static IP address. This means that the IP address is set as static on the RPi and must fall outside the dhcp range of your wifi router, but within the wifi network addrtess range.
A reserved dhcp address. This means that the RPi continues to receive an IP address from the wifi router, but you configure the router to always give it the same one.
I opted for the latter and made a change to my wifi router.
Unfortunately, as all routers are different, I can't advise on how to do this.
At the end of the process, and whichever option you take, you should have a known, fixed, wifi IP address for your Rpi.
Generating key pairs
The VPN is going to use RSA which is asymmetric encryption system. This means that we use two different keys (hence the term key pairs), one for encryption and a different one for decryption.
You recall that when we installed OpenVPN, we also installed Easy-RSA to manage the keys.
First, we copy the Easy-RSA files into the OpenVPN directory tree
sudo cp -r /usr/share/easy-rsa/ /etc/openvpn
Now, edit the config file to point to the new directory
Find the line starting with
export EASY_RSA=
And edit it to point to the new path. If you are using exactly the directories I've given, it will look like this:
export EASY_RSA="/etc/openvpn/easy-rsa"
Write out the file
[Control]O and hit [Enter]
And exit from Nano
[Control]X
Configuring the Certificate Authority
We are going to set up OpenVpn to use signed keys. We could use manual passwords, but the scope for poor and/or forgotten passwords is too great, so I'm not even going to suggest it as an option. Also, if a remote client device such as your phone is lost or stolen, its key can be revoked to preventg it accessing the VPN.
Move to the directory you just created:
cd /etc/openvpn/easy-rsa
We need to run as root here and for the next few sections.
For reasons that I don't understand, we can't just put sudo in front of each command, so
sudo su
Make sure you are in the right directory
pwd
The result should be
/etc/openvpn/easy-rsa
If it's not, don't proceed unless you know what you're doing - this stage can seriously trash your RPi3.
Now, run the setup program
source ./vars
You should see
NOTE: If you run ./clean-all, I will be doing a rm -rf on /etc/openvpn/easy-rsa/keys
The "rm-f" is why you needed to be sure what directory you were in. It will delete everything under the specified directory.
Run the cleanup script
./clean-all
Building the Certificate Authority
Run the script to build the CA and answer the questions, or leave the default values by hitting [Enter]
./build-ca
Now, build the key server, providing your server name. On the line below you can see that I used RaspberryPi3
./build-key-server RaspberryPi3
Again, it will ask you a load of questions which you can answer, or leave the default values by hitting [Enter]
This time, however, you will also be asked for a challenge password. Don't enter anything, Just press [Enter]
When asked
Sign the certificate?
And
1 out of 1 certificate requests certified, commit?
Type "y" for yes, and hit [Enter] in each case.
You should finally see
Write out database with 1 new entries
Data Base Updated
Congratulations: you've just created a CA and given your server a certificate.
The server private key is in RaspberryPi3.key
Configuring Diffie-Hellman key exchange
Prior to using the VPN, both ends (your Rpi3 VPN server and your client e.g. your phone) need to swap keys securely so they know they can trust each other.
Diffie-Hellman key exchange is a way of doing this, so now we'll configure that.
Still in the /etc/openvpn/easy-rsa directory, run the build script
./build-dh
You'll see a message that says
Generating DH parameters, 2048 bit long safe prime, generator 2
This is going to take a long time
Mine took nearly 9 minutes without the RPi3 doing anything else.
Mitigate against denial of service attacks
Realistically, you're unlikely to suffer one of these unless you've attracted the attention of some very unsavoury people.
However, better safe than sorry, so let's generate a HMAC (hash-based message authentication code).
openvpn --genkey --secret keys/ta.key
Create a client certificate
Each client, such as your phone, that needs to connect needs a certificate.
In the command below, replace CLIENTNAME with a name representing your client device e.g. SamsungPhone
./build-key-pass CLIENTNAME
You will be asked for a PEM pass phrase. Use something memorable, as you may need to type it in a few times. Record it in KeePass.
It will ask you for more details: fill them in as you wish, except for
"Common name" which can't be blank. I suggest leaving the default which should be the CLIENTNAME you provided earlier.
"Challenge password" which must be blank, again.
Again, it will ask you if you want to sign and commit the certificate. Answer y to both questions.
The certificate will be written to CLIENTNAME.key
Harden the RSA key
It's best to harden the RSA key with triple-DES
Again, replace CLIENTNAME with the client device name you chose above e.g. SamsungPhone
openssl rsa -in keys/CLIENTNAME.key -des3 -out keys/CLIENTNAME.3des.key
It will ask you for a passphrase you used above and then for a new PEM pass phrase, repeated for confirmation.
I used the same phrase throughout.
Repeat this process for each further client device you want to connect to your VPN.
You could use a single cert for all devices, but as explained above, if there is a problem with one, you will need to change everything.
Edit the OpenVPN server configuration
First, we need to make sure we have permission to save a configuration file
The next command allows "others" i.e. anyone, to "write" to the /etc/openvpn directory
chmod o+w /etc/openvpn
You need to create a specific file with the below settings in it, however, first you need to substitute some values
In the details below
a.b.c.d should be replaced with the IP address of your RPi3. (2 locations) This is the address you are using to connect remotely to it with Putty.
p.q.r.s should be replaced with the IP address of your wifi router (your default gateway). (1 location) This is for DNS.
If your wifi router doesn't provide DNS, remove this line completely and rely on the next line (Google's DNS server)
Make the changes with an editor on your host machine and then use this command to create the file on the RPi3:
nano /etc/openvpn/server.conf
Note: If any text appears in the file, it already exists and you need to decide what to do i.e. edit or replace.
This shouldn't happen if you've followed these instructions all the way through.
Copy the text you've just changed into the nano editor. The simplest way is to copy it in Windows, then click inside the nano editor in Putty and Right-click
Write out the file
[Control]O and hit [Enter]
And exit from Nano
[Control]X
Now revert the ability for anyone to write to that directory with this command
chmod o-w /etc/openvpn
Configuration to paste into /etc/openvpn/server.conf (don't forget to change a.b.c.d and p.q.r.s) :
local a.b.c.d # Replace a.b.c.d with the IP address of your RaspberryPi3
dev tun
proto udp
port 1194
ca /etc/openvpn/easy-rsa/keys/ca.crt
cert /etc/openvpn/easy-rsa/keys/RaspberryPi3.crt # Replace RaspberryPi3 with your server name if different
key /etc/openvpn/easy-rsa/keys/RaspberryPi3.key # Replace RaspberryPi3 with your server name if different
dh /etc/openvpn/easy-rsa/keys/dh2048.pem
server 10.8.0.0 255.255.255.0
# server and remote endpoints
ifconfig 10.8.0.1 10.8.0.2
# Add route and subnet to the client routing table
push "route 10.8.0.1 255.255.255.255"
push "route 10.8.0.0 255.255.255.0"
# Add your local subnet
push "route a.b.c.d 255.255.255.0" # Replace a.b.c.d with the IP address of your RaspberryPi3
# Add DNS address
push "dhcp-option DNS p.q.r.s" # Replace p.q.r.s with the IP address of your wifi Router
push "dhcp-option DNS 8.8.8.8" # Add Google's DNS server as backup
push "redirect-gateway def1"
client-to-client
duplicate-cn
keepalive 10 120
tls-auth /etc/openvpn/easy-rsa/keys/ta.key 0
cipher AES-128-CBC
comp-lzo
user nobody
group nogroup
persist-key
persist-tun
status /var/log/openvpn-status.log 20
log /var/log/openvpn.log
verb 1
Configure the RaspberryPi3 firewall
Create a script that will run every time the RPi3 starts
nano /etc/iptables-openvpn.sh
And enter the below text, substituting a.b.c.d with your RPi3 IP address, the same as above
#!/bin/sh
iptables -t nat -A POSTROUTING -s 10.8.0.0/24 -o eth0 -j SNAT --to-source a.b.c.d
Write out the file
[Control]O and hit [Enter]
And exit from Nano
[Control]X
Now we need to control access to this file
chmod 700 /etc/iptables-openvpn.sh
And give ownership to root
chown root /etc/iptables-openvpn.sh
Tell the RPi3 to run this script every time it starts
nano /etc/network/interfaces
Look for the line that describes the wifi interface, probably very much like this:
iface wlan1 inet manual
And directly underneath it, enter a new line
There is likely a line already there. This shouldn't be touched, so the relevant section should look something like this
iface wlan1 inet manual
pre-up /etc/iptables-openvpn.sh
wpa-conf /etc/wpa_supplicant/wpa_supplicant.conf
The indenting isn't necessary, it just make sthings easier to read.
Write out the file
[Control]O and hit [Enter]
And exit from Nano
[Control]X
Finally, reboot the RPi3 to read the new configuration:
shutdown -r now
Putty will drop the connection and the RPI3 will restart
(You could run the script manually, but that wouldn't prove the startup process)
Use a known public address
Your public IP address is the one that the Internet knows about. It's different from the static RaspberryPi3 address you set up earlier which is relevant only to your local network.
Your public IP address is provided by your ISP and it can vary, although it may not do so for weeks or months.
We could use DDNS (Dynamic Domain Name System) where your RPi3 tells a remote DNS server what it's IP address is every time it starts up and so the clients know where to find your VPN server.
However, I am going with the simple option of working with my ISP provided address and just taking the hit if and when that changes.
You can obtain this by googling "whats my ip"
In the discussion below, I will show this external address as e.f.g.h
Configure your firewall to pass the connection through
Next, we must allow the VPN client to initiate a connection into our private network.
As before, this is specific to your own firewall/router so seek help if you don't know what you are doing.
This is probably the most dangerous thing we do in this project and should be thoroughly checked: failure could leave your private network wide open to the internet.
Preparing the client config files
The OpenVPN client uses a .ovpn configuration file. We create this on the server: you will need a separate one for each client you plan to use.
We are going to use a script initially created by Eric Jodoin and edited by others.
Set root:
sudo su
Go to your keys directory
cd /etc/openvpn/easy-rsa/keys
We are going to download the script from GitHub
We could just copy and paste, but sometimes this leads to trouble, so we use a more complex approach 
Browse to this page (using your Windows machine): https://gist.github.com/laurenorsini/10013430
Locate the Embed dropdown:

Drop this down and select "Clone via HTTPS"
Copy the provided url and use it in this statement on the RPi3:
git clone https://gist.github.com/10013430.git
This will create a directory called 10013430 under cd /etc/openvpn/easy-rsa/keys
In here is a file called MakeOpenVPN.sh
Copy it up into our keys folder:
cp /etc/openvpn/easy-rsa/keys/10013430/MakeOpenVPN.sh .
And give root execute privileges on this file
chmod u+x ./MakeOpenVPN.sh
We need a template to work from, so
nano Default.txt
And paste this text in:
client
dev tun
proto udp
remote e.f.g.h 1194
resolv-retry infinite
nobind
persist-key
persist-tun
mute-replay-warnings
ns-cert-type server
key-direction 1
cipher AES-128-CBC
comp-lzo
verb 1
mute 20
Make sure you replace e.f.g.h with your previously determined external ip address
Write out the file
[Control]O and hit [Enter]
And exit from Nano
[Control]X
Run the make script
./MakeOpenVPN.sh
Provide a client name: I used SamsungTablet
This name *must* have matching crt, csr and key files that you created earlier
The script throws various errors, but it seems to work (sorry I haven't figured the problem)
(Note to self: even with the git clone, the file had two errors ??)
You should end up with a new file called e.g. SamsungTablet.ovpn
This file needs to be copied to the root of the sdcard on whatever remote device you are configuring.
Setting up your client
Now, we will configure our remote device to access the VPN server.
I am initially using a Samsung Galaxy Tab 4 tablet that's about 18 months old.
First, install the OpenVPN client from the Google play store. Look for OpenVPN Connect as there are multiple apps that look similar.
Next you will need to import the ovpn file you just copied to the sdcard.
Start the OpenVPN Connect app, drop the down the menu, select "Import" and then "Import Profile from SD card"
You should see the ovpn file you just copied onto the sdcard
Select it and click select.
You should see "Profile Imported" and a request for a Private key Password.
Fill this in and click "Save"
Click "Connect"