RoadTest: Microchip AVR-IoT WG Dev Board
Author: MARK2011
Creation date:
Evaluation Type: Development Boards & Tools
Did you receive all parts the manufacturer stated would be included in the package?: True
What other parts do you consider comparable to this product?: basic, cheap ESP modules...
What were the biggest problems encountered?: Communication issues caused by misunderstanding of Google Cloud billing policy...
Detailed Review:
First of all I'd like to express my thanks to Microchip and Element 14 for selecting me as the roadtester of this amazing board!
The roadtest concern new development board designed to fulfill requirements of easy to introduce projects focusing secured (CryptoAuthentication) IoT data acquisition and computation
board details:
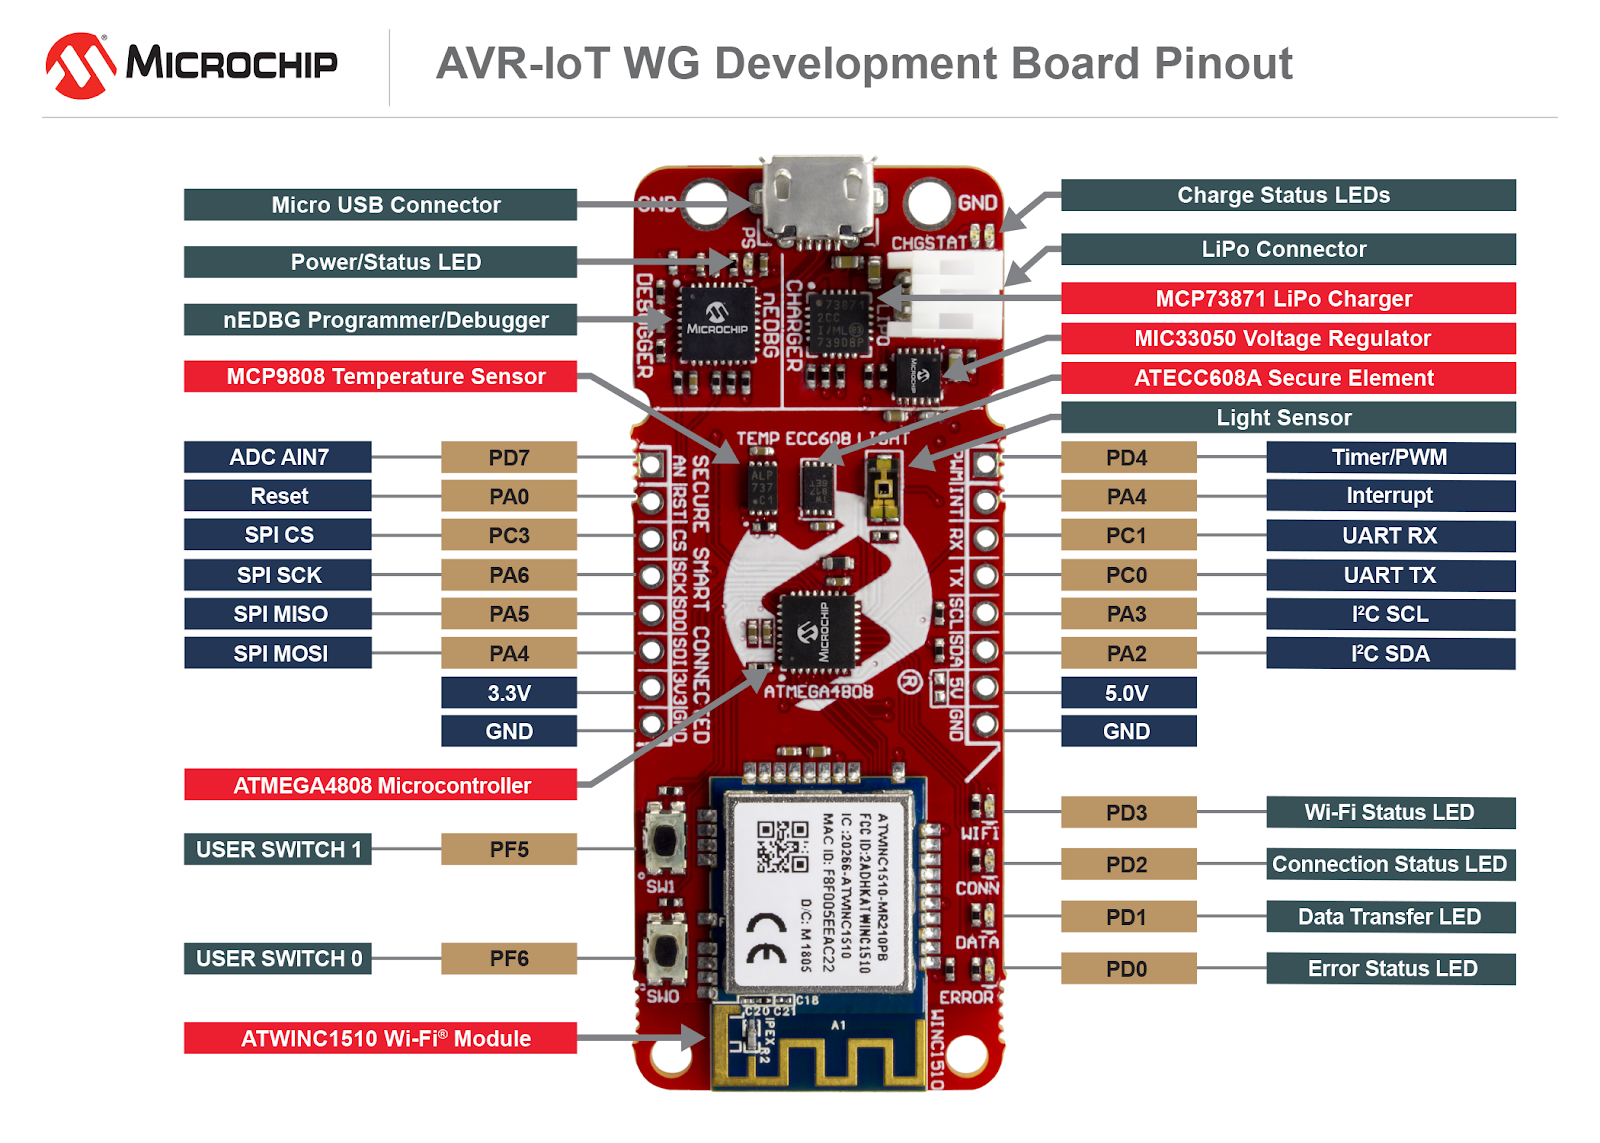
AVR-IOT WG Development Board
Microchip Part Number: ac164160
I need to admit, after relative easy start, I faced some terrible issues conducting experiments with the board.
At last, my basic tests ended successfully but I couldn't managed to conduct all planned tasks in time.
I regret, that most advanced part still wait for realization.
I hope my idea of results presentation - less comments more pictures
will be acceptable!
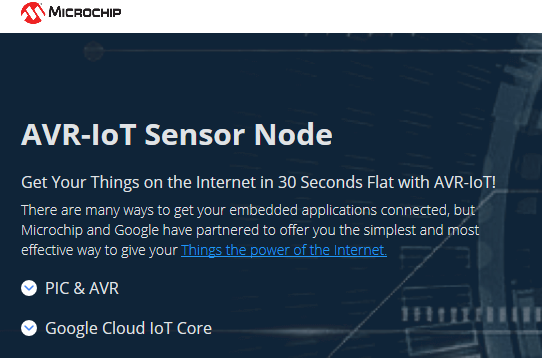
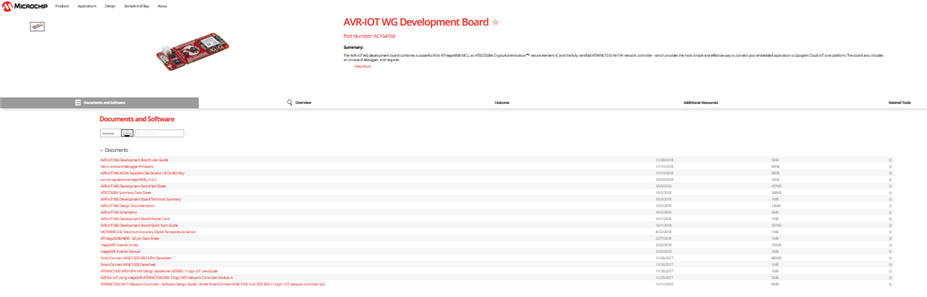
Going to base Microchip's AVR-IoT Development Board site link:
you have access to main information about the board.

According to Microchip statement
The AVR-IoT WG development board combines a powerful 8-bit ATmega4808 MCU,
an ATECC608A CryptoAuthentication™ secure element IC and the fully certified ATWINC1510 Wi-Fi® network controller
- which provides the simple and effective way to connect users embedded application to Google’s Cloud IoT core platform.
The board also includes an on-board debugger, and requires no external hardware to program and debug the MCU.
As usually with their products, Microchip prepared very professional support for its devices.
Details and links to documentation are available here
https://www.microchip.com/design-centers/internet-of-things/google-cloud-iot/avr-iot

https://www.microchip.com/developmenttools/ProductDetails/AC164160
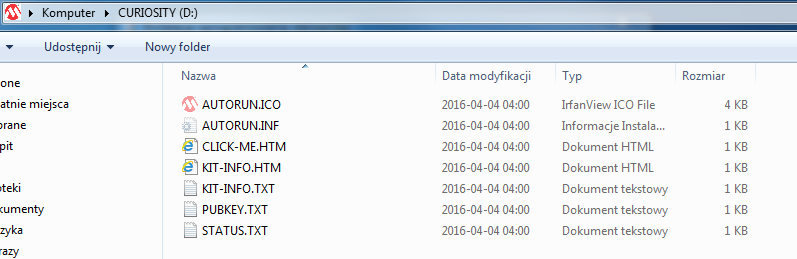
Documents and Software are always available under onboard "KIT-INFO.htm" link
Selection of most important documentation of the board
AVR-IoT-WG-User-Guide-50002809A.pdf
MCHP-ML3208UK-Fact Sheet Secure IoT Sensor Node)-97865M.pdf
ATWINC1500
https://www.microchip.com/wwwproducts/en/ATWINC1500
AVR-IOT is based on the idea of IoT developed mainly with support of:
Google Cloud IoT (Solutions for secured authentication and nodes) https://www.microchip.com/design-centers/internet-of-things/google-cloud-iot
and also:
Microsoft Azure Cloud Computing https://www.microchip.com/design-centers/internet-of-things/microsoft-azure-cloud-computing
Amazon Web Services https://www.microchip.com/design-centers/internet-of-things/amazon-web-services
The AVR-IOT WG board implements a wireless (WiFi) IoT sensor node using AVR microcontroller
As the late roadtester I do not want to bore you with the duplication of the process of opening a package.
All previous roadtesters showed it properly. I confirm it was the fun to open that orange box with brand new, outstanding board.
Lack of any accompanying stuff as cables, terminals or paper documentation didn't surprise me.
Omitting the unpacking phase I need to confirm, the shipment was very fast. The box was packed well and delivered safely.

above: all the stuff I only forget to show ESD bag which secure the shipment but also warn the user to be carefully with electrostatic issues!
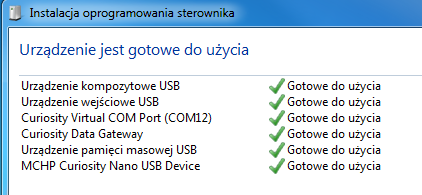
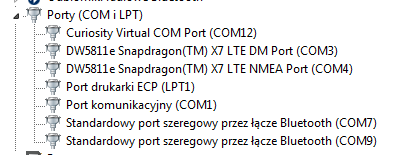
- driver installation
The MCU is preloaded with a firmware image that enables to quickly connect and send data to the Google Cloud IoT platform
using the on-board temperature and light sensors.
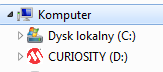
"D:\AUTORUN.INF"
AUTORUN
[autorun]
icon=AUTORUN.ICO
"D:\KIT-INFO.TXT"
Firmware: 01.04.013C (hex)
Kit: AVR-IoT WG
Serial: ATML320XXXXXX
Device: ATmega4808
At that point I would like to mention the Drag & Drop idea of firmware uploading.
I was prepared to act as usually with firmware : debug/ compile/build and than still using the dedicated software - upload the binary code into the controller...
https://github.com/MicrochipTech/AVR-IoT_WG_Sensor_Node
after upgrade AVR-IoT_WG_Sensor_Node_v1_0_3.hex:
in KIT-INFO.TXT file
Firmware: 01.05.0142 (hex)
node starting page (available under
CLICK-ME.HTM
communication issues:
At the beginning the board didn't want to communicate with the WLAN.
After several attempts and switching on- off it started to work.
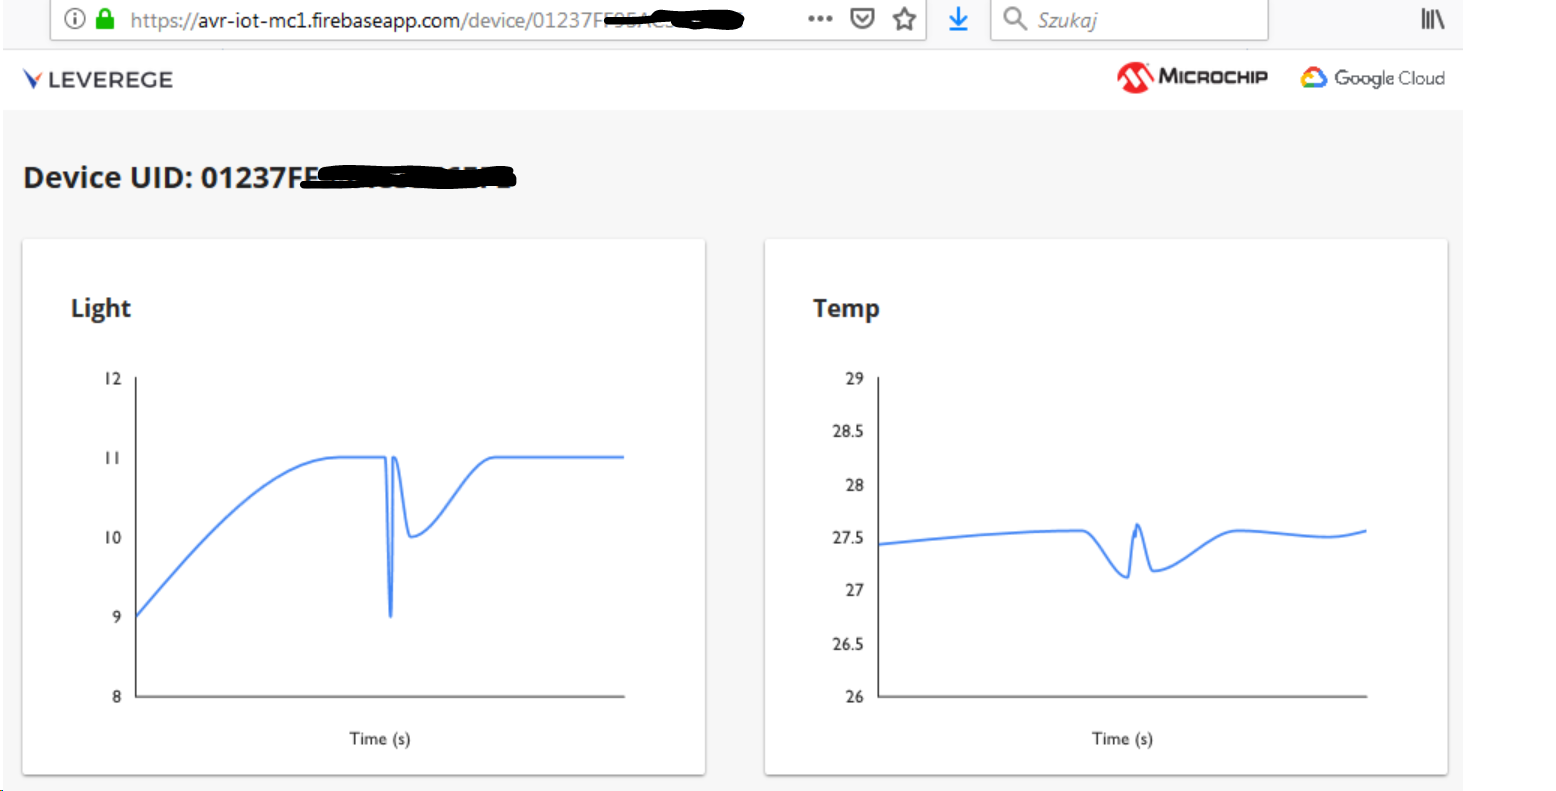
The board uses its sensors - temperature and light intensity transducers.
On the pictures below you can see first measurements - temperature and light readouts in cloud archive

Atter several weeks of experiments I found new firmware version available on Git.
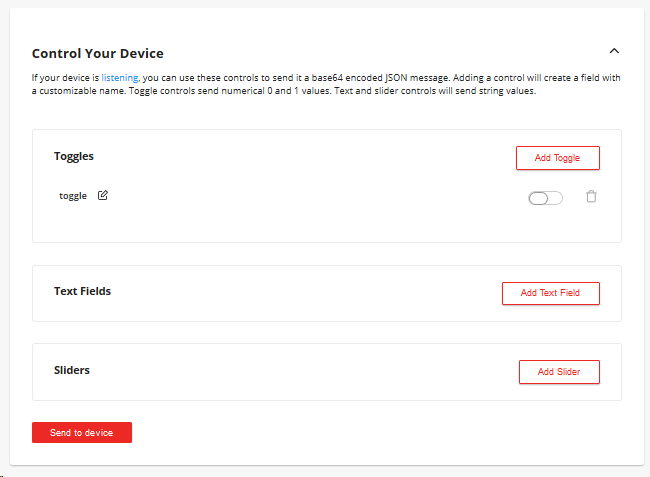
After providing the board with new firmware - I discovered new functionality on the dashboard.
It gave extra features and daschboard view:
But truly speaking - I had no idea how to employ these new functionality using pure, original software
The Google Cloud/ Leverege functions (later described) do not support it I'm afraid.
The next easy way to start communication with the board is:
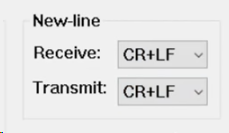
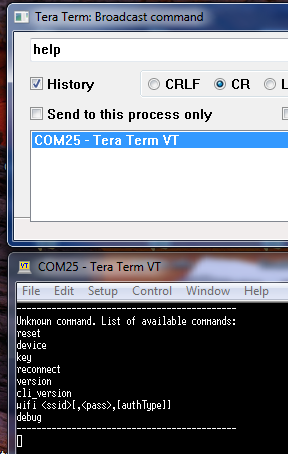
The board could be managed using common UART interface.
Using simple terminal programm after connecting via USB to the computer it works as ordinary RS232 device:
following few commands are available in the original firmware:
reset
device
key
reconnect
version
cli_version
wifi <
debug
next inportant stage ef board exploration will be:
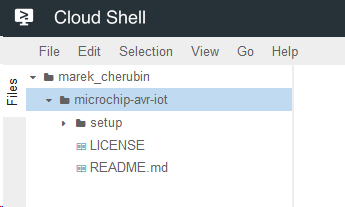
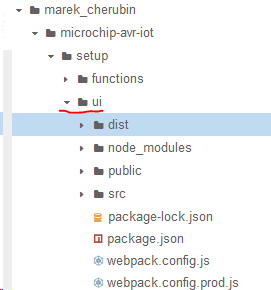
All you need to start is available on Git:
https://github.com/Leverege/microchip-avr-iot
additioanlyy you can use that link as the support
Leverege - Getting Started with AVR-IoT: Pushing Data from Device to Cloud
https://www.leverege.com/blogpost/avr-iot-guide-pushing-data-to-cloud
I found most valuable information about the Leverege solutions concerned AVR-IoT here:
https://www.leverege.com/blogpost/avr-iot-guide-pushing-data-to-cloud
https://www.leverege.com/blogpost/iot-connectivity-options-for-asset-tracking
https://www.leverege.com/blogpost/cellular-iot-security
 https://console.cloud.google.com/cloud-resource-manager?pli=1
 https://cloud.google.com/iot-core/
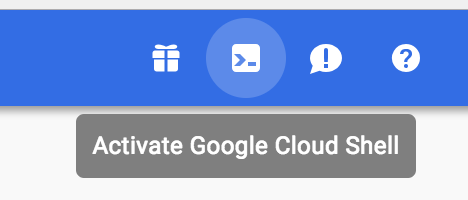
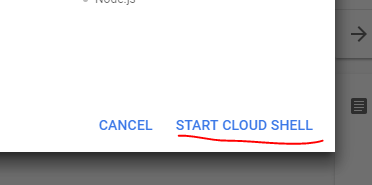
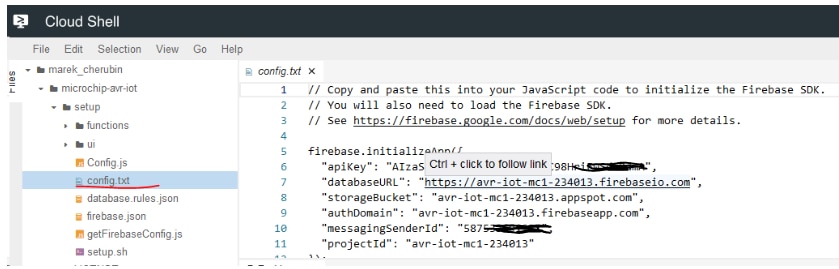
I realized, that google Chrome is most convieneient when working with GCP - specially that concern the cloud shell interface.
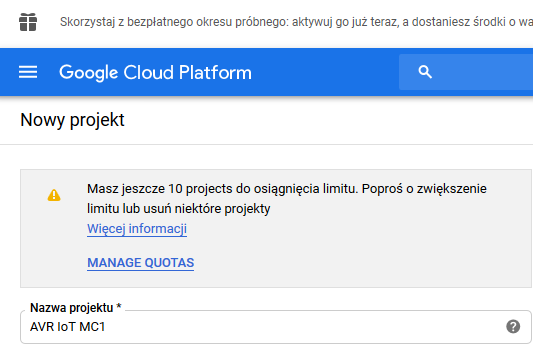
Run the Quickstart Script
in the GCP window

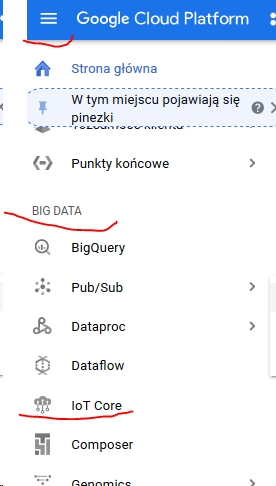
Google Cloud, you'll see IoT Core on the side bar in the BIG DATA section.

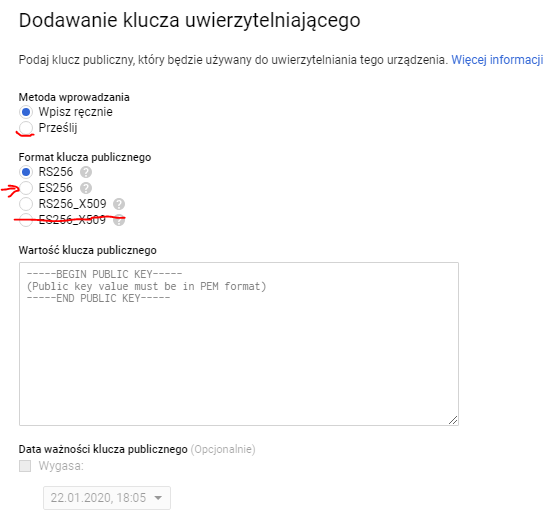
If you forget to add the key before - in the shell there is possibility to correct the mistake here:
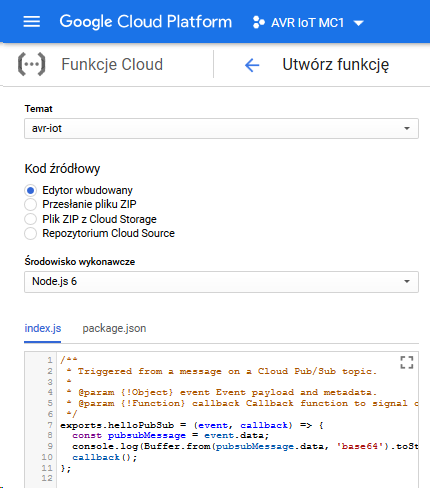
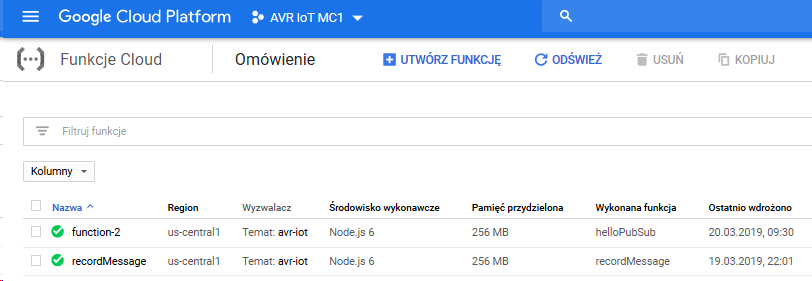
adding functions
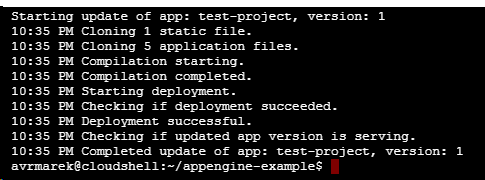
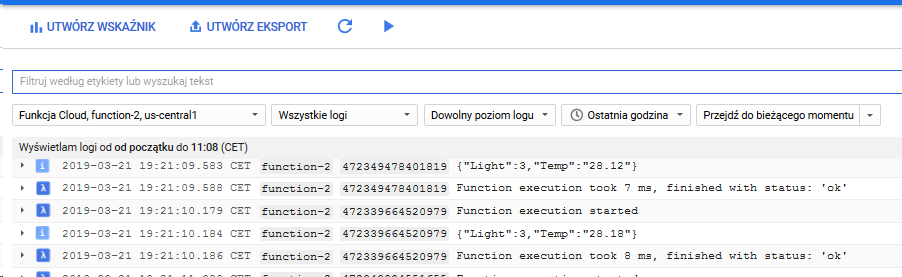
LOGs
Here you can see the script created in the shell console:
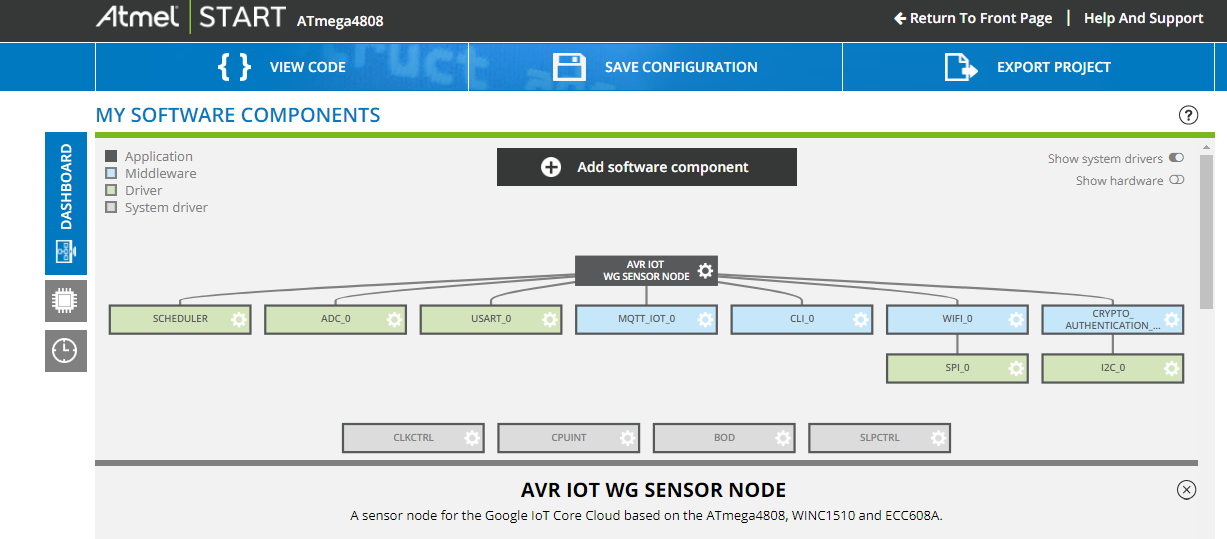
Atmel START Rapid Development Tool
>>> Instruktion page 15
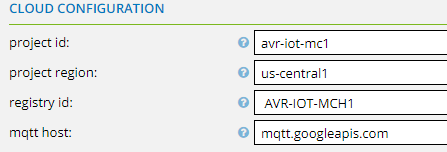
Cloud configuration
The section below was a little confusing for me at the bagining as the instruction wasn't upgraded properly after introduction of the new version of LEVEREGE project
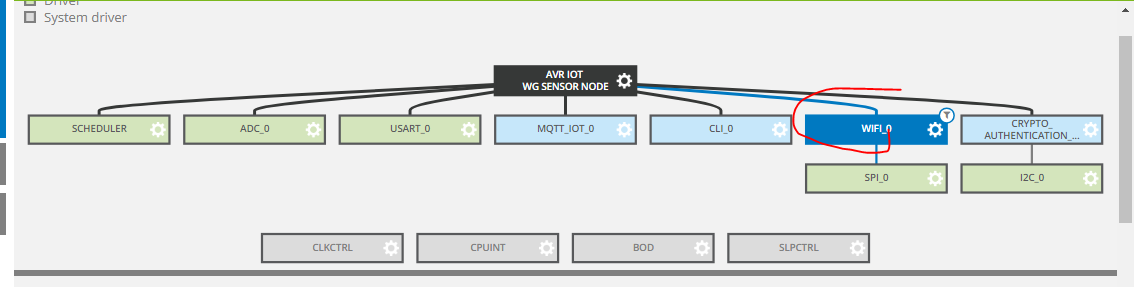
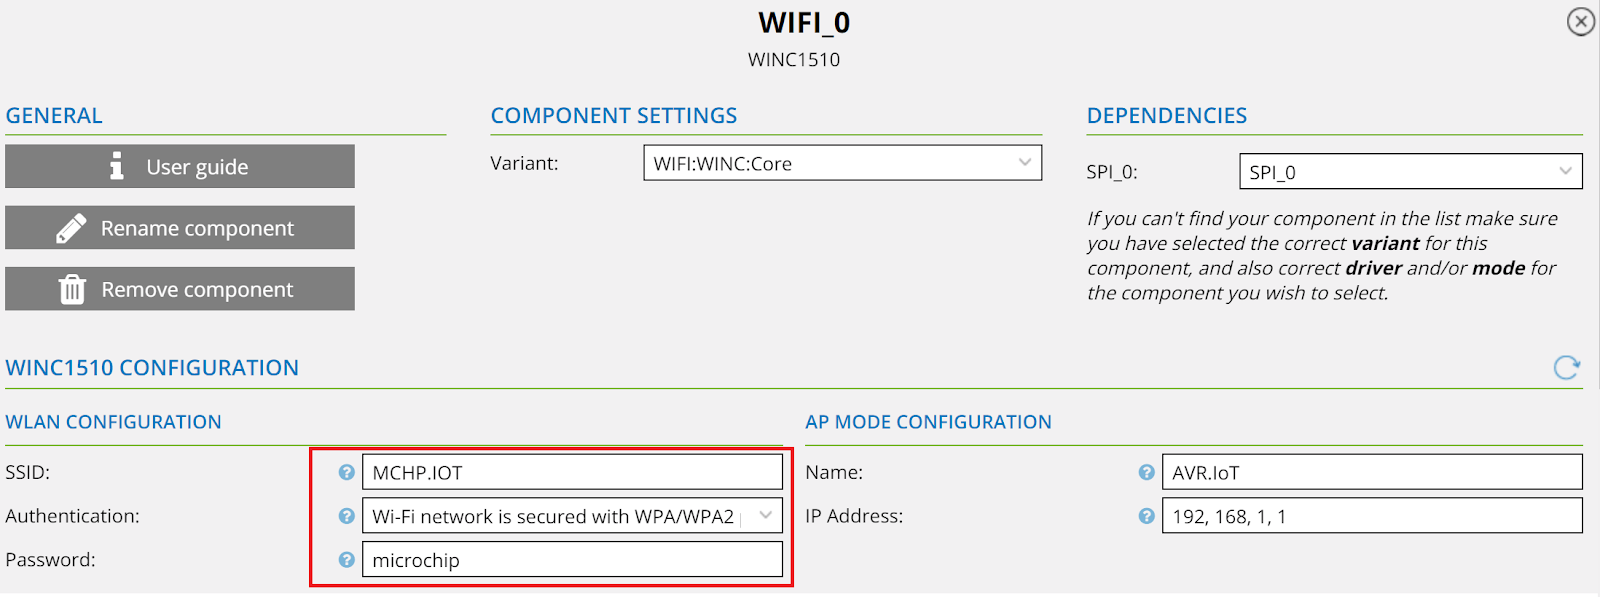
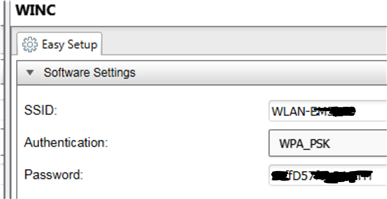
Under the WLAN Configuration section, we need to enter our WiFi credentials.
I need to choose:
WIFI_0
WLAN CONFIGURATION

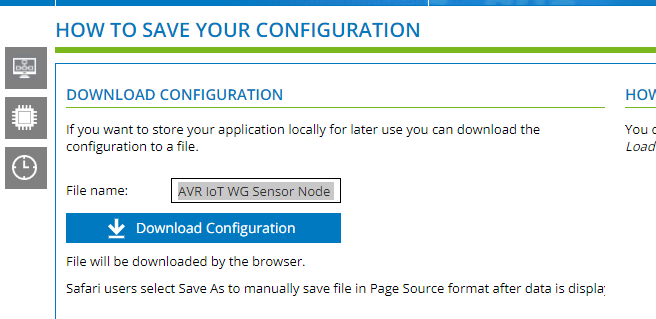
now we are ready to:
just to avoid the risk of loose entered setting.
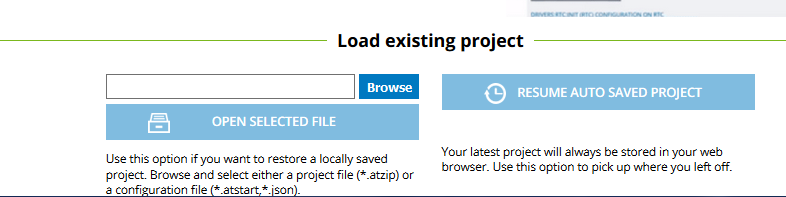
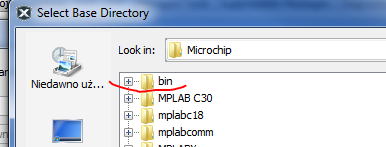
I could save/ load configuration file - "Load existing project"
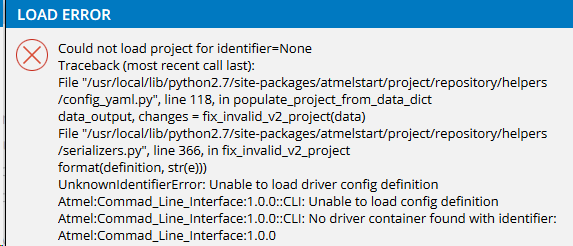
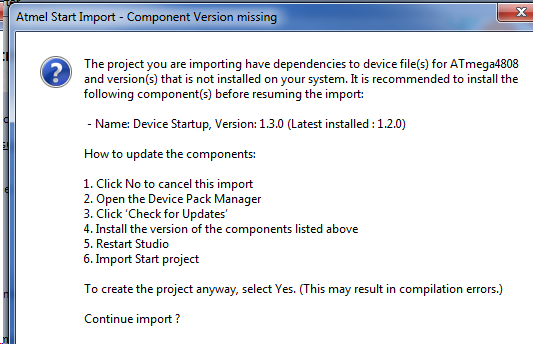
Sometimes I got some errors
- mostly the version mismatch issues etc...
Could not load project for identifier=None
Traceback (most recent call last):
File "/usr/local/lib/python2.7/site-packages/atmelstart/project/repository/helpers/config_yaml.py", line 118, in populate_project_from_data_dict
data_output, changes = fix_invalid_v2_project(data)
File "/usr/local/lib/python2.7/site-packages/atmelstart/project/repository/helpers/serializers.py", line 366, in fix_invalid_v2_project
format(definition, str(e)))
UnknownIdentifierError: Unable to load driver config definition Atmel:Commad_Line_Interface:1.0.0::CLI: Unable to load config definition Atmel:Commad_Line_Interface:1.0.0::CLI: No driver container found with identifier: Atmel:Commad_Line_Interface:1.0.0
I got similar errors also with “foreign” projects or projects from previous version
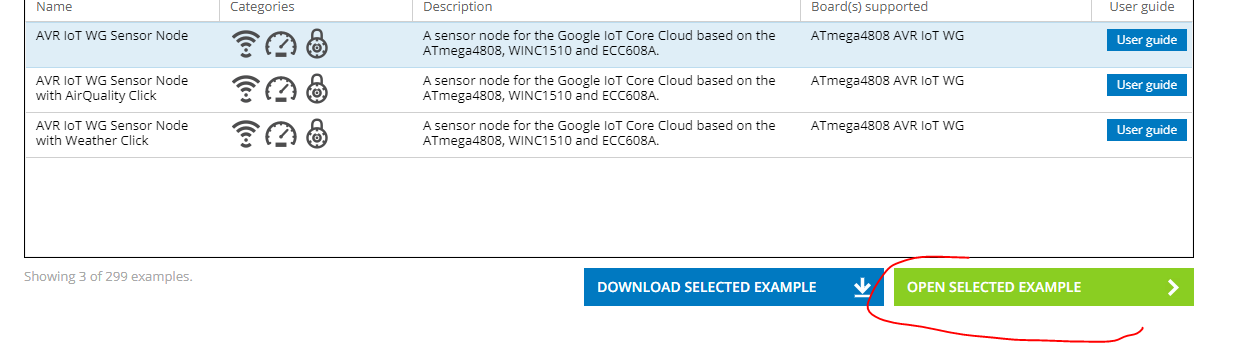
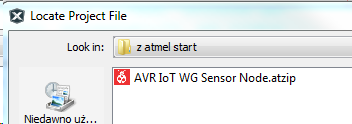
At the end of the above operations I got the file:
AVR IoT WG Sensor Node.atzip
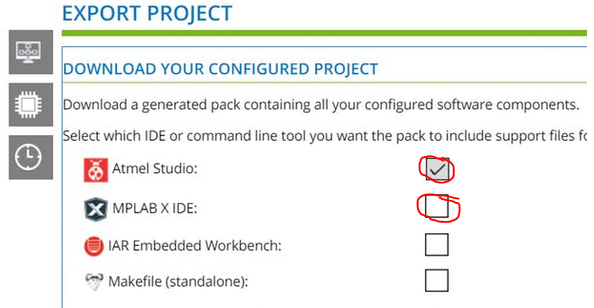
The AVR-IoT board is supported by two popular and advanced Integrated Development Environments (IDEs)
- Atmel Studio
and Microchip MPLAB® X IDE
I decided to avoid (boring) description of installation of software used to program the device.
I have Microchip's MPLAB X with its compilers instaleed and used sucessfully from years.
Nevertheless the basic version of that suite is free, easy to get on Michrochip site and user friendly during installation.
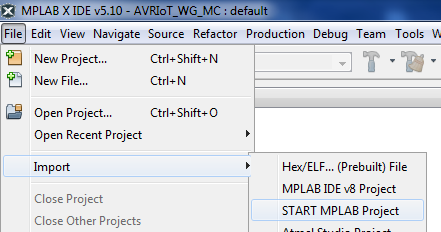
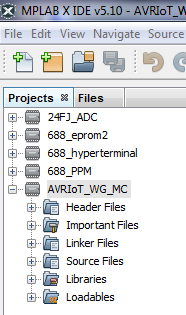
now: try to import the new project to the MPLAB X
The chip was "imported" properly:
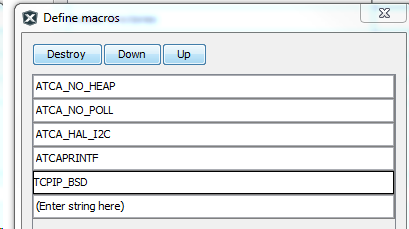
According to the NOTICE from the Atmel START user guide
I had to add
"ATCA_NO_HEAP;ATCA_NO_POLL;ATCA_HAL_I2C;ATCAPRINTF;TCPIP_BSD"
to project settings
->XC8 Compiler->Preprocessing and messages->Define macros.
And also
"-Wno-pragmas"
to XC8 Global options>additional options
moreover:
The project needs to be compiled in "-Os" optimization which needs a licensed version.
errors of build using the XC8 compliler in MPLAB X after import the project from the Atmel START
#pragma pack(pop, ATCAPacket)
^
In file included from cli/cli.c:37:0:
cli/../mqtt/mqtt_core/mqtt_core.h:319:34: error: unknown type name 'mqttContext'
mqttCurrentState MQTT_Disconnect(mqttContext *mqttContextPtr);
^
cli/../mqtt/mqtt_core/mqtt_core.h:320:43: error: unknown type name 'mqttContext'
mqttCurrentState MQTT_TransmissionHandler(mqttContext *mqttContextPtr);
^
cli/../mqtt/mqtt_core/mqtt_core.h:321:40: error: unknown type name 'mqttContext'
mqttCurrentState MQTT_ReceptionHandler(mqttContext *mqttContextPtr);
...
cloud/crypto_client/crypto_client.c:35:2: error: #error : This project uses CryptoAuthLibrary V2. Please add "ATCA_NO_HEAP" to toolchain symbols.
#error : This project uses CryptoAuthLibrary V2. Please add "ATCA_NO_HEAP" to toolchain symbols.
^
cloud/crypto_client/crypto_client.c:39:2: error: #error : This project uses ATCA_NO_POLL option. Please add "ATCA_NO_POLL" to toolchain symbols.
#error : This project uses ATCA_NO_POLL option. Please add "ATCA_NO_POLL" to toolchain symbols.
BUILD FAILED (exit value 2, total time: 13s)
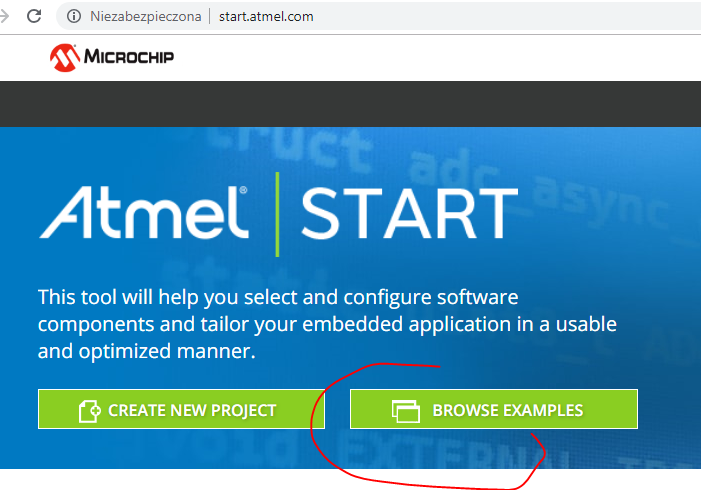
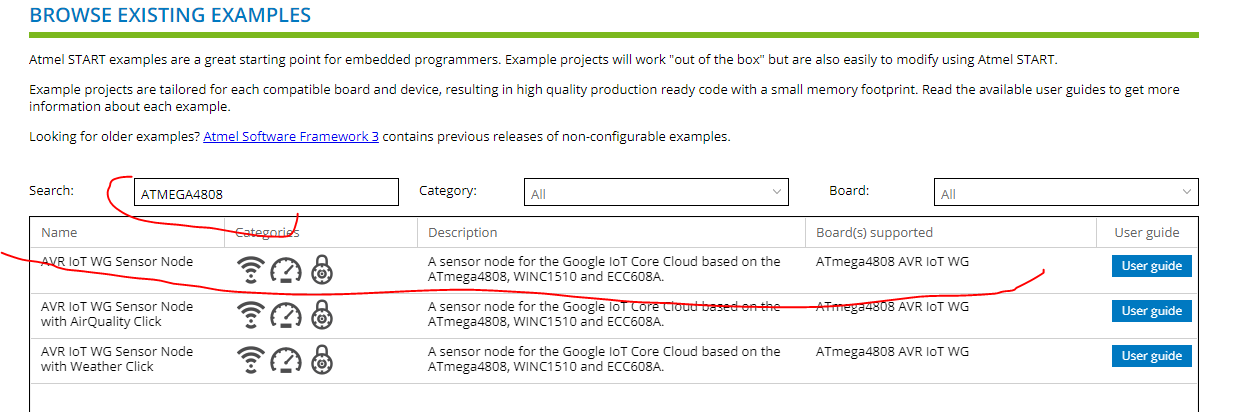
Attempt to use the Atmel START (http://start.atmel.com/) failed
and the exported project couldn't be compiled in mplabX.
after the struggle with AVR-GCC compiler toolchain connection with MPLAB X
- The simple steps condusted according to the microchip instructions failed... - It's described some lines below.
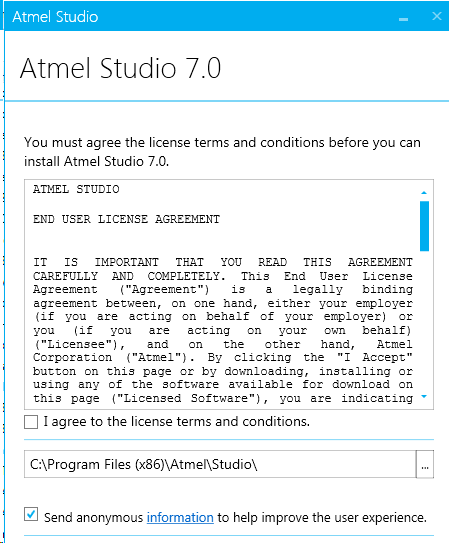
I decided to install the whole ATMEL STUDIO.
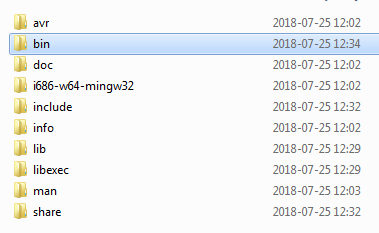
After embedding avr-gcc-toolchain


BUILD SUCCESSFUL (total time: 18s)
Loading code from C:/ ... /MPLABXProjects/AVR_IoT_WGSN_AtmStrt.X/dist/Default/production/AVR_IoT_WGSN_AtmStrt.X.production.hex...
Configuration Bits: address 0x821282: FREQSEL = 0 does not match any valid value in the device database.
Setting to the default value.
Configuration Bits: address 0x83128A: LB = 0 does not match any valid value in the device database.
Setting to the default value.
Loading completed
I also succeed to compile the project preparing it from the beginning in mplab X.
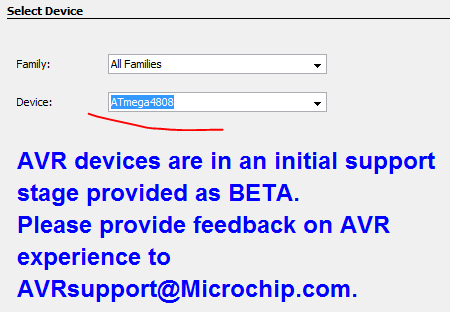
Creating the project "from the beginning" in the MPLAB X
we choose ATmega4808:
our board is visible here:

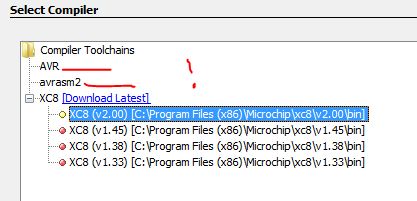
XC8 v2 was "onboard" - installed previously
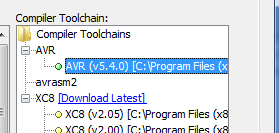
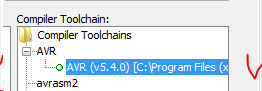
I decided to add the AVR-gcc - to compare compilers capabilities etc...
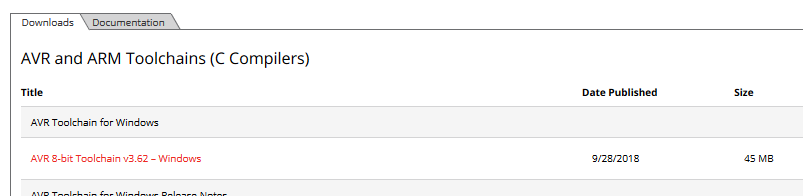
https://www.microchip.com/mplab/avr-support/avr-and-arm-toolchains-c-compilers
Avr8-gnu-toolchain-3.6.2.1759-win32.any.x86.zip
According to the picture below, the GCC compiler is available now:
NOW -

The latest source code for AVR-IoT WG Development Board (which uses ATmega4808) is available in MPLAB Code Configurator (MCC):
https://www.microchip.com/mplab/mplab-code-configurator,
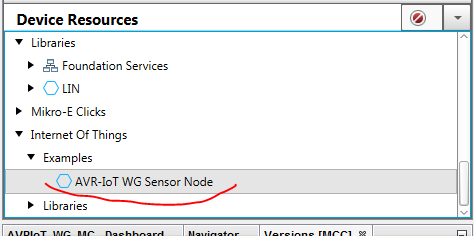
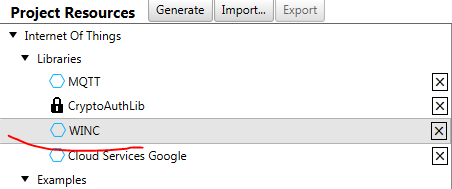
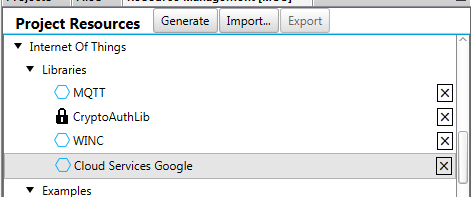
MCC is available as a plugin in MPLAB X. In MCC, the user needs to navigate to
Device Resources -> Internet Of Things -> Examples and double click on 'AVR-IoT WG Sensor Node' to add it to 'Project Resources'.
The complete source code (with hardware peripherals configured for the AVR-IoT WG Development Board) will be generated on clicking the 'Generate' button in MCC.
now change:
into:
changed to my individual project names:
ramained intouched!
GENERATE NOW
17:44:30.498 INFO: Fetching list of available libraries.
17:44:30.869 INFO: Download Complete: ..............\.mcc\en586797.xml
17:44:52.340 INFO: Start MCC
17:44:52.601 INFO: Core v4.65 loaded.
17:44:52.609 INFO: Libraries defined in the configuration:
17:45:52.429 INFO: Saved configuration to file ...........\MPLABXProjects\AVR_4808_moj1.X\MyConfig.mc3
@@@@@@@@@@@@@@@@@@@@@@@@@@@@@@@@@@@@@@@@@
18:02:49.019 INFO: Saved configuration to file ..........\MPLABXProjects\AVR_4808_moj1.X\MyConfig.mc3
@@@@@@@@@@@@@@@@@@@@@@@@@@@@@@@@@@@@@@@@@
19:03:29.342 INFO: Saved configuration to file ..........\MPLABXProjects\AVR_4808_moj1.X\MyConfig.mc3
@@@@@@@@@@@@@@@@@@@@@@@@@@@@@@@@@@@@@@@@@
19:03:41.213 INFO: ...nerated_files\winc\spi_flash\source\spi_flash.c Success. New file.
19:03:44.782 INFO: *****************************************************
19:03:44.782 INFO: Generation complete (total time: 15437 milliseconds)
19:03:44.782 INFO: *****************************************************
19:03:44.783 INFO: Generation complete.
19:03:44.910 INFO: Saved configuration to file .............\MPLABXProjects\AVR_4808_moj1.X\MyConfig.mc3
19:06:01.167 INFO: Saved configuration to file .............MPLABXProjects\AVR_4808_moj1.X\MyConfig.mc3
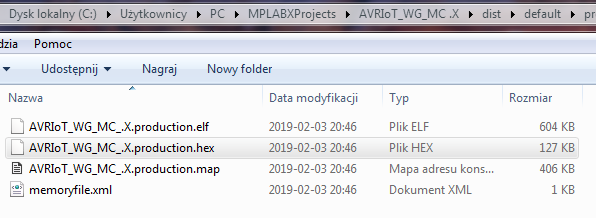
The project compiles without any problem with XC8
as the result I got binary file here:
I had serrious issues trying to use gcc compiler
build/default/production/att13Anewmain.o att13Anewmain.c -DXPRJ_default=default
nbproject/Makefile-default.mk:116: recipe for target 'build/default/production/att13Anewmain.o' failed
make[2]: Leaving directory '............../MPLABXProjects/attiny13A_test1.X'
nbproject/Makefile-default.mk:90: recipe for target '.build-conf' failed
make[1]: Leaving directory '.................MPLABXProjects/attiny13A_test1.X'
nbproject/Makefile-impl.mk:39: recipe for target '.build-impl' failed
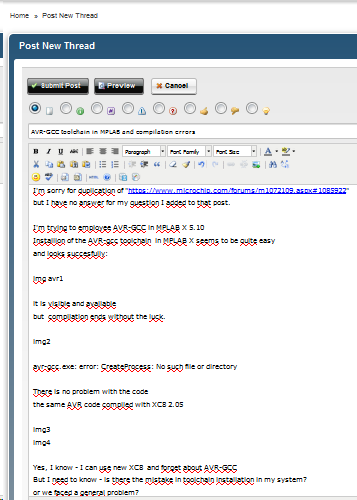
avr-gcc.exe: error: CreateProcess: No such file or directory
make[2]: *** [build/default/production/att13Anewmain.o] Error 1
make[1]: *** [.build-conf] Error 2
make: *** [.build-impl] Error 2
BUILD FAILED (exit value 2, total time: 323ms)
I tried to solve the problem
I knew I'm not the first faced similar issue:
https://www.microchip.com/forums/m1072109.aspx#1085922
I decided to continue that subjest on the microchip forum and alsu add the new post concerning gcc toolchain
https://www.microchip.com/forums/m1087155.aspx
Unfortunatelly I didn't get any advice.
Finally I decided to install ATMEL STUDIO
Now I managed to build the imported project using Atmel studio...
some fine tuning was necessary:
building the project
was sucessfull
moreover:
I realized that gcc toolchain form installation above works properly as the gcc compiler in MPLAB X.
I was able now to build AVR-IOT projects using MPLAB X with both compilers"XC8 and AVR-GCC.
After simple drag and drop of my binary file (my firmware) into the CURIOSITY folder
I found above view on the dashboard
and after the while- charts known from the original firmware:
Unfortunately the communication was extremely unstable.
It was strange - and concerned only instability of connection with my “own” program prepared according to Leverege instructions .
I tested two ways - using ready to use Atmel-Start example and building “from the beginning” using MPLAB-X and MCC.
After upload, the “firmware” It disconnects often - sometimes restores to work for the while or get lost at all!
To avoid notices about my WiFi connection reliability I must ensure, the WLAN’s are sufficient enough, the board works fine with original firmware/ software.
I checked it with two WLAN's - everything went fine with "base" [AVR-IoT_WG_Sensor_Node_v1.0.3.hex] and also “fresh” [v1.1.0] firmware.
After clicking "CLICK-ME.HTM" dashboard on https://avr-iot.com/device/---- is alive and online full time.
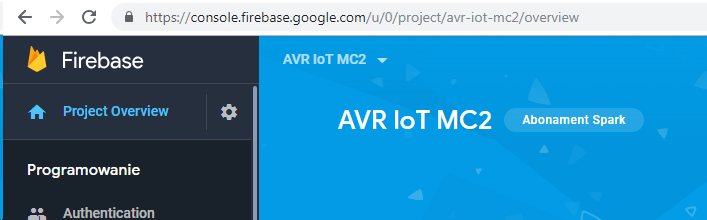
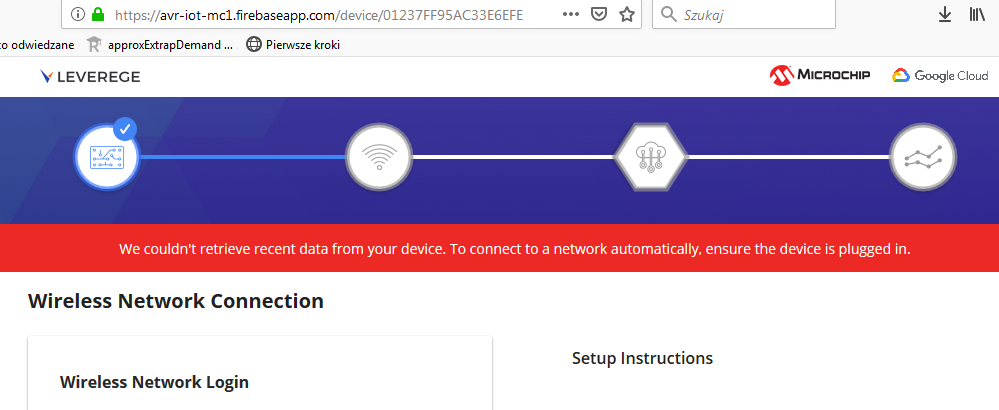
Unfortunately after putting my ".hex" (nothing beyond the example from manual) into the board, after move to my dashboard at https://avr-iot-mc1.firebaseapp.com/device/0123...
it catches the connection for a moment to lose it soon.
I checked - this is not a problem with my WLAN, in many places and with different routers the issue repeats!
Above - very rare screen in my case at these days
I was told about the UI feature, which expects a constant flow of data,and would show the “connection page” if it doesn't receive data for 15s or longer.
But I didn’t change data flow parameters I suppose “my” firmware broadcasts data as frequently as “original”,
I was suggested to adjust the maxDataAge variable in the UI source code but, honestly, I’m afraid that parameter is unavailable in our standard project.

Powering question investigations
I conducted my basic experiments supplying the board using USB cable connected to the computer as well as using external (micro) USB supply.
That method appear to me as quite stable, nevertheless I observed once or twice curious (sic!) switching off the board (communication) with only red led lighting.
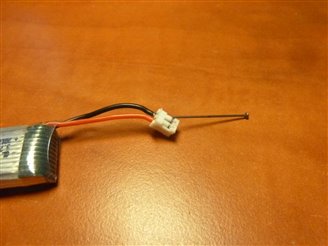
I decided to use and test battery supply option of the board.
Thanks to reading about that subject on microchip and AVR forum I found, that I need to be carry about the polarization of the battery.
That post helped me to avoid serious issue, maybe saved from destroying supply section even...
https://www.avrfreaks.net/forum/avr-iot-wg-battery-charger-problem?skey=AVR%20IoT%20WG

above attempt to use the simple LiPo battery from the ordinary toy

WRONG POLARITY!!!
let's fix it as simple as possible:
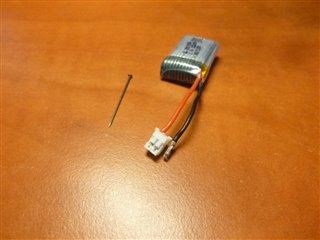

it works now!
Charging:

almost charged

fully charged:

using the battery I suffered more often, mentioned above issue with "sleeping" the unit after relative short working period.
The only solution was brutally restart (disconnect/connect the battery)
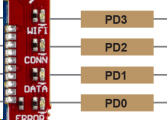
Using my experience from PIC- related projects I wanted to quickly extend it using our board.
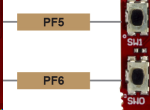
Except I/O available on CURIOSITY/ MIKROELEKTRONIKA form factor connectors
I wanted to use onboard switches and LEDS.
I need to express my confuse...
as most of that (indeed) simple projects failed...
I humble admit it must have been my fault and I should improve codes
nevertheless that stage isn't successful yet...
Also in that point some modesty was necessary...
I’m not a hacker but I imagined to find some examples and try to experiment with the board in the security field
Unfortunately that remains as the open question I didn't find the way to break ATECC608A
Anyway attempt to play with it is still challenging for me...
...and
Mechanical issues -
The quality of the product from the designing/ electric and mechanical point of view
based on my experience - is great
I didn't experiment with MIKROELEKTRONIKA modules together with AVR-IoT but I checked possibilities of connecting these modules
using interface with suitable form factor
- fully compatible with CURIOSITY modules.
I didn't find any cons regarding board quality.
Reliable, aesthetic but elegant, quite handy
with many advantages mentioned in chapters above.
After relative (too) long time of dealing with AVR-IoT WG board,
spending several hours configuring and experimenting with Google Cloud Shell scripts
and ATMEL START /ready to use/ examples
as well as "self prepared" MPLAB/ MCC project
I feel obliged to put some words as the summary.
At the final stage of that roadtest I have quite different feelings as in the middle of my work...
Let's explain my hesitations...
Neglecting the enthusiasm at the beginning when except difficulties with start up communication, it worked according to the manual and takes "30 seconds to run"
I experienced lot of troubles trying to implement Leverege instruction of prepare of individual project/ firmware...
I tried to described it before. It's pity that stupid misunderstanding related to Google Cloud billing issue costed as many time and emotions.
Happily, everything works correctly now!
I feel quite comfortable navigating through the software (MPLAB X +MCC or ATMEL)
Also GCS configuration isn't the mystery anymore!
Nevertheless I still remember my hesitation when installing the soft, doubts when the editing issued cause errors in GC Shell and communication was lost.
Possibilities of the board especially regarding IoT security are outstanding indeed! I haven't even used few percent of its functionality.
I focused on start fluent communication but the tool is extremely universal.
The AVR-IoT WG is powerful equipment providing support for your project.
Having skills and experience you can take on many challenges from the realm of IoT.
The open question is the price.
I, personally use cheap ESP modules. It mostly provide the same basic IoT features...
But as I said... basic...
And the last CONs...
The Google Cloud is free ... as the trial for first 365 days...
thanks for reading
Marek