RoadTest: Cypress PSoC 62S2 Wi-Fi & BT5.0 Pioneer Dev Kit
Author: shivamgpl8824tiwari
Creation date:
Evaluation Type: Development Boards & Tools
Did you receive all parts the manufacturer stated would be included in the package?: True
What other parts do you consider comparable to this product?: Texas Automotive MCU CC2642R-Q1 are close to PSOC6
What were the biggest problems encountered?: Support And Code Example
Detailed Review:
Road Test outline:
My goal for this road test is to give you an overview of the PSoC 62S2 Wi-Fi BT Pioneer Kit. I'll focus on how an i use the board boards for making different types of projets and connecting it with ModusToolbox Software that you might be considering as an alternative of PSOC Creator. I've worked with development boards on my JOB. PSoC 62S2 Wi-Fi BT Pioneer Kit designed for High Performance application and also provides Different types of connectivity options. I also find that how well the board is supported is significant. Are there good examples? Can you find a Board Support Package so you can work with different types of PSOC development kits.I feel these are the things that will make the difference between hitting the ground running with your design and struggling with the tools at hand.
Unboxing:
The CY8CKIT-062S2-43012 PSoC 62S2 Wi-Fi BT Pioneer Kit has the following contents

Hardware Description:
Block Diagram of Pioneer Board:


ModusToolbox is a set of multi-platform development tools and a comprehensive suite of GitHub-hosted firmware libraries. Together, they enable an immersive development experience for customers creating converged MCU and Wireless systems.The firmware libraries comprise easily customizable Board Support Packages (BSP) for Infineon MCUs and Bluetooth SoC (20xxx) kits, a comprehensive set of middleware libraries - enabling industry-leading features such as CapSense®, Bluetooth Low Energy and Mesh, and the lowest-power, most reliable Wi-Fi on the market - plus an impressive set of thoroughly tested and amazingly helpful code example applications.
Documentation & Tool Links-
To access some doc you need to create account and login first
Cypress Developer Community 3.0 Web Site (https://community.cypress.com/welcome
PSoC®62S2 WiFi-BT Pioneer Kit Web Site (https://www.cypress.com/documentation/development-kitsboards/psoc-62s2-wi-fi-bt-pioneer-kit-cy8ckit-062s2-43012)
PSoC®62S2 WiFi-BT Pioneer Kit Guide (Cypress Semi Doc 002-28109, Rev *E – 02/11/20) NOTE: “User’s Guide”; (https://www.cypress.com/file/487006/download)
PSoC®62S2 WiFi-BT Pioneer Kit Quick Start Guide (Cypress Semi Doc 002-28145, Rev *B – 12/29/2019) (https://www.cypress.com/file/487011/download)
MuRata Type 1LV CYW43012 Website (https://wireless.murata.com/type-1lv.html)
MuRata Type 1LV CYW43012 WiFi+Bluetooth Combo Module Data Sheet (MuRata Doc SP-9B1LV-M, Rev M – 11/21/2019) (https://wireless.murata.com/datasheet?/RFM/data/type1lv.pdf)
CYW43012 Single-Chip Ultra-Low Power, IEEE 802.11n, 802.11ac-friendly MAC/Baseband/Radio with Bluetooth 5.0 (Cypress Semi Doc 002-18925, Rev *M – 6/30/2020); (http://www.cypress.com/file/497511/download)
Cypress GitHub Server (https://github.com/cypresssemiconductorco)
Cypress ModusToolbox Home Page https://www.cypress.com/products/modustoolbox-software-environment
Cypress ModusToolbox Installation Guide (Cypress Semi Doc 002-22556, Rev *L) (https://www.cypress.com/file/512706/download)
Cypress ModusToolbox 2.2 User Guide (Cypress Semi Doc 002-29893, Rev *G) (https://www.cypress.com/file/512716/download)
Cypress ModusToolbox AnyCloud User Guide (Cypress Semi Doc 002-30738, Rev *A), (https://www.cypress.com/file/509821/download)
Cypress ModusToolbox Software GitHub Repository, (https://github.com/cypresssemiconductorco/modustoolbox-software)
Cypress Code Examples for Modus Toolbox Software GitHub Repository, (https://github.com/cypresssemiconductorco/Code-Examples-for-ModusToolbox-Software)
Cypress Programmer Home Page (https://www.cypress.com/products/psoc-programming-solutions)
Cypress Programmer GUI User Guide (Cypress Semi Doc 002-25230, Rev *D) (https://www.cypress.com/file/451356/download)
Cypress KitProg3 User Guide (Cypress Semi Doc 002-24616, Rev *L) (https://www.cypress.com/documentation/development-kitsboards/kitprog-user-guide)
Modus IDE Installation and Board Setup and starting with first blink project:
Back to the only example in the user manual, Hello World. First open the ModusToolbox and select the workspace directory. The default base directory is <user_dir>/mtw.

Click “New Application” in the Quick Start panel to bring up Project Creator 1.2. Project Creator goes through specifying your hardware base as defined by your dev kit or MCU. The panel on your right outlines a brief description of the selected H/W platform. By clicking next


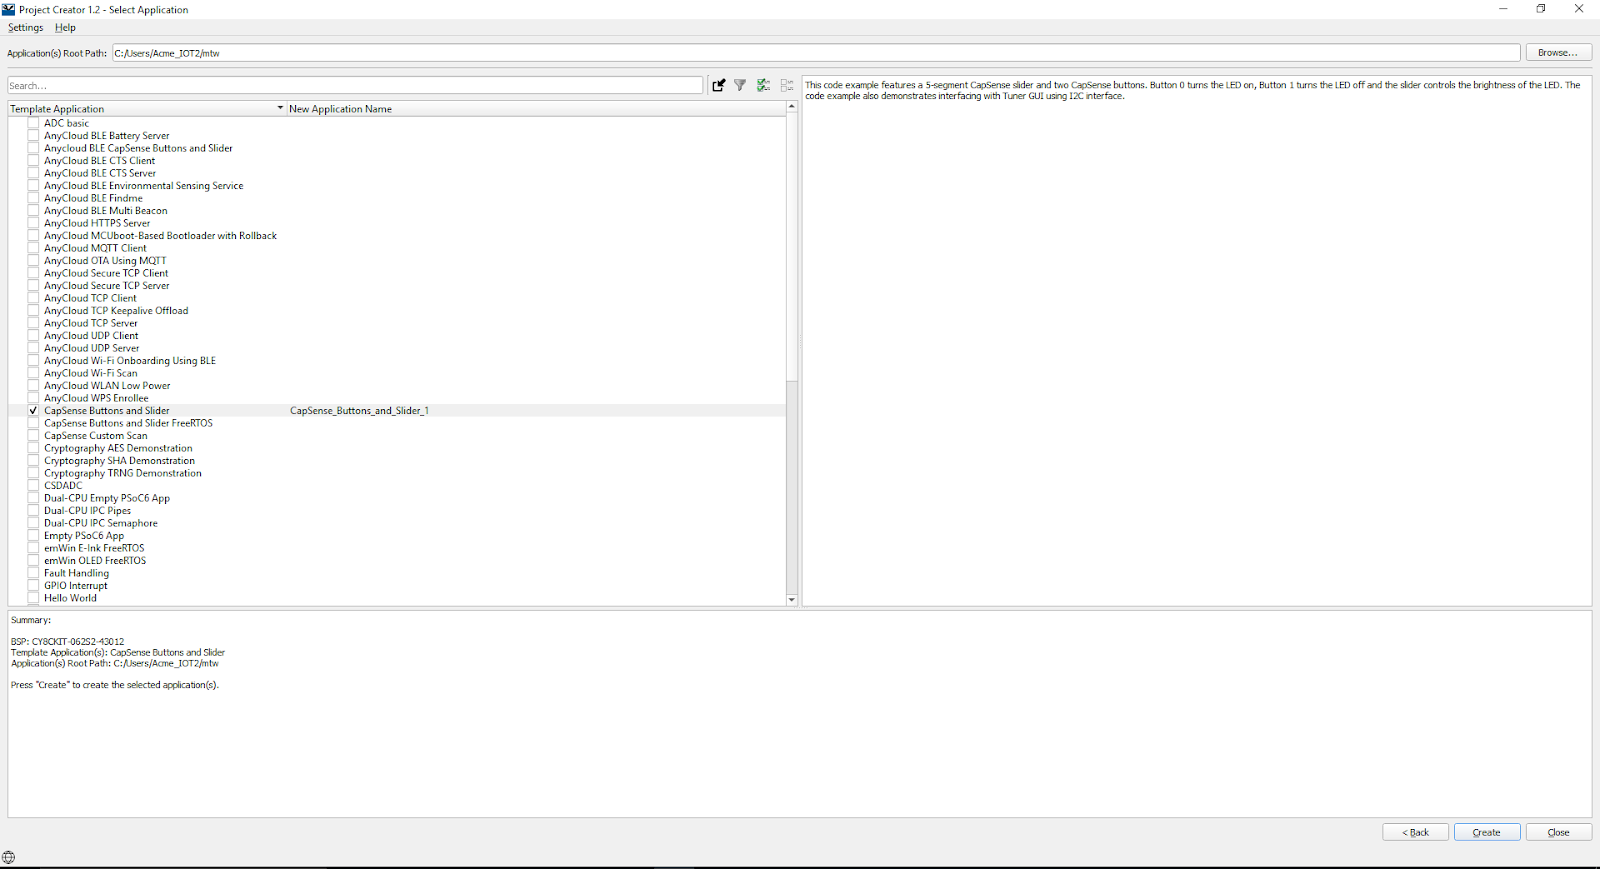
The next Project Creator window will display the list of available examples in your solution collection under Template Application. The brief summary of each example is displayed in right sight of the template example application window This is important because some examples require addition resource before they can be build and/or run. For the user manual example, check the “Hello World” and then click [Create] to start the process. The process downloads the latest source code and dependencies.


The read.me tab gives the complete description about the example project and step by step procedure that how to go through for evaluating the example


The code first initialize the board and all global interrupts
int main(void)
{
    cy_rslt_t result;


    /* Initialize the device and board peripherals */
    result = cybsp_init();

    /* Board init failed. Stop program execution */
    if (result != CY_RSLT_SUCCESS)
    {
        CY_ASSERT(0);
    }


    /* Enable global interrupts */
    __enable_irq();


    /* Initialize retarget-io to use the debug UART port */
    result = cy_retarget_io_init(CYBSP_DEBUG_UART_TX, CYBSP_DEBUG_UART_RX,
                                 CY_RETARGET_IO_BAUDRATE);


    /* retarget-io init failed. Stop program execution */
    if (result != CY_RSLT_SUCCESS)
    {
Code initialize retarget.io to monitor the keyboard input
result = cy_retarget_io_init(CYBSP_DEBUG_UART_TX, CYBSP_DEBUG_UART_RX,
                                 CY_RETARGET_IO_BAUDRATE);


    /* retarget-io init failed. Stop program execution */
    if (result != CY_RSLT_SUCCESS)
    {
        CY_ASSERT(0);
    }
/* Initialize the User LED */
    result = cyhal_gpio_init(CYBSP_USER_LED, CYHAL_GPIO_DIR_OUTPUT,
                             CYHAL_GPIO_DRIVE_STRONG, CYBSP_LED_STATE_OFF);


    /* GPIO init failed. Stop program execution */
    if (result != CY_RSLT_SUCCESS)
    {
        CY_ASSERT(0);
    }
For building the application go to quick start> under the the project name >Build Hello_world Application

After the download is complete, highlight the <project name> in the Explorer section, then scroll the Quick Start section until your find <project_name> Program (KitProg3_MiniProg) and highlight it to start the build.
When the build is complete the firmware is automatically loaded to the board.

To add debugger to the board go through Launches > Hello_World Debug(KitProg3_MiniProg4)

Final to verify the firmware, open your terminal (i.e. Tera Term, etc.) and press the reset (XRES – SW1) button on the board to display the output


If you have already build your code and just want to load it to your board, you can use the Cypress Programmer to accomplish the task.

To configure the device according to your uses and application launch Device Configuration from tool window

For peripheral configuration

Analog comparator0 configuration:

To communicate different sensor and Hardware Communication port should be intelligently configured


Pin Mapping and configuration:

Configure system and different Power:

Peripheral clock divider selection:

DMA Controller and DMA data0 and datawire1 configure:

Wifi and Bluetooth configuration setup:

Capsence Test of PSoC 62S2 Wifi BT Pioneer Dev Kit
CapSense is a Cypress capacitive sensing solution. Capacitive sensing can be used in a variety of applications and products where conventional mechanical buttons can be replaced with sleek human interfaces to transform the way users interact with electronic systems. These include home appliances, and automotive, IoT, and industrial applications. CapSense supports multiple interfaces (widgets) using both CSX and CSD sensing methods with robust performance.
Use CapSense for:
The CSD HW block enables multiple sensing capabilities on PSoC devices including self-cap and mutual-cap capacitive touch sensing solution, a 10-bit ADC, IDAC, and Comparator. The CSD driver is a low-level peripheral driver, a wrapper to manage access to the CSD HW block. Each middleware access to the CSD HW block is through the CSD Driver.
The CSD HW block can support only one function at a time. However, all supported functionality (like CapSense, ADC, etc.) can be time-multiplexed in a design. I.e. you can save the existing state of the CapSense middleware, restore the state of the ADC middleware, perform ADC measurements, and then switch back to the CapSense functionality.
Capsence block Diagram:
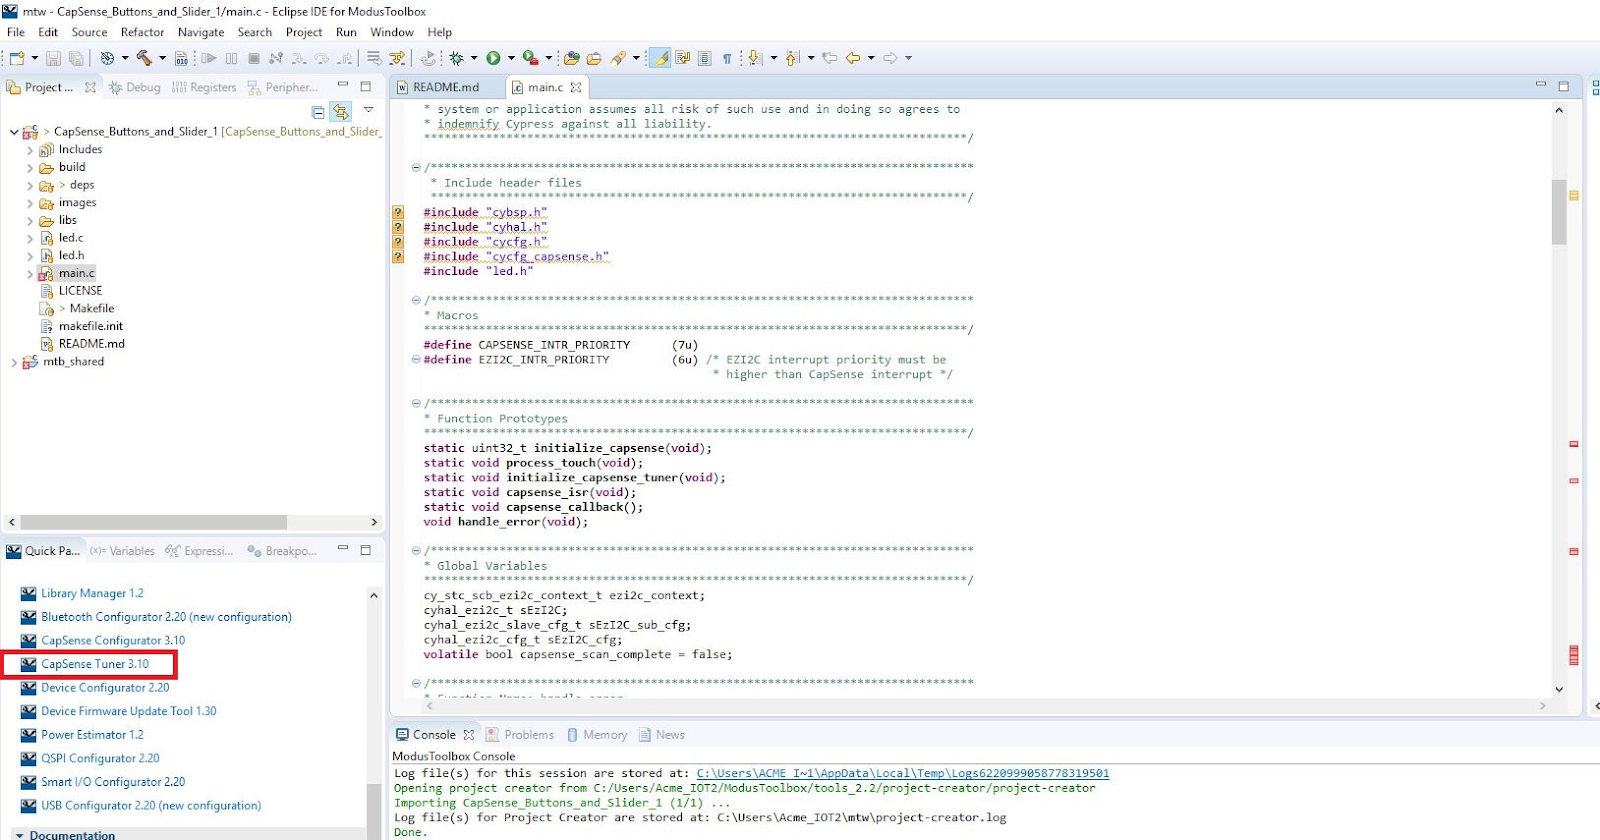
Click on your project >Tools > Launch> Capsence tuner
In communication setup goto Tools>Communication setup and select I2C commucation
Noise o CSB(TX0) and TX1 pad
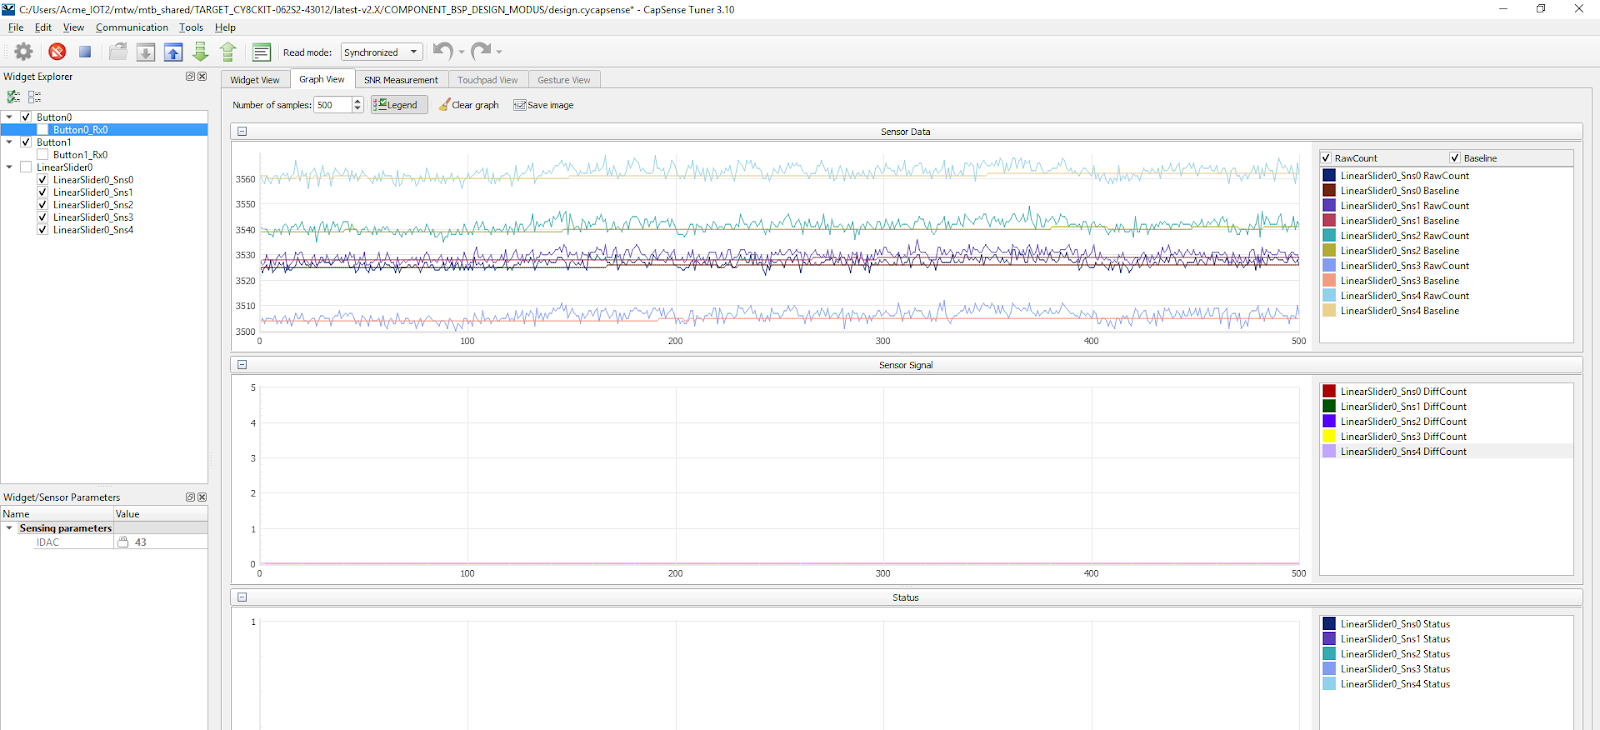
Base Noise on slider
Button Response of Tx0 and Tx1
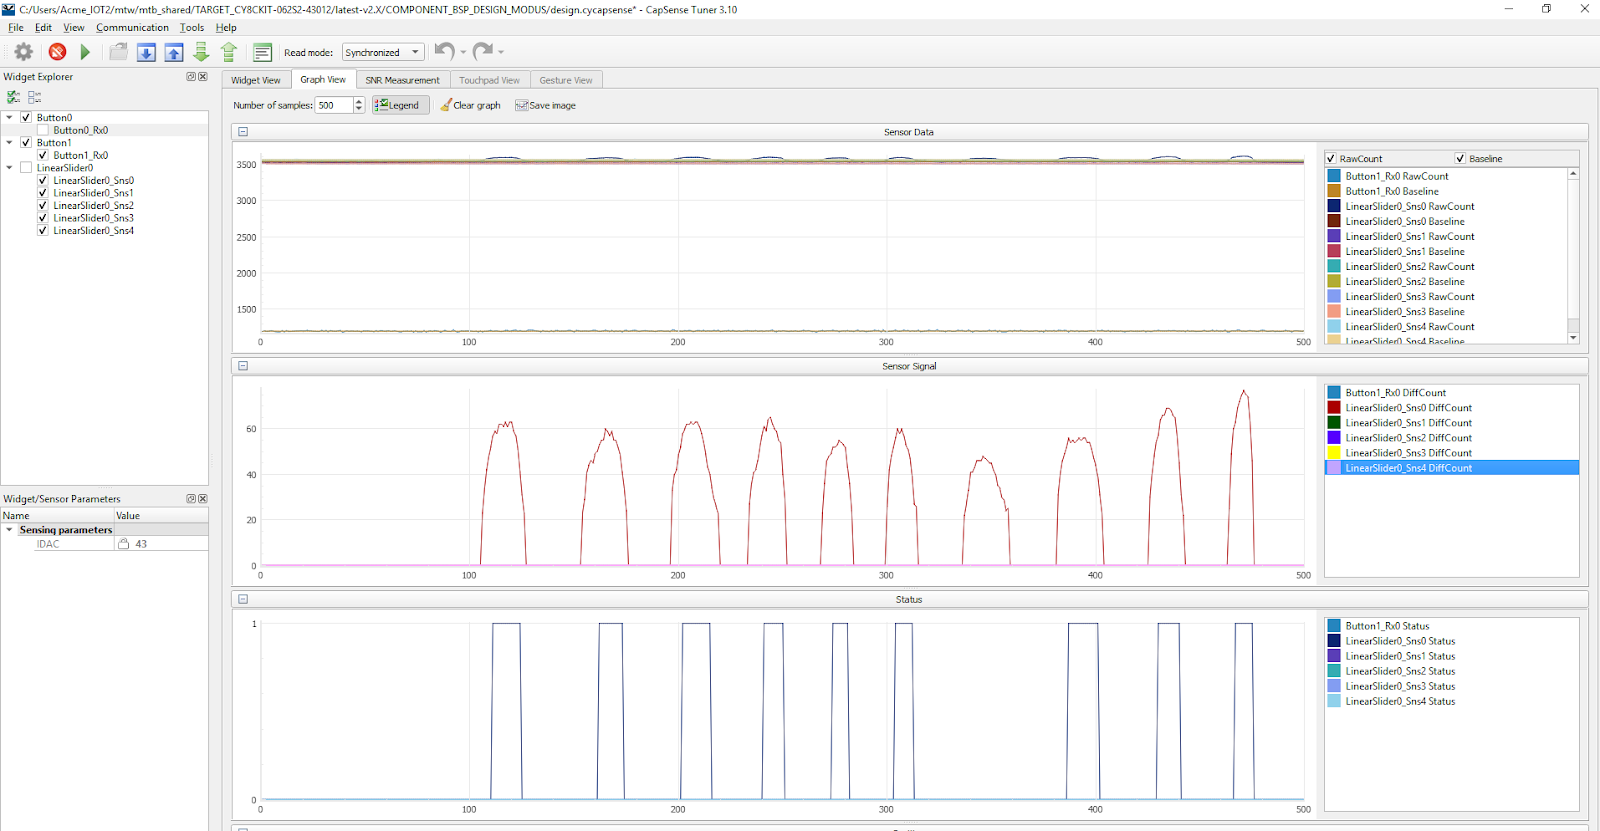
Linear Slider Response From SnS0 to SnS4
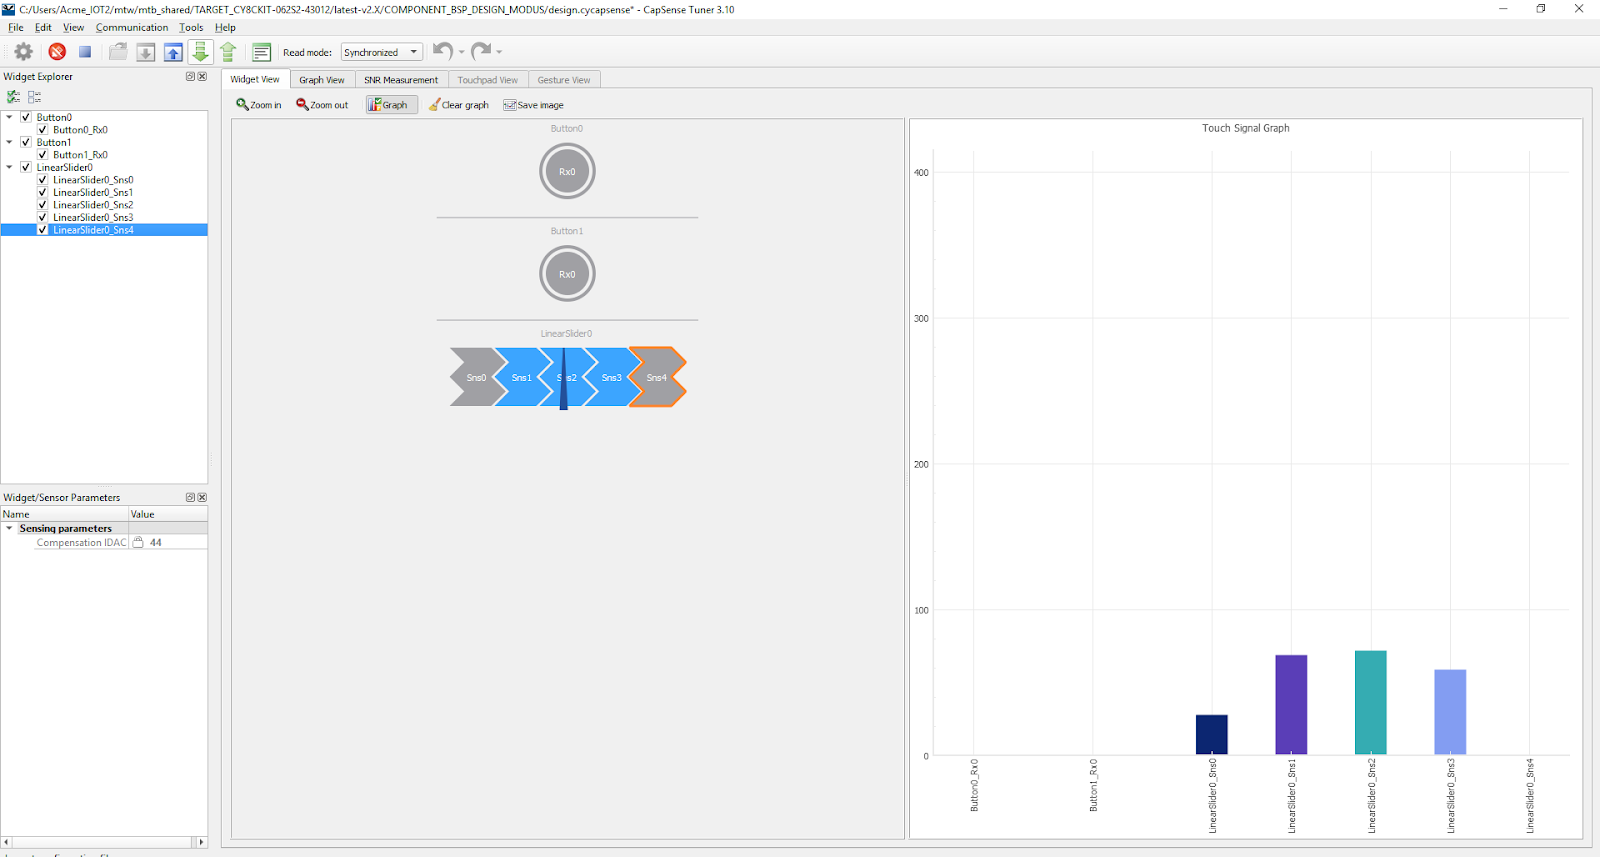
Widget view of slider button response
SNR Measurement of BTN0
SNR Measurement of Linear_SliderSns0
BTN0 Excellent noise immunity with wet hand and water drop on touch pad
Touch Sliders also have good noise immunity with wet hand and water splash
With Water drop on sliders it showing slide movement on slider which is not very good
What I did not tried:
As I have mentioned in my application to build a cattle monitoring system for my farming land but due lack of support of HB100 radar sensor which I want to use in my
solution.
What’s next?
I would like to explore more of the examples solutions from the ModusToolbox collection for which I ran out of time.I will also build my project as i have submitted in my application if there is any support of HB100 radar sensor
I would still like to try some of the AnyCloud solutions, so stay tuned for an update. Hopefully Cypress will include their code examples and update documentation in the future.
Please forgive me if there is any mistake because this is my first roadtest on Element14.
Summary Conclusion –
My main goal is to "evaluate" the kit and develop the applications using the Cypress Semiconductor’s PSoC 62 Series microcontroller (MCU) and the new dual band 2.4/5.0 GHz WiFi & Bluetooth 5 module.
PSoC®62S2 WiFi-BT Pioneer Kit (CY8CKIT-062S2-43012) is highly configurable and well well suite IOT application, but PSoC®62S2 WiFi-BT Pioneer Kit (CY8CKIT-062S2-43012) does not supported in PSoC Creator and Modus is a middleware so PSoC creator is easy to use for beginner as well as experienced user
but Modus tool box is not very user friedly for beginners.
MCU of the device is so powerful so it can easily handle high end application .the device equipped with Wifi BT combochip which provides . Bluetooth includes Bluetooth 5 which gives low power and high range
PSoC 6 is built on an ultra-low power 40 nm process and uses as little as 22 uA/MHz in active power mode and 7 uA in deep sleep mode with 64 KB SRAM retention.
Programmable Analog pins are highly flexible and can be easily programmed and easily according to the application. 12 bit ADC Resolution is quite good but are not suitable for highly precise measurement like Electricity meters and RTD Sensors where much high accuracy is needed. resolution of ADC shuld be increased atleast 16 bit.
CapSense performance of the device is awesome and I am highly impressed with performance.