In this project, we use Digilent Pmods and Raspberry Pi 4 to measure the temperature, control the speed of a DC motor, display data, and control the device. Digilent Pmod HAT is used to connect Pmods to Raspberry Pi 4. The motor controller will have two modes: one in which the motor speed changes according to the temperature (in this mode temperature limits for 0% and 100% motor speed can be set on the user interface) and a second mode, in which the motor runs with a constant speed for a defined time, then it is stopped for the same time (in this mode, the motor speed and the time are the parameters controllable by the user). The user interface will be used to change modes.
Inventory
1. Hardware
- Raspberry Pi 4 Model B
- Pmod HAT Adapter
- Pmod TC1Pmod TC1
- Pmod HB3Pmod HB3
- Pmod KYPDPmod KYPD
- Pmod OLEDrgbPmod OLEDrgb
- Pmod TPH2Pmod TPH2
- a 5V DC motor
- MTE cables
- a small screwdriver (to fasten the bolts in the terminal blocks)
2. Software on Raspberry Pi
- Python 3 - this is preinstalled on the default Raspberry Pi OS
- Visual Studio Code - or any other text editor of your choice
Hardware Description
Pmod HAT - Connect Pmods to Raspberry PiThe Pmod HAT Adapter has five main connectors and three jumpers. On the top, the standard Raspberry Pi HAT connector can be found. The adapter has three 2x6 Digilent Pmod connectors (JA, JB, and JC) and each of them can also be used as two separate 1x6 Pmod connectors (for example JA can be separated to JAA and JAB). All the Pmod ports contain a ground and a 3.3V pin to supply power to the connected Pmod. In addition to the GPIO (General Purpose Input/Output) function, you can use JAA and JBA as SPI interface, JBB as the I2C interface, and JCA as UART interface. Pmod HAT also has a 5V input jack plug, jumpers enabling pull-up resistors on the I2C lines, and a jumper that enables writing to Pmods' internal memory. | 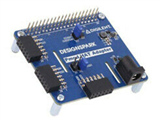 |
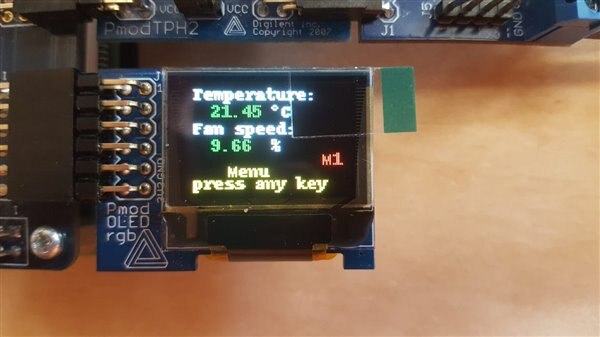
Pmod OLEDrgb - Display the temperature and motor speedThe Pmod OLEDrgb is a 96x64 pixel, organic RGB LED display with 16-bit color resolution. The module contains a display driver which communicates with host boards or systems through SPI and GPIO. For this project, we plug Pmod OLEDrgb to ports JA, or JB on the Pmod HAT Adapter which supports SPI communication. | 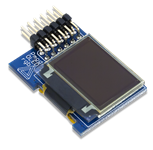 |
Pmod KYPD - Enter inputs and interface with the systemThe Pmod KYPD contains 16 momentary pushbuttons, arranged in 4 rows and 4 columns. By driving the column lines to a logic level low voltage one at a time, users may read the corresponding logic level voltage on each of the rows to determine which button, if any, is currently being pressed. The device communicates with Raspberry Pi via GPIO. We can connect it to any port on the Pmod HAT. |  |
Pmod TC1 - Measure the temperatureThe Pmod TC1 contains a K-type thermocouple wire and a cold-junction thermocouple-to-digital converter. The device can measure temperatures from -73°C to 482°C with ±2°C accuracy and returns a 14-bit signed digital value. Pmod TC1 is required to be connected to ports JAA, or JBA (the upper part of ports JA, or JB) on the Pmod HAT for SPI communication. |  |
Pmod HB3 - Drive the motorThe Pmod HB3 is an H-bridge DC motor driver, with an output of up to 12V and 2A. The device communicates with Raspberry Pi via GPIO. It can be connected to any port on the Pmod HAT Adapter. If a 5V motor is used, power to the motor could be supplied from one of the 5V PW pins of the Raspberry Pi, which are able to output around 2A, when the microcontroller has a proper power supply. | 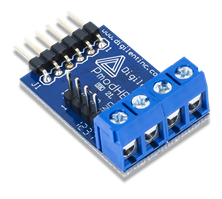 |
Pmod TPH2 - Connect the Pmod TC1 and Pmod HB3 to Pmod HATThe Pmod TPH2 is a 12-point test header. In this project, it can be used to break up one of the 2x6 Pmod ports of the Pmod HAT Adapter so that multiple Pmods can be connected to the same port (with the help of MTE cables). |  |
Raspberry Pi 4 model BAs the "brain" of the application, a Raspberry Pi 4 Model B is used, in a headless setup, with the recommended Raspberry Pi OS. You can use other Raspberry Pi models and OS which are able to run Python 3. The detailed presentation of how to install and set up the operating system is out of scope. You can find the detailed guide here. |  |
Hardware Setup
Both Pmod OLEDrgb and Pmod TC1 (with SPI interface) can only be connected to specific ports on Pmod HAT. Pmod OLEDrgb is connected to port JA while Pmod TC1 can only be connected to port JBA. Pmod KYPD is connected to port JC and the Pmod HB3 is to port JBB. Pmod TPH2 can be used to break out port JB so that the two Pmods (TC1 and HB3) can be connected to the same port. Connect the thermocouple wire and the motor to the respective terminal blocks. As mentioned above, you can power the motor directly from the Raspberry Pi. The attached Fritzing file shows the connection.

Software Setup
Firstly, you need to enable SPI and Serial Port on Raspberry Pi. Open a terminal, then type: sudo raspi-config
In the menu, select 3. Interface Options then select P4 SPI and enable it. Select Interface Options again, then select P6 Serial Port. The first thing that appears, the login shell, can be left disabled. You only need to enable the serial port hardware in the second prompt. | 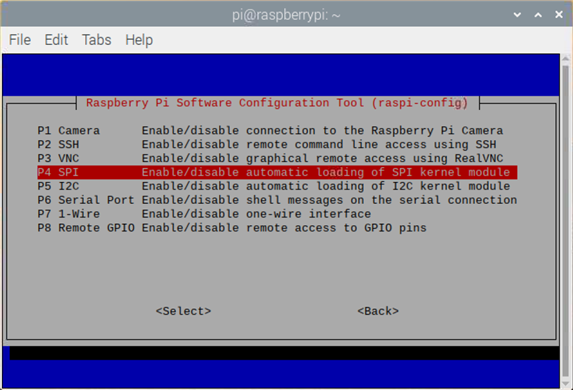 |
Next, you change the default Python version to Python 3.The recommended Raspberry Pi OS comes with both Python 2 and Python 3 preinstalled. Check the Python version with the following commands: python --version python3 --version
If the preinstalled Python 3 3.6 or before, you need to install a newer version through commands: sudo apt-get install python3.x where x is the version number. For example, we use Python 3.7 in this project (as this is the version preinstalled on the recommended Raspberry Pi OS). So, you will type sudo apt-get install python 3.7
To change the default python version to Python 3, run the following command: sudo update-alternatives --install /usr/bin/python python /usr/bin/pythonn3 1 Now Python 3 should appear as the default interpreter. python --version | 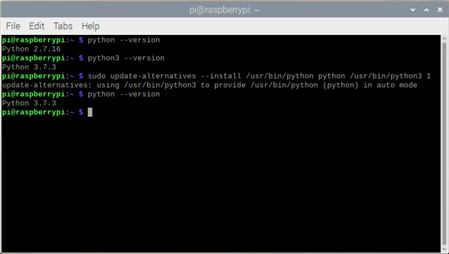 |
The last step is to install the required modules. For this, just type the following commands in the terminal:
sudo pip install designspark.pmod |  |
Code
1. fan_controller.py
The Python script consists of three modules: fan_controller.py, keypad.py and display.py. The fan_controller.py is the main module. In this module, first of all, we import all required libraries and modules and create a class, and define variables:
#!/usr/bin/env python


"""
The controller sets the speed of a fan according to temperature (mode 1),
or lets the fan run with a constant speed for a given time (mode 2).
Temperature is measured with Pmod TC1.
The motor is driven by Pmod HB3.
The user interface is realized with Pmod OLEDrgb and Pmod KYPD.
"""

# import necessary modules
from DesignSpark.Pmod.HAT import createPmod
from luma.core.render import canvas
from datetime import datetime, timedelta
import time

# import own modules
import display
import keypad

# create objects for each pmod
TC1 = createPmod('TC1', 'JBA')
HB3 = createPmod('HB3', 'JBB')
keypad.KYPD = createPmod('KYPD', 'JC')  # Pmod KYPD and Pmod OLEDrgb are
display.OLED = createPmod('OLEDrgb', 'JA')  # used in separate modules


class settings:
    """ this class contains "global variables" """
    TEMP_AVG = 500  # number of temperature measurements to average
    TEMP_MIN = 22.0  # temperature for 0% fan speed
    TEMP_MAX = 35.0  # temperature for 100% fan speed
    TIME_RUN = 15  # number of minutes to run (mode 2)
    CONST_SPEED = 75    # speed in mode 2
    MOTOR_REV = False  # reverse the rotation of the motor
    MODE = 1  # starting mode
Next, functions are defined. The four functions are action_M1(), which sets the motor speed according to the measured and averaged temperature, action_M2(), which the motor speed is set, then the function waits for the defined time (keypresses finish the function). The function set_param() sets a parameter and the function decode_key() decides which menu, or submenu to display on a keypress.
def action_M1():

    """ this is done in mode 1 """
    # get average temperature
    average_temp = 0.0
    for _ in range(settings.TEMP_AVG):
        average_temp = average_temp + TC1.readCelcius()
    average_temp = average_temp / settings.TEMP_AVG

    # calculate the speed from the temperature
    average_temp = average_temp - settings.TEMP_MIN
    max_temp = settings.TEMP_MAX - settings.TEMP_MIN
    if max_temp <= 0:
        max_temp = 1
    speed = 0
    if average_temp > 0:
        speed = average_temp * 100 / max_temp

    # limit the speed
    if speed > 100:
        speed = 100
    elif speed < 0:
        speed = 0

    # set the speed of the motor
    if settings.MOTOR_REV:
        HB3.reverse(speed)
    else:
        HB3.forward(speed)

    # display data
    display.data_M1(average_temp, speed, settings.TEMP_MIN,
                    settings.MODE)
    return


def action_M2():
    """ this is done in mode 2 """
    # calculate stop time
    stop_time = datetime.now() + timedelta(minutes=settings.TIME_RUN)

    # set motor speed
    if settings.MOTOR_REV:
        HB3.reverse(settings.CONST_SPEED)
    else:
        HB3.forward(settings.CONST_SPEED)

    # wait but check buttons
    try:
        # if the time didn't expire, continue
        while datetime.now() < stop_time:
            # display data in every iteration (the time will change)
            display.data_M2(settings.CONST_SPEED, stop_time -
                            datetime.now(), settings.MODE)
            # check for keypress
            if keypad.KYPD.getKey() != None:
                raise keypad.KeyPressed
            pass
    # on keypress, stop the motor and exit
    except keypad.KeyPressed:
        HB3.forward(0)
        return

    # calculate stop time
    stop_time = datetime.now() + timedelta(minutes=settings.TIME_RUN)

    # stop motor
    HB3.reverse(0)

    # wait but check buttons
    try:
        # if the time didn't expire, continue
        while datetime.now() < stop_time:
            # display data in every iteration (the time will change)
            display.data_M2(0, stop_time - datetime.now(), settings.MODE)
            # check for keypress
            if keypad.KYPD.getKey() != None:
                raise keypad.KeyPressed
            pass
    # on keypress, stop the motor and exit
    except keypad.KeyPressed:
        HB3.forward(0)
        return
    return


def set_param(text, unit):
    """ get a parameter and display it """
    # display a text to ask for the parameter
    display.require(text)
    # read the parameter
    parameter = keypad.get_param()
    # display the parameter
    display.parameter(text, parameter, unit)
    # wait for a button to exit
    keypad.wait_for_key()
    return parameter


def decode_key(stage, key=None):
    """ this is done, when a key is pressed """
    # skip the main menu, if the key was pressed,
    # when a submenu was displayed
    if stage == 0:
        # display the main menu
        display.menu()
        # wait for a keypress
        key = keypad.wait_for_key()

    # if "A" is pressed in the main menu, or mode 1 submenu
    # was requested
    if key == "A" or stage == 1:
        # set mode to 1
        settings.MODE = 1
        # display submenu for mode 1
        display.menu_M1()
        # wait for a keypress
        key = keypad.wait_for_key()
        # if "C" is pressed in the submenu
        if key == "C":
            # request and set the minimum temperature
            settings.TEMP_MIN = set_param("low temperature limit", "\xb0C")
            # go back to the mode 1 submenu
            decode_key(1)
        # if "D" is pressed in the submenu
        elif key == "D":
            # request and set the minimum temperature
            settings.TEMP_MAX = set_param("high temperature limit", "\xb0C")
            # go back to the mode 1 submenu
            decode_key(1)
        else:
            # go back to the main menu
            decode_key(0)

    # if "B" is pressed in the main menu, or mode 2 submenu
    # was requested
    elif key == "B" or stage == 2:
        # set mode to 2
        settings.MODE = 2
        # display submenu for mode 2
        display.menu_M2()
        # wait for keypress
        key = keypad.wait_for_key()
        # if "C" is pressed in the submenu
        if key == "C":
            # request and set the speed
            settings.CONST_SPEED = set_param("speed", "%")
            # go back to the mode 2 submenu
            decode_key(2)
        # if "D" is pressed in the submenu
        elif key == "D":
            # request and set the runtime
            settings.TIME_RUN = set_param("nr. of minutes", "min")
            # go back to the mode 2 submenu
            decode_key(2)
        else:
            # go back to the main menu
            decode_key(0)
    return
Now, we create the "chassis" of the script. It contains the main loop, in which keypresses are checked. If no key is pressed, the action of the current mode is executed. If a key is pressed, the motor is stopped and the key is decoded, the respective menu is displayed. When exiting the script, proper cleanup is necessary.
# main program

try:
    # setup
    keypad.KYPD.setKeyMapDefault()  # set default key map
    time.sleep(1)  # wait a second

    # main loop
    while True:
        # if no key was pressed
        if keypad.get_key() == None:
            # if the mode variable is 1
            if settings.MODE == 1:
                # call function for mode 1
                action_M1()
            # if the mode variable is 2
            elif settings.MODE == 2:
                # call function for mode 2
                action_M2()
        # if a key was pressed
        else:
            # stop the motor
            HB3.forward(0)
            # decode the key
            decode_key(0)

except KeyboardInterrupt:
    # exit on ctrl+c
    pass
finally:
    # close opened connections
    TC1.cleanup()
    HB3.cleanup()
    keypad.KYPD.cleanup()
    display.OLED.cleanup()
2. keypad.py
The module consists of an empty object (KYPD) which is initialized in the fan_controller.py, an exception type when a key is pressed (in mode 2). There are 4 functions: get_param() sets a new keymap and map letters to 0 and reads a two-digit number from the keypad; wait_for_key() is the debounced, blocking key reader function; get_key() is the debounced, non-blocking key reader; debounce() return every keypress only once. To return a keypress, the key must be released and is checked by validating 1000 consecutive "None" states of the keypad.
"""
This is the module containing keypad control functions
"""

# import necessary modules
from DesignSpark.Pmod.HAT import createPmod

# the KYPD object is needed in this module,
# but is initialized in the main program
KYPD = None


class KeyPressed(Exception):
    """This exception is raised when a key is pressed"""
    pass


def get_param():
    """ this function returns a two digit number
    entered on the Pmod KYPD """
    # set a new keymap: letters are mapped to 0
    keyMap = [['1', '2', '3', '0'], ['4', '5', '6', '0'],
              ['7', '8', '9', '0'], ['0', '0', '0', '0']]
    KYPD.setKeyMap(keyMap)

    # wait for a keypress
    key = wait_for_key()
    # save the first digit
    parameter = int(key) * 10
    # wait for a keypress
    key = wait_for_key()
    # save the second digit
    parameter = parameter + int(key)

    # restore default keymap
    KYPD.setKeyMapDefault()
    return parameter


def wait_for_key():
    """ this function wait until a key is pressed,
    then returns that key"""
    # read keypresses
    key = KYPD.getKey()
    # read keypresses until a key is pressed
    while key == None:
        key = KYPD.getKey()
    # debounce the keypad
    debounce()
    return key


def get_key():
    """ this function returns the debounced keypresses
    non-blocking: returns None if nothing was pressed """
    # get keypress
    key = KYPD.getKey()
    # debounce it
    debounce()
    return key


def debounce():
    """ this function debounces the keypad
    if 1000 consecutive states of the keypad
    are "None", the keyes are released """
    # enter in a loop
    flag = True
    while flag:
        # set the flag to False
        flag = False
        # inspect 1000 consecutive states of the keypad
        for _ in range(1000):
            # if a key is pressed
            if KYPD.getKey() != None:
                # restart the debouncing process
                flag = True
                break
    return
3. display.py
The display module has an empty object (OLED) which is initialized in the fan_controller.py, and 7 functions to display various data. These functions start with a line, clear the screen, and draw multiple lines of text.
"""

This is the module containing display control functions
"""

# import necessary modules
from DesignSpark.Pmod.HAT import createPmod
from luma.core.render import canvas

# the OLED object is needed in this module,
# but is initialized in the main program
OLED = None


def require(text):
    """ display a text to require a parameter """
    with canvas(OLED.getDevice()) as draw:
        # clear the screen
        draw.rectangle(OLED.getDevice().bounding_box,
                       outline="black", fill="black")
        # display some text
        draw.text((20, 10), "Enter the", fill="white")
        draw.text((0, 30), text, fill="red")
    return


def parameter(text, number, unit):
    """ display a parameter with unit """
    with canvas(OLED.getDevice()) as draw:
        # clear the screen
        draw.rectangle(OLED.getDevice().bounding_box,
                       outline="black", fill="black")
        # display some text
        draw.text((0, 10), text, fill="white")
        draw.text((30, 30), str(number), fill="green")
        draw.text((45, 30), unit, fill="white")

        draw.text((25, 45), "Exit", fill="yellow")
        draw.text((5, 52), "press any key", fill="yellow")
    return


def data_M1(average_temp, speed, min_temp, mode):
    """ display data in mode 1: temperature and speed """
    with canvas(OLED.getDevice()) as draw:
        # clear the screen
        draw.rectangle(OLED.getDevice().bounding_box,
                       outline="black", fill="black")

        # dislpay the temperature
        draw.text((5, 0), "Temperature: ", fill="white")
        draw.text((15, 10), "%.2f" % (average_temp + min_temp), fill="green")
        draw.text((50, 10), "\xb0" + "C", fill="white")

        # display the speed
        draw.text((5, 20), "Fan speed: ", fill="white")
        draw.text((15, 30), "%.2f" % speed, fill="green")
        draw.text((50, 30), "%", fill="white")

        # display current mode
        draw.text((80, 38), "M" + str(mode), fill="red")

        # display some text
        draw.text((25, 45), "Menu", fill="yellow")
        draw.text((5, 52), "press any key", fill="yellow")
    return


def data_M2(speed, time, mode):
    """ display data in mode 2: speed and remaining time left """
    with canvas(OLED.getDevice()) as draw:
        # clear the screen
        draw.rectangle(OLED.getDevice().bounding_box,
                       outline="black", fill="black")

        # display the speed
        draw.text((5, 0), "Speed: ", fill="white")
        draw.text((15, 10), str(speed), fill="green")
        draw.text((50, 10), "%", fill="white")

        # display the time left
        draw.text((5, 20), "Time left: ", fill="white")
        _, remainder = divmod(time.seconds, 3600)
        minutes, seconds = divmod(remainder, 60)
        draw.text((15, 30), str(minutes) + ":" + str(seconds), fill="green")
        draw.text((50, 30), "min:s", fill="white")

        # display the mode
        draw.text((80, 38), "M" + str(mode), fill="red")

        # display some text
        draw.text((25, 45), "Menu", fill="yellow")
        draw.text((5, 52), "press any key", fill="yellow")
    return


def menu():
    """ display the main menu """
    with canvas(OLED.getDevice()) as draw:
        # clear the screen
        draw.rectangle(OLED.getDevice().bounding_box,
                       outline="black", fill="black")

        # display option for key "A"
        draw.text((5, 0), "Press ", fill="white")
        draw.text((40, 0), "A", fill="green")
        draw.text((20, 10), "for mode ", fill="white")
        draw.text((75, 10), "1", fill="red")

        # display option for key "B"
        draw.text((5, 25), "Press", fill="white")
        draw.text((40, 25), "B", fill="green")
        draw.text((20, 35), "for mode", fill="white")
        draw.text((75, 35), "2", fill="red")

        # display some text
        draw.text((25, 45), "Exit", fill="yellow")
        draw.text((5, 52), "press any key", fill="yellow")
    return


def menu_M1():
    "display submenu for mode 1"
    with canvas(OLED.getDevice()) as draw:
        # clear the screen
        draw.rectangle(OLED.getDevice().bounding_box,
                       outline="black", fill="black")

        # display option for key "C"
        draw.text((5, 0), "Press ", fill="white")
        draw.text((40, 0), "C", fill="green")
        draw.text((50, 0), "to set", fill="white")
        draw.text((0, 10), "low temp. limt", fill="red")

        # display option for key "D"
        draw.text((5, 25), "Press", fill="white")
        draw.text((40, 25), "D", fill="green")
        draw.text((50, 25), "to set", fill="white")
        draw.text((0, 35), "high temp. limt", fill="red")

        # display some text
        draw.text((25, 45), "Exit", fill="yellow")
        draw.text((5, 52), "press any key", fill="yellow")
    return


def menu_M2():
    "display submenu for mode 2"
    with canvas(OLED.getDevice()) as draw:
        # clear the screen
        draw.rectangle(OLED.getDevice().bounding_box,
                       outline="black", fill="black")

        # display option for key "C"
        draw.text((5, 0), "Press ", fill="white")
        draw.text((40, 0), "C", fill="green")
        draw.text((50, 0), "to set", fill="white")
        draw.text((0, 10), "constant speed", fill="red")

        # display option for key "D"
        draw.text((5, 25), "Press", fill="white")
        draw.text((40, 25), "D", fill="green")
        draw.text((50, 25), "to set", fill="white")
        draw.text((0, 35), "run time", fill="red")

        # display some text
        draw.text((25, 45), "Exit", fill="yellow")
        draw.text((5, 52), "press any key", fill="yellow")
returnAll of the above scripts are available to download in the attachments.
Run the script
To run the script, enter the following line in the terminal:
python /home/pi/path_to_script/fan_controller.py
where path_to_script is the path to the Python script. Make sure that the Raspberry Pi is powered on. You can also add the above line followed by an ampersand in the /etc/rc.local file (see the image to the right) so that Python runs when the Raspberry Pi 4 boots

Testing
Power on the Raspberry Pi. If the script doesn't start at startup, run the script.
Initially, the speed of the motor is set according to the temperature. Press any key to access the main menu. In the main menu, choose mode 1 (press A) or 2 (press B). When you are in one of the modes, you can set parameters by pressing C or D. You can exit the menus by pressing any key (which is not listed in the menu or submenu).
In mode 1, the speed of the motor depends on the temperature. Users can set the temperature limits for 0% and 100% speed from the submenu. In mode 2, the speed of the motor is constant for a predefined time (initially 15 minutes). Then, the motor stops for the same amount of time. Users can set the motor speed and the time in mode 2.