


When submitting this project, one of the requirements I've set was to have a script to post to twitter (at least twice a day) a photo of the hydroponics vegetables progress with some environmental status.
Here I'm going to explain how .
Hardware
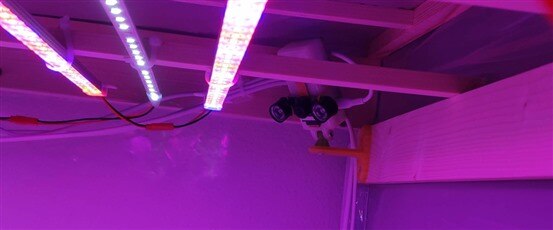
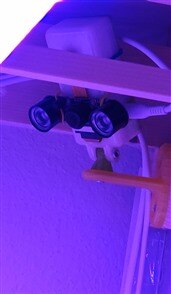
This is installed in a Raspberry PI Zero W with a 64Gb SD Card. It's equipped with a RPI Camera NOIR 5M fisheye with 130 degrees.
Software
The software is a simple python script that takes pictures every 10m, but only posts to twitter every 4 hours.
There are a few libraries that needed to be installed. Let's install them.
Again, I'm not using virtual environments because the RPi Zero W is just for this.
sudo apt-get install picamera Pillow-PIL tweepy python3-systemd
Here's the code
import picamera
from PIL import Image, ImageDraw, ImageFont
import tweepy
import sys
import time
import schedule
import glob
import os
import requests
import logging
from systemd.journal import JournalHandler
import configparser

config = configparser.ConfigParser()
config.read ('tweetSpaceVegetables.ini')


url_web_services = config['default']['urlWebServices']

""" LOGGING """
log = logging.getLogger('SpaceVegetablesTweeter')
log_fmt = logging.Formatter("%(levelname)s %(message)s")
log_ch = JournalHandler()
log_ch.setFormatter(log_fmt)
log.addHandler(log_ch)
log.setLevel(logging.DEBUG)


#constants
pictureFolder = config['default']['pictureFolder']
pictureWaterMark = config['default']['pictureWaterMark']

# Twitter settings
def get_api(cfg):
    auth = tweepy.OAuthHandler(cfg['consumer_key'], cfg['consumer_secret'])
    auth.set_access_token(cfg['access_token'], cfg['access_token_secret'])
    return tweepy.API(auth)

# sendToTwitter()
def sendToTwitterv2():
    log.info("Sending to Twitter")
    cfg = {
            "consumer_key"          : config['twitter']['consumerKey'],
            "consumer_secret"       : config['twitter']['consumerSecret'],
            "access_token"          : config['twitter']['accessToken'],
            "access_token_secret"   : config['twitter']['accessTokenSecret']
    }

    api = get_api(cfg)
    # get latest file in directory
    list_of_files = glob.glob('images/*.jpg')
    latest_file = max(list_of_files, key=os.path.getctime)

    #status message
    message = getEnvironment()
    message += "#spacevegetables #element14 #1meterofpi"
    status = api.update_with_media (pictureFilename, message)


# add a watermark
def addWatermark():
    log.info("Adding watermark")
    # size of watermark to add
    # Remember - should be a small image - change dimentions here
    # NOTE: Probably do this automatically
    size_w = 105
    size_h = 105
    # load watermark
    img_watermark = Image.open(pictureWaterMark)
    # load image taken from camera
    img_orig = Image.open(pictureFilename)


    # Perform calculations for the image size
    img_w, img_h = img_orig.size
    # the 20 is a margin from the edge of W and H
    def_w = (img_w - 20) - size_w
    def_h = (img_h - 20) - size_h
    img_orig.paste(img_watermark, (def_w, def_h), img_watermark)
    img_orig.save(pictureFilename)
    #img_orig.show()

def addTimestamp():
    log.info("Adding timestamp")
    img = Image.open(pictureFilename)
    draw = ImageDraw.Draw(img)
    font = ImageFont.truetype("/usr/share/fonts/truetype/ttf-bitstream-vera/Vera.ttf", 20)
    stamp = time.strftime("%Y-%m-%d %H:%M:%S")
    draw.text((953,1050),stamp, (255,255,255),font=font)
    img.save (pictureFilename)

""" Get environment status
from Space Vegetables """
def getEnvironment():
    log.info("Getting environmental status")
    response = requests.get(url_web_services + 'all')
    # get all we need about environment
    r = response.json()
    units = ["",
            " %",
            " lux",
            "",
            "hPa",
            "ppm",
            "ºC",
            ""]
    #print (r)
    message = ""
    unitsval = 0
    for values in r:
        if values == "humidity" or values == "temperature":
            continue
        val = "{:<20}{} {}".format(values,r[values],units[unitsval])
        unitsval += 1
        message += val + "\n"
    return message


# schedule to send to twitter
log.info("Scheduling sending to Twitter")
schedule.every(4).hours.do(sendToTwitterv2)

# main
if __name__ == "__main__":
    while True:
        log.info("Taking a picture")
        pictureFilename = pictureFolder + time.strftime("%Y%m%d-%H%M%S") + '.jpg'
        with picamera.PiCamera() as camera:
            camera.resolution = (1920,1080)
            #camera.rotation = 180
            camera.start_preview()
            time.sleep(3)
            camera.capture(pictureFilename)
            camera.stop_preview()

        #add watermark
        addWatermark()

        #add timestamp
        addTimestamp()

        # sleep 10 minutes
        log.info("Sleeping 10 minutes")
        time.sleep(600)
        schedule.run_pending()
Here's the config file that is read when the program starts:
# Config file for Space Vegetables Twitter post
[default]
urlWebServices = http://<rpi_4_2gb_ip>/api/v1/resources/
pictureFolder = images/
pictureWaterMark = space_vegetables.png

[twitter]
consumerKey = <consumer_key_from_twitter>
consumerSecret = <consumer_secret_from_twitter>
accessToken = <access_token_from_twitter>
accessTokenSecret = <access_token_secret_from_twitter>
Explaining the code
The first lines import the required libraries
Lines 15 and 16 define a config file to be read with the configurations. As you can see from above, we store in the file several configurations. We need to keep this clean and simple.
The config file is called tweetSpaceVegetables.ini and is read.
config = configparser.ConfigParser()
config.read ('tweetSpaceVegetables.ini')
Line 18 is an example on how we retrieve the configurations
url_web_services = config['default']['urlWebServices']
The configuration setting is called urlWebServices and its located in the default settings
NOTE: Every value we get from the config file is a string. We need to convert it to the value we need if it's not a string we want.
Lines 21 to 26 define a logger. Every time a picture is taken or a post is sent to twitter, I want to know.
Line 21 gets an instance of the logger object for the script. The name is whatever you want to call it. A more common method is to use __name__ instead of 'SpaceVegetablesTweeter'
log = logging.getLogger('SpaceVegetablesTweeter')
Line 22 configures the formating of the messages that will appear in the log
Line 24 sets the formatting to the log instance
log_fmt = logging.Formatter("%(levelname)s %(message)s")
This will create the following messages in the systemd log:
Nov 26 14:17:31 tweetyPI /home/pi/tweetSpaceVegetables.py[398]: INFO Taking a picture
Nov 26 14:17:35 tweetyPI /home/pi/tweetSpaceVegetables.py[398]: INFO Adding watermark
Nov 26 14:17:36 tweetyPI /home/pi/tweetSpaceVegetables.py[398]: INFO Adding timestamp
Nov 26 14:17:37 tweetyPI /home/pi/tweetSpaceVegetables.py[398]: INFO Sleeping 10 minutes
Line 23 sets an instance of JournalHandler to systemd and line 24 adds it to the current logger
Line 26 sets an optional logging level
We then get the variables content from the config file.
pictureFolder is where to save the images and pictureWatermark is the location of the image to add as a watermark.
Next we set Twitter configurations
def get_api(cfg)
This function will authenticate with Twitter to be able to post. If successful, will return a authentication token.
def sendToTwitterv2()
This function posts to twitter.
Line 41 will display a message in the log.
Because this script takes a picture every 10 minutes, and a post to twitter is only every 4 hours, when posting to twitter I want the latest picture available.
This following lines will get the latest image available.
Line 51 generates a list of all the images in the directory.
Line 52 , using the max function, returns the image name with the latest modification time. The max function uses a key to order. We use ctime (Linux changed timestamp) to know the latest one.
# get latest file in directory
list_of_files = glob.glob('images/*.jpg')
latest_file = max(list_of_files, key=os.path.getctime)
Lines 55 and 56 create the message to be sent in the post. We get the environmental parameters with the function getEnvironment(). In line 56 we add some hashtag words .
message = getEnvironment()
message += "#spacevegetables #element14 #1meterofpi"
In line 57 we send it, using the tweepy function update_with_media to attach a picture to our message. The result is:
def addWatermark()
This function adds a watermark to the pictures taken.
Lines 66 and 67 define the dimensions of the watermark picture. Lines 69 and 71 open the watermark picture and the picture just taken. Next, in line 75 we get the dimensions of the image taken by the camera. We know the dimensions, but this way we can use it for any image, even with not known dimensions.
size_w = 105
size_h = 105
# load watermark
img_watermark = Image.open(pictureWaterMark)
# load image taken from camera
img_orig = Image.open(pictureFilename)
Lines 77 and 78 calculate the top-left position in the picture taken from the camera for the top-left watermark picture. I left a 20px margin, so the watermark picture won't be positioned at the edges.
def_w = (img_w - 20) - size_w
def_h = (img_h - 20) - size_h
ie:
picture_widht: 1920
picture_height: 1080
watermark_w: 105
watermark_h: 105
position_watermark_w = (picture_widht - 20) - watermark_w = (1920 - 20) - 105 = 1900 - 105 = 1795
position_watermark_h = (picture_height - 20) - watermark_h = (1080 - 20) - 105 = 1060 - 105 = 955
1795, 955 will be the top-left position in the picture taken from the camera for the watermark picture.
Line 79 pastes the watermark picture in the original picture at the position (pixels) calculated above
Line 80 saves the changed picture - to be easier, it overwrites the original picture with this new one.
img_orig.paste(img_watermark, (def_w, def_h), img_watermark)
img_orig.save(pictureFilename)
def addTimestamp()
We now going to add a timestamp to the images.
We start by open the image in line 85. Next, in line 86 we create an object to draw in the opened image.
img = Image.open(pictureFilename)
draw = ImageDraw.Draw(img)
At line 87 we define a font to use to write on the image, with size 20.
font = ImageFont.truetype("/usr/share/fonts/truetype/ttf-bitstream-vera/Vera.ttf", 20)
Line 88 we define what we're going to "stamp" in the image. Create a string with the current date and time.
stamp = time.strftime("%Y-%m-%d %H:%M:%S")
Finally, we "draw" the text at coordinates X:953 and Y:1050, with white color and with the defined font
draw.text((953,1050),stamp, (255,255,255),font=font)
Again, we save the picture, overwriting the old one.
img.save (pictureFilename)
def getEnvironment()
It's here that we use the Space Vegetables Web Services.
We're using Python requests to get the values.
At line 96 we create a request for the web service function all. We save the response .
We then convert the response to json format.
response = requests.get(url_web_services + 'all')
# get all we need about environment
r = response.json()
Line 99 creates a list with the units used for the values. At line 108 we define the variable that will hold the message to post to twitter. Next, we set a variable to 0 called unitsval. This will allow us to match the units to the values in the response.
We then cycle the values in the json response (r) - line 110.
for values in r:
Because Twitter has limited characters, I skip the values from humidity and temperature. They are from the Enviro HAT sensor.
if values == "humidity" or values == "temperature":
            continue
Next, we create a variable with the value and the unit:
val = "{:<20}{} {}".format(values,r[values],units[unitsval])
I'm using the new Python formatting to pad and align all the values .
:<20 will alignt the charactes in the left and give 20 spaces to the right. If you put any character between : and < it will use that character instead of spaces.
Then, it increases unitsval one value and concatenates the message and a new line.
unitsval += 1
message += val + "\n"
Next, and here's the magic with Python Scheduler, we schedule that, every 4 hours, we execute the function sendToTwitterv2
schedule.every(4).hours.do(sendToTwitterv2)
The script will take pictures, put a watermark and a timestamp without having to care about sending to twitter. The Python scheduler will take care of it.
Now, we get to the main function.
To make it easier for the time lapse and to make sure no 2 pictures will ever have the same name, the pictures name is a string composed of YYYYmmdd-HHMMS.jpg (current date and time to the seconds).
ie: 20201126-235356.jpg
pictureFilename = pictureFolder + time.strftime("%Y%m%d-%H%M%S") + '.jpg'
Next, with the picamera we set the resolution of the image, start the preview, sleep 3 seconds to let the camera sensor adjust to conditions and take the picture. We then stop the preview.
with picamera.PiCamera() as camera:
            camera.resolution = (1920,1080)
            #camera.rotation = 180
            camera.start_preview()
            time.sleep(3)
            camera.capture(pictureFilename)
            camera.stop_preview()
Here's an example (already with timestamp and watermark):

After that, we add the watermark, the timestamp and sleep for 10 minutes .
   addWatermark()

   #add timestamp
   addTimestamp()

   # sleep 10 minutes
   log.info("Sleeping 10 minutes")
   time.sleep(600)
The last line calls run_pending on the default scheduler instance. Run all jobs that are scheduled to run.
schedule.run_pending()
Because we're sleeping for 10 minutes, the worst case scenario is that the schedule jobs will run 10 minutes late !
Boot
Because we want the script to run at boot, let's create a systemd unit for it.
vi /etc/systemd/system/SpaceVegetablesTwitter.service
[Unit]
Description = Space Vegetables twitter posting
After = network.target
StartLimitIntervalSec = 500
StartLimitBurst = 5

[Service]
Restart = on-failure
RestartSec = 5s
User = pi
Group = pi
WorkingDirectory = /home/pi
Environment = "PATH=/home/pi"
ExecStart = /usr/bin/python3 /home/pi/tweetSpaceVegetables.py

[Install]
WantedBy = multi-user.target
Enable it to start automatically at boot
sudo systemctl enable SpaceVegetablesTwitter
Here it is.
Hope it helps anyone.
Happy coding
Top Comments