Welcome to blog 4 of Neonatal Incubator Monitoring System. In this tutorial, we will learn how to display serial data on a Blynk dashboard using the ESP32. We'll be using the Blynk IoT platform, which allows us to create custom dashboards and sends alerts to the doctor/caretaker from anywhere in the world.

Set up the ESP32
Connect the ESP32 to your computer using a USB cable and open the Arduino IDE. Install the ESP32 board package by going to "Tools" -> "Board" -> "Boards Manager" and searching for "esp32". Install the package and select the "ESP32 Dev Module" board from the "Tools" -> "Board" menu.
Next, we need to install the Blynk library. Go to "Sketch" -> "Include Library" -> "Manage Libraries" and search for "Blynk". Install the Blynk library and add it to your sketch by going to "Sketch" -> "Include Library" -> "Blynk".

#include <WiFi.h>
#include <BlynkSimpleEsp32.h>

char auth[] = "your_auth_token"; // Replace with your Blynk auth token
char ssid[] = "your_wifi_ssid"; // Replace with your WiFi SSID
char password[] = "your_wifi_password"; // Replace with your WiFi password

void setup() {
  Serial.begin(9600); // Set the baud rate to 9600
  Blynk.begin(auth, ssid, password); // Connect to Blynk server
}

void loop() {
  if (Serial.available() > 0) { // If there's serial data available
    String data = Serial.readStringUntil('\n'); // Read the data
    Blynk.virtualWrite(V1, data); // Send the data to the Blynk dashboard
  }
  Blynk.run(); // Run the Blynk event loop
}

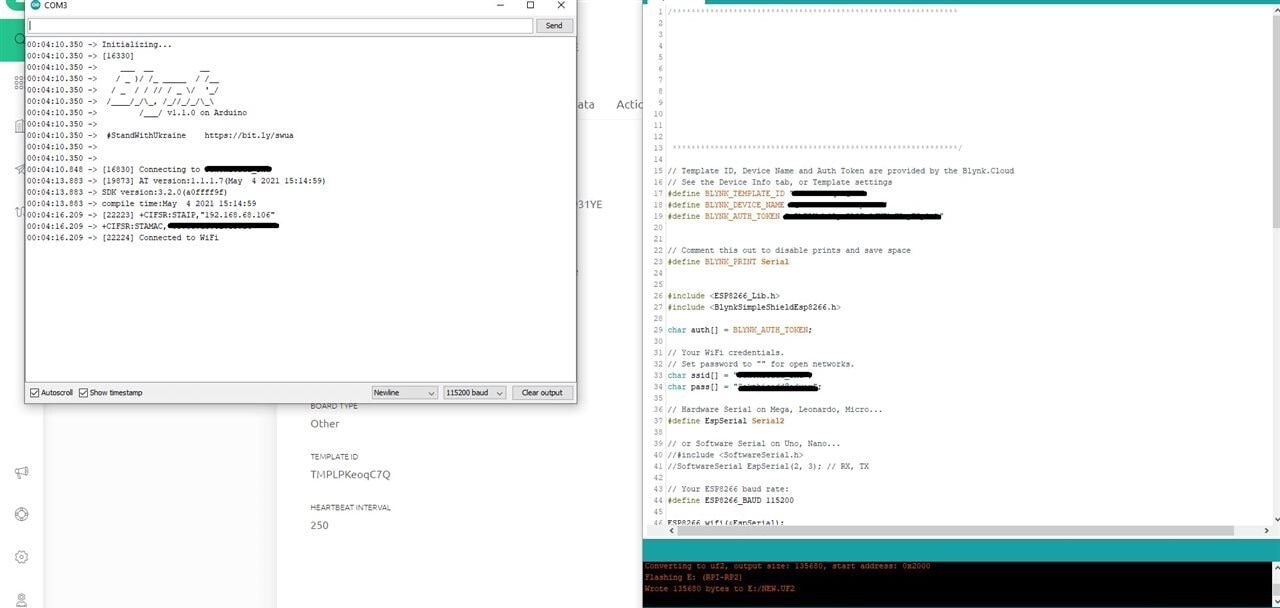
Update SSID, password, Device ID, and Auth Token in the sketch and upload it to the ESP32 Dev board. The ESP32 is now connected to the WiFi router.
Set up the Blynk dashboard
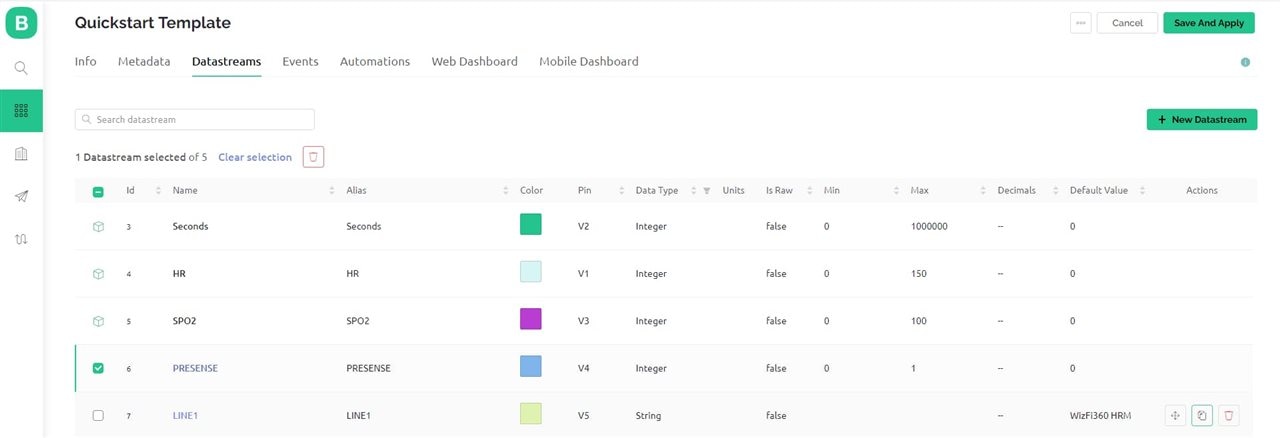
First, we need to create a new project for the Blynk mobile app. Download the Blynk app (App Store, Google Play). Once you're logged in, tap the "Create New Project" button and give your project a name and device type (ESP32 in this case). Choose the "Custom Dashboard" template and create the project. Set the DataStream as shown below

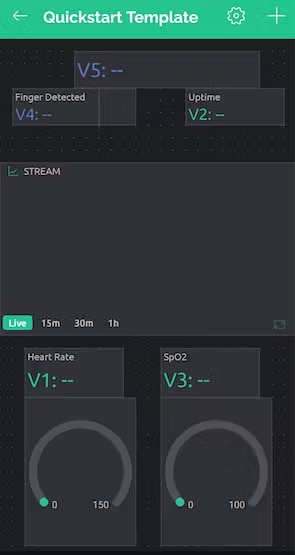
Add the elements to the dashboard to make the UI. Now the device is ready to receive the data from PSoc and update it to the Blynk Dashboard. The Ambient Light, Temperature, Heart Rate, SpO2 and finger presence data are sent to the Blynk Console and the devices connected to them.


