


Introduction
Our Challenge target is able to remote notify the mailbox's owner with or without mail though AWS IoT platform, which currently we developed a IOS APP for this purpose.
Future more, we like use the internal MIC and Sound card to detect dog bites and produce alarm , so the postman things good.
However, due to time strains and complex, we are hard to develop the AI to recognise the bad dog sound. So we change our jobs to connect our sound clip picked from the PDM Mic to AWS Transcribe, which Amazon AI for convert speech to text. The transcriptions will showed on the device LCD and IOS App.
In this blog, i also improve our IOS platform to support multi-device pairing, for example, if we want to sell our Intelligence Mailbox to customers, our mobile App is the marketing points , we can not build IOS app for every customer deliver to them, instead we publish one mobile APP in APP Store for all customer, customer work basic process to pairing the device and APP. We introduced how to implement this.
Ref Amazon Transcribe https://aws.amazon.com/transcribe/?nc1=h_ls
Alexa for IOS
Firstly, i wish build prototype by use the Cypress Pioneer Kit connect to AWS Alexa, we builded a Companion IOS App and try the step of LWA.
The problem is the Cypress Pioneer Kit only with 288kb SRAM, as the heap size is too restricted, although most communication though MQTT,
the access token update require another TLS socket for https connect, which every TLS socket require relative high heap size, our MQTT open one Socket, and we require additional memory for sound buffering and shadow, the WHD wifi also require so many resource. As our experiments, build the new https TLS socket will let all network down, require reboot for recovery.
The Prototyping Kit have 1MB SRAM should get better result working for Alexa IoT project.
https://docs.aws.amazon.com/iot/latest/developerguide/avs-integration-aws-iot.html
AWS Transcribe
Last Blog, we are success to storage the sound clip in S3 Storage, which stream by MQTT publish. In here, we work more in our Lamba python function.
Support many Things
Firstly, we modify the Lambda to support many Things, remember, at Last Blog, under IoT Rules, we set the Partition key: ${Topic()), as the Rules Topics pattern is [Things]/sound/send,
we are easy to extract the Things name from the Partition key inside of kinesis stream json.
  for record in event['Records']:

        partitionkey = record["kinesis"]["partitionKey"]
        things = partitionkey[:len(partitionkey)-11]
Each 'Things' have separate temp documents, so one Lambda function can be served to all mailboxs serverless.
Detect Last Coming
The last 9-10 bytes of the block is added for "total_num" , so our timestamp for sequence is last 8 bytes, and backward with two byte "total block"
We used this value to check all block have been arrived and trigger the transcribe step.
# decode total num of block
        total_num = int.from_bytes(payload[SAMPLE_SIZE-10:SAMPLE_SIZE-8], byteorder='little',signed='true')
Wave Header
We added the Wave header so good for the AWS transcribe accept wav 16bit Mono
            soundclip[0:0]=bytes.fromhex('52494646')
            soundclip[4:4]=(36+total_num*RECORD_SIZE).to_bytes(4,byteorder='little');
            soundclip[8:8]=bytes.fromhex('57415645666d7420')
            soundclip[16:16]=(16).to_bytes(4,byteorder='little')
            soundclip[20:20]=(1).to_bytes(2,byteorder='little')
            soundclip[22:22]=(1).to_bytes(2,byteorder='little')
            soundclip[24:24]=(16000).to_bytes(4,byteorder='little')
            soundclip[28:28]=(32000).to_bytes(4,byteorder='little')
            soundclip[32:32]=(2).to_bytes(2,byteorder='little')
            soundclip[34:34]=(16).to_bytes(2,byteorder='little')
            soundclip[36:36]=bytes.fromhex('64617461')
            soundclip[40:40]=(total_num*RECORD_SIZE).to_bytes(4,byteorder='little')
Ref: Microsoft WAVE soundfile format
Transcribe Job
transcribe = boto3.client('transcribe')
job_name = key.replace("income/","")
job_uri = "https://voicerecognise.s3-us-west-2.amazonaws.com/income/"+job_name
transcribe.start_transcription_job(
TranscriptionJobName=job_name,
Media={'MediaFileUri': job_uri},
MediaFormat='wav',
LanguageCode='en-US'
)
while True:
status = transcribe.get_transcription_job(TranscriptionJobName=job_name)
if status['TranscriptionJob']['TranscriptionJobStatus'] in ['COMPLETED', 'FAILED']:
break
print("Not ready yet...")
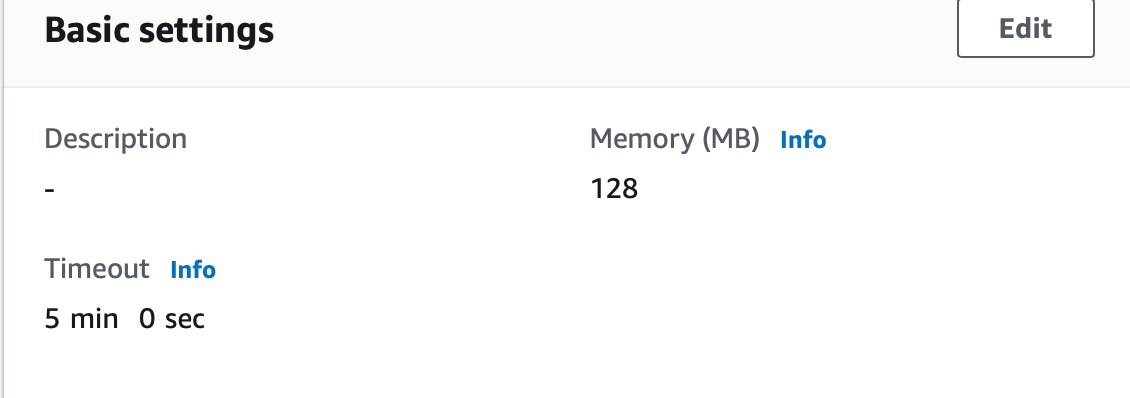
time.sleep(5)Simple we pass the internal S3 sound file uri to Transcribe and wait for job done, because the transcribe sometime require few minutes to finish, set Lambda Function Timeout to 5 mins.
Send Result to IoT
First, set the Permissions:
Permissions > Execution role > click the "Role" > IAM > added AWSIoTDataAccess

The return json not include the transcript, instead we open another Uri for the Transcript
  resulturl =  status['TranscriptionJob']['Transcript']['TranscriptFileUri']
    with urllib.request.urlopen(resulturl) as response:
        html = response.read().decode('utf-8')
        print("transcribe:",html)
        transcripts = json.loads(html)
        transcript = ""
        for trans in transcripts['results']['transcripts']:
            transcript += trans['transcript']
            transcript += ' '
Finally, publish the transcript though boto3 "iot-data" to topic [Things]/transcript/get
    iotclient = boto3.client('iot-data')

    message = "{ \"requests\":\"finish\",\"transcript\":\""+ transcript + "\"}"

    try:
        transcripttopic = things+'/transcript/get'
        response = iotclient.publish(
            topic=transcripttopic,
            qos=0,
            payload=message
            )
Our IOS App and Cypress Kits subscribe to this topic, so APP and Kits both show the text simultaneously, see the top Video for Demo.

In this practice, the AWS IoT can be fully integrated of AWS cloud and easy to interact between multi-services.
The IOS App Pairing
Our APP use AWS IoT Shadow for sync between IOS App and the devices for two-way control, although user identify by Cognito, the last version of IOS App only support one devices "Things". Finally in this project, we improve the APP to support many "Things". We suppose every Device with a unique "Things" under AWS IoT, our job for ensure the App user is real the owner of the mailbox, the pairing step is:
1. APP User enter the DSN (device serial no) which every products with a unique number under firmware or write to eFuse
2. The LCD display a passcode
3. The APP User input the passcode in the APP
4. Finish, unless another IOS APP pair this device or change of IOS account, the user don't require pairing again.
The "Things" name is transparent to users, so it is more security and flexible can be change in future.
All above process only need a shared MQTT publish/subscribe channel and a addition shadow states "HASH", no server required.

Our App first identify the user by Cognito, after Cognito we connect to AWS IOT
Verify passcode
1. We retrieve the pairing_passcodekey and passcode storage under User Preferences, if not find, no paired.
2. If IOS Preferences with pairing_passcodekey and passcode data , we work for "get" the "Things" shadows, if no "hash" shadow, no paired.
if the "hash" observed, we calculate SHA256 pairing_passcodekey hash, if both hash some, pass.

if (pairing_passcode==nil || shadow_hash != sha256(data:pairing_passcode).base64EncodedString()){
                print("HASH mismatch")
                aws_iot_disconnected()
                aws_iot_pairing()
                return;
            }
either shadows update/get with "hash", we will check again the hash, so if other APP paired the device, the device will send "update" immediately, make this APP check the hash again and fail and immediately disconnect, so only one APP can pair with a device at a time.
Implement Pairing
For new user, or the passcode HASH check fail, the user need work for pairing, to link the products and the APP.
1. Firstly a dialog require the customer enter the Product Serial No

2. The App subscribe to "mailbox/productmetadata/get", publish a message to "mailbox/productmetadata", which every "mailbox" subscribe this.
/* subscribe for listen get device productmetadata */
    dataManager.subscribe(toTopic: "mailbox/productmetadata/get", qoS: .messageDeliveryAttemptedAtLeastOnce, messageCallback:messageblock )

    dsn = input_dsn;

    /* send publish to get device productmetadata */
    dataManager.publishString("{\"requests\":\"ios_pairing\",\"dsn\":\"\(dsn!)\",\"uuid\":\"\(uuid!)\"}",onTopic: "mailbox/productmetadata", qoS: .messageDeliveryAttemptedAtLeastOnce )
requests: ios_pairing
dsn: The serial code
uuid: The APP UUID (A unique ID for IOS APP)
3. Devices random choose 8 character codeverifier and display on LCD
mbedtls_ctr_drbg_random((void*)&ctx_drbg,(unsigned char *)codeverifier,8);

   for(int i=0;i<8;i++){

   if (codeverifier[i]>='A' && codeverifier[i]<='Z')
   continue;
   if (codeverifier[i]>='a' && codeverifier[i]<='z')
     continue;
   if (codeverifier[i]>='0' && codeverifier[i]<='9')
     continue;

  codeverifier[i] += 23;
  --i;

  }
Devices calculate the SHA256 hash of codeverifier and send those information to APP
sprintf(productmetadata,"{\"DSN\":\"%s\",\"TOPIC\":\"%s\",\"HASH\":\"%s\",\"UUID\":\"%s\"}",DSN,AWSIOT_THING_NAME,base64buffer,uuid.c_str());
  awsiot_publish(productmetadata,"mailbox/productmetadata/get");
DSN: The serial code
UUID: The APP UUID
HASH: the code verifier HASH
TOPIC: device things name
4. APP received above code, check the DSN and UUID match, and show the dialog require user enter the 8 character showed on LCD

5. APP check both HASH, if some mean the user input correct.
The APP generated 32 bytes random paired_passcode and send the paired_passcode's HASH to Device
   dataManager.publishString("{\"requests\":\"ios_paired\",\"dsn\":\"\(dsn!)\",\"uuid\":\"\(uuid!)\",
\"pass_hash\":\"\(passhash)\"}",onTopic: "mailbox/productmetadata", qoS: .messageDeliveryAttemptedAtLeastOnce )
6. The Device received above message, simple update the HASH to shadow and save the HASH to FRAM for power loss retrieve.
  status.pass_hash = passhash;
  fram_write_status();
  awsiot_update("hash", passhash);
All above hash encode with BASE64.
Reference of Video for the Pairing Process.
Next
The final blog is Summary of this projects, together provide the IOS APP, the device code and Lambda functions.