element14 Community
element14 Community
    Register Log In
  • Site
  • Search
  • Log In Register
  • Community Hub
    Community Hub
    • What's New on element14
    • Feedback and Support
    • Benefits of Membership
    • Personal Blogs
    • Members Area
    • Achievement Levels
  • Learn
    Learn
    • Ask an Expert
    • eBooks
    • element14 presents
    • Learning Center
    • Tech Spotlight
    • STEM Academy
    • Webinars, Training and Events
    • Learning Groups
  • Technologies
    Technologies
    • 3D Printing
    • FPGA
    • Industrial Automation
    • Internet of Things
    • Power & Energy
    • Sensors
    • Technology Groups
  • Challenges & Projects
    Challenges & Projects
    • Design Challenges
    • element14 presents Projects
    • Project14
    • Arduino Projects
    • Raspberry Pi Projects
    • Project Groups
  • Products
    Products
    • Arduino
    • Avnet & Tria Boards Community
    • Dev Tools
    • Manufacturers
    • Multicomp Pro
    • Product Groups
    • Raspberry Pi
    • RoadTests & Reviews
  • About Us
  • Store
    Store
    • Visit Your Store
    • Choose another store...
      • Europe
      •  Austria (German)
      •  Belgium (Dutch, French)
      •  Bulgaria (Bulgarian)
      •  Czech Republic (Czech)
      •  Denmark (Danish)
      •  Estonia (Estonian)
      •  Finland (Finnish)
      •  France (French)
      •  Germany (German)
      •  Hungary (Hungarian)
      •  Ireland
      •  Israel
      •  Italy (Italian)
      •  Latvia (Latvian)
      •  
      •  Lithuania (Lithuanian)
      •  Netherlands (Dutch)
      •  Norway (Norwegian)
      •  Poland (Polish)
      •  Portugal (Portuguese)
      •  Romania (Romanian)
      •  Russia (Russian)
      •  Slovakia (Slovak)
      •  Slovenia (Slovenian)
      •  Spain (Spanish)
      •  Sweden (Swedish)
      •  Switzerland(German, French)
      •  Turkey (Turkish)
      •  United Kingdom
      • Asia Pacific
      •  Australia
      •  China
      •  Hong Kong
      •  India
      •  Korea (Korean)
      •  Malaysia
      •  New Zealand
      •  Philippines
      •  Singapore
      •  Taiwan
      •  Thailand (Thai)
      • Americas
      •  Brazil (Portuguese)
      •  Canada
      •  Mexico (Spanish)
      •  United States
      Can't find the country/region you're looking for? Visit our export site or find a local distributor.
  • Translate
  • Profile
  • Settings
Design For A Cause 2021
  • Challenges & Projects
  • Design Challenges
  • Design For A Cause 2021
  • More
  • Cancel
Design For A Cause 2021
Blog Blog#3 - Building the chair
  • Blog
  • Forum
  • Documents
  • Polls
  • Files
  • Mentions
  • Sub-Groups
  • Tags
  • More
  • Cancel
  • New
  • Share
  • More
  • Cancel
Group Actions
  • Group RSS
  • More
  • Cancel
Engagement
  • Author Author: hitesh.boghani
  • Date Created: 27 May 2021 11:51 PM Date Created
  • Views 390 views
  • Likes 2 likes
  • Comments 0 comments
  • smart chair
Related
Recommended

Blog#3 - Building the chair

hitesh.boghani
hitesh.boghani
27 May 2021

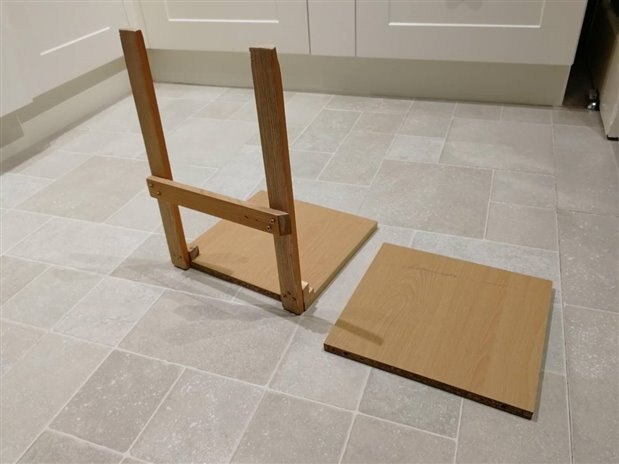
OK, I will be honest. When I finished, it looked more like a stool than a chair image My 3 year old called it a table image! But anyways, let me show you how I built it.


This chair needs to have wheels so that it can be driven around on flat surfaces in homes. So, I wanted to include a base for this such that the base can be tuck under the sofa (those that have space underneath) or similar furniture for sitting and sleeping. Then I needed to have a frame and on top, a surface to sit on. This needs to be as thin as possible so that it can come onto the sofa and one can easily hop onto it from their seating position on the side, without needing to get up and sit on it. Well, that is the point of this project that this device needs to be able to support the sitting up movement so that fragile joints (knee) are not taking all the load.


I found some wood lying around in my garage so I arranged and tried to create something like I described above and here is what they look like.


image

For the top panel to be able to rotate, I needed to install an axle (or rod) that can be attached to a motor via gears. Lots of axles, gears and bearings to choose from!

imageimageimage


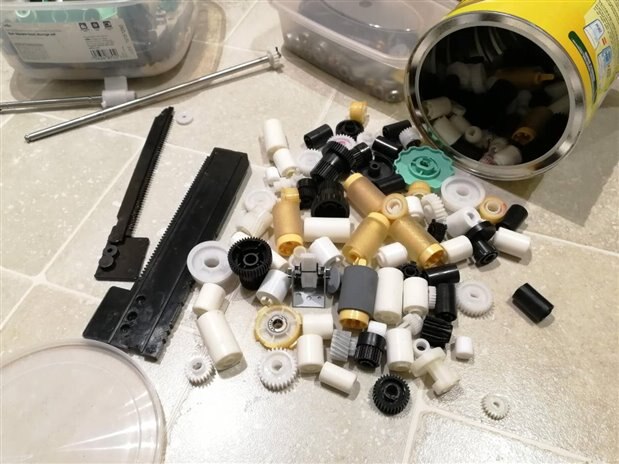
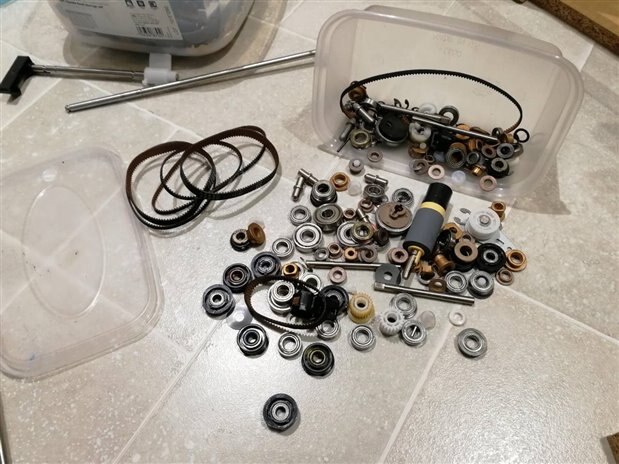
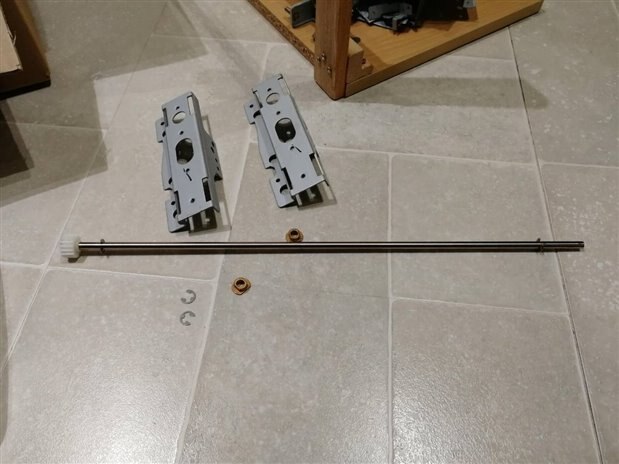
To mount it and also the motor, I needed to find some suitable brackets. Luckily, I found some identical brackets in my treasure! You can also see an axle with a gear attached and some bearing support and stop clips.

image

After some hours of drilling, aligning and more drilling and screwing, I managed to build the frame and mount the motor unit. You might notice here that I had planned to use BLDC motor but attached stepper motor instead. This is because I seem to have fried a component in BLDC motor's driver PCB. I will detail this in my next blog.


image

Now that my build is almost finished, I started focusing on electronics along with Arduino Nano 33 IoT. Until now, I was thinking of using an encoder or potentiometer to measure angular position of the seat but I had another thought by this time. I was thinking that perhaps I could use in-built IMU on Arduino Nano 33 IoT so that I can sense the angular velocity of the seat using the gyroscope and use this for supplying the appropriate power via stepper motor to assist the intended movement. This would simplify the amount of electronics that might be needed here.

  • Sign in to reply
element14 Community

element14 is the first online community specifically for engineers. Connect with your peers and get expert answers to your questions.

  • Members
  • Learn
  • Technologies
  • Challenges & Projects
  • Products
  • Store
  • About Us
  • Feedback & Support
  • FAQs
  • Terms of Use
  • Privacy Policy
  • Legal and Copyright Notices
  • Sitemap
  • Cookies

An Avnet Company © 2025 Premier Farnell Limited. All Rights Reserved.

Premier Farnell Ltd, registered in England and Wales (no 00876412), registered office: Farnell House, Forge Lane, Leeds LS12 2NE.

ICP 备案号 10220084.

Follow element14

  • X
  • Facebook
  • linkedin
  • YouTube