INFRARED THERMOMETER WITH UBIDOTS, PART 1
HARDWARE
In the image below I show you the electrical diagram that we will use in this chapter.

LIST OF PARTS:
Arduino Nano 33 IoT Development Board
Infrared Thermometer - MLX90614
Micro OLED Breakout
Lithium Ion Battery - 1Ah
HOW DOES IT WORK?
First, the WiFi connection is established between the Arduino NANO 33 IoT board and the Modem;
The infrared thermometer detects two temperatures: 1) the ambient temperature, and 2) the temperature of the aimed object;
Both temperature values (ambient and object) are printed on the serial port and the Micro OLED Breakout screen for 5 seconds approx ;
Every 5 seconds the object temperature value is sent to the IoT server.
We will use the service provider IoT Ubidots, and the configuration will be seen in the next chapter.
SOFTWARE
PREREQUISITES FOR ARDUINO IDE:
Download and install the Micro OLED Breakout display library here.
Download and install the MLX90614 Infrared Thermometer library here
Once the libraries were installed, I used the Arduino IDE 1.8.11 to compile and upload the code to the Arduino NANO 33 IoT board. The code and comments are shown below: "ubidots_temp.ino"
// AUTHOR: GUILLERMO PEREZ GUILLEN
/********************************
* Libraries included
*******************************/
#include <SPI.h>
#include <WiFiNINA.h>
#include <avr/dtostrf.h>
#include <Wire.h> // I2C library, required for MLX90614
#include <SparkFunMLX90614.h> //Click here to get the library: http://librarymanager/All#Qwiic_IR_Thermometer by SparkFun
#include <SFE_MicroOLED.h> // display configuration
#define PIN_RESET 9 // display configuration
#define DC_JUMPER 1 // display configuration
MicroOLED oled(PIN_RESET, DC_JUMPER); // display configuration - 12C declaration
IRTherm therm; // Create an IRTherm object to interact with throughout
/********************************
* Constants and objects
*******************************/
#define DEVICE_LABEL "arduino-nano-33"
#define TOKEN "BBFF-******************************"
char const * VARIABLE_LABEL_1 = "temperature";
char const *SERVER="industrial.api.ubidots.com";
//Replace the above line if you are an Educational user char const *SERVER="things.ubidots.com";
const int HTTPPORT= 443;
char const *AGENT="Arduino Nano 33 IoT";
char const *HTTP_VERSION = " HTTP/1.1\r\n";
char const *VERSION ="1.0";
char const *PATH= "/api/v1.6/devices/";
char const * SSID_NAME = "*********"; // Put here your SSID name
char const * SSID_PASS = "************"; // Put here your password
int status = WL_IDLE_STATUS;
WiFiSSLClient client;
/********************************
* Auxiliar Functions
*******************************/
void printWiFiStatus() {
// print the SSID of the network you're attached to:
Serial.print("SSID: ");
Serial.println(WiFi.SSID());
// print your board's IP address:
IPAddress ip = WiFi.localIP();
Serial.print("IP Address: ");
Serial.println(ip);
// print the received signal strength:
long rssi = WiFi.RSSI();
Serial.print("signal strength (RSSI):");
Serial.print(rssi);
Serial.println(" dBm");
}
void getResponseServer() {
Serial.println(F("\nUbidots' Server response:\n"));
while (client.available()) {
char c = client.read();
Serial.print(c); // Uncomment this line to visualize the response on the Serial Monitor
}
}
void waitServer() {
int timeout = 0;
while (!client.available() && timeout < 5000) {
timeout++;
delay(1);
if (timeout >= 5000) {
Serial.println(F("Error, max timeout reached"));
break;
}
}
}
void sendData(char* payload) {
int contentLength = strlen(payload);
/* Connecting the client */
if (client.connect(SERVER, HTTPPORT)) {
Serial.println("connected to server");
client.print(F("POST "));
client.print(PATH);
client.print(DEVICE_LABEL);
client.print(F("/"));
client.print(HTTP_VERSION);
client.print(F("Host: "));
client.print(SERVER);
client.print(F("\r\n"));
client.print(F("User-Agent: "));
client.print(AGENT);
client.print(F("\r\n"));
client.print(F("X-Auth-Token: "));
client.print(TOKEN);
client.print(F("\r\n"));
client.print(F("Connection: close\r\n"));
client.print(F("Content-Type: application/json\r\n"));
client.print(F("Content-Length: "));
client.print(contentLength);
client.print(F("\r\n\r\n"));
client.print(payload);
client.print(F("\r\n"));
Serial.print(F("POST "));
Serial.print(PATH);
Serial.print(DEVICE_LABEL);
Serial.print(F("/"));
Serial.print(HTTP_VERSION);
Serial.print(F("Host: "));
Serial.print(SERVER);
Serial.print(F("\r\n"));
Serial.print(F("User-Agent: "));
Serial.print(AGENT);
Serial.print(F("\r\n"));
Serial.print(F("X-Auth-Token: "));
Serial.print(TOKEN);
Serial.print(F("\r\n"));
Serial.print(F("Connection: close\r\n"));
Serial.print(F("Content-Type: application/json\r\n"));
Serial.print(F("Content-Length: "));
Serial.print(contentLength);
Serial.print(F("\r\n\r\n"));
Serial.print(payload);
Serial.print(F("\r\n"));
waitServer();
getResponseServer();
}
/* Disconnecting the client */
client.stop();
}
/********************************
* Main Functions
*******************************/
void setup() {
//Initialize serial and wait for port to open:
Serial.begin(115200);
while (!Serial) {
; // wait for serial port to connect. Needed for native USB port only
}
// check for the WiFi module:
if (WiFi.status() == WL_NO_MODULE) {
Serial.println("Communication with WiFi module failed!");
// don't continue
while (true);
}
// attempt to connect to WiFi network:
while (status != WL_CONNECTED) {
Serial.print("Attempting to connect to SSID: ");
Serial.println(SSID_NAME);
// Connect to WPA/WPA2 network. Change this line if using open or WEP network:
status = WiFi.begin(SSID_NAME, SSID_PASS);
// wait 10 seconds for connection:
delay(10000);
}
Serial.println("Connected to wifi");
printWiFiStatus();
Wire.begin(); //Joing I2C bus
oled.begin(); // Initialize the OLED
oled.clear(ALL); // Clear the display's internal memory
oled.display(); // Display what's in the buffer (splashscreen)
if (therm.begin() == false){ // Initialize thermal IR sensor
Serial.println("Qwiic IR thermometer did not acknowledge! Freezing!");
while(1);
}
Serial.println("Qwiic IR Thermometer did acknowledge.");
therm.setUnit(TEMP_C); // Set the library's units to Farenheit
// Alternatively, TEMP_F can be replaced with TEMP_C for Celsius or
// TEMP_K for Kelvin.
pinMode(LED_BUILTIN, OUTPUT); // LED pin as output
delay(100);
oled.clear(PAGE); // display, Clear the buffer.
}
void loop(){
char payload[200];
char str_val_1[30];
digitalWrite(LED_BUILTIN, HIGH);
// Call therm.read() to read object and ambient temperatures from the sensor.
if (therm.read()) // On success, read() will return 1, on fail 0.
{
for (int i = 1; i < 17; i++) {
Serial.print("Object: " + String(therm.object(), 2));
Serial.println("C");
Serial.print("Ambient: " + String(therm.ambient(), 2));
Serial.println("C");
Serial.println();
oled.clear(PAGE); // Clear the display
oled.setCursor(0, 0); // Set cursor to top-left
oled.setFontType(0); // Smallest font
oled.print("TO:"); // Print "TO" - object temperature
oled.setFontType(2); // 7-segment font
oled.print(String(therm.object(), 1)); // Print
oled.setCursor(0, 20); // Set cursor to top-middle-left
oled.setFontType(0); // Repeat
oled.print("TA:"); // Print "TA" - ambient temperature
oled.setFontType(2);
oled.print(String(therm.ambient(), 1));
oled.display();
delay(250);
}
/*4 is the total lenght of number,maximun number accepted is 99.99*/
String value = String(therm.object(), 1);
float temperature = value.toFloat();
dtostrf(temperature, 4, 2, str_val_1);
sprintf(payload, "%s","");
sprintf(payload, "{\"");
sprintf(payload, "%s%s\":%s", payload, VARIABLE_LABEL_1, str_val_1);
sprintf(payload, "%s}", payload);
//Send the payload to Ubidots
sendData(payload);
}
delay(250);
}
INSTRUCTIONS:
1) You can download the code here: ubidots_temp.rar
2) Please type the name of your SSID and password in the code lines shown below:
char const * SSID_NAME = "*********"; // Put here your SSID name
char const * SSID_PASS = "************"; // Put here your password
3) In the next chapter (Design for A Cause 2021 - Health Monitoring in Home Utilizing IoT – Blog #4) I will show you how to get the DEVICE_LABEL, TOKEN, and VARIABLE_LABEL_1 of your Dashboard created. Once done, please type the information in the code lines shown below:
#define DEVICE_LABEL "arduino-nano-33"
#define TOKEN "BBFF-******************************"
char const * VARIABLE_LABEL_1 = "temperature";
4) Finally verify and upload the code to the Arduino NANO 33 IoT board
3D PRINTING AND ASSEMBLING THE DEVICE
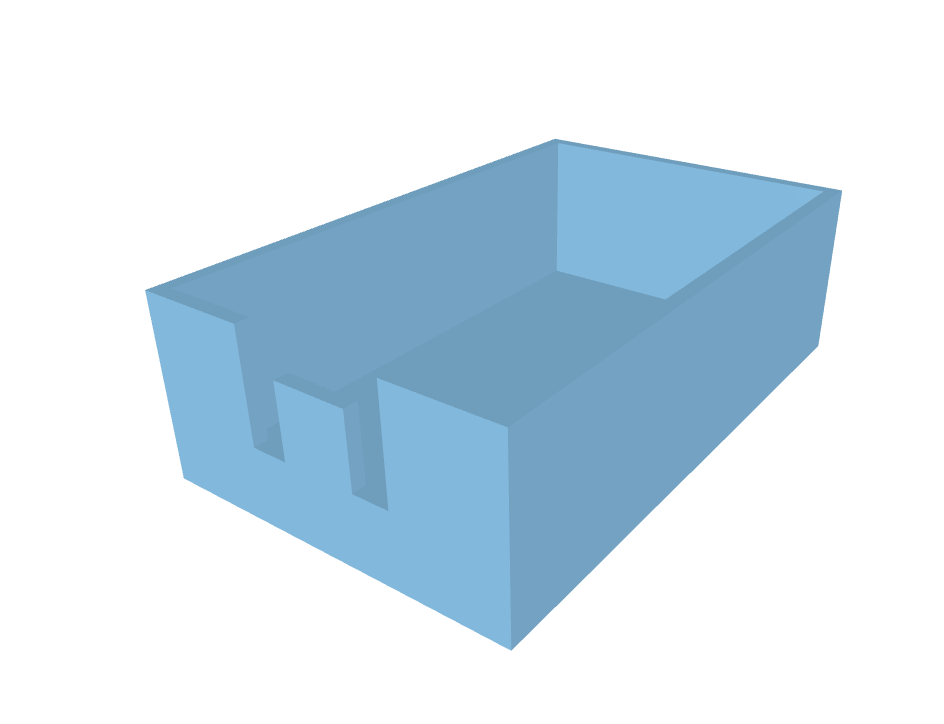
In the image below we show the box designed for this device.
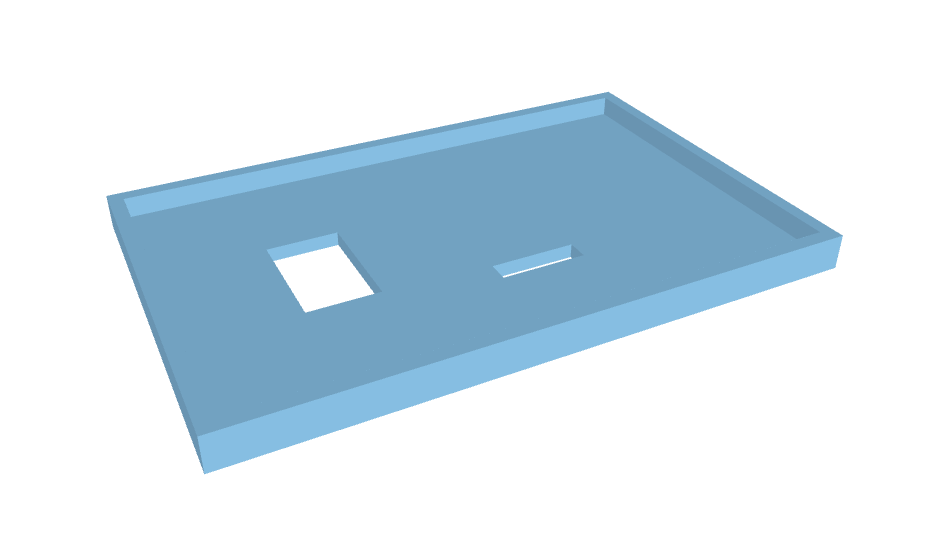
Also, the image below shows the cover.
If you want to make a 3D impression of these designs, you can download the STL files here: health_monitoring_box.rar
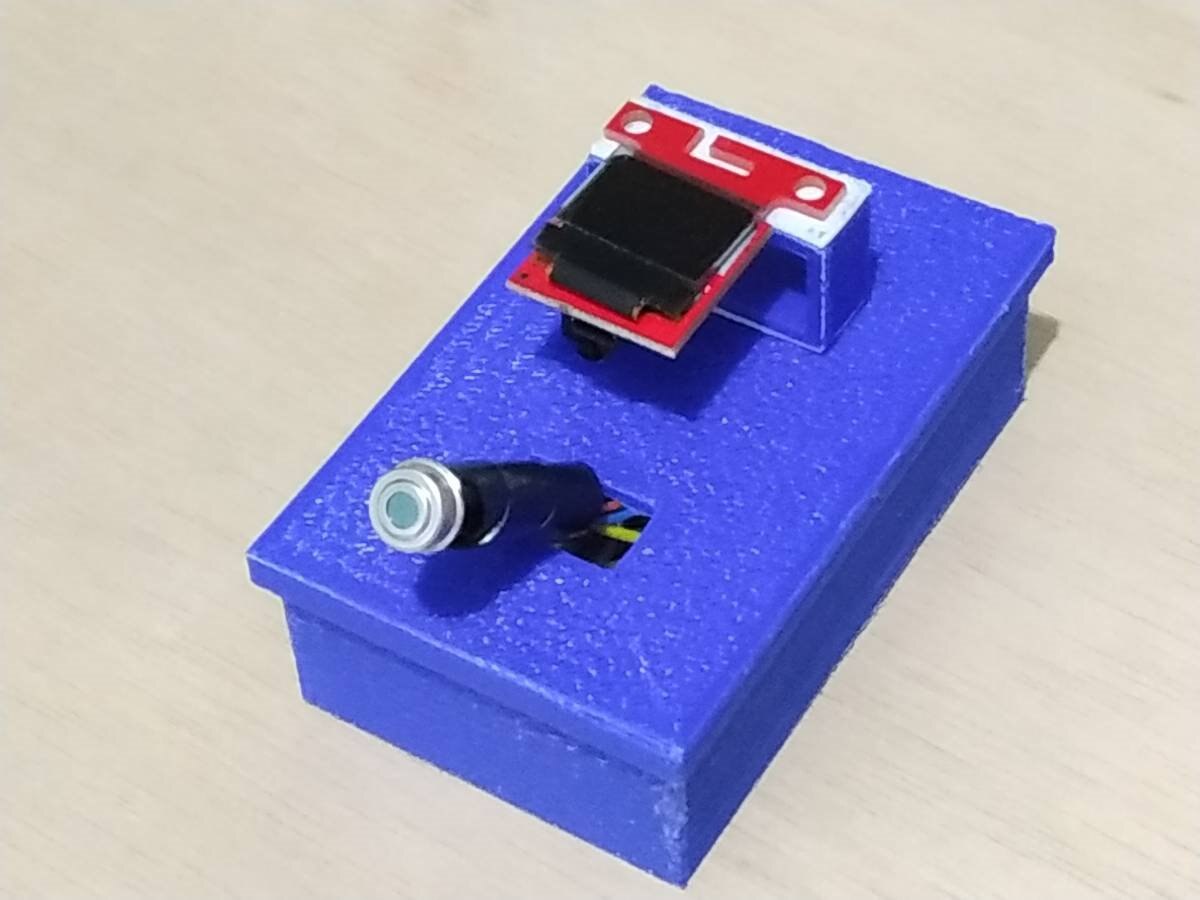
The image below shows the assembled project.