


Hello!
It's been a bit silent in the Energy Harvesting Blog lately, I think everyone is trying to get their harvesting going... I'll let you know what I did last week
Trade fair:
First, a few very dodgy pictures; I went to the Electronics and Automation Trade Fair in Utrecht, and of course Wurth was also there. To my delight they had a table with both RoadTest Challenges: wireless power and Energy Harvesting; very nice to see. The other picture shows 'Energy Harvesting Development On-The-Go'. As I'm very productive while sitting in the train, I took my EnergyMicro board with me.
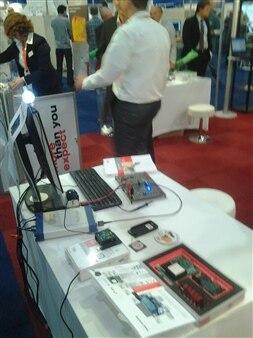
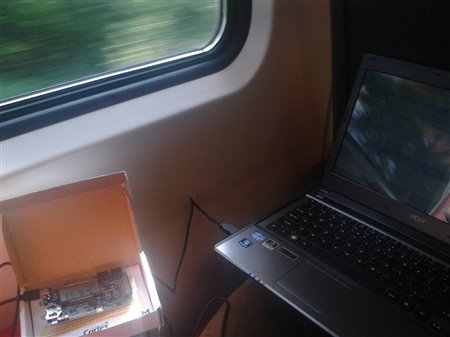
Trade show with Energy Harvesting, and debugging on the train
Temperature sensor
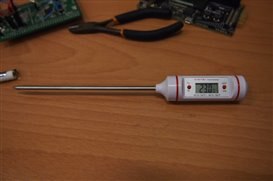
Because I want to determine whether my egg is ready, I need to measure temperature. I received this thermometerthis thermometer in the mail last week, which I'm going to use in this project. Of course, the first thing to do is to open it up and look what's inside:
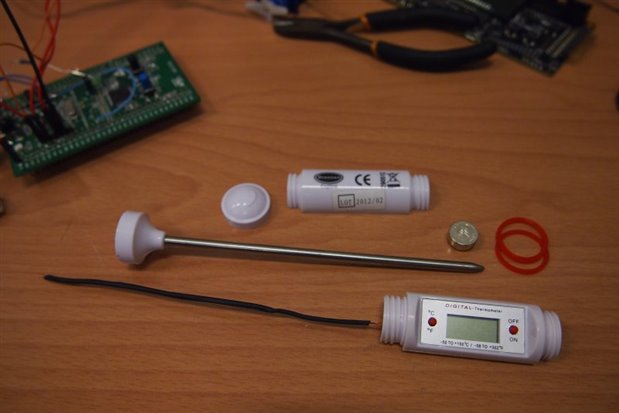
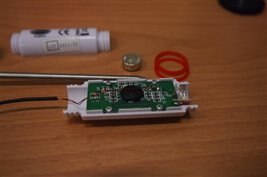
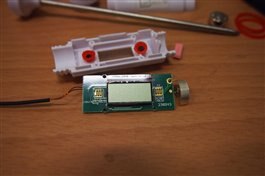
I'm going to use the sensor part, and maybe later use the display, but I think I won't be able to finish that in time. Now, I have to find out what sensor it is. That actually was harder than I thougt; at room temperature it was about 100kOhm, so I guessed it was either a 100kOhm PT100, or a thermistor. Dipping the probe in boiling water gave me about 6.7kOhm, which helped me a lot in finding the right sensor type. This chart shows the right resistance-versus-temperature chart.
Now I had to hook it up to the demo board. I soldered the thermistor between ADC0_CH1 and GND, and placed a pull-up resistor between ADC0_CH1 and PD0. Now, when I want to do a temperature measurement, I can make output PD0 3V3 (High) and measure the voltage on ADC0_CH1. After the measurement, I turn PD0 low again, and no current will flow through the thermistor and pull-up anymore! This has several benefits:
- The thermistor won't heat up due to its own dissipation (not such a big problem here, but would be a problem in high precision situations)
- Energy is only used when it is needed!
Writing code
For those interested: here is my code repository
As said before, I'll start out with the 'inttemp' example code for the STK3700. I made the following changes:
- Remove Fahrenheit calculations (not necessary)
- Change temperature reading to ADC_CH1 instead of internal sensor
- Add switching on- and off of PD0 to power the Thermistor
- Add calculation to change voltage readout to resistor value
- Added calculation of temparature based on Beta value, as per this wikipedia link, and based on a Beta value of 3892. Had to include math.h for log() and exp() functions
I'm surprised at the ease of coding each time I start with new ARM controllers. So many functions are given in libraries, and example code is really easy to comprehend. Back in the time when I started programming AT90S8535's you had to do a lot of peripheral code writing yourself, and if you didn't, the generic code would always be insufficient for your needs. Great to see that the API's have really changed to great usable material!
Also, using the debugger works like a charm, I'm developping the EFM32 from code::blocks, and use the JLinkGDBserver from Segger. The other great debugging tool is the display on the board, especially because you can simply printf() to it!
Results so far:
Thermistor measurement goes well, I get a good resistor reading. The conversion to temperature also works now! I'll have to make a temperature-to-egg-hardness-algorithm now..... Stay Tuned!

