


Three blog posts in one day, what gives? We are currently in the grips of a snow storm that has closed roads and businesses. I have the time so why not blog with it.
This post is designed to provide some details around physically assembling the two MIKROE boards and Raspberry Pi and the configuration needed to have the Pi detect the boards. I found little to no information on how to accomplish this. Knowing that if you let the magic smoke out of electronics it doesn't work anymore, I created this post in the hope you can avoid that.
I acknowledge misza contributions and especially his second blog post, Blog #2: Introduction to MAX40080 as the major contributing factor to me getting this far.
I am extremely disappointed by not surprised in the lack basic support documentation that I have found so far. The details in misza second blog post contributed to me getting this working.
- For my assembly I have three printed circuit boards.
MIKROE Current 6 click (C6C)
MIKROE Pi 3 click shield (P3CS)
Raspberry Pi 3B (Pi3B)

The C6C plug into socket 1 or 2 on the P3CS board. There is no keying on the board to ensure the boards are connected correctly. Just make sure the terminal strip end of the C6C board aligns with the header pins of the P3CS board as shown in the drawing.
The P3CS is a board that fits on top of the Raspberry Pi single board computer. I found this youtube video that demonstrates the process nicely. https://www.youtube.com/watch?v=sDxZRZGz9E4
If you don't use the stand-offs in the assembly, I strongly encourage you to place a non-conductive material in between the board sandwich. I have had shield board touch components on the Pi releasing the magic smoke. In my setup I stuffed the Pi instruction sheet to make the sandwich. It is alway nice to keep things loose in development because things change and removing screws is such a pain.
The assumption is that you are familiar with loading an Raspberry Pi OS on the Raspberry Pi. If not head on over to this link . https://www.raspberrypi.com/documentation/computers/getting-started.html
for the consumables.
With a SD card installed and the Pi/Click sandwich assembled apply power to the Raspberry Pi.
The click assembly uses i2C bus for communication. This needs to be enabled in the Pi operating system. Start the Raspberry Pi configuration tool to make this change.
sudo raspi-config
Use the arrow keys to navigate to the required menu option.
3 Interface Options> I5 I2C Enabled/disabled automatic loading of I2C kernel module> <Yes>.
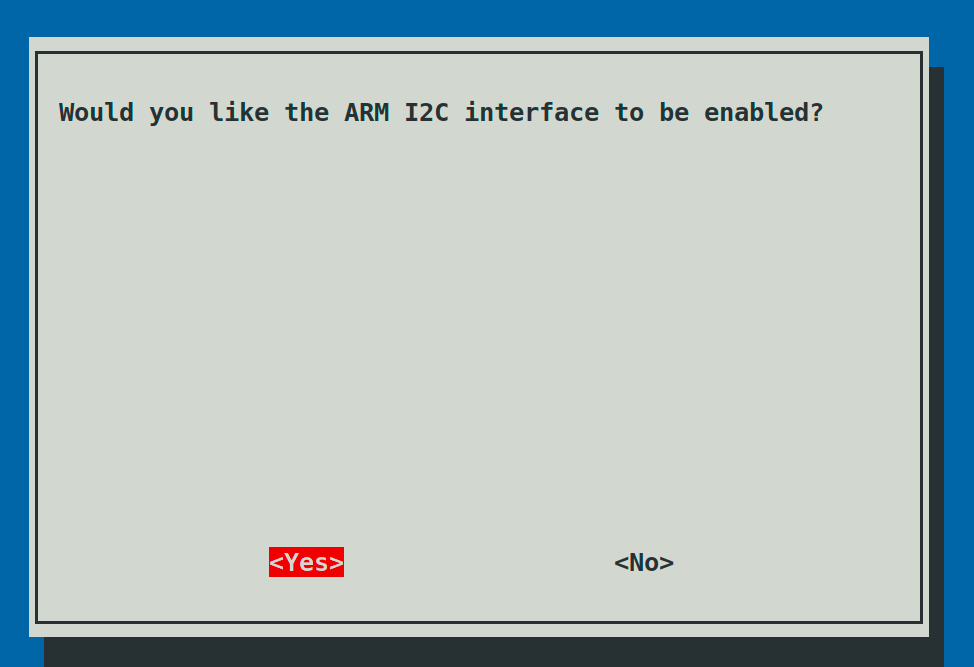
I recommend a reboot. Some options will take immediately and others do require the reboot. I just reboot after config changes to be sure.
As the operating system has matured some software is included by default and others still have to be added. I’m never quit sure so I run the command and if the software is there, then no fault found. From the Pi terminal install the following software tools.
sudo apt install python3-smbus i2c-tools
The i2c-tools suite will provide details about what devices are available.
From the command line on the Pi use either
sudo i2cdetect -y 1
or
sudo i2cdetect -y 0
and you should get an output.
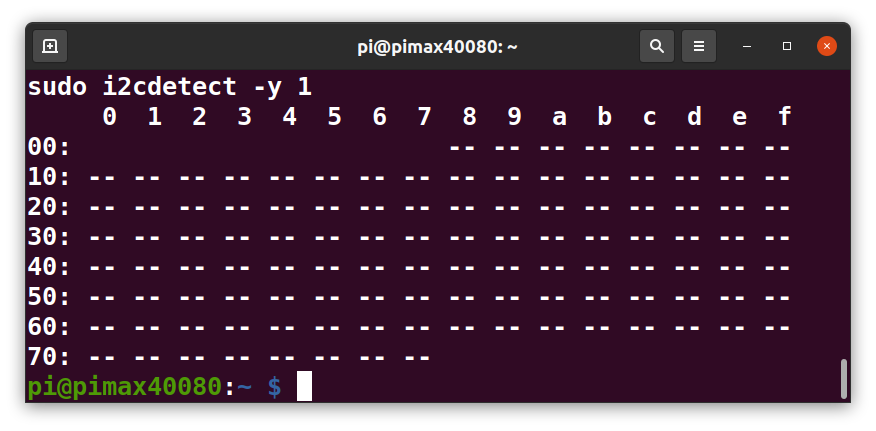
The screen shot is the command output with no devices detected. What gives everything is assembled and connected?
As misza pointed out in his blog post, the Current 6 Click board has a EN (enable) pin that helps determine the i2C address for the board. On the shield board it is labeld CS. I recall this being chip select from my legacy careers. The pin is controlled via a Raspberry Pi GPIO pin. For a C6C board in slot 1 of the Pi3CS board it is gpio 8 and in slot 2 it is gpio7.
The enable needs to be established on boot. A common method to configure a gpio on boot and have them permanent is to make changes to the /boot/config.txt
I found an explanation at this link to carry you through the weeds.
https://forums.raspberrypi.com/viewtopic.php?f=117&t=208748
If you just want the details. Add the following entry to the bottom of the config.txt file
[all]
#Set GPIO8 to be output set to 1
gpio=8=op,dh
If your C6C board is in slot 2 change the 8 to a 7.
After saving the changes reboot.
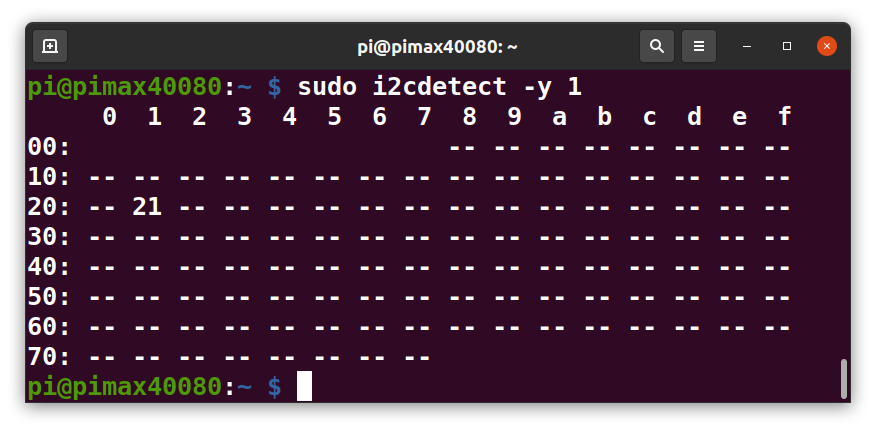
Now the output from the i2c-tools detect should show an device.
sudo i2cdetect -y 1
I observed some strange behaviour with the click board that I have not seen with other i2C type boards.
If you enable a gpio and use i2ctools to detect the board, then remove the gpio enable and reboot, the i2c-tools output slows to a craw, where as before the output appeared almost instantly. Only after you remove the C6C board does the i2ctool return to normal. It seems once the board is enabled it loads down the i2C bus even after the enable is removed.
I have little knowledge to know what is happening other than I notice the i2ctools not performing and wanted to see if it was something I was doing to cause it to happen.
This completes my process to assemble and configure the MIKROE boards so that it can be detected. I hope it helped. Now to figure out how to read the sensor board, that is something else entirely different.
-

misaz
-
Cancel
-
Vote Up
0
Vote Down
-
-
Sign in to reply
-
More
-
Cancel
-

colporteur
in reply to misaz
-
Cancel
-
Vote Up
0
Vote Down
-
-
Sign in to reply
-
More
-
Cancel
-

colporteur
in reply to colporteur
-
Cancel
-
Vote Up
0
Vote Down
-
-
Sign in to reply
-
More
-
Cancel
Comment-

colporteur
in reply to colporteur
-
Cancel
-
Vote Up
0
Vote Down
-
-
Sign in to reply
-
More
-
Cancel
Children