


#5 Implement AI vision with Luckfox Pico Pro Board
For Extreme Environment Home Assistance Sensors
1 Brief
Within the Home assistant Operation System(HAOS) Add-ons, there are VLC player plugin. The video can be streamed in RTSP for supervision.
The video can be preprocessed with AI engine. I have test with Raspberry Pi 4B, it runs in Raspbian OS and work well with most AI engine like tensorflow and pytorch. But it consumed more power. Then I play with Luckfox Pico Pro and start with MNIST number recognition. Other model such as yolo can work well within this frame.
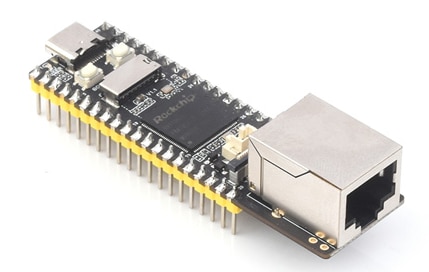
2 Luckfox Pico Pro
ESPhome is open sources and backend supported with Arduino Ecosystem and ESP-IDF if ESP chips are used.
LuckFox Pico Pro is low-cost micro Linux development boards based on the Rockchip RV1106 chip.RV1106 is a highly integrated IPC visual processing SoC designed for AI-related applications. It is built on a single-core ARM Cortex-A7 32-bit core with integrated NEON and FPU, and features a built-in NPU that supports INT4/INT8/INT16 mixed operations, with a computing power of up to 0.5 TOPs.
Furthermore, it features a new hardware-based ISP that supports various algorithm accelerators such as HDR, 3A, LSC, 3DNR, 2DNR, sharpening, haze removal, gamma correction, and more. Additionally, it has a built-in 16-bit DDR2 DRAM to maintain demanding memory bandwidth, as well as built-in POR, audio codec, and MAC PHY. In essence, the RV1103 is a powerful processor suitable for various AI application scenarios.
3 Train MNIST model in Pytorch
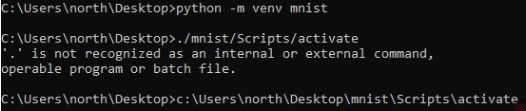
Prepare Pytorch engine environment with Anaconda or Virtual Environment in python
python -m venv mnist
Then install torch and torchvision. Run the following python code
from __future__ import print_function
import argparse
import torch
import torch.nn as nn
import torch.nn.functional as F
import torch.optim as optim
from torchvision import datasets, transforms
from torch.optim.lr_scheduler import StepLR
class Net(nn.Module):
def __init__(self):
super(Net, self).__init__()
self.conv1 = nn.Conv2d(1, 32, 3, 1)
self.conv2 = nn.Conv2d(32, 64, 3, 1)
self.dropout1 = nn.Dropout(0.25)
self.dropout2 = nn.Dropout(0.5)
self.fc1 = nn.Linear(9216, 128)
self.fc2 = nn.Linear(128, 10)
def forward(self, x):
x = self.conv1(x)
x = F.relu(x)
x = self.conv2(x)
x = F.relu(x)
x = F.max_pool2d(x, 2)
x = self.dropout1(x)
x = torch.flatten(x, 1)
x = self.fc1(x)
x = F.relu(x)
x = self.dropout2(x)
x = self.fc2(x)
output = F.log_softmax(x, dim=1)
return output
def train(args, model, device, train_loader, optimizer, epoch):
model.train()
for batch_idx, (data, target) in enumerate(train_loader):
data, target = data.to(device), target.to(device)
optimizer.zero_grad()
output = model(data)
loss = F.nll_loss(output, target)
loss.backward()
optimizer.step()
if batch_idx % args.log_interval == 0:
print('Train Epoch: {} [{}/{} ({:.0f}%)]\tLoss: {:.6f}'.format(
epoch, batch_idx * len(data), len(train_loader.dataset),
100. * batch_idx / len(train_loader), loss.item()))
if args.dry_run:
break
def test(model, device, test_loader):
model.eval()
test_loss = 0
correct = 0
with torch.no_grad():
for data, target in test_loader:
data, target = data.to(device), target.to(device)
output = model(data)
test_loss += F.nll_loss(output, target, reduction='sum').item() # sum up batch loss
pred = output.argmax(dim=1, keepdim=True) # get the index of the max log-probability
correct += pred.eq(target.view_as(pred)).sum().item()
test_loss /= len(test_loader.dataset)
print('\nTest set: Average loss: {:.4f}, Accuracy: {}/{} ({:.0f}%)\n'.format(
test_loss, correct, len(test_loader.dataset),
100. * correct / len(test_loader.dataset)))
if True:
parser = argparse.ArgumentParser(description='PyTorch MNIST Example')
parser.add_argument('--batch-size', type=int, default=64, metavar='N',
help='input batch size for training (default: 64)')
parser.add_argument('--test-batch-size', type=int, default=1000, metavar='N',
help='input batch size for testing (default: 1000)')
parser.add_argument('--epochs', type=int, default=14, metavar='N',
help='number of epochs to train (default: 14)')
parser.add_argument('--lr', type=float, default=1.0, metavar='LR',
help='learning rate (default: 1.0)')
parser.add_argument('--gamma', type=float, default=0.7, metavar='M',
help='Learning rate step gamma (default: 0.7)')
parser.add_argument('--no-cuda', action='store_true', default=False,
help='disables CUDA training')
parser.add_argument('--no-mps', action='store_true', default=False,
help='disables macOS GPU training')
parser.add_argument('--dry-run', action='store_true', default=False,
help='quickly check a single pass')
parser.add_argument('--seed', type=int, default=1, metavar='S',
help='random seed (default: 1)')
parser.add_argument('--log-interval', type=int, default=10, metavar='N',
help='how many batches to wait before logging training status')
parser.add_argument('--save-model', action='store_true', default=False,
help='For Saving the current Model')
args = parser.parse_known_args()[0]
use_cuda = not args.no_cuda and torch.cuda.is_available()
use_mps = not args.no_mps and torch.backends.mps.is_available()
if use_cuda:
device = torch.device("cuda")
elif use_mps:
device = torch.device("mps")
else:
device = torch.device("cpu")
torch.manual_seed(args.seed)
train_kwargs = {'batch_size': args.batch_size}
test_kwargs = {'batch_size': args.test_batch_size}
'''
if use_cuda:
cuda_kwargs = {'num_workers': 1,
'pin_memory': True,
'shuffle': True}
train_kwargs.update(cuda_kwargs)
test_kwargs.update(cuda_kwargs)
'''
transform=transforms.Compose([
transforms.ToTensor(),
transforms.Normalize((0.1307,), (0.3081,))
])
dataset1 = datasets.MNIST('../data', train=True, download=True,
transform=transform)
dataset2 = datasets.MNIST('../data', train=False,
transform=transform)
train_loader = torch.utils.data.DataLoader(dataset1,**train_kwargs)
test_loader = torch.utils.data.DataLoader(dataset2, **test_kwargs)
model = Net().to(device)
optimizer = optim.Adadelta(model.parameters(), lr=args.lr)
scheduler = StepLR(optimizer, step_size=1, gamma=args.gamma)
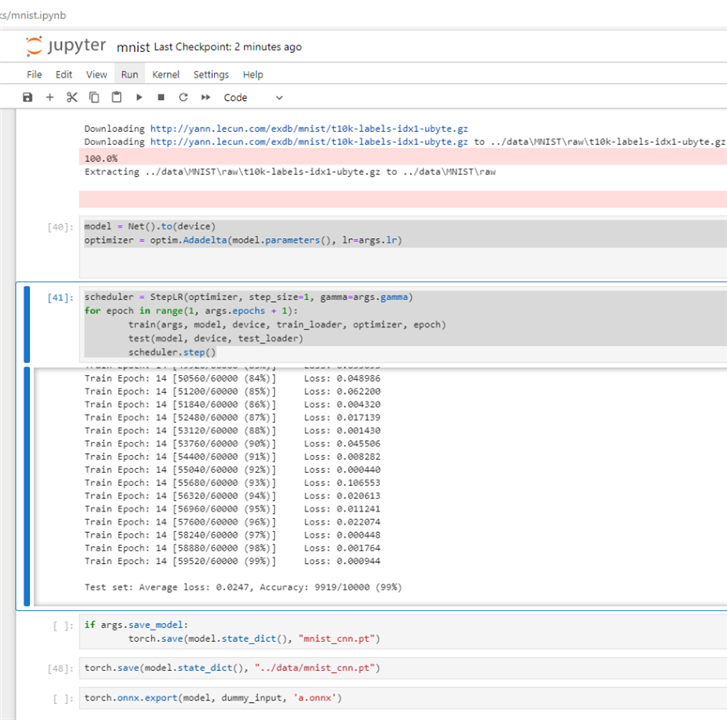
for epoch in range(1, args.epochs + 1):
train(args, model, device, train_loader, optimizer, epoch)
test(model, device, test_loader)
scheduler.step()
if args.save_model:
torch.save(model.state_dict(), "mnist_cnn.pt")
AI model is exported in ONNX format. The accuracy can reach 99% in MNIST dataset for 15 epho.
4 Prepare Rockchip SDK for AI
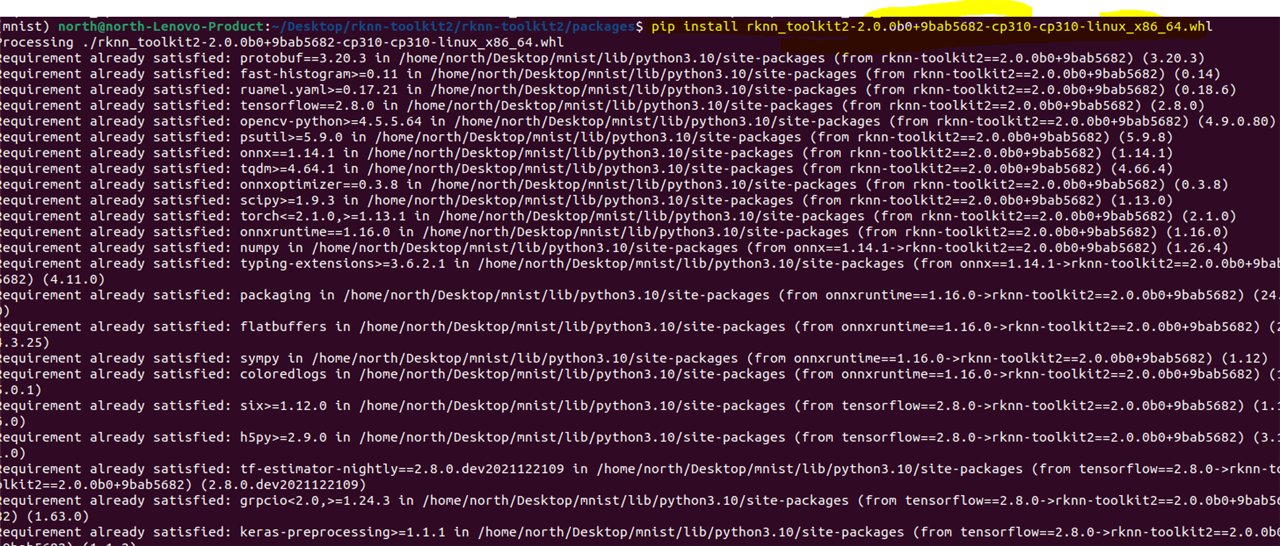
Download the rknn toolkit for convert ONNX into RKNN format, which compress the AI model into integer to save memory space. At the cost of lower accuracy.
git clone https://github.com/airockchip/rknn-toolkit2.git --depth 1
git clone https://github.com/airockchip/rknn_model_zoo.git --depth 1
Build the code as per Readme, then RKNN library is ready to use.
Then convert the ONNX format into Rockchip format in RKNN with the following code
import sys

from rknn.api import RKNN

DATASET_PATH = '../../../datasets/COCO/coco_subset_20.txt'
DEFAULT_RKNN_PATH = '../model/yolov5.rknn'
DEFAULT_QUANT = True

def parse_arg():
    if len(sys.argv) < 3:
        print("Usage: python3 {} onnx_model_path [platform] [dtype(optional)] [output_rknn_path(optional)]".format(sys.argv[0]))
        print("       platform choose from [rk3562,rk3566,rk3568,rk3588,rk1808,rv1109,rv1126]")
        print("       dtype choose from [i8, fp] for [rk3562,rk3566,rk3568,rk3588]")
        print("       dtype choose from [u8, fp] for [rk1808,rv1109,rv1126]")
        exit(1)

    model_path = sys.argv[1]
    platform = sys.argv[2]

    do_quant = DEFAULT_QUANT
    if len(sys.argv) > 3:
        model_type = sys.argv[3]
        if model_type not in ['i8', 'u8', 'fp']:
            print("ERROR: Invalid model type: {}".format(model_type))
            exit(1)
        elif model_type in ['i8', 'u8']:
            do_quant = True
        else:
            do_quant = False

    if len(sys.argv) > 4:
        output_path = sys.argv[4]
    else:
        output_path = DEFAULT_RKNN_PATH

    return model_path, platform, do_quant, output_path

if __name__ == '__main__':
    model_path, platform, do_quant, output_path = parse_arg()

    # Create RKNN object
    rknn = RKNN(verbose=False)

    # Pre-process config
    print('--> Config model')
    rknn.config(mean_values=[[0, 0, 0]], std_values=[
                    [255, 255, 255]], target_platform=platform)
    print('done')

    # Load model
    print('--> Loading model')
    ret = rknn.load_onnx(model=model_path)
    if ret != 0:
        print('Load model failed!')
        exit(ret)
    print('done')

    # Build model
    print('--> Building model')
    ret = rknn.build(do_quantization=do_quant, dataset=DATASET_PATH)
    if ret != 0:
        print('Build model failed!')
        exit(ret)
    print('done')

    # Export rknn model
    print('--> Export rknn model')
    ret = rknn.export_rknn(output_path)
    if ret != 0:
        print('Export rknn model failed!')
        exit(ret)
    print('done')

    # Release
    rknn.release()
The block diagram for RKNN is as follows
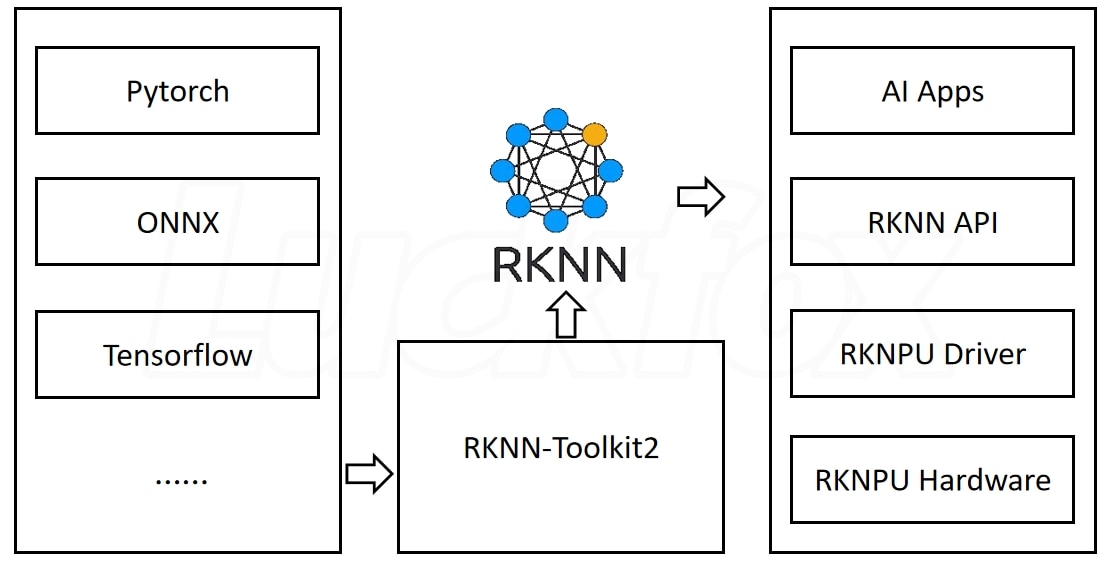
It bridge the AI engine and Rockchip hardware driver with RKNN toolkit APIs
5 Train MNIST model in Pytorch
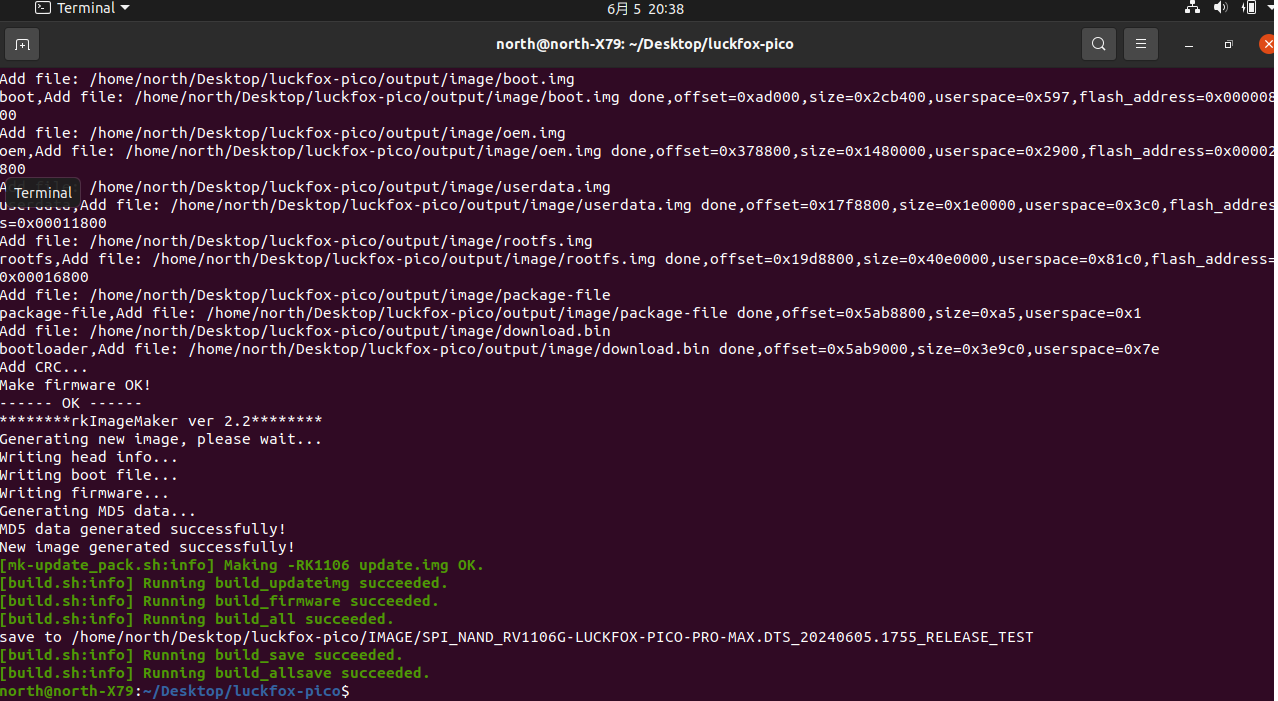
The firmware of Luckfox can be ubuntu or buildroot, download the source code of Buildroot for Rockchip RV1106 . Build from source code

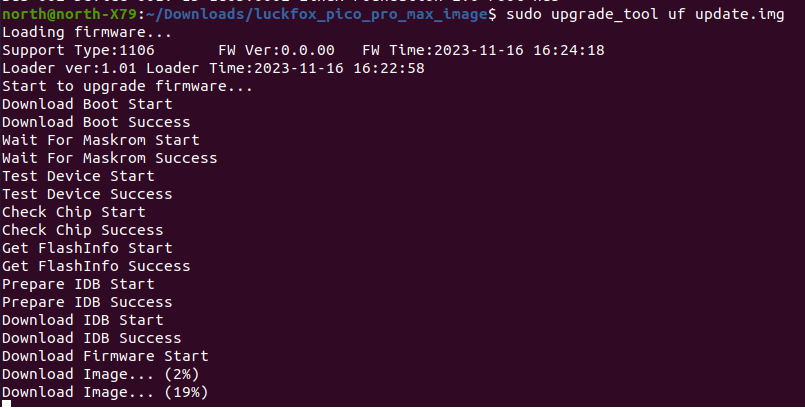
Or download binary file from Preparations | LUCKFOX WIKI . Then download into the Luckfox Pico board with upgrade_tool
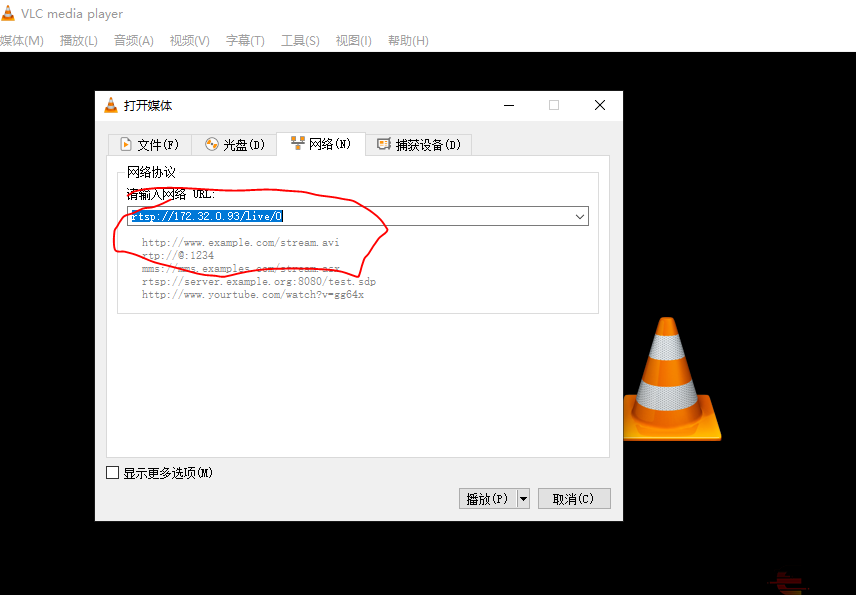
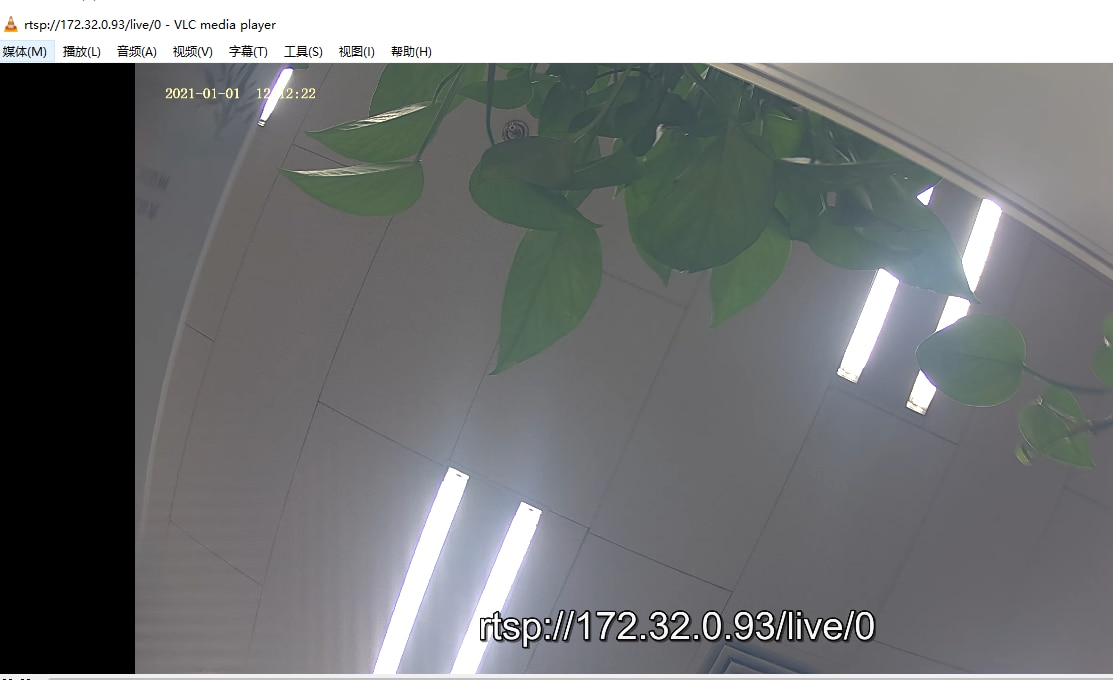
Now, the Luckfox Pico is ready to video steam, open VLC player in rtsp stream
Here is the video in 30fps
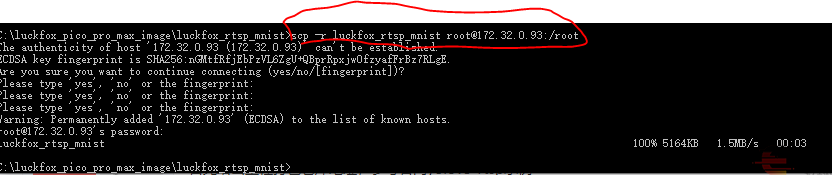
Then build the code and download the code with scp
Coding according to RKNN API, define the vector
void *data = RK_MPI_MB_Handle2VirAddr(stVpssFrame.stVFrame.pMbBlk);
cv::Mat frame(height,width,CV_8UC3,data);
Then inference the output with AI engine and above RKNN model
inference_mnist_model(&rknn_app_ctx, sub_pics[i], detect_results);
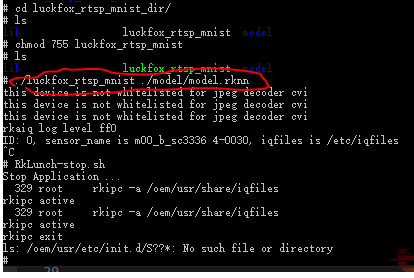
run the code with RKNN model
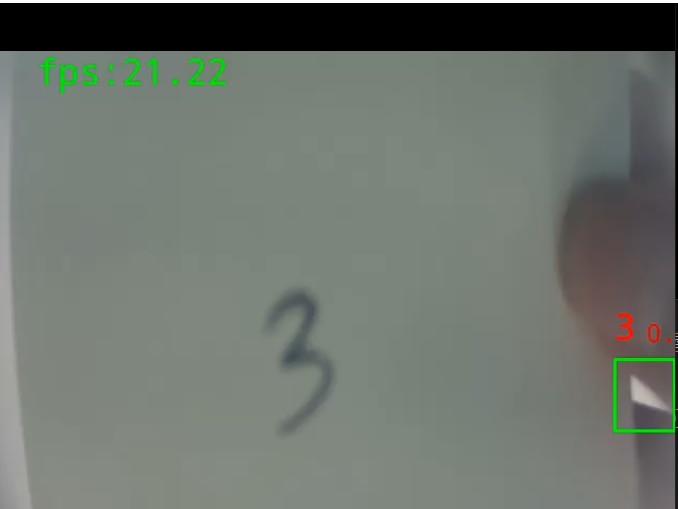
Open VLC player for rtsp stream, the number can be read with accuracy value, this is result for number "3"

6 Summary
This is how to getting start deploy AI model on Rockchip RV1106, with other model, more can be done. Such as person detection, face recognization.
Then network port of rtsp can be modified in Buildroot firmware configuration. Then this can be integrated into Home assistance Operation system for smart home.
Reference
[2] Getting Started Tutorial | LUCKFOX WIKI
