A good way to work is to use of an Operating System. In this case, the platform provided by AMD is a distribution called Petalinux. For a general purpose computing systems there are no problems selecting distributions or wide range of processors available, but this time there is the integration of custom IP and default tools to develop the software units in the Arty Z7 board. Petalinux is a custom Linux-based distribution for developing of images that will be integrated into the Board Support Package. This image can be a base image without tools for the basic work or select which tools should be integrated to the image for continuous integration and testing, such as nano, as a code editor, and gcc, as a C compiler. All the tools require that the application runs over Linux-based system, unfortunately some users are Windows-based Operating System users. This fact is not an obstacle to develop this kind of systems, most of the users can use a Virtual Machine with a Linux distribution, install the tools, and develop a Linux based system.
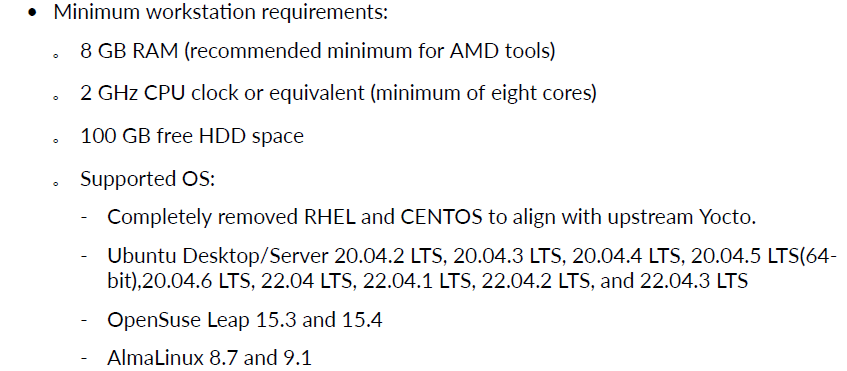
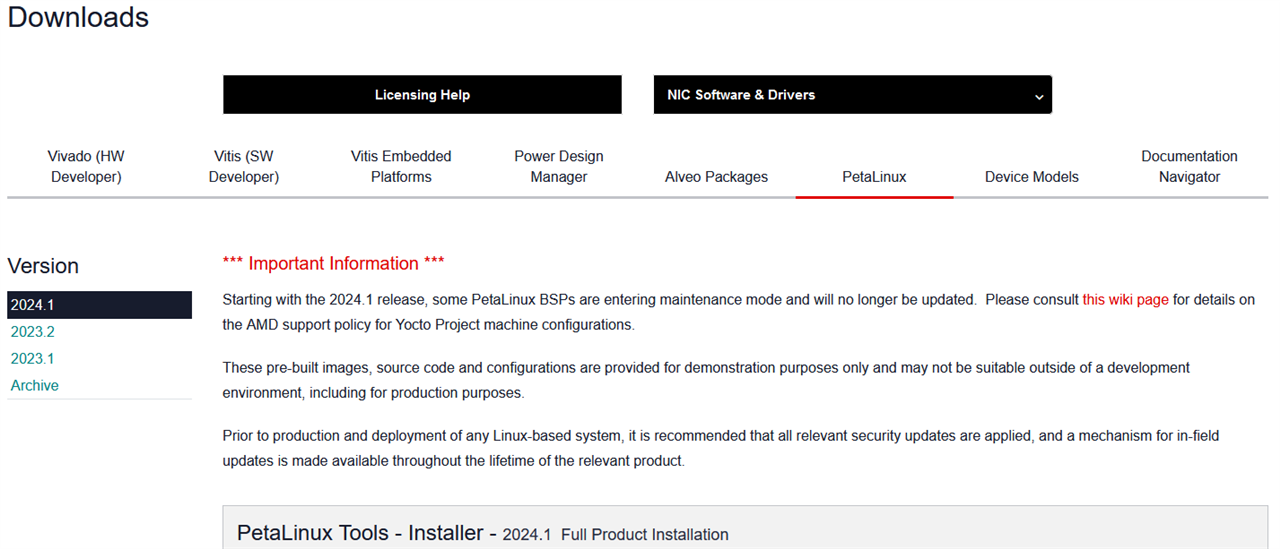
For the actual setup, the Oracle VirtualBox software unit is used for the OS virtualization. The version of the AMD Unified Installer for FPGAs & Adaptive SoCs used is the 2024.1 version, consequently, the Petalinux version must be the same. According to the Installation Requirements, Ubuntu Desktop 20.04.6 is selected as the operating system for the version 2024.1 since the version 2023.2 is compatible with the same system in case of platform downgrade. In addition, the computing resources must be shared with the virtualized system, so the memory assigned was 4 GB of RAM, although the minimum recommended is 8GB due to the limitations of the computer, 4/12 processors available in the Ryzen 5 8x, and a 150GB virtual disk. The virtual disk may have less space because the main software, Vivado/Vitis, is available in the Windows OS.

The Petalinux requires its main installation file downloaded from official AMD site, from here the tools must be the same version because there is a version according your unified installer.

To avoid increasing the complexity of interaction between the operating systems, the VirtualBox allows the data management through a shared folder. This can be added in the configuration of the machine. In order to reach this feature, the Guest options must be installed when you configure the OS with its ISO file. This folder allows the transfer of installation files or XSA platform definitions, and receive the Linux images or compilations for our board.
In the virtualized operating system, you must install the Petalinux in a isolated folder, this must contain only the petalinux files and no other kind of files. The project files must be managed in other folder. In order to use the Petalinux tools, the command below must be executed before any interaction,
source <Petalinux Installation Folder>/setting.sh
This command verify the system met the computational requirements for usage. This time, verify if the installation is correct, the space in disk is sufficient and network additional requirements. Here, the warn about the tftp server has not an impact for the compilation and generation of Linux images.

The PetaLinux Tools Documentation: Reference Guide (1144) contains the information about the Petalinux usage in the creation of custom distributions for architectures based on Zynq 7000, MPSoC and Microblaze. The first stage is create a petalinux project for our board, to do it the petalinux-create command will create a folder with the minimum files to start to work. Particularly, the command used is like below,
petalinux-create project <Options>
Here, the command will create a base for a project, but the options configure the project according to the platform to create from the starting level which colud be the following
| --template TEMPLATE | microblaze; zynqMP; zynq (selected for the ZYNQ7000 board); versal |
| --name | plDemo_ptlx (Based on the customIP demo) |
| --force | (only in case of overwriting) |
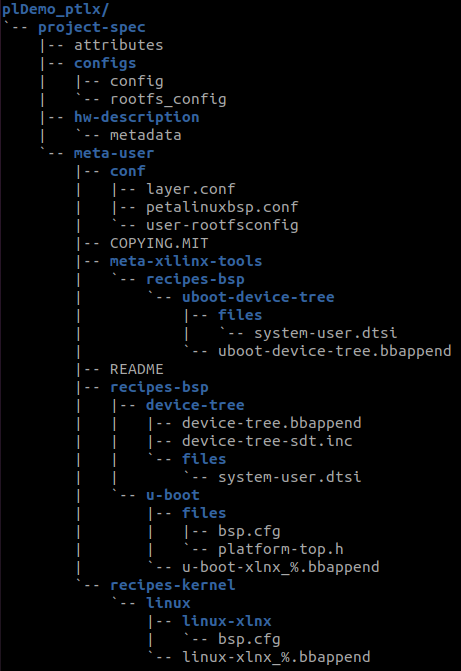
Upon successful execution, the command creates the following directory tree, which contains all the configuration files needed to build the Linux image. Here the developer is able to incorporate all the tools to develop its system. Some users, like me, prefers the usage of the tool nano to edit code and texts in the file system. Unfortunately, only vim can be configured by default in the starting project. To add tools to the catalog, it is required to modify the user-rootfsconfig file, located on <Petalinux Project Directory>/project-spec/meta-user/conf and add in the last line CONFIG_nano.
| {gallery}CONFIG_nano |
|---|
|
Directory Tree: Petalinux project directory |
|
User packages: Add the support for the nano editor |
To start the configuration of the image it is needed to add the XSA file, created in the Vivado project. When the Hardware is exported, the .bit file must be integrated. and execute the command petalinux-config --get-hw-description <Path to the XSA file>. After the correct reading, the developer can configure the image. For this test, only the hardware description can be updated, only Exit from the configuration interface. To add the development packages and other required according to the project, the command petalinux-config -c rootfs to add two important packages. The first package is the packagegroup-core-buildessential located on Filesystem Packages->misc. The second package is located on user Packages since the developer added manually the package in the configuration file. Finally, the command petalinux-build will compile and create a base directory with all the filesystem required for the boot image creation. The first time, the command downloads all the necessary packages to create the image. The first time you execute the command, you should receive an error creating the files from not available packages, you only execute again and will load the info from the cached files and comile successfully
| {gallery}Image configuration |
|---|
|
Get Hardware description: the XSA file configures the project |
|
nano editor: Configured in userrootfs-config file |
|
roofs config: Add the packages for the development in the board |
|
building process: compiling and download of the packages for the architecture |
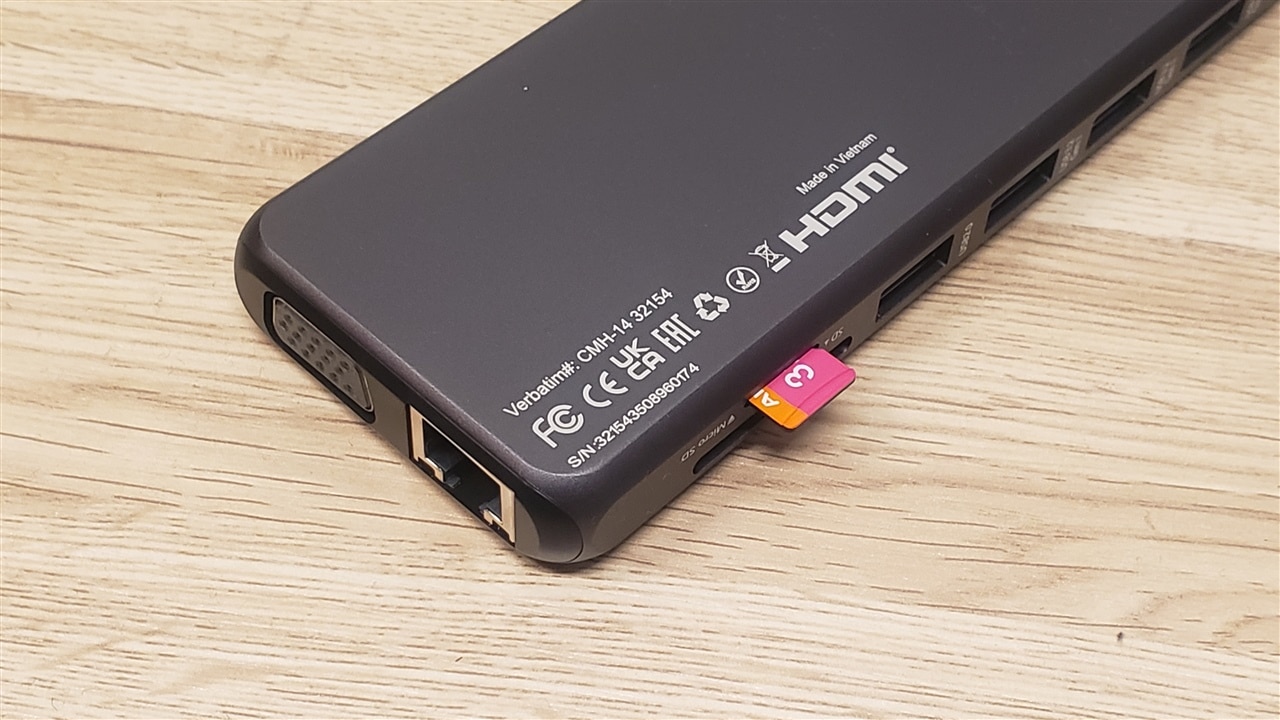
Before to start the construction of the SD image for the system it is necessary to check if the SD card reader can be integrated to as USB device in the VirtualBox system. If your SD card reader is not detected it is sufficient to get one with USB interface. To extend the device support you must download the Extension pack available in the VirtualBox site, install it and restart your system to ensure that the devices with USB 3.0 interfaces can be detected and configured in the system. (Sorry the spanish interface)

This time, a Verbatim USB C port extension is used to guarantee the SD reading in the virtualized system.

from the petalinux project directory change directory to images/linux and execute the command petalinux-package to create the images required to use the SD card. Here, the paramenters must be boot --u-boot to create the boot images. For the Programmable Logic configuration, the --fpga system.bit argument must be added, since the project creation renames the XSA files to system.* the bit file is integrated with that name. And the --force to overwrite the available files from past compilations.

The SD cars must be partitioned and formated as follows,
| Size | Format | Contains | |
| boot | almost 1GB | FAT32 |
BOOT.BIN boot.scr image.ub |
| root | almost 4GB | ext4 |
Extract the files from rootfs.cpio.gz > rootfs.cpio |
This is the minimum required to create a boot image in our board. The virtualized system and the USB card reader are required because the Windows OS has not native support for EXT4 partitions.
To test the system, use the system and with the nano editor create a .c file with the following,
#include<stdio.h>
#include<unistd.h>
#include<stdint.h>
#include<stdlib.h>
#include<fcntl.h>
#include<sys/mman.h>

#ifndef FCPU
#define FCPU 100000000UL
#endif

int main(int argN, char *argV[]){
        size_t dPWM_Size = 0x10000;
        off_t dPWM_Base = 0x43C00000;
        uint32_t *dPWM_vPtr;
        int fd;
        int i;

        float period_f;
        uint32_t params[2];

        period_f = FCPU/atoi(argV[1]);

        fd = open("/dev/mem", O_RDWR | O_SYNC);

        dPWM_vPtr = (uint32_t*)mmap(NULL, dPWM_Size, PROT_READ | PROT_WRITE, MAP_SHARED, fd, dPWM_Base);

        dPWM_vPtr[0] = (uint32_t)(period_f);
        dPWM_vPtr[1] = atoi(argV[2])*period_f/100;

        for(uint8_t k = 0; k < 10; k++){
                printf("%u\n", dPWM_vPtr[2]);
        }

        close(fd);

        return 0;
}
The code above test the access to the custopm IP, but this time is required a file descriptor since the Linux operating system manages all the resources and access to them. in this case the software require root privilegies. This creates the following behavior,


