Introduction
In this blog, we will install PYNQ in an SD card and boot the board from that. The goal is to be able to use python jupyter notebook on it.
What is PYNQ?
PYNQ is an open-source project from AMD that makes it easier to use Adaptive Computing platforms. Using Python and Jupyter notebooks, it allows users to access the power of programmable logic and microprocessors for high-performance applications. It's great for software developers, system architects, and hardware designers. PYNQ supports Zynq based boards (Zynq, Zynq Ultrascale+, Zynq RFSoC), Kria SOMs, Xilinx Alveo accelerator boards and AWS-F1 instances.
JupyterLab
JupyterLab is an interactive development environment for notebooks, code, and data. It combines all the features of Jupyter notebooks with a flexible interface, making it ideal for data analysis, research, and machine learning. PYNQ uses the Jupyter Notebook environment to provide examples and documentation.
Flashing the Image
The pre-compiled PYNQ image can be downloaded from this link.
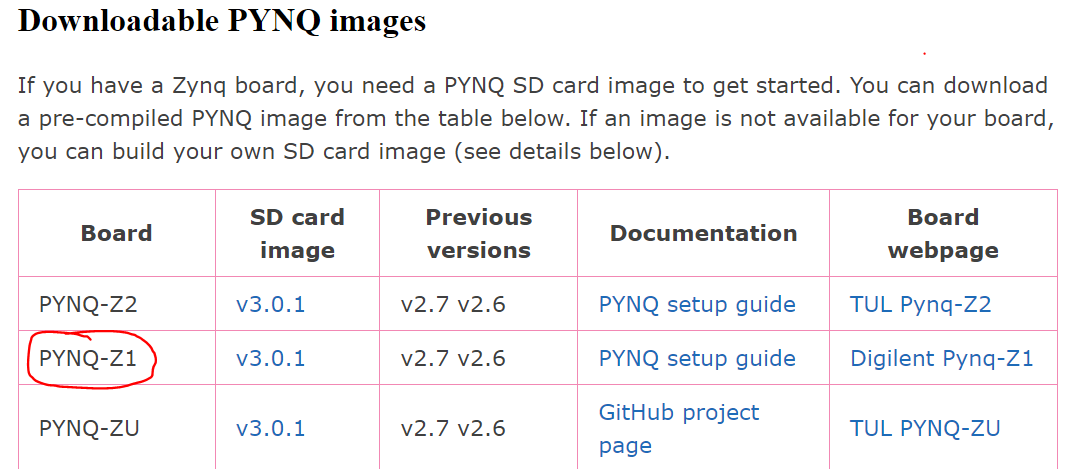
We will be using the PYNQ image for the PYNQ-Z1 board as both the boards (PYNQ Z1 & the Arty Z7) are similar in architecture.
After downloading the image, we will flash it on an SD card. The SD card should be >=8GB. I am using a 32GB SD card. I am using the Balena Etcher to flash the image on the SD card. The BalenaEtcher can be downloaded from this link. After installing it, open the Balena Etcher. Select the pynq image file and the USB device as target device (SD card) and click on flash. It will take a few minutes to complete.
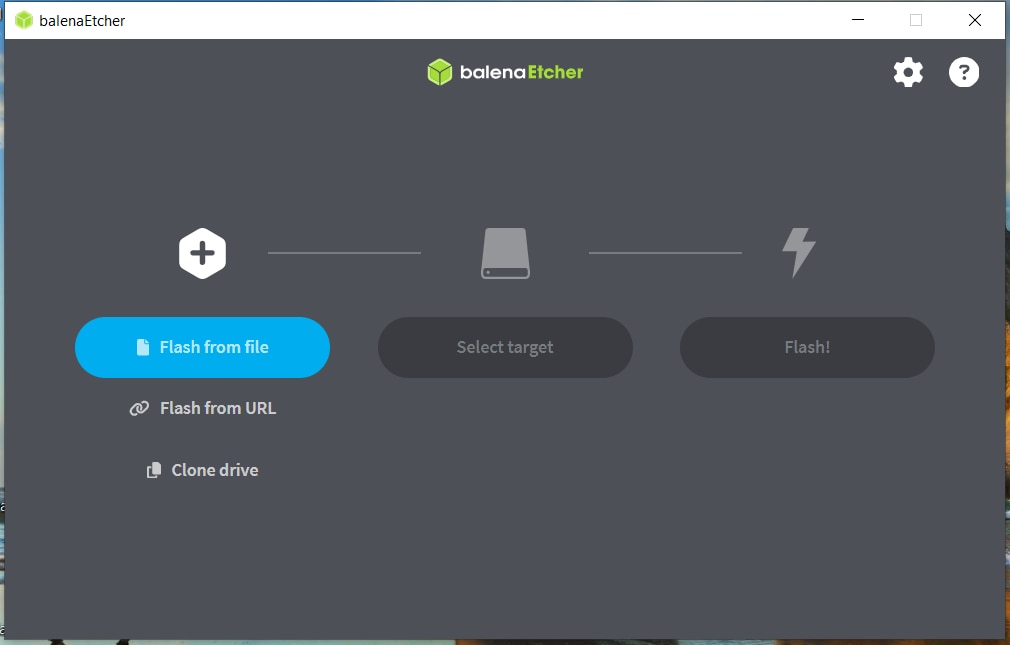
After the flash is successfully complete, remove the SD card from the computer. We will insert this SD card in the board and boot from it in the coming sections.
Running PYNQ on Arty Z7
In this section, I will go through the steps of installing PYNQ on the Arty Z7 board. I am following the steps mentioned on this guide for the PYNQ-Z1 board. Same steps can be used for Arty Z7 also.
Board Setup
Actually, the process is pretty simple. There are a bunch of blue colored pin covers on the board. Till now, I thought these were only covers for the pins but actually these serve very important purpose. Based on the pins on which these are placed, the board chooses from where to boot (SD Card, QSPI Flash or JTAG) and which power supply to use (USB or external adaptor). The boot mode is selected using pin JP4 and the power source is selected using pin JP5. By default, JP4 is set to QSPI and JP5 is set to USB. Now follow the following steps to boot from SD Card.
- Set the JP4 / Boot jumper to the SD position by placing the jumper over the top two pins of JP4.
- Set the JP5 / Power jumper to the USB position to power the board from USB cable.
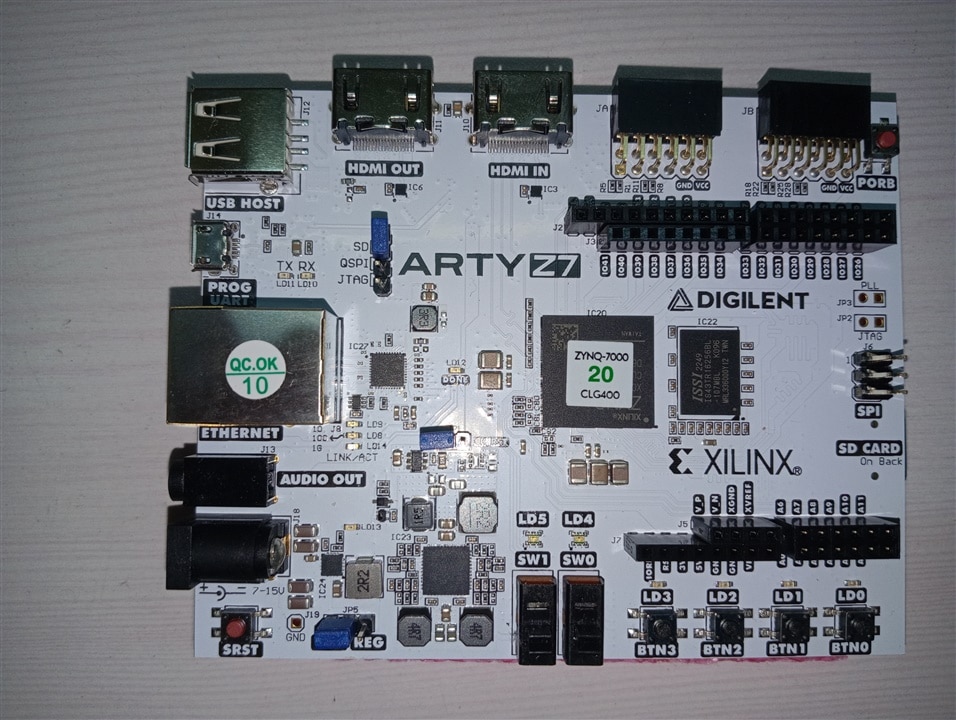
- Insert the Micro SD card loaded with the PYNQ-Z1 image into the Micro SD card slot underneath the board (J9).
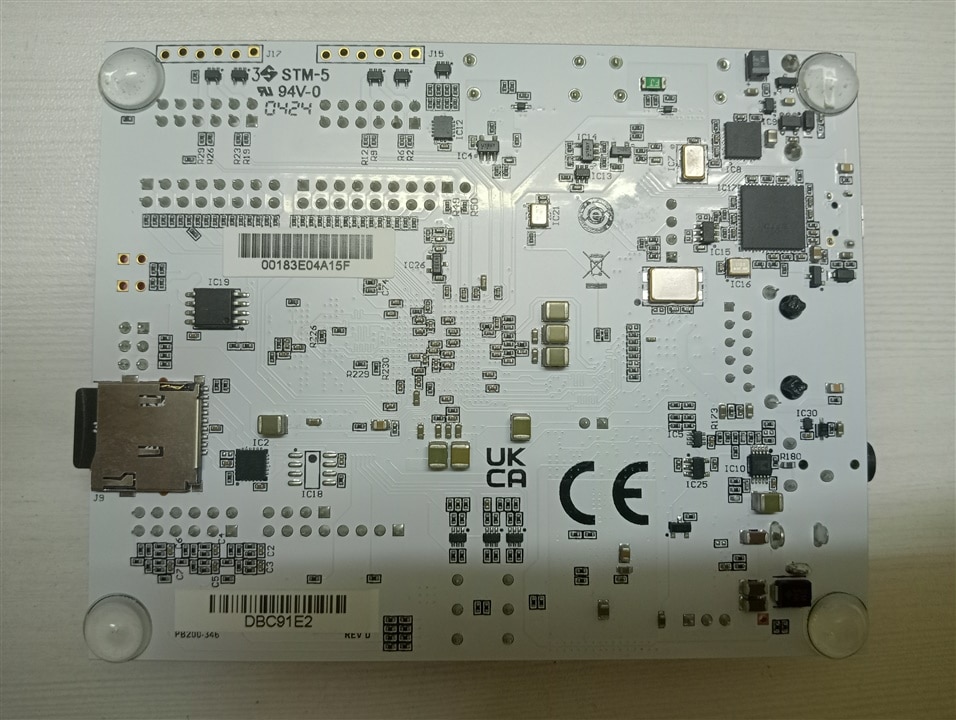
- Connect the USB cable to your PC/Laptop, and to the PROG - UART / J14 MicroUSB port on the board to turn it on. When the board is powered, it should follow the below led sequences:
- The Red LD13 LED will come on immediately to confirm that the board has power.
- After a few seconds, the Yellow/Green LD12 / Done LED will light up to show that the Zynq® device is operational.
- After a minute you should see two Blue LD4 & LD5 LEDs and four Yellow/Green LD0-LD3 LEDs flash simultaneously.
- The Blue LD4-LD5 LEDs will then turn on and off while the Yellow/Green LD0-LD3 LEDs remain on. The system is now booted and ready for use.
- I have attached a short video of the time when the blue LEDs flash below:
Ethernet
Once the board is setup, we need to connect to it to start using Jupyter notebook. It will allow us to update the board and easily install new packages. Follow the below steps:
- Now, connect the board to the ethernet port of the computer using cable.
- First we need to assign an Static IP Address for our computer. We need to set it to be in the same range as the board. e.g. if the board is 192.168.2.99, the laptop/PC can be 192.168.2.x where x is 0-255 (excluding 99, as this is already taken by the board). The below steps are for Windows 10:
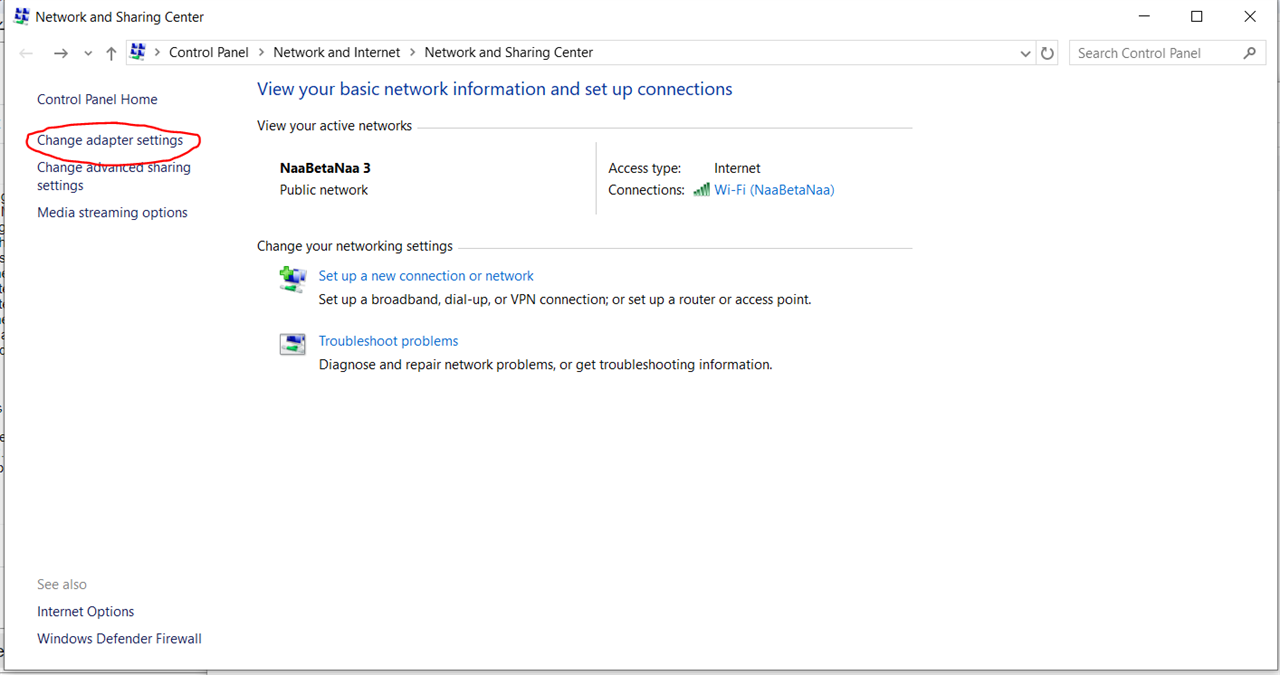
- Go to Control Panel > Network and Internet > Network and Sharing Center.
- Click on 'Change Adaptor Settings'.
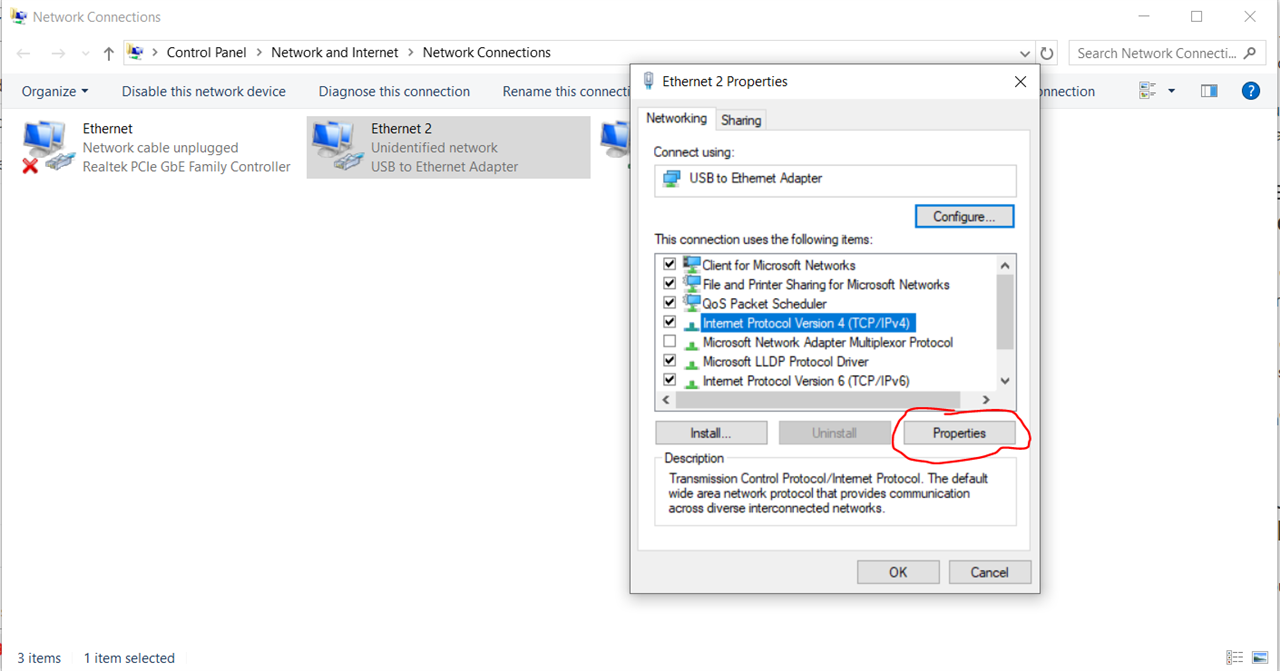
- Right click on the Ethernet then select Properties. In the properties window, select Internet Protocol Version 4 (TCP/IPv4) and again click Properties.
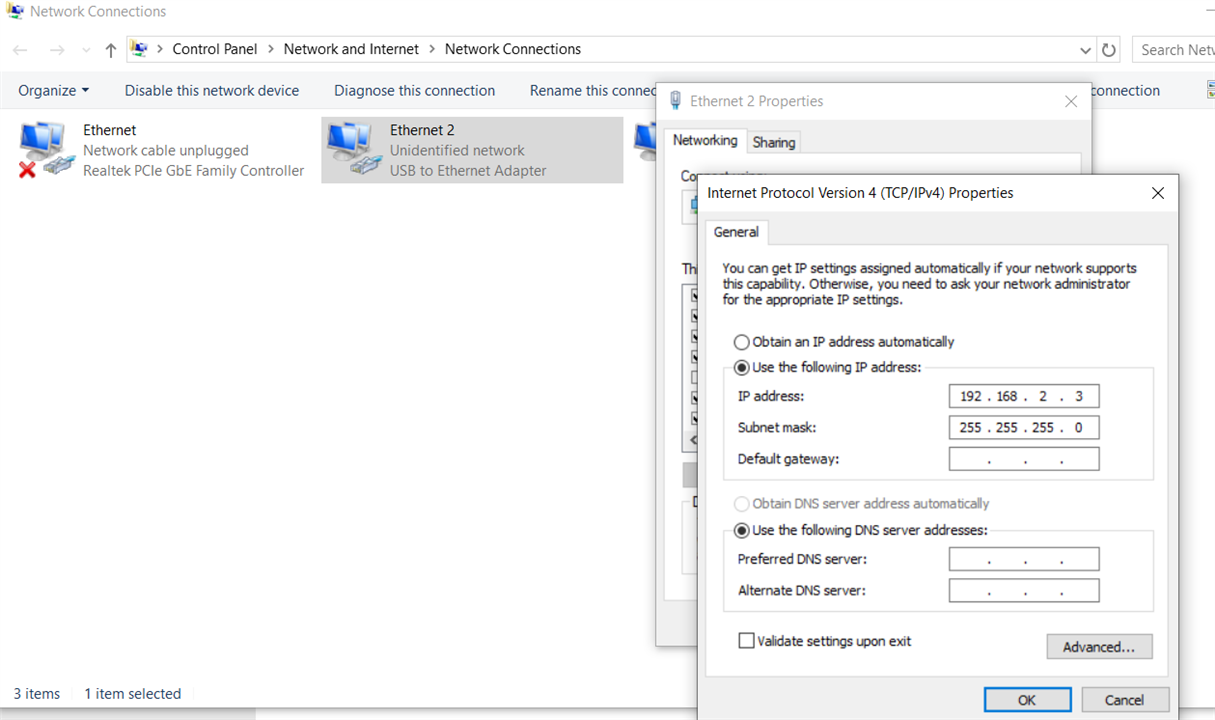
- Select Use the following IP address.
- Set the Ip address to 192.168.2.3 (or any other address in the same range as the board).
- Set the subnet mask to 255.255.255.0 and click OK.
- Now, Browse to http://192.168.2.99
- It should open a jupyter notebook. The default username is 'xilinx' and password is 'xilinx'.
- After logging in, you should see the below screen.
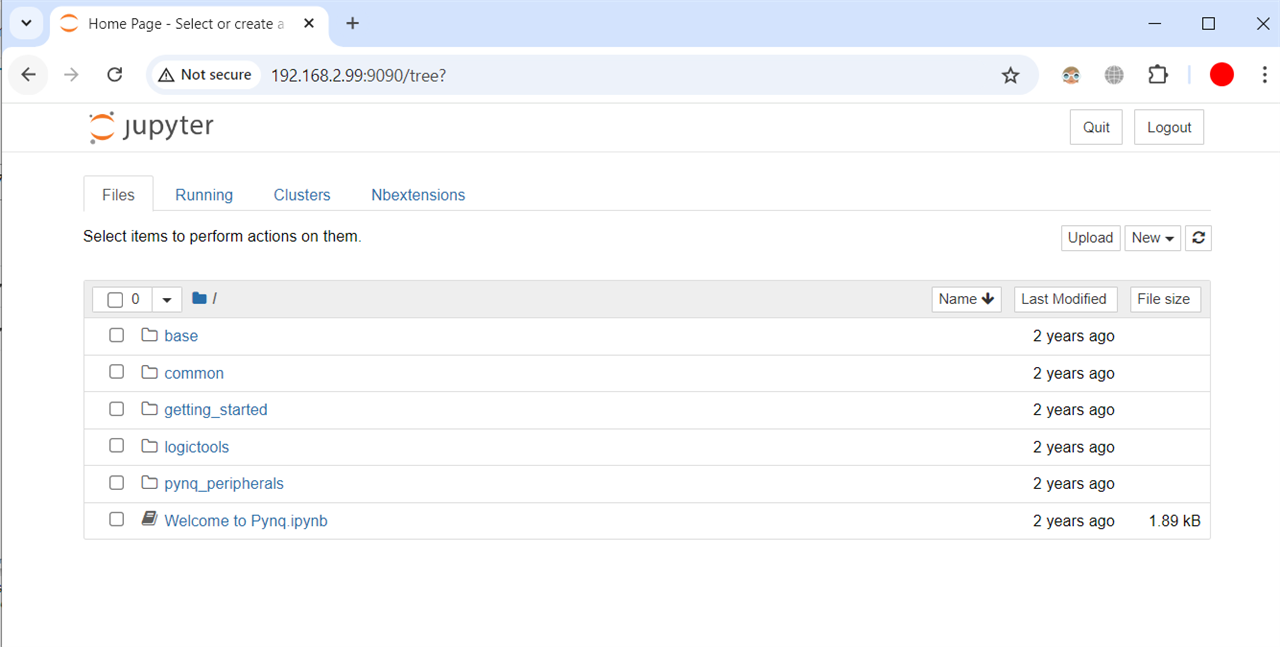
- The default hostname is pynq and the default static IP address is 192.168.2.99
The Getting_Started folder in the Jupyter home area includes some introductory Jupyter notebooks.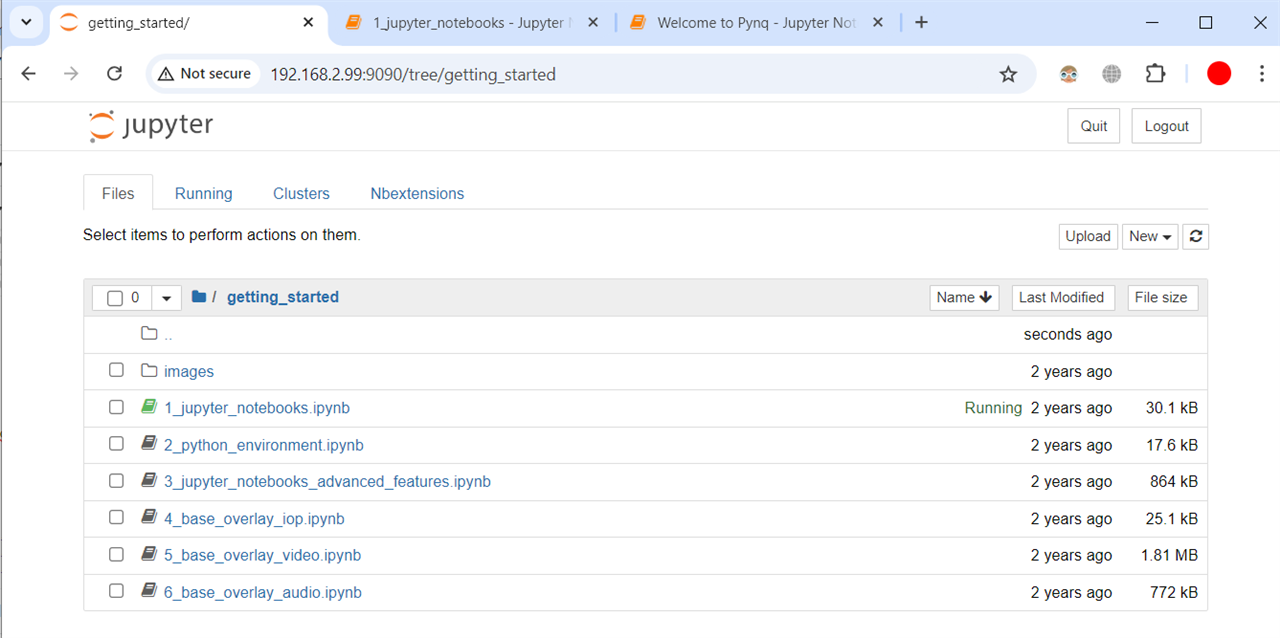
We can also access the Pynq home area as a network drive, to transfer files to and from the board. To access the Pynq home area in Windows Explorer type the following in the navigation bar.\\192.168.2.99\xilinx # If connected to a Computer with a Static IP
When prompted, the username is 'xilinx' and the password is 'xilinx'. The following screen should appear: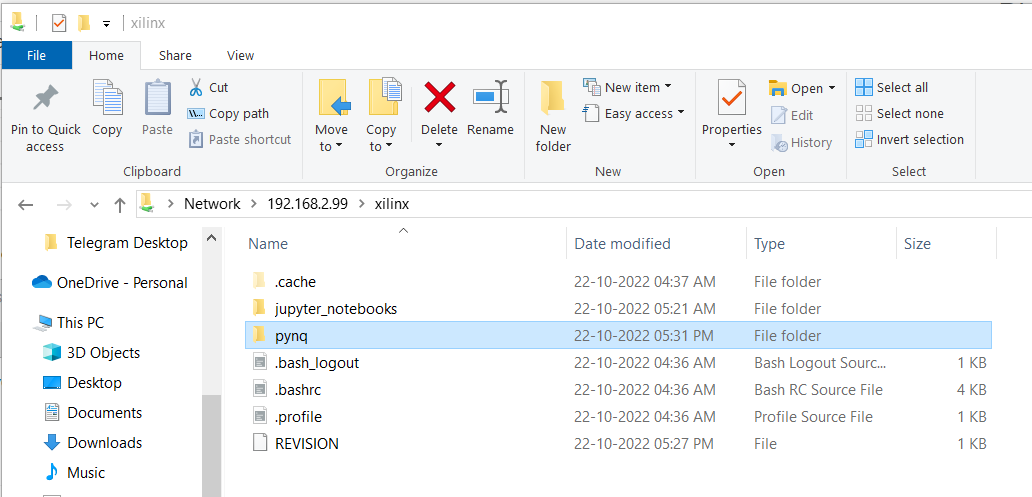
Few other settings like hostname, proxy settings, opening a USB serial terminal can also be done. The detailed steps can be found on this link.
Running Python code on Arty Z7
In this section, we will try to run some Python code using the jupyter notebook.
Creating a folder
To create a new folder in Jupyter, click on the 'New' drop down menu and select 'Folder'.
An 'Untitled Folder' will appear. To rename the folder, click on the checkbox against it to select it and click on 'Rename'.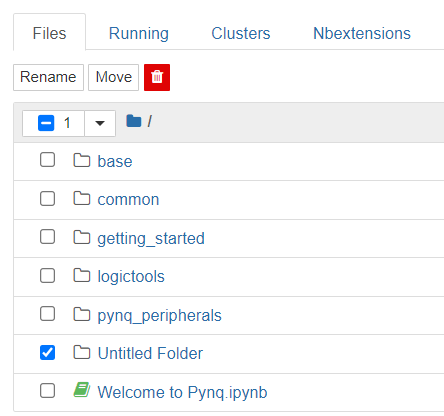
Enter the new name in the prompt and click on 'Rename'.
Creating a new python jupyter notebook and running Python code
To create a python notebook, open the folder in which you want to create it. Click on the 'New' drop down menu and select 'Python 3 (ipykernel)'. This will create a new untitled notebook in a new tab.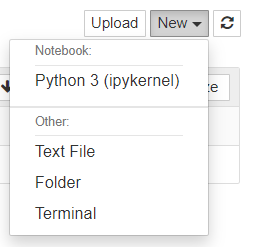
Write your code in the cells. Press 'Enter' to go to the new line. Press 'Shift+Enter' to run the current cell and go to new cell. To save the file, click on the save button (red circle).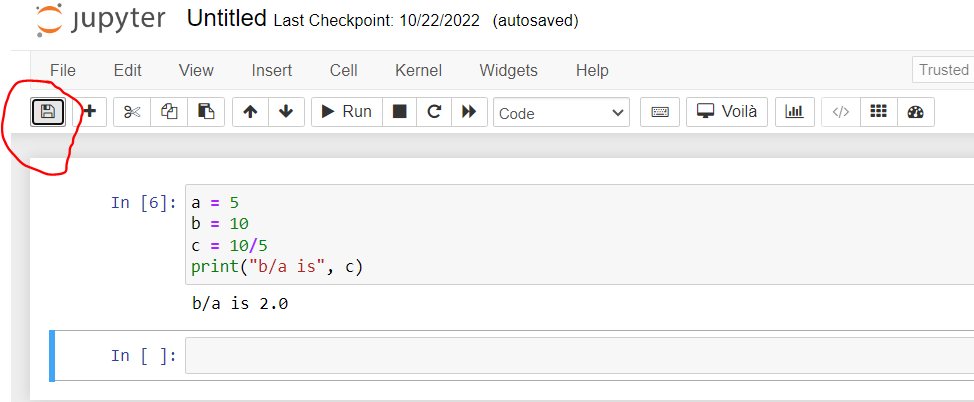
To rename the file, go to the 'File' menu and click on 'Rename'.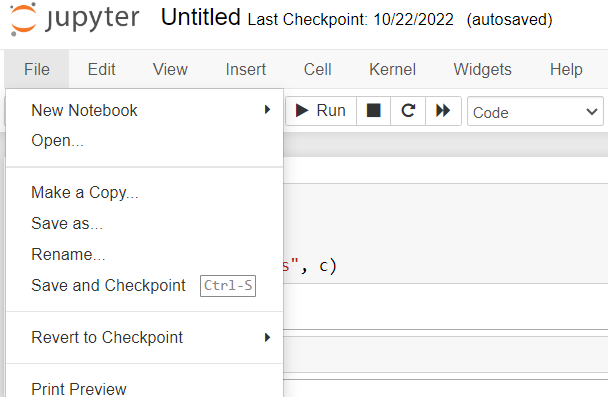
Accessing Internet
I have my laptop connected to the internet through wifi and I want to share the wifi connection to access internet from the arty z7 board.
Steps
Go to the 'Network and Sharing Center' and click on 'Change adapter settings'.
Right-click on the Wi-Fi adapter and select Properties.
Go to the Sharing tab and check the box that says 'Allow other network users to connect through this computer's Internet connection'.
Under 'Home networking connection,' select the Ethernet connection where the board is connected.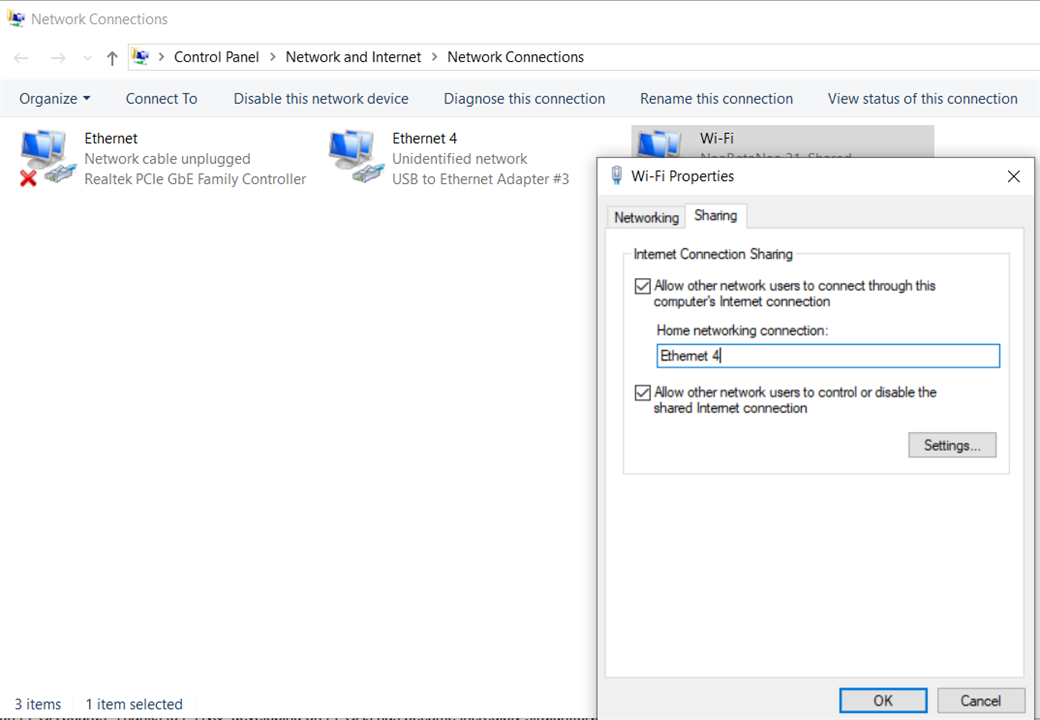
Updating packages
Now, we will update all the packages using the internet connection from the terminal.
Click on 'New' and select 'Terminal'.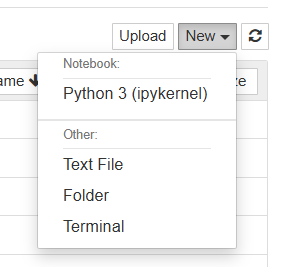
Now, in the terminal type 'sudo apt update' & then 'sudo apt upgrade'.
Summary
I was surprised to learn that Python code can be run on FPGA boards. Thanks to PYNQ, developing on FPGAs has become incredibly straightforward, bridging the gap between software and hardware design.
References
