


Introduction
This will be my first blog post on the Eye On Intelligence Challenge. At the very beginning of my blog post, I would like to thank Element14 and the contest sponsor AMD for choosing me as one of the official challengers for the Eye On Intelligence Challenge. In this experimenting challenge, I will try to build a smart system that will help visually impaired humans perceive their environment and navigate like a normal human without any assistance from others. I will obviously use Digilent Arty Z7, a ZYNQ 7000 SoC-based development board, and PYNQ development platform to achieve my goal. I will also use Vivado for FPGA logic design.
My Project Goal
Globally, Around 2.2 Billion people don’t have the capability to see. They cannot perceive their environment and navigate like normal humans which results in reduced mobility. In this project, my motive is to solve the problem by developing an FPGA based real-time embedded vision system capable of accurately identifying the objects surrounding the visually impaired and explaining the environment to him using text-to-speech. A blind person can hear the converted speech using his earphone. I will use Xilinx’s DPU (Deep Learning Processor Unit) IP and Python language to implement accelerated machine learning in FPGA fabric.
The project is going to be a long journey but in this blog, I will uncover the challenger kit and setup the PYNQ developing platform.
Uncovering everything
In this blog post, I will unbox the challenger kit and try to set up the PYNQ development platform for the ARTY Z7 board. The following items (one webcam, a multicomp pro power adapter, Digilent pmod light sensor, and the more exciting Arty Z7 board) were included inside the package I received.

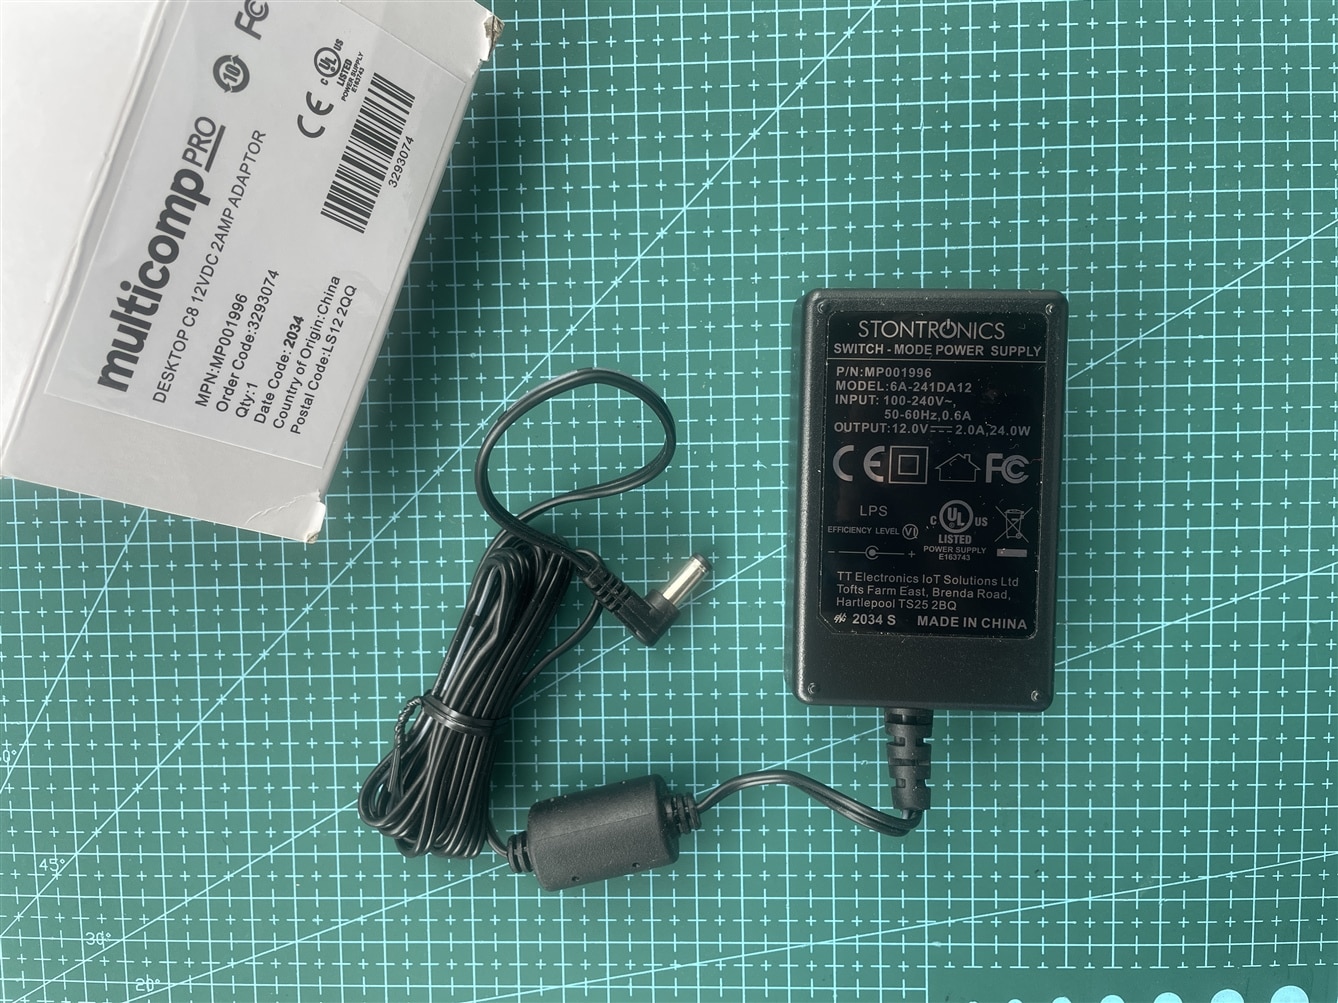
The 24-watt multicomp pro Switch-mode power supply can provide 2A at 12V. The form factor of the power supply is amazing. According to Digilent the supply for Arty Z7 must use a coax, center-positive 2.1mm internal-diameter plug, and deliver 7VDC to 15VDC. Considering those this power supply is a perfect choice for Arty 7.

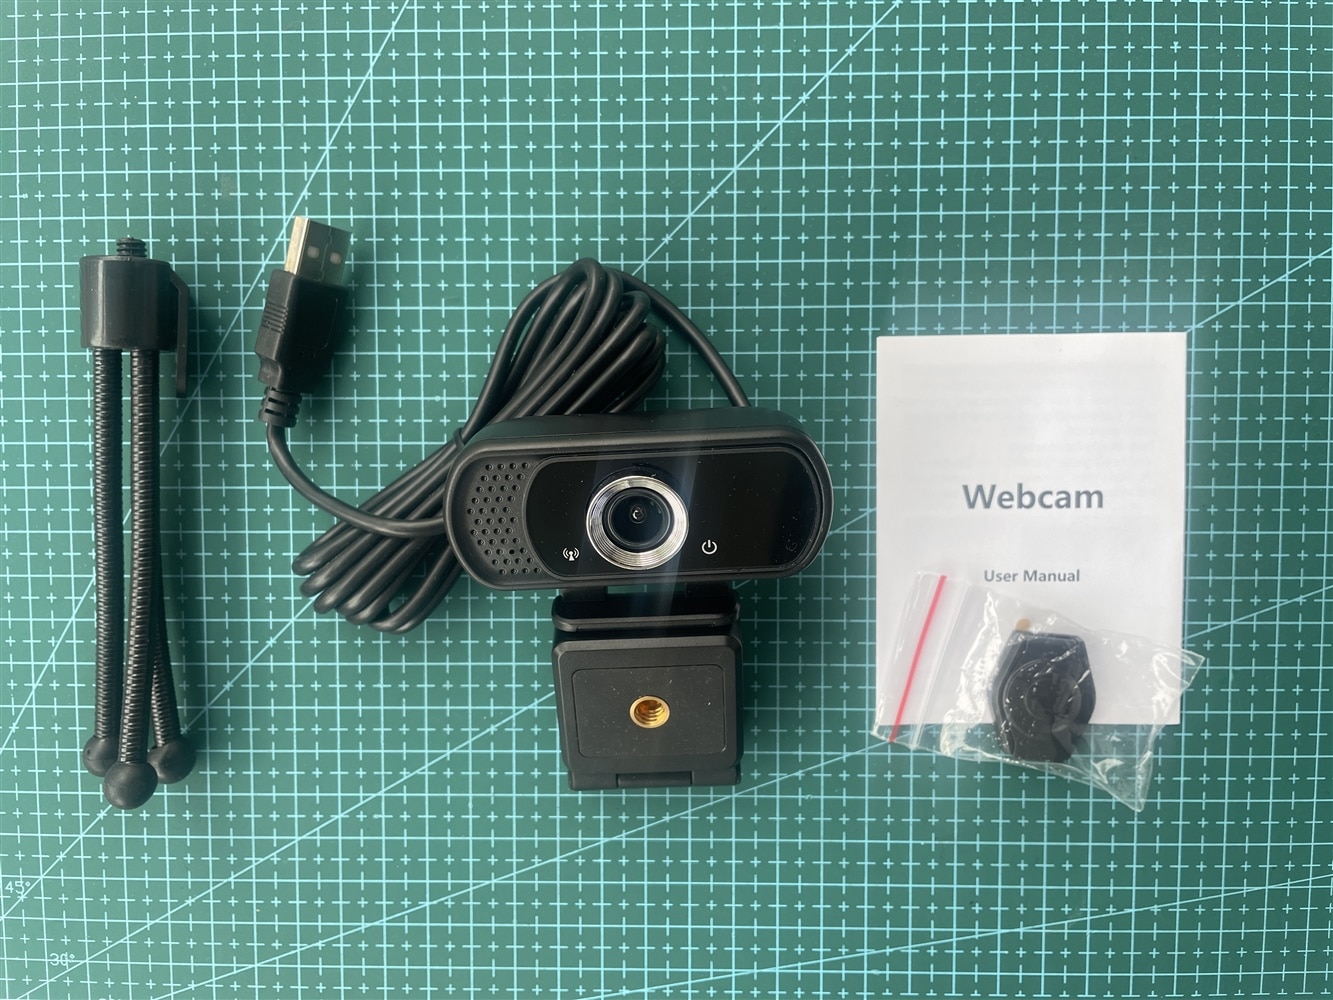
For any embedded vision project a camera is required and fortunately, the kit includes a good quality HD web camera to make our work easy. I was not aware of the brand ZIQIAN for the camera but I hope it will satisfy me. At least the mini tripod and camera cover gave me such an impression. This mini tripod will definitely help me throughout the experiment.
And the final
| {gallery}The Mighty ARTY Z7 |
|---|
|
Just Outside the Box: I like the packaging |
|
About to uncover: bottom and top sponges are separated. |
|
The Arty Z7: Just the perfect size! |
|
Bottom view: looks nice with 4 drops legs (I don't know the exact name) |


Installing PYNQ
PYNQ (Python+Zynq), is an Open Source FPGA development platform from AMD® that makes it easier to use embedded machine learning applications using Zynq SoC. Using the Python language and libraries, we can exploit the benefits of programmable logic and microprocessors to build more capable and exciting electronic systems.
PYNQ can be used to create high performance applications with:
- parallel hardware execution
- high frame-rate video processing
- hardware accelerated algorithms
- real-time signal processing
- high bandwidth IO
- low latency control
We can design custom Overlays with VIVADO for PYNQ FPGA for utilizing hardware accelerator for embedded vision applications.
Before getting started with any new hardware I always have a look at the user manual/reference manual and getting started guide. I finished this task even before receiving the kit. So, after getting the Arty 7 in my hand I directly started working. I got a tutorial in Hackster (https://www.hackster.io/90432/programming-python-on-zynq-fpga-ec4712) that helped me to setup PYNQ for Arty Z7 board.
I downloaded the PYNQ image from the link: http://www.pynq.io/boards.html for PYNQ-Z1 board. This board is fully compatible with the Arty Z7 board.
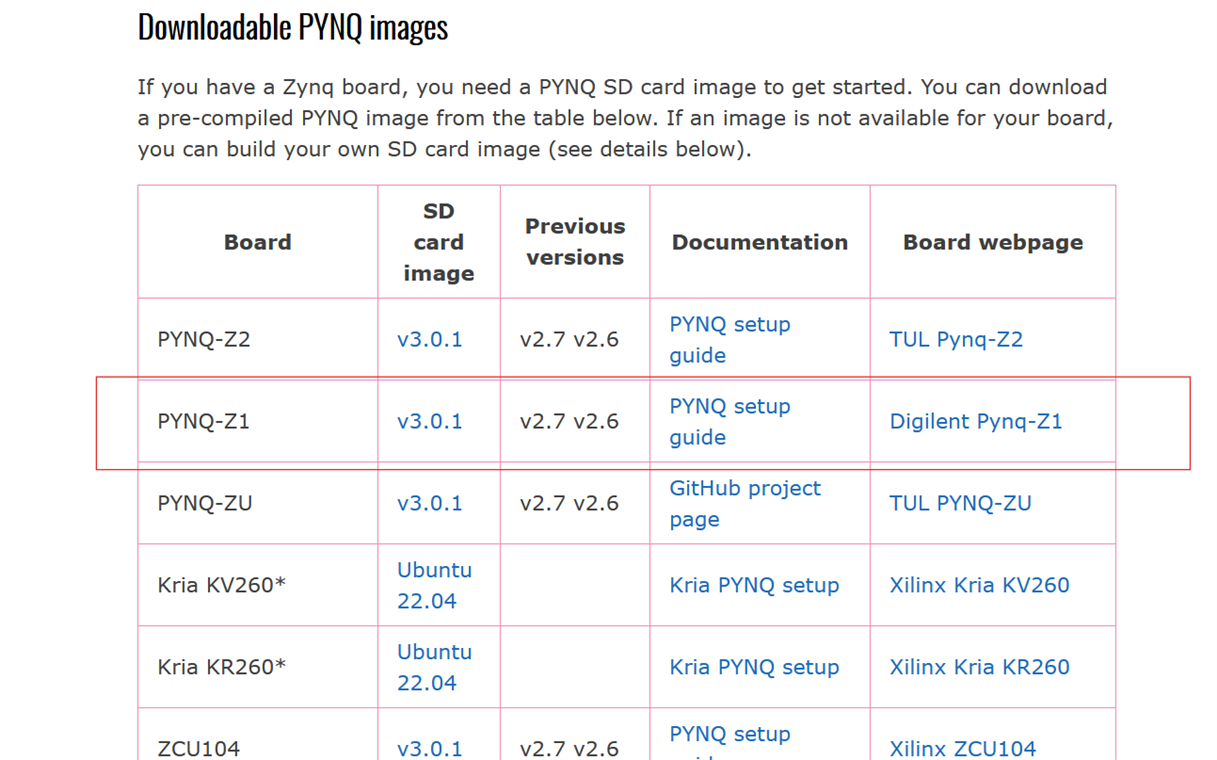
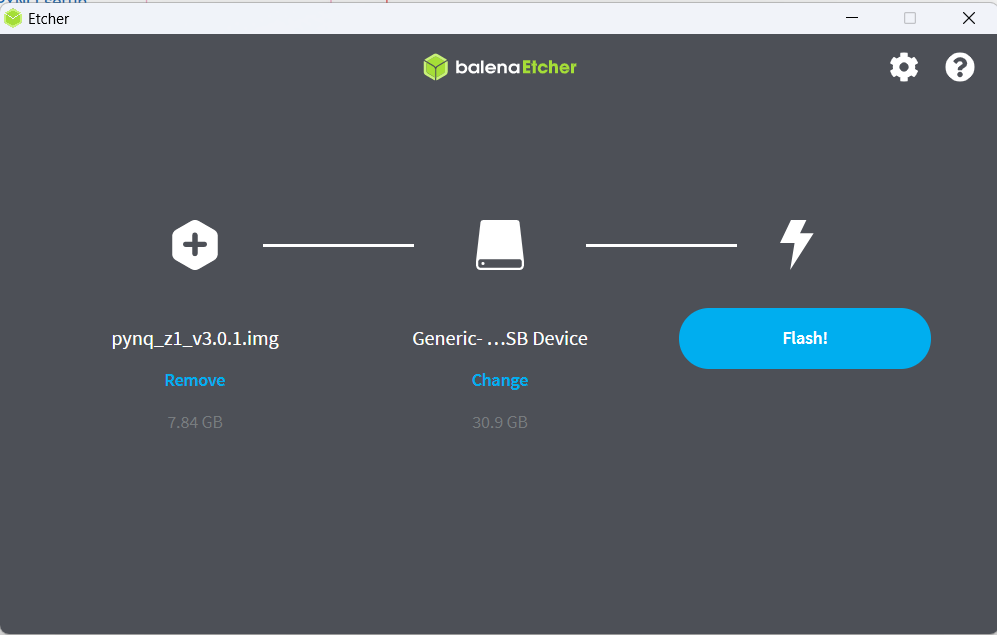
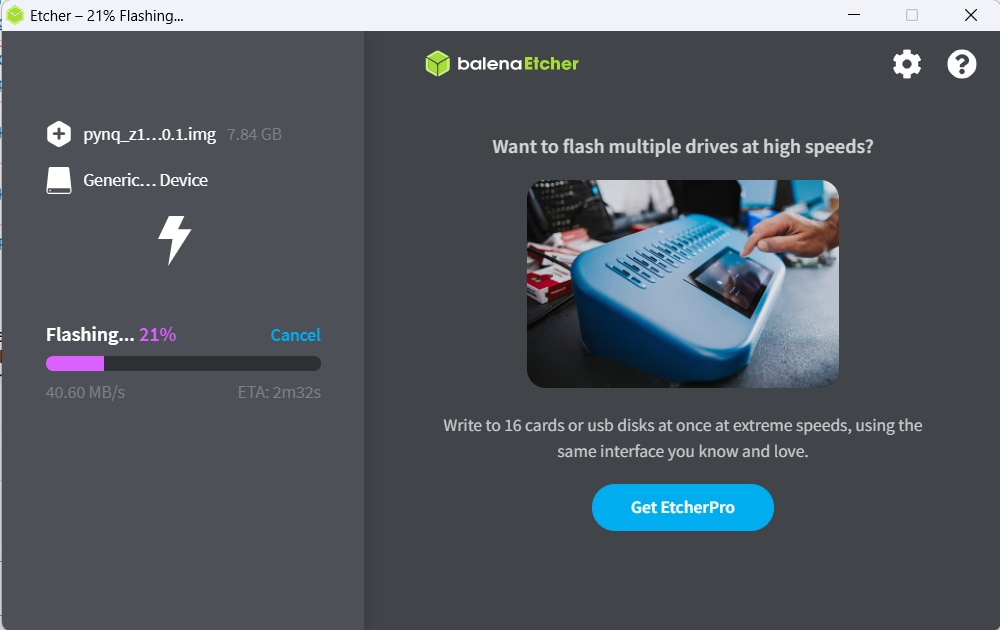
The download size was 1.7GB. Once we have the image, we need to burn the ISO file to a MicroSD card, ideally this card should be at least 8GB. I managed a 32GB class 10 SD card to burn the PYNQ image. As I will work with lots of images the bigger SD size is a good choice. To burn the ISO image to the SD card, several tools are available. I have balenaEtcher installed on my computer. So, I used balenaEtcher to burn the PYNQ image to my SD card.
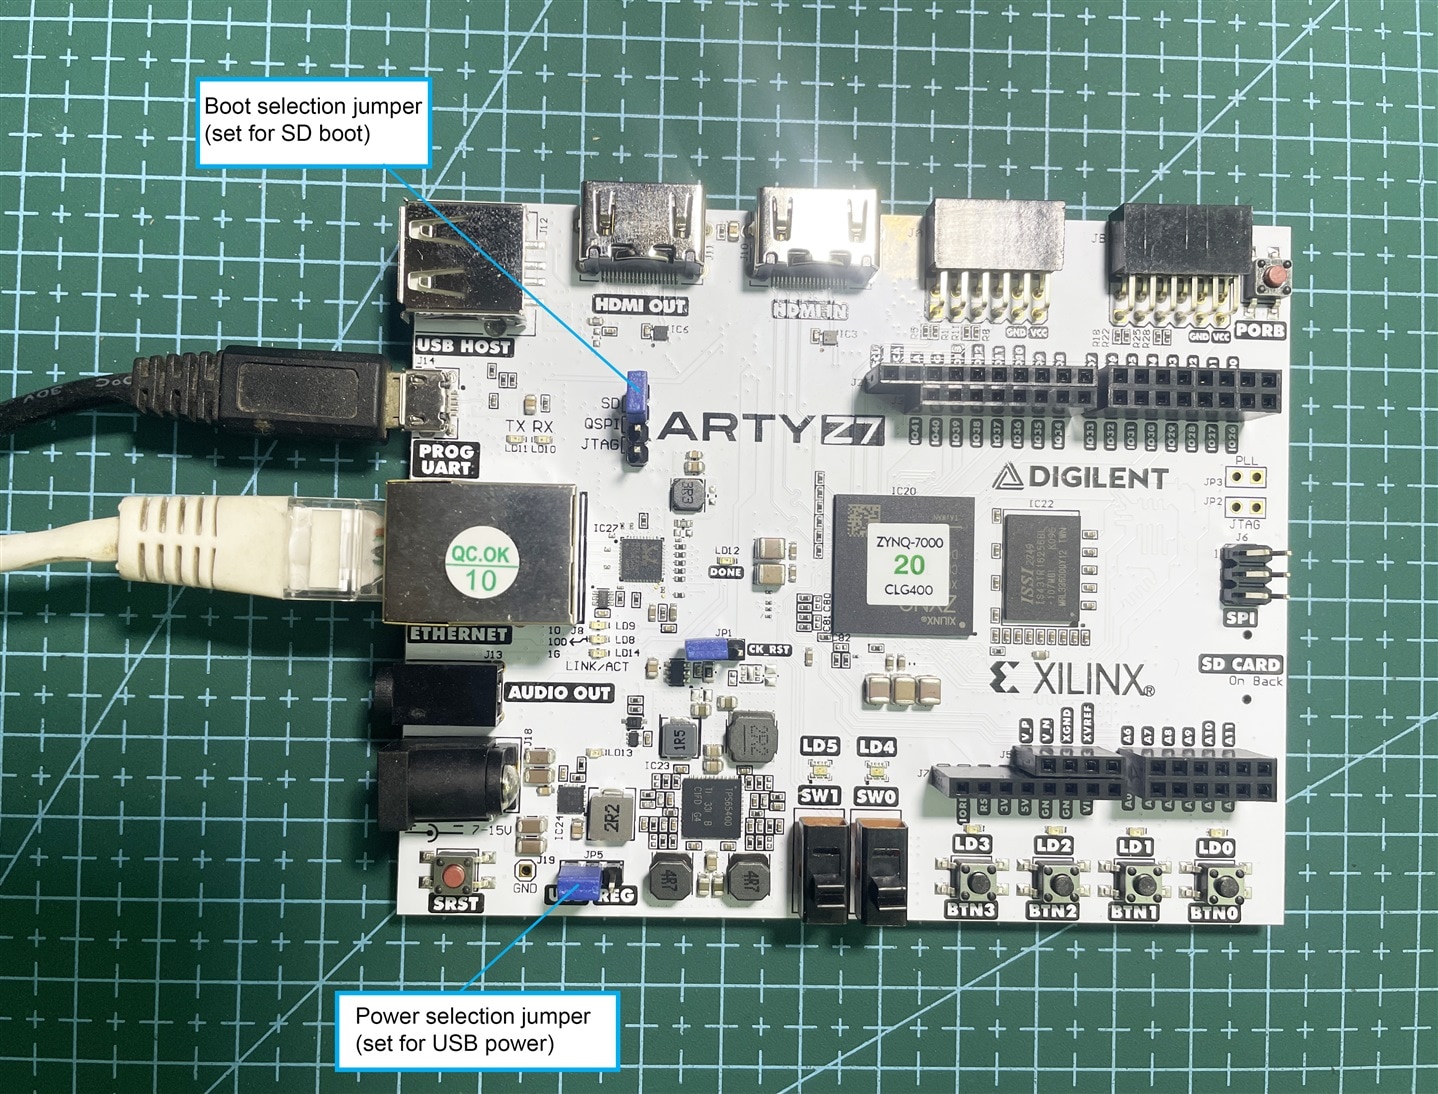
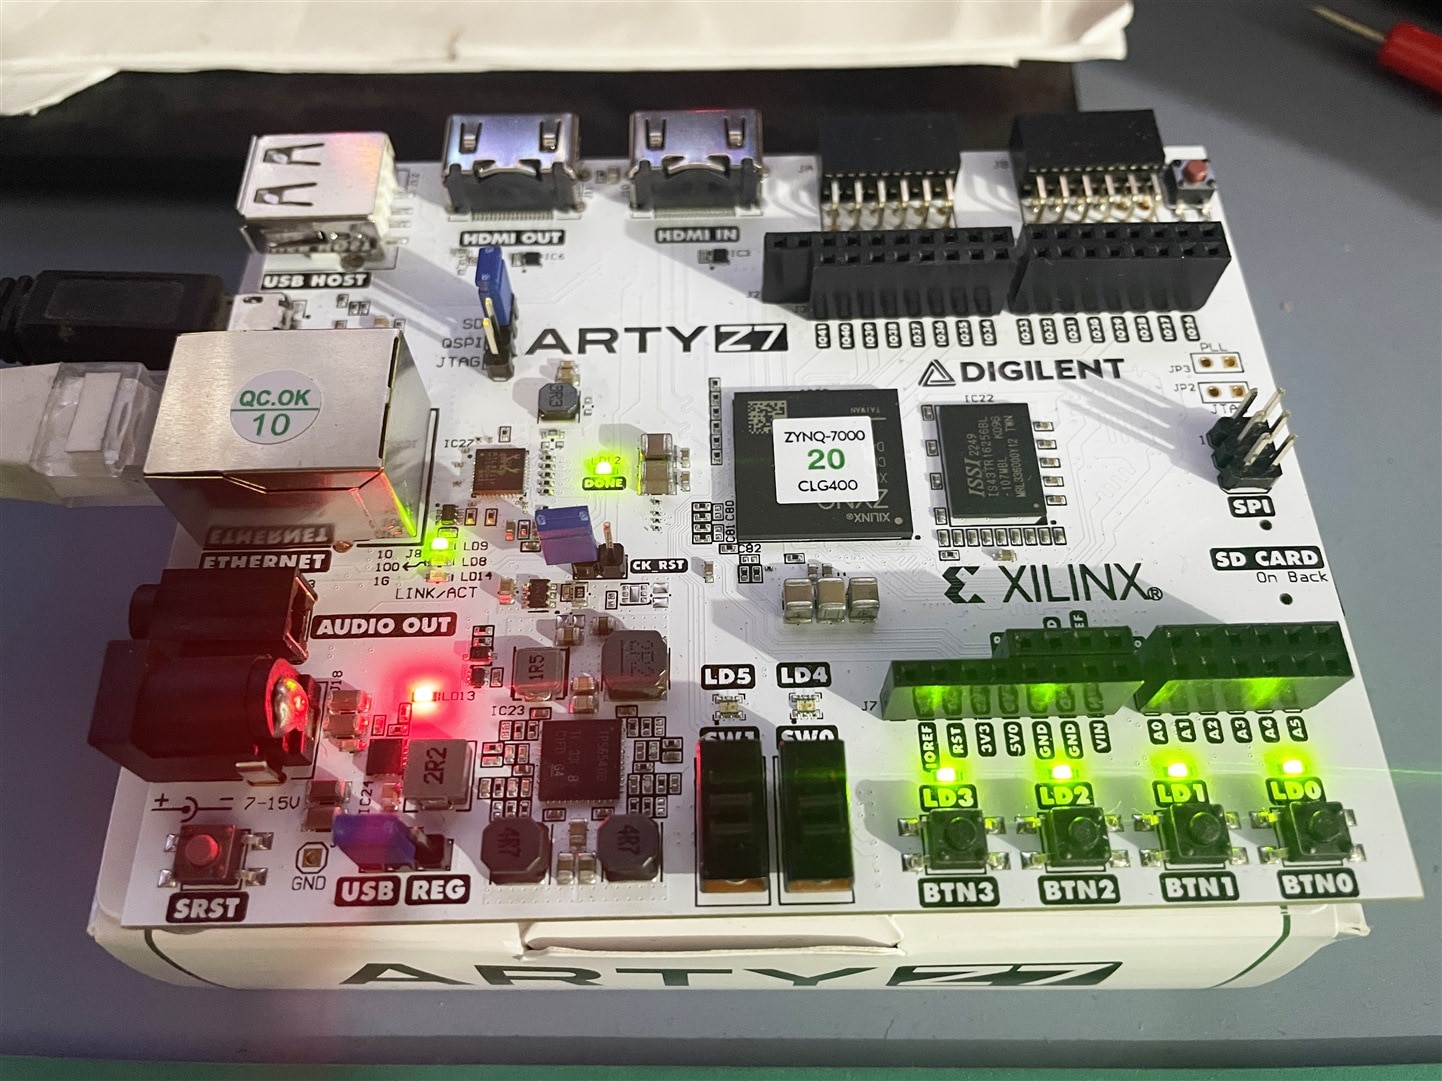
Once the image is written to the SD Card, I inserted the card into the Arty Z7-20 and set the configuration jumper JP4 to SD mode so that the board boots from the SD card. Then I connected the board with a router through an Ethernet cable. The Arty Z7-20 can be powered from the onboard USB-JTAG-UART port (J14) or from some other type of power source such as a battery or external power supply. Jumper JP5 (near the power switch) determines which power source is used.
In this blog, I am not going to use any external peripherals or computation extensive processing and power consumption of the Arty Z7 board will be low. So, I will use USB power input for the board. My jumper configurations and the connections for the Arty Z7 board are illustrated in the following image (the board is not powered yet):
So, I burned the SD card with the PYNQ image and inserted it into the Arty Z7 board, configured the jumpers, and connected the power and ethernet cable. Now, it's the right time to power up the board.
Just a few seconds have passed after I powered on the board. I got the Done LED illuminated, indicating the Xilinx Zynq has been configured, followed by activity on the Ethernet LEDs. After completing the boot sequence the PYNQ framework is now ready. Four LEDs are illuminated. Before that, I noticed several times flashing of all LEDs.
We are now ready to leverage Python on Arty Z7-20, we do this by using Jupyter notebooks running on the Arty Z7-20. To connect to the Arty Z7-20 and its Jupyter notebooks, we need to open a browser on the same network as the Arty Z7-20, entering the address pynq:9090 this will open the initial page as shown below.
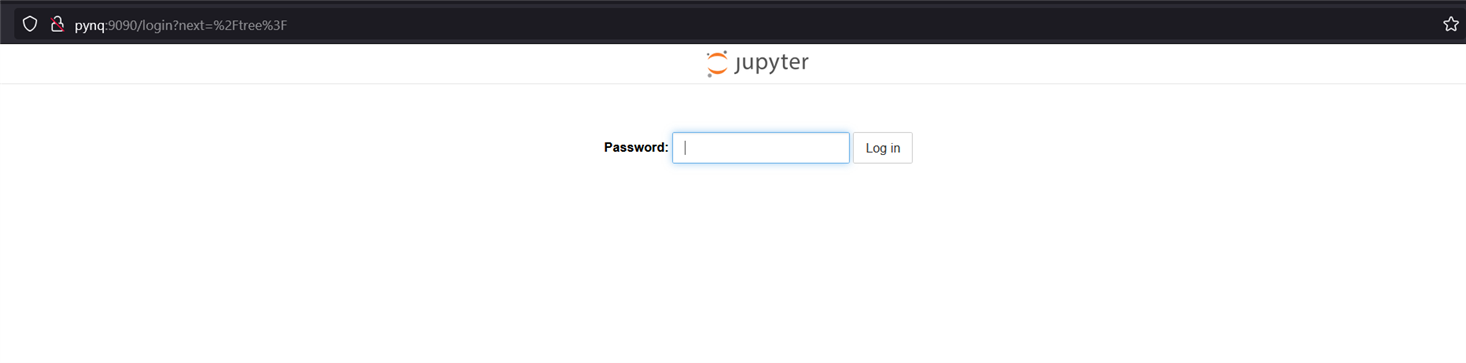
To log in we need to enter the password (default: xilinx). After login, we can develop our Python based applications.

On the landing page, there are several folders available. In the getting_started directory, there are excellent guides about Jupyter notebooks and Python environments and features. These guides can provide great introductory knowledge for getting started.
In the next blog, I will try to explore PYNQ in detail and also experiment with a few examples.


