element14 Community
element14 Community
    Register Log In
  • Site
  • Search
  • Log In Register
  • Members
    Members
    • Benefits of Membership
    • Achievement Levels
    • Members Area
    • Personal Blogs
    • Feedback and Support
    • What's New on element14
  • Learn
    Learn
    • Learning Center
    • eBooks
    • STEM Academy
    • Webinars, Training and Events
    • More
  • Technologies
    Technologies
    • 3D Printing
    • FPGA
    • Industrial Automation
    • Internet of Things
    • Power & Energy
    • Sensors
    • More
  • Challenges & Projects
    Challenges & Projects
    • Design Challenges
    • element14 presents
    • Project14
    • Arduino Projects
    • Raspberry Pi Projects
    • More
  • Products
    Products
    • Arduino
    • Dev Tools
    • Manufacturers
    • Raspberry Pi
    • RoadTests & Reviews
    • Avnet Boards Community
    • More
  • Store
    Store
    • Visit Your Store
    • Choose Another Store
      • Europe
      •  Austria (German)
      •  Belgium (Dutch, French)
      •  Bulgaria (Bulgarian)
      •  Czech Republic (Czech)
      •  Denmark (Danish)
      •  Estonia (Estonian)
      •  Finland (Finnish)
      •  France (French)
      •  Germany (German)
      •  Hungary (Hungarian)
      •  Ireland
      •  Israel
      •  Italy (Italian)
      •  Latvia (Latvian)
      •  
      •  Lithuania (Lithuanian)
      •  Netherlands (Dutch)
      •  Norway (Norwegian)
      •  Poland (Polish)
      •  Portugal (Portuguese)
      •  Romania (Romanian)
      •  Russia (Russian)
      •  Slovakia (Slovak)
      •  Slovenia (Slovenian)
      •  Spain (Spanish)
      •  Sweden (Swedish)
      •  Switzerland(German, French)
      •  Turkey (Turkish)
      •  United Kingdom
      • Asia Pacific
      •  Australia
      •  China
      •  Hong Kong
      •  India
      •  Korea (Korean)
      •  Malaysia
      •  New Zealand
      •  Philippines
      •  Singapore
      •  Taiwan
      •  Thailand (Thai)
      • Americas
      •  Brazil (Portuguese)
      •  Canada
      •  Mexico (Spanish)
      •  United States
      Can't find the country/region you're looking for? Visit our export site or find a local distributor.
  • Translate
  • Profile
Forget Me Not Design Challenge
  • Challenges & Projects
  • Design Challenges
  • Forget Me Not Design Challenge
  • More
  • Cancel
Forget Me Not Design Challenge
Blog HOW-TO: First steps with the Raspberry Pi
  • Blog
  • Forum
  • Documents
  • Events
  • Mentions
  • Sub-Groups
  • Tags
  • More
  • Cancel
  • New
Blog Post Actions
  • Subscribe by email
  • More
  • Cancel
  • Share
  • Subscribe by email
  • More
  • Cancel
Group Actions
  • Group RSS
  • More
  • Cancel
Engagement
  • Author Author: tekmeister
  • Date Created: 2 Aug 2014 12:42 PM Date Created
  • Views 184 views
  • Likes 3 likes
  • Comments 8 comments
  • forget_me_not
  • iot_modern_security
  • raspberrypi
  • raspbian
  • linux
Related
Recommended

HOW-TO: First steps with the Raspberry Pi

tekmeister
tekmeister
2 Aug 2014

Getting started with Linux and the Raspberry Pi can be daunting. Hopefully this post helps alleviate the pain for those just starting out.


Before you start, I'm assuming you already have a Raspberry Pi (RPi) and an SD card (microSD for the model B+). Life will be a bit easier if you have a monitor and keyboard that you can use with the RPi, although it's not essential.


Download an OS image

Firstly you want to choose a Linux image. I normally use the Raspbian distribution. You can also try the NOOBS image, which provides a number of options of operating systems.

http://www.raspberrypi.org/downloads/


Burn the image to your SD card

I use the free tool Win32 Disk Imager on Windows to write the image to my SD card. Full instructions are documented at http://www.raspberrypi.org/documentation/installation/installing-images/README.md


Boot the Raspberry Pi

Once the image has been written to the SD card, put the card into your RPi.  Also plug the ethernet cable into the RPi to connect it to the network.


If you are using a monitor you also want to connect the HDMI cable to the RPi before you power it up.


Now turn on the Rpi by plugging your power cable into the microUSB socket.


If you have a monitor , you'll see a bunch of messages will while the RPi is starting up - it will take around 30 seconds.


Finding your Pi on the network

If you have a monitor and keyboard connected to the Pi, you can skip this step.

If you don't have an external monitor connected to the Pi, you'll need to connect to it via Ethernet. To do this we'll need to find its IP address.


The tool I use is Advanced IP Scanner. It generally picks up the subnets automatically, so you just need to hit "Scan" and wait.


Once it's done, you want to look down the Manufacturer column for entries called "Raspberry Pi Foundation". Make a note of the IP address.


Connecting to the Pi

You can connect to the Pi using SSH over ethernet to run commands, install software, etc.

The best tool on Windows is Putty. Enter the IP address of your Pi, and make sure the port is 22 and the connection type is SSH, then click "Open".


Logging in

You can either log in over SSH or using an attached keyboard and monitor.

The default username for Raspbian is "pi" (without the quotes) and the password is "raspberry".


Extending the partition on the SD card

By default, the image you burned to the SD card earlier doesn't actually use the entire space of the SD card.

You will want to run sudo raspi-config and select  "Expand Filesystem" . After you have rebooted (sudo reboot) the partition will be extended to the size of your SD card.


Updating software

Generally one of the first things I will do is make sure the latest packages are installed. This is done with 2 commands:


  • sudo apt-get update makes sure the list of packages is up to date
  • sudo apt-get upgrade installs the latest packages


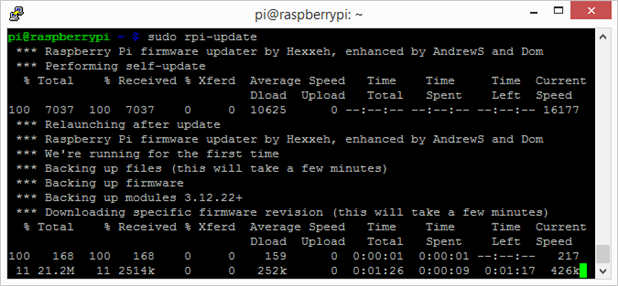
There is another command sudo rpi-update which will update the firmware and kernel to the latest (bleeding-edge) versions. Typically you don't need to do this unless a particular app requires it.


Miscellaneous commands

You may find these useful:

  • sudo dpkg-reconfigure tzdata - change your timezone
Anonymous

Top Comments

  • ipv1
    ipv1 over 7 years ago in reply to shabaz +2

    Dear sir,

    Here is another popular tutorial for your kind consideration. Adding a shutdown button to the Rpi. http://embeddedcode.wordpress.com/2013/10/18/adding-a-shutdown-button-to-the-raspberry-pi/

Parents
  • shabaz
    shabaz over 7 years ago

    Hi!


    We had a collaboration effort here to document raspberry pi setup, where we tried to go into hopefully not excessive detail, but not too minimalist either - especially around things like power supply and composite video which could trip up people new to the RPI platform. However, it's not B+-ized.

    If you've noticed B+ stuff (or can improve on some of the documentation) it would be great to see it either in the comments there (so that the main text can be updated) or if you prefer, a link to your material in the comments there too.


    In each step we tried to minimize assumptions, because with the default quick start guide, in a few areas it assumes people have read through the documentation or have prior knowledge in more areas than feels comfortable, before they begin (and we know people don't do read the entire documentation first).

    • Cancel
    • Up 0 Down
    • Reply
    • More
    • Cancel
Comment
  • shabaz
    shabaz over 7 years ago

    Hi!


    We had a collaboration effort here to document raspberry pi setup, where we tried to go into hopefully not excessive detail, but not too minimalist either - especially around things like power supply and composite video which could trip up people new to the RPI platform. However, it's not B+-ized.

    If you've noticed B+ stuff (or can improve on some of the documentation) it would be great to see it either in the comments there (so that the main text can be updated) or if you prefer, a link to your material in the comments there too.


    In each step we tried to minimize assumptions, because with the default quick start guide, in a few areas it assumes people have read through the documentation or have prior knowledge in more areas than feels comfortable, before they begin (and we know people don't do read the entire documentation first).

    • Cancel
    • Up 0 Down
    • Reply
    • More
    • Cancel
Children
  • ipv1
    ipv1 over 7 years ago in reply to shabaz

    Sir, might I be so bold as to suggest a static IP on a wireless Network for RPi. I wrote a blog here.

    Please let me know where I can improve.

    • Cancel
    • Up 0 Down
    • Reply
    • More
    • Cancel
  • shabaz
    shabaz over 7 years ago in reply to ipv1

    Hi Inderpreet,


    Very good point, we don't have static IP config in the setup guide so far - or in fact any wireless configuration. I'll get a link to yours added - I misplaced my WiPi dongle recently, so I've not been able to document any wireless steps : (

    • Cancel
    • Up 0 Down
    • Reply
    • More
    • Cancel
  • ipv1
    ipv1 over 7 years ago in reply to shabaz

    Dear sir,

    Here is another popular tutorial for your kind consideration. Adding a shutdown button to the Rpi. http://embeddedcode.wordpress.com/2013/10/18/adding-a-shutdown-button-to-the-raspberry-pi/

    • Cancel
    • Up +2 Down
    • Reply
    • More
    • Cancel
  • tekmeister
    tekmeister over 7 years ago in reply to shabaz

    I know there are lots of other tutorials for the Pi (I hadn't seen the one you linked to though), but there were a couple of reasons I decided to post my own. Most of the tutorials I've seen only contain part of the information, it's nice to have it in one place. Also I intend to write a follow-up tutorial to help people get OpenHAB installed on the Pi, and I wanted to make sure everyone was on the same page.

    • Cancel
    • Up 0 Down
    • Reply
    • More
    • Cancel
  • mcb1
    mcb1 over 7 years ago in reply to ipv1

    Just read through your link ...very nice


    Thanks

    Mark

    • Cancel
    • Up 0 Down
    • Reply
    • More
    • Cancel
Element14

element14 is the first online community specifically for engineers. Connect with your peers and get expert answers to your questions.

  • Members
  • Learn
  • Technologies
  • Challenges & Projects
  • Products
  • Store
  • About Us
  • Feedback & Support
  • FAQs
  • Terms of Use
  • Privacy Policy
  • Legal and Copyright Notices
  • Sitemap
  • Cookies

An Avnet Company © 2022 Premier Farnell Limited. All Rights Reserved.

Premier Farnell Ltd, registered in England and Wales (no 00876412), registered office: Farnell House, Forge Lane, Leeds LS12 2NE.

ICP 备案号 10220084.

Follow element14

  • Facebook
  • Twitter
  • linkedin
  • YouTube