element14 Community
element14 Community
    Register Log In
  • Site
  • Search
  • Log In Register
  • About Us
  • Community Hub
    Community Hub
    • What's New on element14
    • Feedback and Support
    • Benefits of Membership
    • Personal Blogs
    • Members Area
    • Achievement Levels
  • Learn
    Learn
    • Ask an Expert
    • eBooks
    • element14 presents
    • Learning Center
    • Tech Spotlight
    • STEM Academy
    • Webinars, Training and Events
    • Learning Groups
  • Technologies
    Technologies
    • 3D Printing
    • FPGA
    • Industrial Automation
    • Internet of Things
    • Power & Energy
    • Sensors
    • Technology Groups
  • Challenges & Projects
    Challenges & Projects
    • Design Challenges
    • element14 presents Projects
    • Project14
    • Arduino Projects
    • Raspberry Pi Projects
    • Project Groups
  • Products
    Products
    • Arduino
    • Avnet Boards Community
    • Dev Tools
    • Manufacturers
    • Multicomp Pro
    • Product Groups
    • Raspberry Pi
    • RoadTests & Reviews
  • Store
    Store
    • Visit Your Store
    • Choose another store...
      • Europe
      •  Austria (German)
      •  Belgium (Dutch, French)
      •  Bulgaria (Bulgarian)
      •  Czech Republic (Czech)
      •  Denmark (Danish)
      •  Estonia (Estonian)
      •  Finland (Finnish)
      •  France (French)
      •  Germany (German)
      •  Hungary (Hungarian)
      •  Ireland
      •  Israel
      •  Italy (Italian)
      •  Latvia (Latvian)
      •  
      •  Lithuania (Lithuanian)
      •  Netherlands (Dutch)
      •  Norway (Norwegian)
      •  Poland (Polish)
      •  Portugal (Portuguese)
      •  Romania (Romanian)
      •  Russia (Russian)
      •  Slovakia (Slovak)
      •  Slovenia (Slovenian)
      •  Spain (Spanish)
      •  Sweden (Swedish)
      •  Switzerland(German, French)
      •  Turkey (Turkish)
      •  United Kingdom
      • Asia Pacific
      •  Australia
      •  China
      •  Hong Kong
      •  India
      •  Korea (Korean)
      •  Malaysia
      •  New Zealand
      •  Philippines
      •  Singapore
      •  Taiwan
      •  Thailand (Thai)
      • Americas
      •  Brazil (Portuguese)
      •  Canada
      •  Mexico (Spanish)
      •  United States
      Can't find the country/region you're looking for? Visit our export site or find a local distributor.
  • Translate
  • Profile
  • Settings
In the Air Design Challenge
  • Challenges & Projects
  • Design Challenges
  • In the Air Design Challenge
  • More
  • Cancel
In the Air Design Challenge
Blog Dust, Temperature and Humidity Monitor Chapter 11
  • Blog
  • Forum
  • Documents
  • Polls
  • Files
  • Events
  • Mentions
  • Sub-Groups
  • Tags
  • More
  • Cancel
  • New
  • Share
  • More
  • Cancel
Group Actions
  • Group RSS
  • More
  • Cancel
Engagement
  • Author Author: engswee
  • Date Created: 5 Feb 2015 10:08 AM Date Created
  • Views 736 views
  • Likes 5 likes
  • Comments 4 comments
  • haze_monitor
  • in_the_air
Related
Recommended

Dust, Temperature and Humidity Monitor Chapter 11

engswee
engswee
5 Feb 2015

More Hardware and software update:


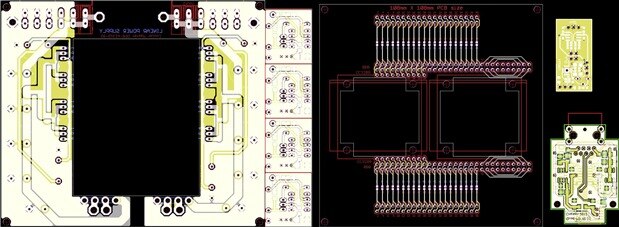
For hardware, PCB have been send for manufacture. Most of the component is ready for assembly.

Now just waiting for PCB and some accessories.

Picture show the final PCB send for manufacture.

image


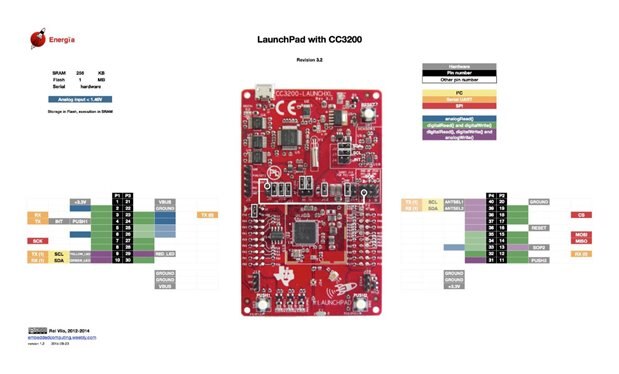
Picture bellow show the pin map for the CC3200. Please edit the given example before upload to MCU.

Do remember if you are using the 430 shapr96 LCD with CC3200, connector at the P1 and P2 is using by the LCD.

Please avoid using pin function at this connector if possible. If you still need to use the pin at P1 and P2 then you need to check in detail at the LCD side which pin is available.

image


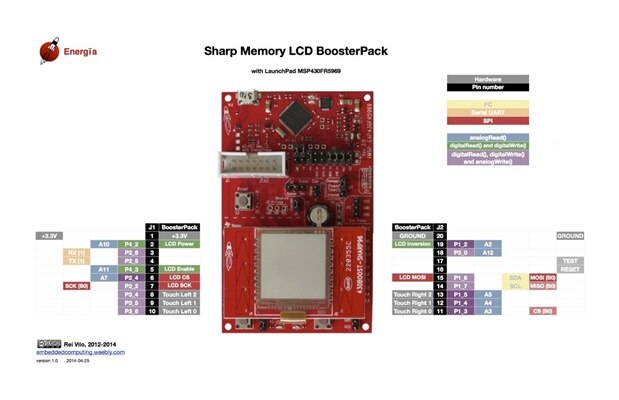
This one show LCD pin map. Please bare in mind that some of the pin is not use for LCD but they been use or connected touch slide.

For more information please go to the given link. Guide_SharpMemoryDisplayBoosterPack | Energia


This picture show the pin map for the LCD:

image

Wire crimping:


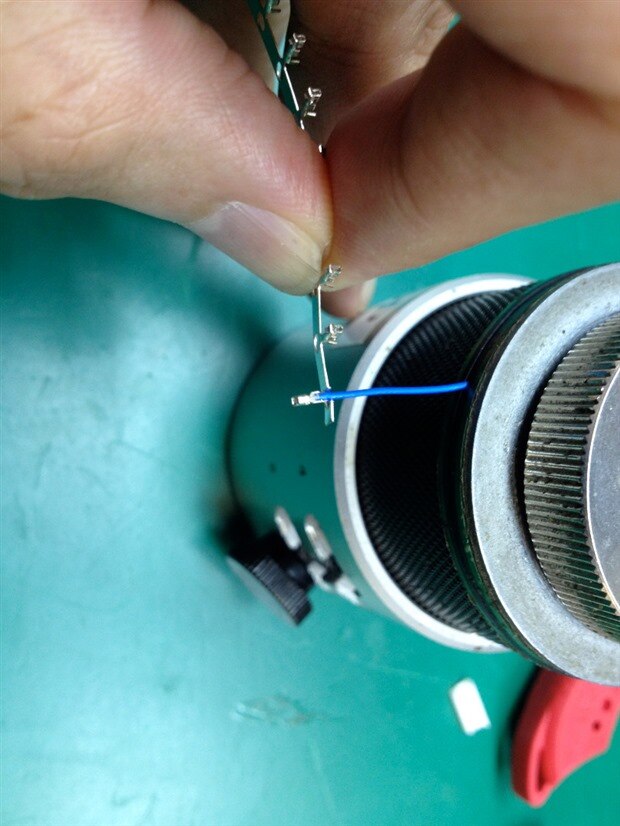
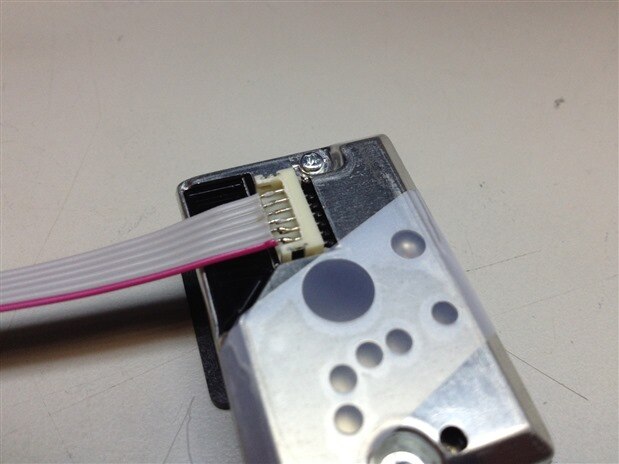
Sound and look simple for wire crimping but without proper tool it will give you bad day. For this I will show the wire cramping for the JPT connector use with dust sensor.

Proper tooling for the wire crimping and some tip to make wire crimping more easy.

But for me, I will solder the wire directly to the connector for better connection image.


image


Please chose suitable cable size for the crimping job if not you will end up with difficulty to place the cable assembly in the holder.

I know some of you thinking of cut down the cable to smaller size but with this end up having a lose wire crimping.

You also need some steady hand for this jobs where very bad for me he..he..


image


Picture show my dust sensor using direct wire soldering image

image


PCB is coming and it look good to use.

image


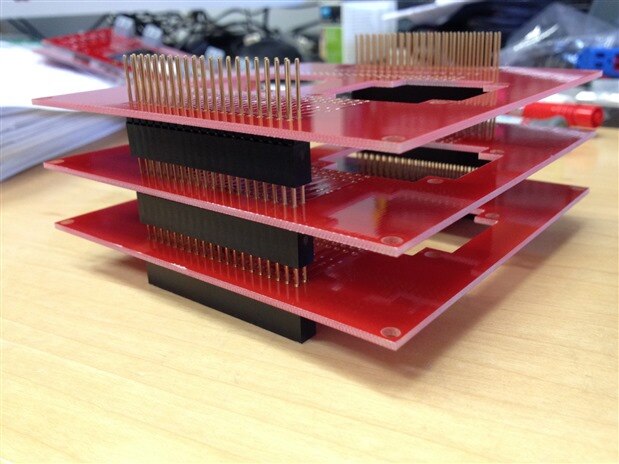
Assembly and Connection:


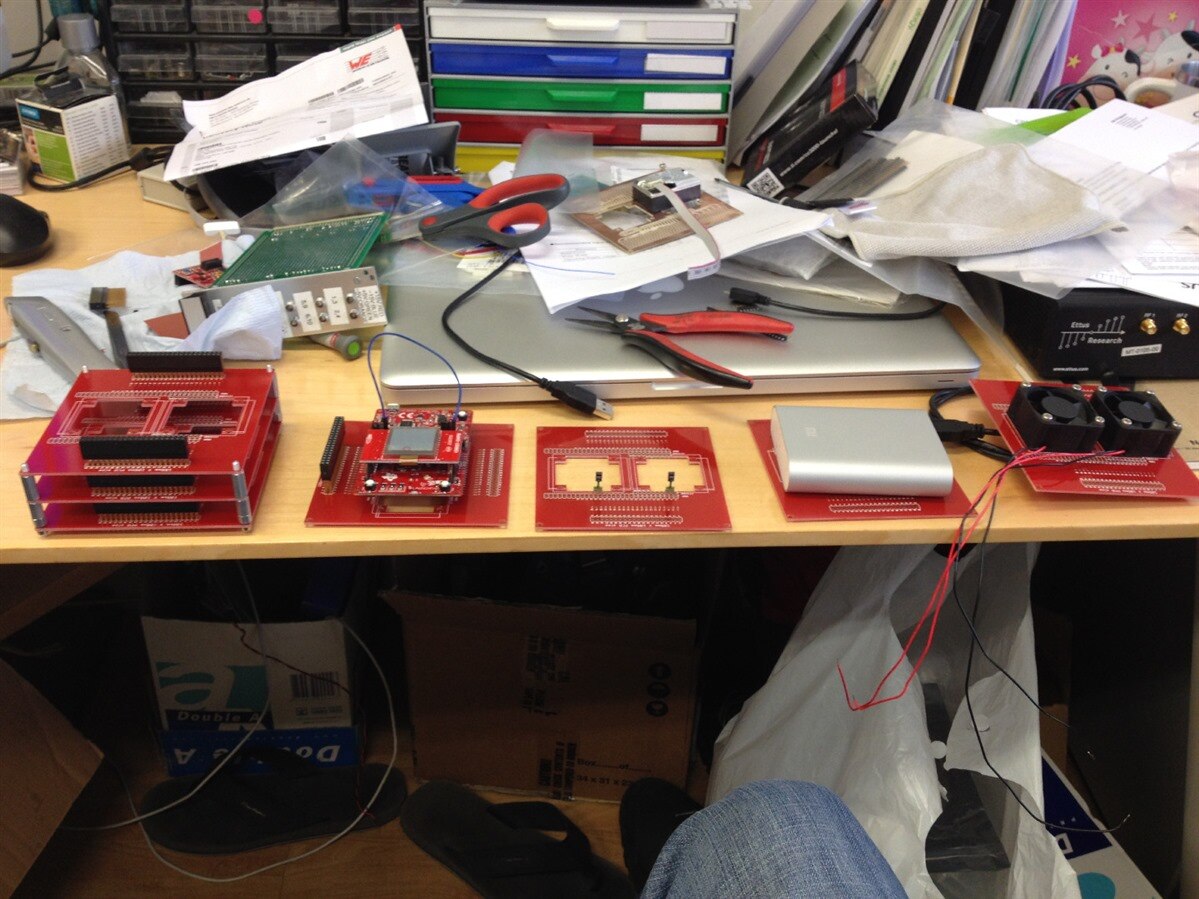
Now in the process of assembly the hardware. Most of the hardware is ready for assembly and now just use temporary fix using magic tape image.

Like I mansion the wiring will be a bit headache due to multipurpose PCB. my self also get confuse about the pin he..he..


Picture show the working progress for the assembly work.
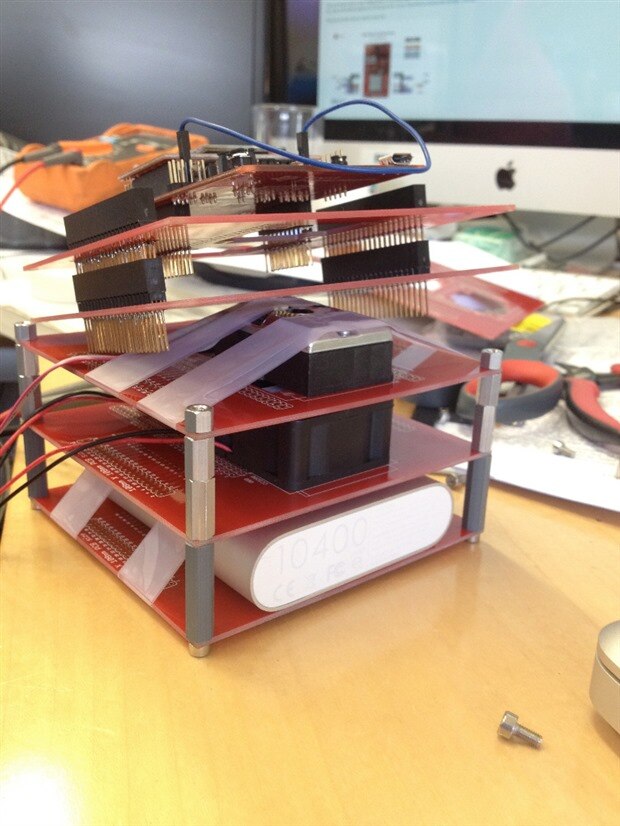
image


image


Spacer:


I plan to use the aluminum spacer from WÜRTH Electronic. They look very nice but unfortunately they only have limited stock.

So I end up using some PVC spacer image

image


Previous:

Dust, Temperature and Humidity Monitor Chapter 10


Next:

Coming soon


  • Sign in to reply

Top Comments

  • shabaz
    shabaz over 10 years ago +1
    Hi ES, Wow, this looks great : ) Very cool 3D structure you've created to hold all the parts together including fans, sensor, etc!!
  • mcb1
    mcb1 over 10 years ago +1
    Nice job It appears very well thought out. Mark
  • amgalbu
    amgalbu over 10 years ago

    Nice job!!!

    I see you too had some problems finding the connector for the Sharp dust sensor image

    • Cancel
    • Vote Up 0 Vote Down
    • Sign in to reply
    • More
    • Cancel
  • engswee
    engswee over 10 years ago in reply to shabaz

    TQ all,


    Quite fun with the project image. Can stack about 30cm high for 10pc PCB.

    Now headache with programing. Maybe not able to finish it in time image. Will try my best..


    cheer

    ES

    • Cancel
    • Vote Up 0 Vote Down
    • Sign in to reply
    • More
    • Cancel
  • mcb1
    mcb1 over 10 years ago

    Nice job

    It appears very well thought out.


    Mark

    • Cancel
    • Vote Up +1 Vote Down
    • Sign in to reply
    • More
    • Cancel
  • shabaz
    shabaz over 10 years ago

    Hi ES,


    Wow, this looks great : )

    Very cool 3D structure you've created to hold all the parts together including fans, sensor, etc!!

    • Cancel
    • Vote Up +1 Vote Down
    • Sign in to reply
    • More
    • Cancel
element14 Community

element14 is the first online community specifically for engineers. Connect with your peers and get expert answers to your questions.

  • Members
  • Learn
  • Technologies
  • Challenges & Projects
  • Products
  • Store
  • About Us
  • Feedback & Support
  • FAQs
  • Terms of Use
  • Privacy Policy
  • Legal and Copyright Notices
  • Sitemap
  • Cookies

An Avnet Company © 2025 Premier Farnell Limited. All Rights Reserved.

Premier Farnell Ltd, registered in England and Wales (no 00876412), registered office: Farnell House, Forge Lane, Leeds LS12 2NE.

ICP 备案号 10220084.

Follow element14

  • X
  • Facebook
  • linkedin
  • YouTube