


![]()
Hello everybody .
Hope every one is doing well . Merry Christmas all.
While the kit does not arrive and having two TTGO LoRa ESP32 SX1267 modules, I've decided to start learning how to send data from one module to the other. And, since temperature is one of the components to monitor in my project, let's use a DHT22, read the temperature and humidity and send it to another module.
Hardware
- 2x LoRa ESP32 SX1276
- DHT22 (or AM2302)
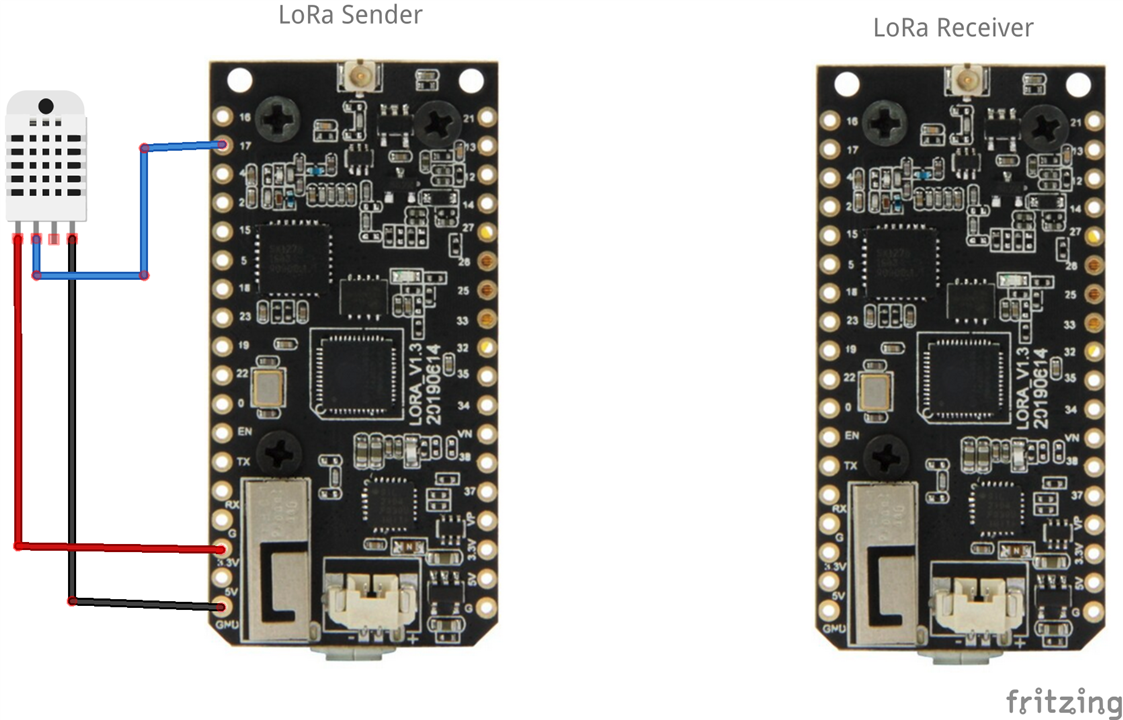
Here's the schematics
Code
The main code for the LoRa send/receive is from randomnerdtutorials. The site is an excellent source for Arduino (and alike) tutorials.
I've adapted it for my modules . I'll explain it in future posts, when the code start to be the final versions.
Here's the code for the sender module - the one where the DHT22 is connected and gathering temperature/humidity values
//Libraries for LoRa
#include <SPI.h>
#include <LoRa.h>

#include <DHT.h>
#define DHTPIN 17
#define DHTTYPE DHT22

DHT dht(DHTPIN, DHTTYPE);

//define the pins used by the LoRa transceiver module
#define SCK 5
#define MISO 19
#define MOSI 27
#define SS 18
#define RST 14
#define DIO0 26

#define BAND 866E6


//packet counter
int readingID = 0;

int counter = 0;
String LoRaMessage = "";

float temperature = 0;
float humidity = 0;


//Initialize LoRa module
void startLoRA(){
  //SPI LoRa pins
  SPI.begin(SCK, MISO, MOSI, SS);
  //setup LoRa transceiver module
  LoRa.setPins(SS, RST, DIO0);

  while (!LoRa.begin(BAND) && counter < 10) {
    Serial.print(".");
    counter++;
    delay(500);
  }
  if (counter == 10) {
    // Increment readingID on every new reading
    readingID++;
    Serial.println("Starting LoRa failed!");
  }
  Serial.println("LoRa Initialization OK!");
  delay(2000);
}


void getReadings(){
  temperature = dht.readTemperature();
  humidity = dht.readHumidity();
  Serial.print("Humidity: ");
  Serial.println(humidity);
  Serial.print("%, Temp: ");
  Serial.println(temperature);
}

void sendReadings() {
  LoRaMessage = String(readingID) + "/" + String(temperature) + "&" + String(humidity);
  //Send LoRa packet to receiver
  LoRa.beginPacket();
  LoRa.print(LoRaMessage);
  LoRa.endPacket();

  Serial.print("Sending packet: ");
  Serial.println(readingID);
  readingID++;
}

void setup() {
  //initialize Serial Monitor
  Serial.begin(115200);
  dht.begin();
  startLoRA();
}
void loop() {
  getReadings();
  sendReadings();
  delay(10000);
}
And here's the code for the receiver LoRa module
//Libraries for LoRa
#include <SPI.h>
#include <LoRa.h>


//define the pins used by the LoRa transceiver module
#define SCK 5
#define MISO 19
#define MOSI 27
#define SS 18
#define RST 14
#define DIO0 26

//433E6 for Asia
//866E6 for Europe
//915E6 for North America
#define BAND 866E6


String LoRaData;

void setup() {
  //initialize Serial Monitor
  Serial.begin(115200);

  Serial.println("LoRa Receiver Test");

  //SPI LoRa pins
  SPI.begin(SCK, MISO, MOSI, SS);
  //setup LoRa transceiver module
  LoRa.setPins(SS, RST, DIO0);

  if (!LoRa.begin(BAND)) {
    Serial.println("Starting LoRa failed!");
    while (1);
  }
  Serial.println("LoRa Initializing OK!");
}

void loop() {

  //try to parse packet
  int packetSize = LoRa.parsePacket();
  if (packetSize) {
    //received a packet
    Serial.print("Received packet ");

    //read packet
    while (LoRa.available()) {
      LoRaData = LoRa.readString();
      Serial.print(LoRaData);
    }

    //print RSSI of packet
    int rssi = LoRa.packetRssi();
    Serial.print(" with RSSI ");
    Serial.println(rssi);

  }
}
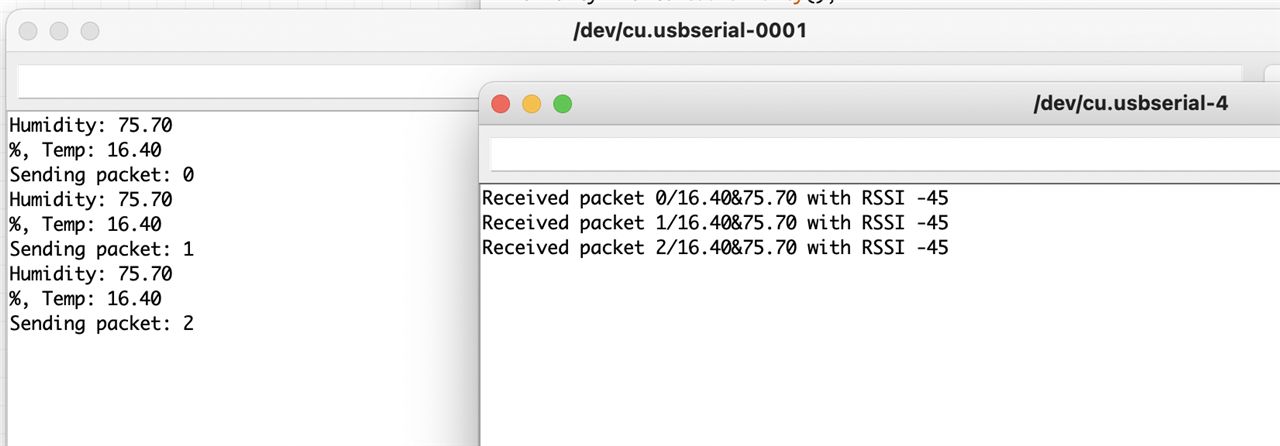
In MacOS (like in any other OS), to be able to have two modules connected and have a serial console for each one open, it's necessary to open two independent Arduinos IDE's.
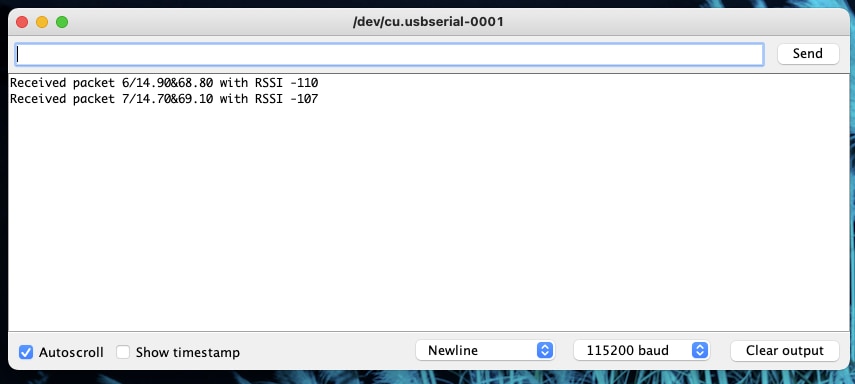
Here's the result, with the two modules connected (different serial ports), sending the temperature/humidity and receiving it in the other module.
Live testing
Since both were communicating, it was time to do a live testing, getting values from outside.
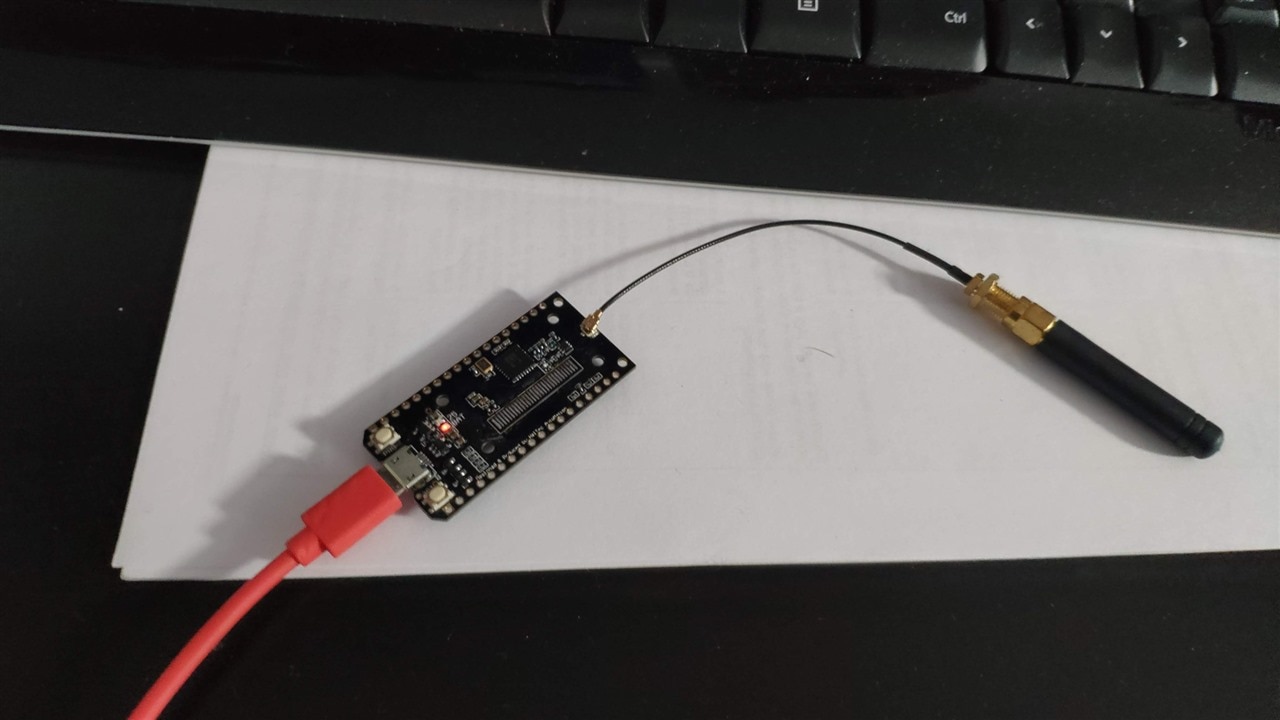
I've placed the module with the temperature sensor outside, powered by a power bank and the other module connected to the computer
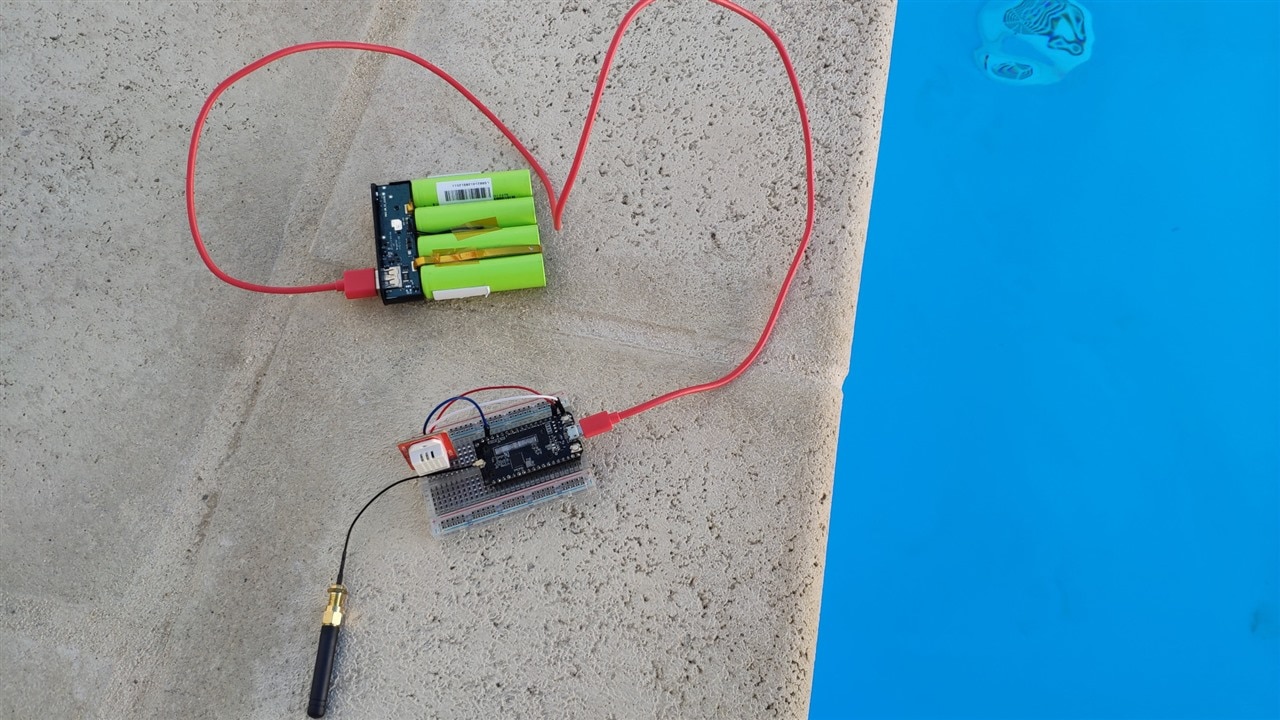
After powering both, the results started to appear.
The next step (and blog), and since these modules are supported by the Arduino IoT Cloud, is receiving the values and send them to the cloud.
Merry Christmas
Here's the second part of this tutorial. Sending values to Arduino IoT Cloud