


Hello Community!
In this blog, I will walk you through my latest LED project powered by the Challenger Kit from Wurth Elektronik. This kit comes packed with a variety of LEDs ready to bring your projects to life with vibrant colours and dynamic lighting effects.
What’s interesting in the Challenger Kit?
The kit includes several types of LEDs, perfect for different lighting experiments. The parts I am looking to evaluate and experiment around through this project are:
-
5x5 LED 1315050930002, 1315050930246
-
2x2 LED 1312121320437
-
Flat 4-pin LED 1313210530000

It is a well thought kit including required breakout boards for 5x5 LEDs, breadboards to prototype around, and an Arduino to spice it all up. Adapter boards for other LED types would have been useful if provided, but I've designed one and is getting fabricated.
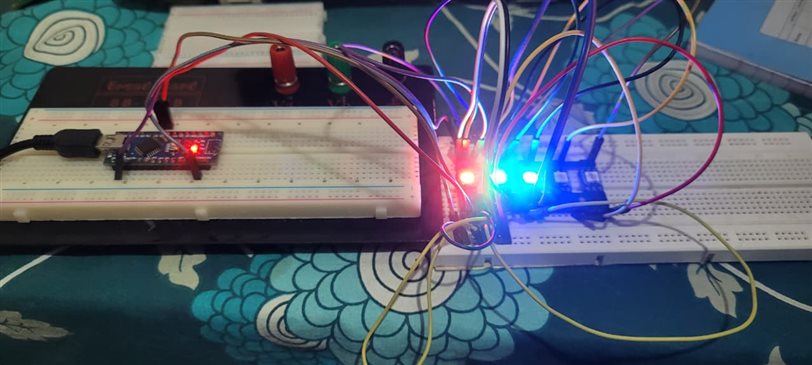
Hardware Setup
Soldering the LEDs
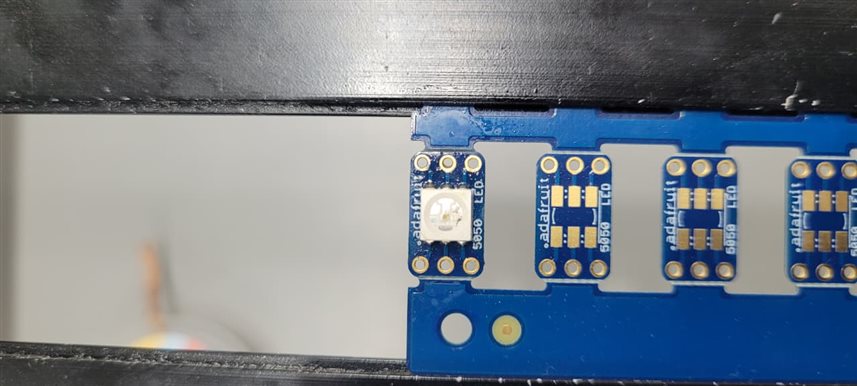
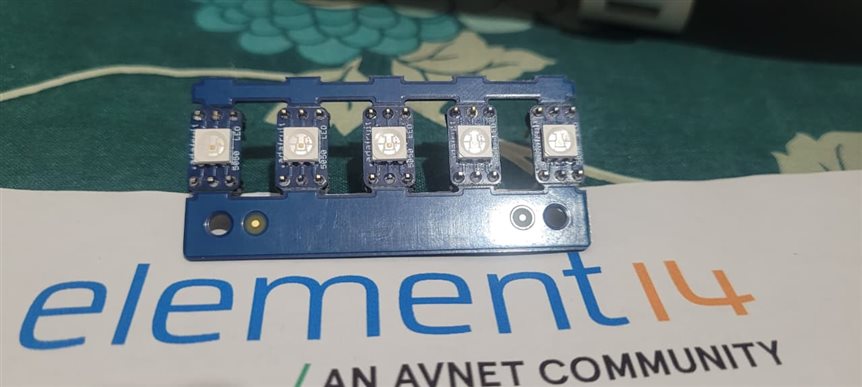
The LEDs have nicely exposed pads on the side and large pads, making soldering easy and clean for both newbies and pros alike.
Wiring it up with Arduino
I decided to start simple with an Arduino Nano for easy setup. The LEDs I’m using are 4-wire 5050 models (P/N 1315050930246) - great because they pair well with breakout boards and are primitive, familiar ones to start with.
Here’s how I connected the LED pins to the Arduino Nano:
| LED Pin | Function | Arduino Pin |
|---|---|---|
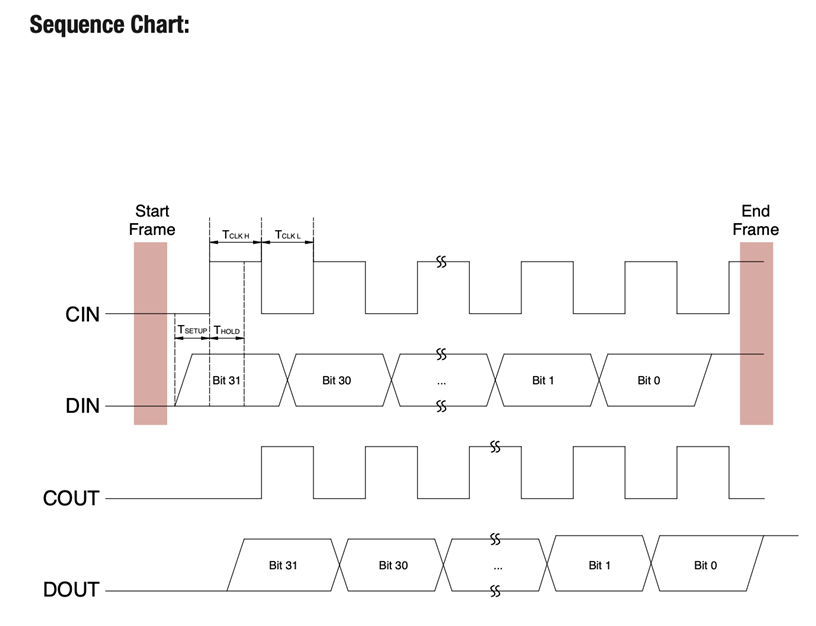
| PIN 1 (DIN) | Data Input | D6 |
| PIN 2 (CIN) | Clock Input | D7 |
| PIN 3 (VSS) | Ground (GND) | GND |
| PIN 4 (VDD) | Power (5V) | VIN (5V) |
The Software and Library Hunt
Using the Official ICLED SDK
The first try was with the official ICLED SDK. Unfortunately, it’s designed for Adafruit Feather 0 boards and wasn’t compatible with Arduino Nano.
DIY Code - Getting LEDs to Light
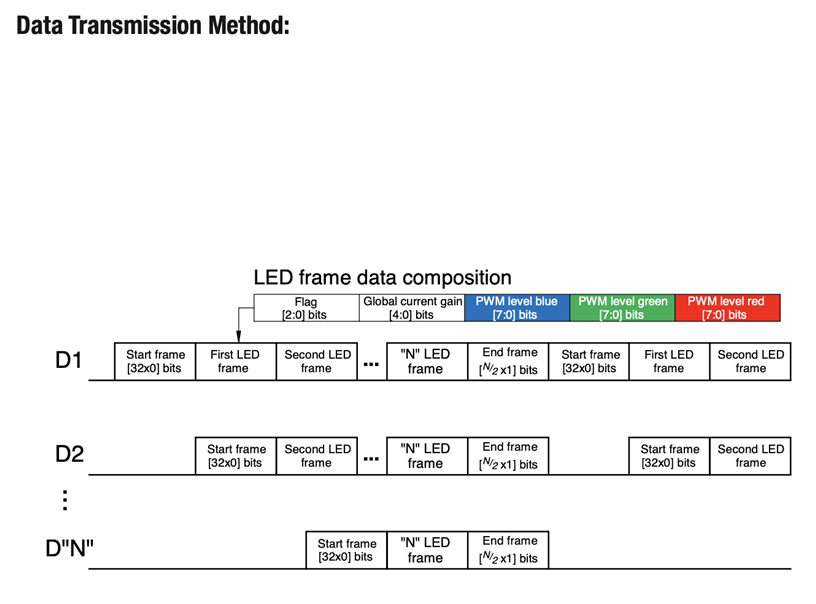
After some datasheet errands, understanding the frame formats and helping hand from GPT, I wrote a basic sketch. And boom! The LED blazed up
Bringing up Colours
Wanting to control RGB LEDs individually, I tailored the sketch to manipulate each LED's colour. Then, I wondered if existing LED libraries could help. After trials, I found the FastLED library worked perfectly since it’s compatible with APA102 LEDs, which share communication protocols with these Wurth LEDs.
#include <FastLED.h>

// Configuration Setup
#define NUM_LEDS 10   // Adjust this to the number of LEDs in your strip
#define DATA_PIN 11     // Connect Wurth DIN to this pin
#define CLOCK_PIN 13    // Connect Wurth CIN to this pin
#define LED_TYPE APA102 // The correct type for your Wurth LED
#define COLOR_ORDER BGR // May need to be RGB depending on your strip

// Global variables
CRGB leds[NUM_LEDS];
uint8_t gHue = 0; // Global variable for cycling colors
int currentPattern = 0;
unsigned long lastPatternChange = 0;
unsigned long patternDuration = 10000; // Time in ms to show each pattern (10 seconds)

// Pattern functions
void rainbowWave() {
  gHue++; // Cycle the base color
  fill_rainbow(leds, NUM_LEDS, gHue, 7);
  FastLED.show();
  delay(20);
}

void confetti() {
  fadeToBlackBy(leds, NUM_LEDS, 10);
  int pos = random16(NUM_LEDS);
  leds[pos] += CHSV(gHue + random8(64), 200, 255);
  gHue++;
  FastLED.show();
  delay(10);
}

void pacmanChase() {
  CRGB headColor = CRGB::Yellow;
  int tailLength = 5;

  for (int i = 0; i < NUM_LEDS + tailLength; i++) {
    fadeToBlackBy(leds, NUM_LEDS, 20);
    if (i < NUM_LEDS) {
      leds[i] = headColor;
    }
    for (int j = 1; j <= tailLength; j++) {
      int tailPos = i - j;
      if (tailPos >= 0 && tailPos < NUM_LEDS) {
        uint8_t tailFadeAmount = 255 - (j * (255 / tailLength));
        leds[tailPos] = headColor;
        leds[tailPos].fadeLightBy(tailFadeAmount);
      }
    }
    FastLED.show();
    delay(20);
  }
}

void bounceChase() {
  int chaseSpeed = 30;

  // Move right
  for (int i = 0; i < NUM_LEDS; i++) {
    leds[i] = CHSV(gHue + i * 4, 255, 255);
    if (i > 0) leds[i-1] = CRGB::Black;
    FastLED.show();
    delay(chaseSpeed);
  }
  leds[NUM_LEDS - 1] = CRGB::Black;

  // Move left
  for (int i = NUM_LEDS - 1; i >= 0; i--) {
    leds[i] = CHSV(gHue + i * 4, 255, 255);
    if (i < NUM_LEDS - 1) leds[i+1] = CRGB::Black;
    FastLED.show();
    delay(chaseSpeed);
  }
  leds[0] = CRGB::Black;

  gHue++;
}

void marqueeChase(CRGB color, int wait) {
  for (int j = 0; j < 3; j++) {
    for (int q = 0; q < NUM_LEDS; q = q + 3) {
      leds[q + j] = color;
    }
    FastLED.show();
    delay(wait);
    for (int q = 0; q < NUM_LEDS; q = q + 3) {
      leds[q + j] = CRGB::Black;
    }
  }
}

// Main Arduino functions
void setup() {
  FastLED.addLeds<LED_TYPE, DATA_PIN, CLOCK_PIN, COLOR_ORDER>(leds, NUM_LEDS);
  FastLED.setBrightness(255); // Set a safe starting brightness
}

void loop() {
  // Check if it's time to change the pattern
  if (millis() - lastPatternChange > patternDuration) {
    currentPattern = (currentPattern + 1) % 4; // Loop through 4 patterns
    lastPatternChange = millis();
    fill_solid(leds, NUM_LEDS, CRGB::Black); // Clear the strip
    FastLED.show();
  }

  // Call the currently selected pattern
  switch (currentPattern) {
    case 0:
      rainbowWave();
      break;
    case 1:
      confetti();
      break;
    case 2:
      pacmanChase();
      break;
    case 3:
      bounceChase();
      break;
  }
}
What’s Next?
In the next blog, I'll introduce to the project workflow and I’m planning to:
-
Add Wi-Fi control to synchronize LED colours wirelessly.
-
Capture screen pixel data to dynamically match LED colours to on-screen content.
-
Build immersive lighting experiences that respond in real-time.
Final Thoughts
This activity was a great way for me to get started with addressable LEDs and explore how to control them beyond default SDKs. Afterall, with spending enough time and debugging, every technology seems friendly 
If you have questions, ideas, or want help with this project, leave a comment below and let’s light things up together!
cc Rohith_22


