element14 Community
element14 Community
    Register Log In
  • Site
  • Search
  • Log In Register
  • About Us
  • Community Hub
    Community Hub
    • What's New on element14
    • Feedback and Support
    • Benefits of Membership
    • Personal Blogs
    • Members Area
    • Achievement Levels
  • Learn
    Learn
    • Ask an Expert
    • eBooks
    • element14 presents
    • Learning Center
    • Tech Spotlight
    • STEM Academy
    • Webinars, Training and Events
    • Learning Groups
  • Technologies
    Technologies
    • 3D Printing
    • FPGA
    • Industrial Automation
    • Internet of Things
    • Power & Energy
    • Sensors
    • Technology Groups
  • Challenges & Projects
    Challenges & Projects
    • Design Challenges
    • element14 presents Projects
    • Project14
    • Arduino Projects
    • Raspberry Pi Projects
    • Project Groups
  • Products
    Products
    • Arduino
    • Avnet Boards Community
    • Dev Tools
    • Manufacturers
    • Multicomp Pro
    • Product Groups
    • Raspberry Pi
    • RoadTests & Reviews
  • Store
    Store
    • Visit Your Store
    • Choose another store...
      • Europe
      •  Austria (German)
      •  Belgium (Dutch, French)
      •  Bulgaria (Bulgarian)
      •  Czech Republic (Czech)
      •  Denmark (Danish)
      •  Estonia (Estonian)
      •  Finland (Finnish)
      •  France (French)
      •  Germany (German)
      •  Hungary (Hungarian)
      •  Ireland
      •  Israel
      •  Italy (Italian)
      •  Latvia (Latvian)
      •  
      •  Lithuania (Lithuanian)
      •  Netherlands (Dutch)
      •  Norway (Norwegian)
      •  Poland (Polish)
      •  Portugal (Portuguese)
      •  Romania (Romanian)
      •  Russia (Russian)
      •  Slovakia (Slovak)
      •  Slovenia (Slovenian)
      •  Spain (Spanish)
      •  Sweden (Swedish)
      •  Switzerland(German, French)
      •  Turkey (Turkish)
      •  United Kingdom
      • Asia Pacific
      •  Australia
      •  China
      •  Hong Kong
      •  India
      •  Korea (Korean)
      •  Malaysia
      •  New Zealand
      •  Philippines
      •  Singapore
      •  Taiwan
      •  Thailand (Thai)
      • Americas
      •  Brazil (Portuguese)
      •  Canada
      •  Mexico (Spanish)
      •  United States
      Can't find the country/region you're looking for? Visit our export site or find a local distributor.
  • Translate
  • Profile
  • Settings
Low Power IoT Design Challenge
  • Challenges & Projects
  • Design Challenges
  • Low Power IoT Design Challenge
  • More
  • Cancel
Low Power IoT Design Challenge
Blog Low Power Sump Well Water Level Monitoring #4 - Water Level Sensor Interrupts
  • Blog
  • Forum
  • Documents
  • Polls
  • Files
  • Mentions
  • Sub-Groups
  • Tags
  • More
  • Cancel
  • New
  • Share
  • More
  • Cancel
Group Actions
  • Group RSS
  • More
  • Cancel
Engagement
  • Author Author: cmelement14
  • Date Created: 4 Nov 2021 1:32 AM Date Created
  • Views 749 views
  • Likes 1 like
  • Comments 0 comments
  • interrupt
  • cypress modus toolbox 2.4
  • low power iot design challenge
  • psoc 62
Related
Recommended

Low Power Sump Well Water Level Monitoring #4 - Water Level Sensor Interrupts

cmelement14
cmelement14
4 Nov 2021

  • 1. Hardware Connection
  • 2. Software Project


1. Hardware Connection


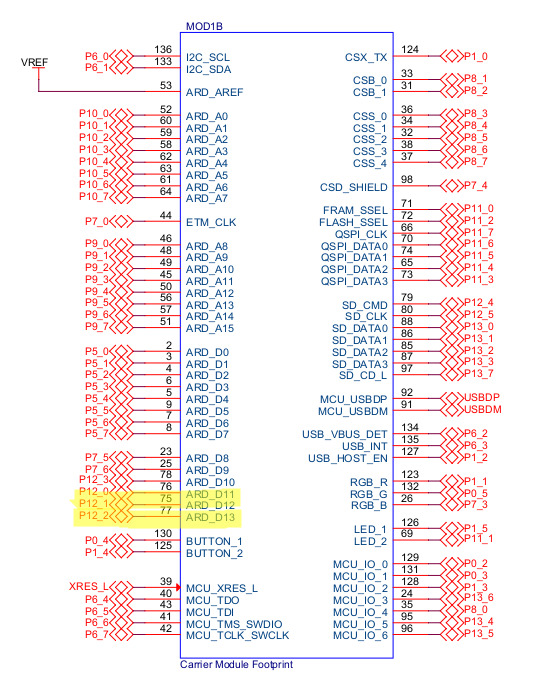
Water level sensor from Anndason, model# DP5200 is used to detect the water level in the sump pit. Basically it's a float switch. When water is rising, it pushes the float towards switch's open or close position depending on you mount the sensor upwards or downwards. I use 3 water level sensors and they are connected to Arduino interface's D11, D12 and D13 pins as shown in the schematic below. The three pins are configured as general digital inputs with internal pull-up. Interrupts are enabled on these three pins as well.

image

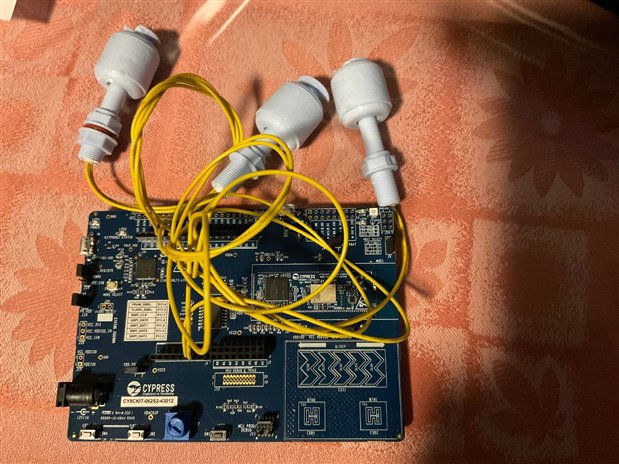
Shown below is the physical connection of the sensors and the development kit.

image


2. Software Project


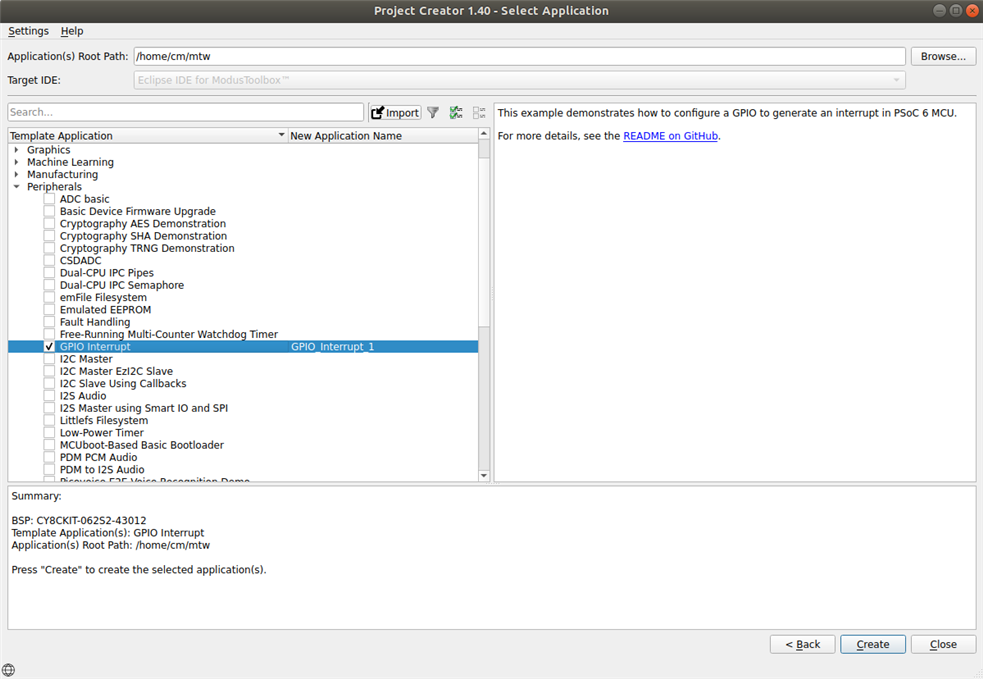
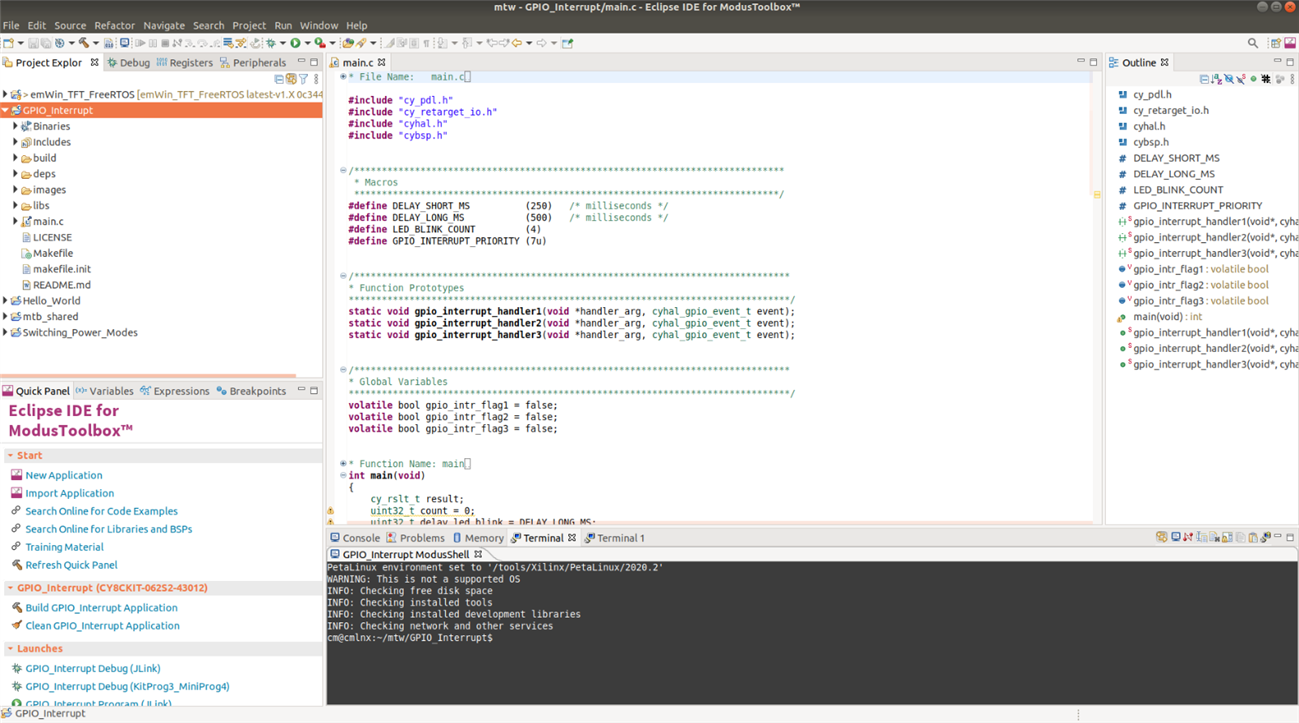
ModusToolbox provides lots of template applications to exercise each part of the hardware's capability. We can easily start from a template application and modify it to become our own application. In this case, I will use GPIO Interrupt template application as my start point.

image

image


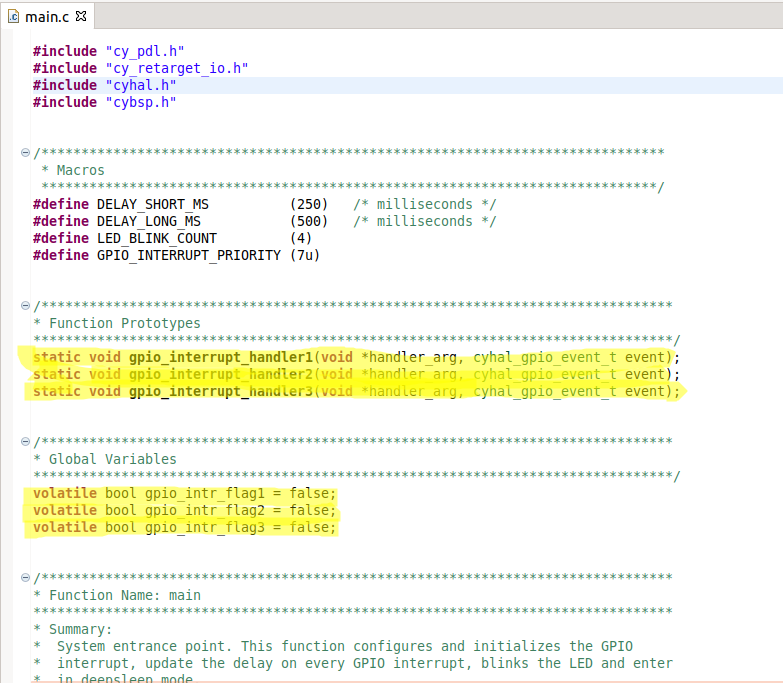
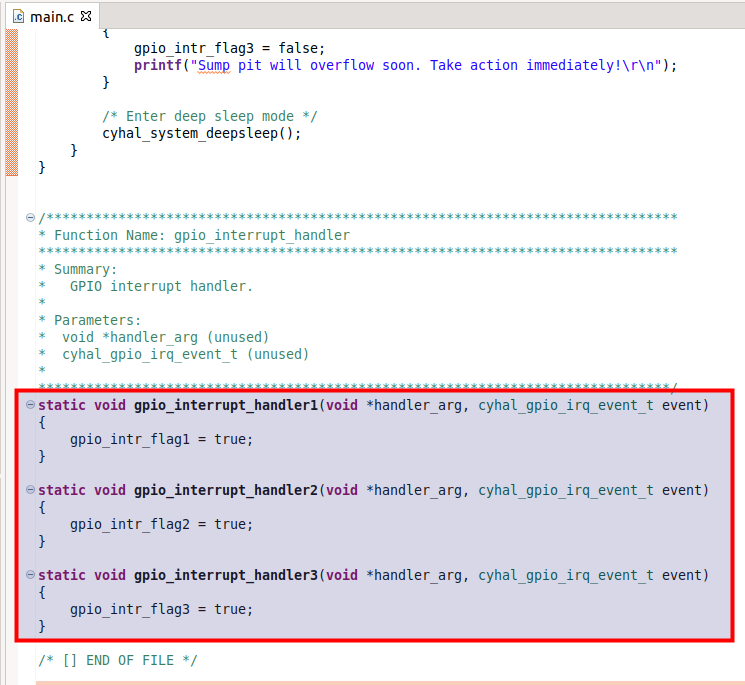
First, declare two more interrupt handler routines so each sensor input has its own interrupt handling. Also define two more global flags which indicates the interrupt has been triggered or not.

image


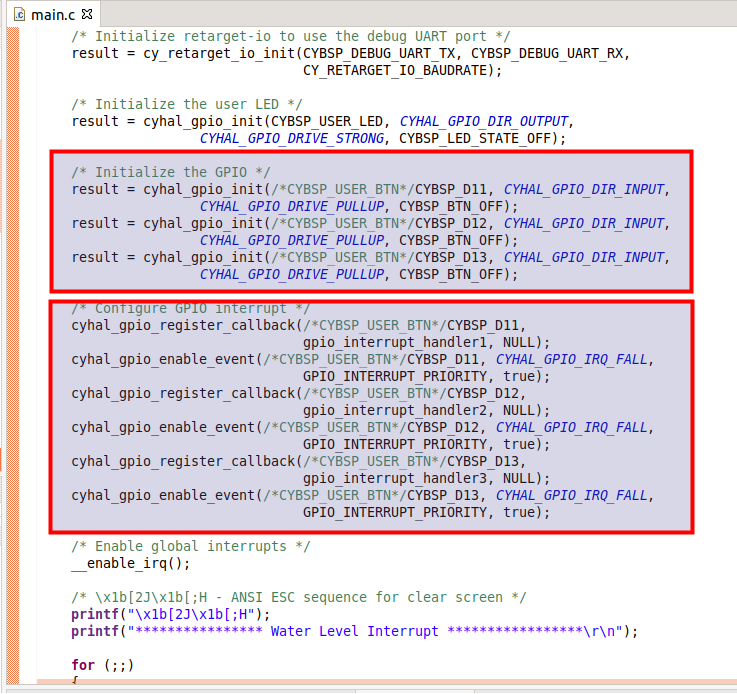
Then initialize three pins as general digit inputs with pull-up. The three Arduino data pins D11, D12 and D13 are defined as CYBSP_D11, CYBSP_D12 and CYBSP_D13 respectively in the BSP software. Next, we configure the interrupt handler, trigger signal and enable interrupt for each pin.

image


After initialization, it's a infinite loop like most bare-metal application. In the loop, we check which interrupt woke up the system and print out corresponding message to indicate the water level.

image


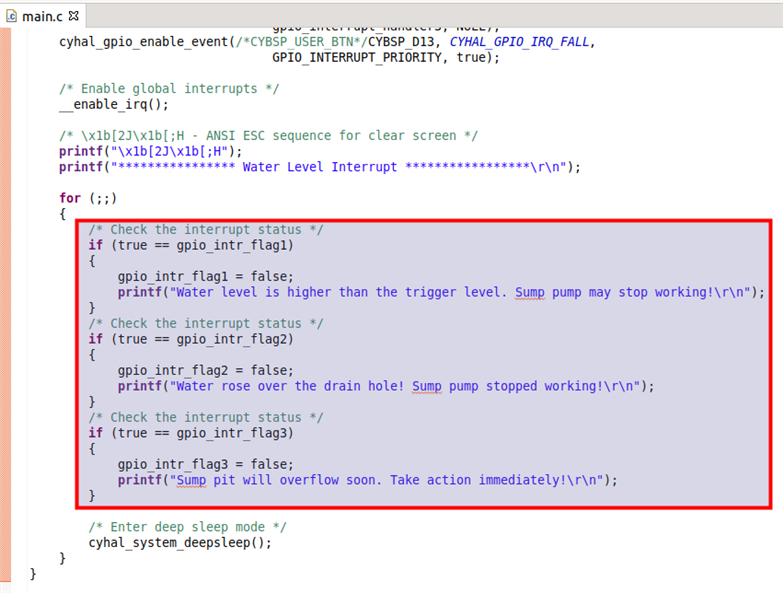
The last part is the interrupt handlers. Usually we should keep interrupt routine as short as possible. In this example, the routines only set the global flags then exit from interrupt.

image


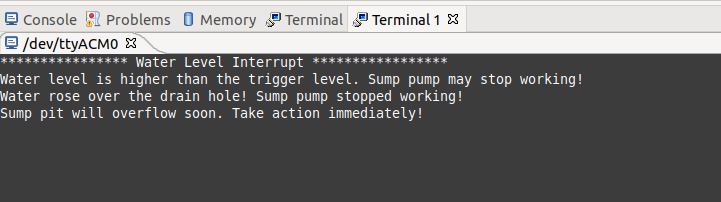
The following is the console output after triggering three sensor sequentially.

image

  • Sign in to reply
element14 Community

element14 is the first online community specifically for engineers. Connect with your peers and get expert answers to your questions.

  • Members
  • Learn
  • Technologies
  • Challenges & Projects
  • Products
  • Store
  • About Us
  • Feedback & Support
  • FAQs
  • Terms of Use
  • Privacy Policy
  • Legal and Copyright Notices
  • Sitemap
  • Cookies

An Avnet Company © 2025 Premier Farnell Limited. All Rights Reserved.

Premier Farnell Ltd, registered in England and Wales (no 00876412), registered office: Farnell House, Forge Lane, Leeds LS12 2NE.

ICP 备案号 10220084.

Follow element14

  • X
  • Facebook
  • linkedin
  • YouTube