element14 Community
element14 Community
    Register Log In
  • Site
  • Search
  • Log In Register
  • Community Hub
    Community Hub
    • What's New on element14
    • Feedback and Support
    • Benefits of Membership
    • Personal Blogs
    • Members Area
    • Achievement Levels
  • Learn
    Learn
    • Ask an Expert
    • eBooks
    • element14 presents
    • Learning Center
    • Tech Spotlight
    • STEM Academy
    • Webinars, Training and Events
    • Learning Groups
  • Technologies
    Technologies
    • 3D Printing
    • FPGA
    • Industrial Automation
    • Internet of Things
    • Power & Energy
    • Sensors
    • Technology Groups
  • Challenges & Projects
    Challenges & Projects
    • Design Challenges
    • element14 presents Projects
    • Project14
    • Arduino Projects
    • Raspberry Pi Projects
    • Project Groups
  • Products
    Products
    • Arduino
    • Avnet Boards Community
    • Dev Tools
    • Manufacturers
    • Multicomp Pro
    • Product Groups
    • Raspberry Pi
    • RoadTests & Reviews
  • Store
    Store
    • Visit Your Store
    • Choose another store...
      • Europe
      •  Austria (German)
      •  Belgium (Dutch, French)
      •  Bulgaria (Bulgarian)
      •  Czech Republic (Czech)
      •  Denmark (Danish)
      •  Estonia (Estonian)
      •  Finland (Finnish)
      •  France (French)
      •  Germany (German)
      •  Hungary (Hungarian)
      •  Ireland
      •  Israel
      •  Italy (Italian)
      •  Latvia (Latvian)
      •  
      •  Lithuania (Lithuanian)
      •  Netherlands (Dutch)
      •  Norway (Norwegian)
      •  Poland (Polish)
      •  Portugal (Portuguese)
      •  Romania (Romanian)
      •  Russia (Russian)
      •  Slovakia (Slovak)
      •  Slovenia (Slovenian)
      •  Spain (Spanish)
      •  Sweden (Swedish)
      •  Switzerland(German, French)
      •  Turkey (Turkish)
      •  United Kingdom
      • Asia Pacific
      •  Australia
      •  China
      •  Hong Kong
      •  India
      •  Korea (Korean)
      •  Malaysia
      •  New Zealand
      •  Philippines
      •  Singapore
      •  Taiwan
      •  Thailand (Thai)
      • Americas
      •  Brazil (Portuguese)
      •  Canada
      •  Mexico (Spanish)
      •  United States
      Can't find the country/region you're looking for? Visit our export site or find a local distributor.
  • Translate
  • Profile
  • Settings
MusicTech
  • Challenges & Projects
  • Design Challenges
  • MusicTech
  • More
  • Cancel
MusicTech
Blog BB Drum fingers
  • Blog
  • Forum
  • Documents
  • Polls
  • Files
  • Mentions
  • Sub-Groups
  • Tags
  • More
  • Cancel
  • New
  • Share
  • More
  • Cancel
Group Actions
  • Group RSS
  • More
  • Cancel
Engagement
  • Author Author: carmelito
  • Date Created: 4 Apr 2016 4:38 PM Date Created
  • Views 583 views
  • Likes 2 likes
  • Comments 0 comments
  • 3D Printing
  • project_diydrumkit
  • BeagleBone
  • music-tech
Related
Recommended

BB Drum fingers

carmelito
carmelito
4 Apr 2016

This weeks blog post is fun version of the DIY Drum kit using the BeagleBone Black, and is something that you can make with friends, at your local maker-space. The STL files for the 3D printed parts are attached to the blog post below at it take about 3 hours to print all the files, I would suggest printing the finger in you favorite color filament first, so that you can add coins and breadboarding wire while the other Beaglebone case parts are printed. Here you will need a friend to help you out to hold the coins and the breadboarding wire while you add hot glue..


The electronic components you will need are

  • Beaglebone black
  • Adafruits 12-key Capacitive touch breakout - based on MPR121 -https://www.adafruit.com/products/1982
  • Beard-boarding wire
  • 10K Potentiometer
  • USB sound card
  • Portable speakers

image


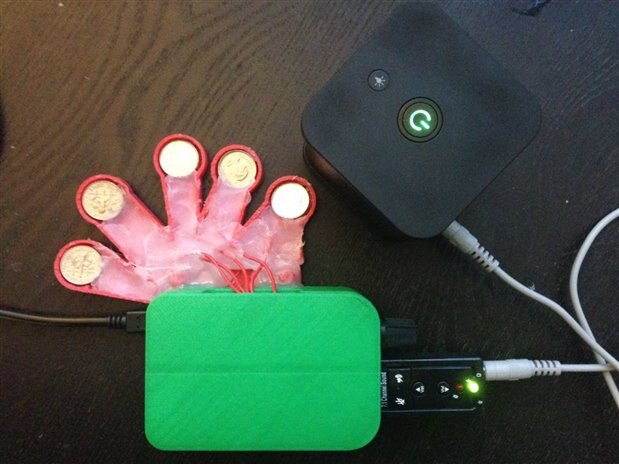
As you see in the video below the Potentiometer besides the sound card is used to traverse between folders on the Beaglebone which have different sets of sounds like Drums , bass guitar sounds etc..

You don't have permission to edit metadata of this video.
Edit media
x
image
Upload Preview
image
https://youtu.be/CXhqjeKqedM


If you are looking for another version with more controls check out - Pocket Version of the DIY Drum kit


Here are the steps you will need follow to complete the build

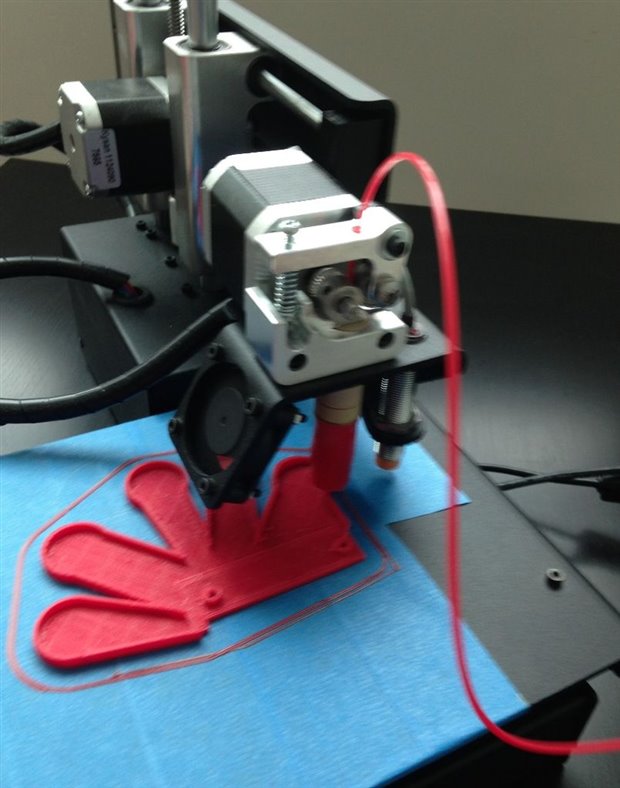
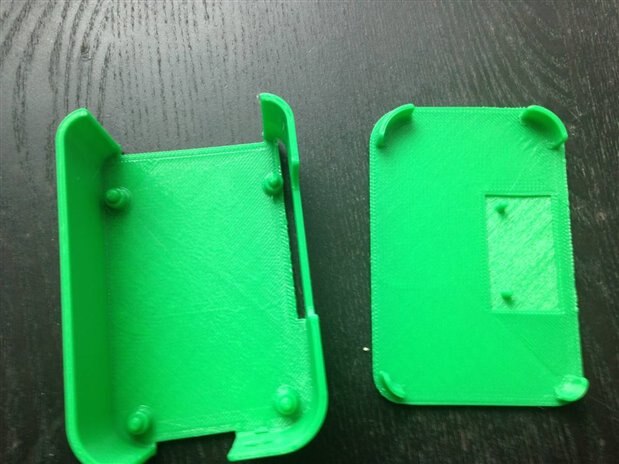
#1  3D print the STL's attached

The parts for 3D printing were designed in 123D design, and you should see 3 STL files in the zip attached below(Fingers.stl,BeagleboneBottom.stl and Beaglebone Top.stl)

Here are some suggested setting to 3D print the parts

  • Layer height - 0.2mm
  • Infill - rectilinear
  • Infill density - 25 %
  • Nozzle temperature if you are using the same Filament - 205 C

image

Note: for the BeagleboneBottom.stl, you will have to add supports as part of your slicer settings

image


#2 Using Hot glue to add the coins and Breadboarding wire

Here is where you will need a friend to help you out, collect a couple of 10 cents if you like in Canada or based on where you live you will need a coins with a diameter of 18mm.

Add the wires below the coins and using a multimeter run a quick continuity test for all the 5 coins to the tip of the wires.


image


#3 Soldering components -  Capacitive touch breakout  and the POT

Now solder some breadboarding wire to the POT

And also solder the ends of the wires from the hand to the MPR121, in my case i have solder another set of wire from the MPR121 to the hand, as I plan on using the breakout board on another version of this project.

image


#4 Checking if the Capacitive touch Breakout  and Sound card are detected by the BeagleBone

Connect the USB sound card to the beaglebone

And connect the MPR121 breakout to the expansion headers on the beaglebone, that is

  • Connect the VCC of the key pad to 3.3V , pin#3 on the P9 header
  • GND to GND to pin#3 on P9
  • SCL on the key pad to pin#19 on P9 header
  • and SDA to pin#20

image

Now connect the Beaglebone to your computer and use the cloud 9 IDE to run the commands below, or use a LAN cable to ssh into the beaglebone to run the following commands

root@beaglebone:~# lsusb

you should see your audio card  detected as C-Media Electronics,Inc. CM108 Audio Controller

root@beaglebone:~# i2cdetect -r 1

here you should see the MPR121 detected as 5a , as shown in the screen shot below.

image


#5 Connecting the Pot to the Beaglebone

Connect the potentiometer to the beaglebone at

  • Connect +ve to 1.8V , that is pin #32 VDD_ADC on P9 header
  • Connect GND to GNDA_ADC , that is pin #34 on P9 header
  • Connect the middle pin of the POT to analog pin #33 on P9 header

image


#6 Clone the Github repository and run the python program

this is currently a work in progress , and is based on Adafruit's python library for the MPR121, I have currently forked the repo and made some modifications specifically for the beaglebone..(I will have more updates in a couple of days -- stay tuned)


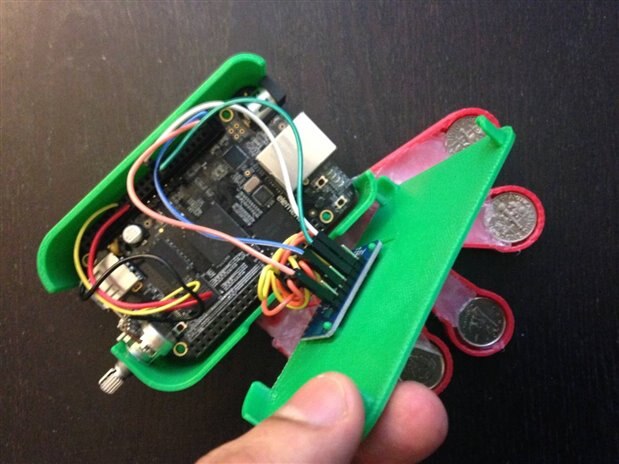
#7 Connect 3D printed Lid to the Top

One you have tested the code add  MPR121 breakout the top 3D printed as shown in the picture, the top should snap fit with the base, but add some hot glue if required.

image

Attachments:
STL_BBDrumFinger.zip
  • Sign in to reply
element14 Community

element14 is the first online community specifically for engineers. Connect with your peers and get expert answers to your questions.

  • Members
  • Learn
  • Technologies
  • Challenges & Projects
  • Products
  • Store
  • About Us
  • Feedback & Support
  • FAQs
  • Terms of Use
  • Privacy Policy
  • Legal and Copyright Notices
  • Sitemap
  • Cookies

An Avnet Company © 2025 Premier Farnell Limited. All Rights Reserved.

Premier Farnell Ltd, registered in England and Wales (no 00876412), registered office: Farnell House, Forge Lane, Leeds LS12 2NE.

ICP 备案号 10220084.

Follow element14

  • X
  • Facebook
  • linkedin
  • YouTube