


The front panel of my vintage toy synthesiser is the place where all the dials and buttons for controlling the sound parameters will be attached to the toy piano. While the final design of the panel has turned out very similar to how I had originally planned it to look, the construction of the panel compared to my initial plan has changed dramatically. In this blogpost I'm going to cover the process of both designing and constructing the front panel for the vintage toy synthesiser, which has been an ongoing process for me over the past couple of weeks.
Design
When approaching the design of the panel there were three main aspects I needed to consider - control layout, control aesthetics, and labelling/text.
Control Layout
Control layout is the process of placing all the needed controls on the front the panel. There were a few things to consider here that affected my final design:
- The total number of sound parameters within the synthesiser - 43
- Panel size - the overall size I can use here is roughy 614cm squared
- Control size - the majority of the controls I am using are potentiometers which are 16mm x 25mm
- Grouping similar controls together - one of the most important rules to any good interface design is that similar controls should be grouped together within their own sections
- Leaving space for other things - I need to make sure I've left enough room for a user to easily operate the controls (e.g. their fingers can fit around the dials), as well as leaving space for control labelling.
Control Aesthetics
My original plan for this project was to use vintage and old-looking controls; however when consider other things such as budget, time, and panel layout, this proved to be a very hard task. Therefore in the end I abandoned this idea, and set myself a new plan to just make sure the controls match the black/white/silver colour scheme of the piano. However another part of my initial plan was to make sure controls are small/miniature, again keeping inline with the design of the piano.
There were only two types of controls I needed for the front panel - dials/knobs/potentiometers, and a toggle switches.
Dials
I've spent the past couple of months buying a range of different knob caps from eBay, and seeing how they look attached to the toy piano. The knob cap I settled on is an aluminium black and silver cap with a very simple design, simply because I thought it went well with the existing aesthetics of the piano. I tried several sizes of the same knob cap, however settled on a 13mm one.
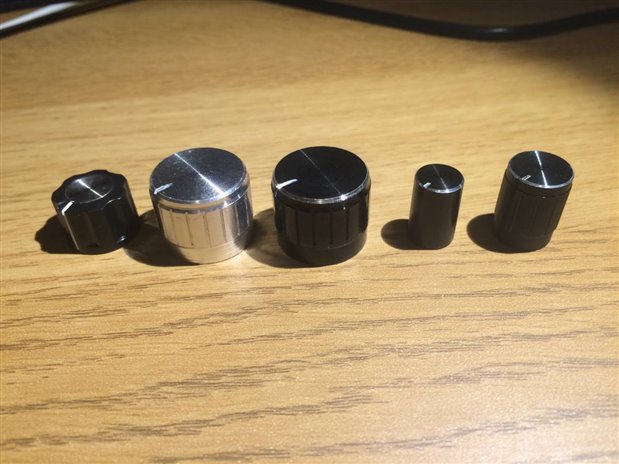
Different knob caps I tried, with the one I settled on on the far right.
Toggle Switches
One parameter of the synth needs to use a switch rather than a dial, and from the get-go of this project I knew exact what switch I would use which would suit the vintage toy piano aesthetic - a simple mini silver metal toggle switch.
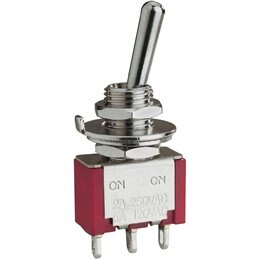
The type of toggle switch I will be using on the panel
Labelling/Text
All the controls on the front panel need to be labelled in some way so that the user knows what they do, and the main thing to consider here was what type of font to use. Whereas I had original planned to use a handwritten or old-style font, I ended up choosing a common sans-serif font due to it looking best with the final panel construction method (see Construction section below). I also had to consider what colour to use here, which preferably would be silver/grey/white.
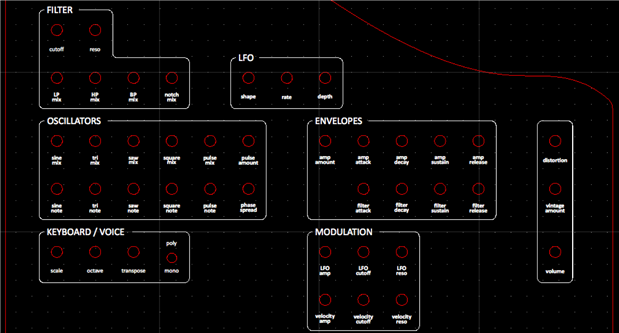
Final Design
Here is a technical drawing of the final design of the front panel, showing all the positions of the controls as well as the labelling of the controls:
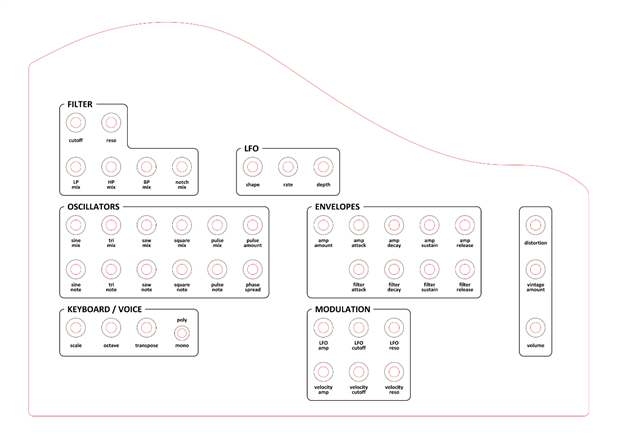
The final panel design, show control positions and labelling
There are a couple of reasons why I placed the controls in this particular layout:
- All controls are grouped into their relevant individual sections
- There's space left for adding further controls into relevant positions in the future
Construction
As mentioned above, the construction of the front panel of the vintage toy synthesiser changed dramatically from my original plan.
Initial Plan
My initial plan for constructing the front panel was to drill holes into the existing wooden panel of the piano, and labelling each control my etching text into the existing paintwork. However both of these ideas ended up being abandoned for the following main reasons:
- The existing panel was too thick and wouldn't have allowed me to fit the bolts onto the potentiometers to attach them to the panel. I attempted to find pots with longer shafts, but this proved to be very difficult.
- The existing panel was quite brittle and would probably have split quite easily after drilling 43 holes into it.
- The paintwork was also very brittle and chipped easily, so attempting to etch text into it wouldn't have looked very good.
Laser Cutting - First Attempt
After realising I would need to construct a whole new panel for the piano I was recommended getting it produced using laser cutting, as this could cut out all the needed holes instead of me having to do it myself. With the help of my wonderful girlfriend I got a CAD drawing produced, found a local laser cutting company, Bristol Design Forge, and got a new panel constructed in 3mm birch plywood with all the needed holes for the controls. The thickness was perfect for attaching potentiometers, and was a lot stronger.
A CAD drawing for the first panel design

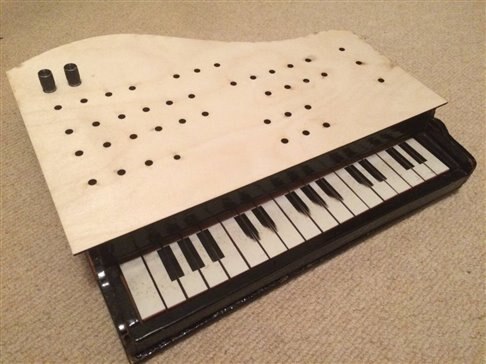
The 3mm birch plywood laser cut panel
The main downside of this method was that I would now have to completely paint the panel, and this is where disaster struck. First of all I used a gloss black paint that probably wasn't designed to to be used on objects that would be handled a lot (it was tacky and smelly, even after it had dried), and secondly the paint caused the panel to warp quite considerably meaning that it now didn't sit nicely on the existing piano enclosure. I learned two things here:
- Plywood is susceptible to warping
- Try paint on a test bit of material first!!
I decided to learn from these mistakes and move on quickily.
Final Laser Cut Panel
After the first failed attempt at laser cutting I was then recommended to consider using acrylic instead of wood. While I really wanted to keep all parts of the synth wooden, keeping inline with the existing enclosure, there were quite a few benefits to using acrylic instead of wood:
- It could come in gloss black without me needing to apply any paint
- I could use laser engraving to produce the control labelling on my panel, which would come out in frosted white - one of preferable labelling colours. This would mean I wouldn't need to paint or stick labels on the panel myself, which probably wouldn't have looked that good.
- It's not susceptible to warping
Therefore once again with the help of my wonderful girlfriend and Bristol Design Forge I got a second laser cut panel produced, this time in 3mm gloss black acrylic.
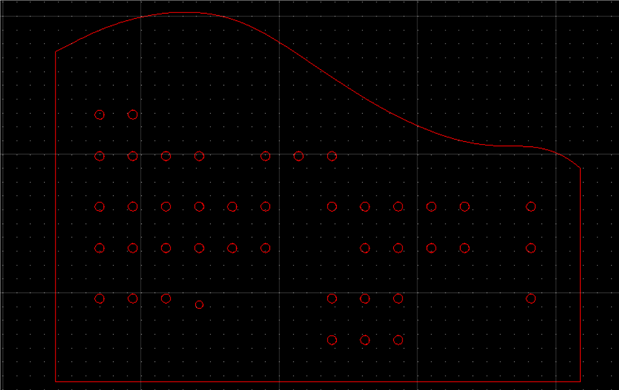
A close up of the CAD drawing for the second version of the panel, showing cut lines in red and engrave lines in white.
The .dxf design file for this can be found in the projects git repository.
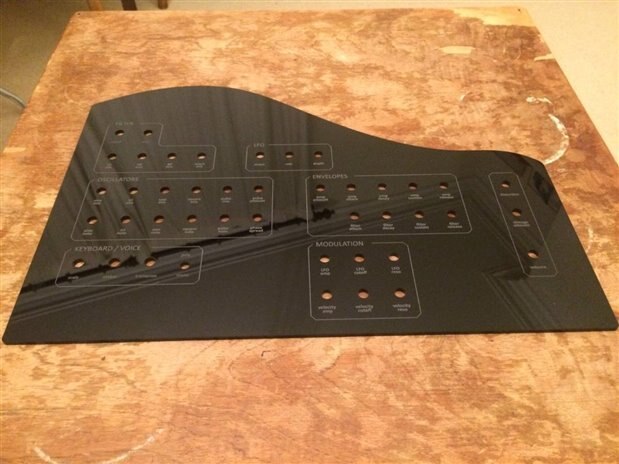
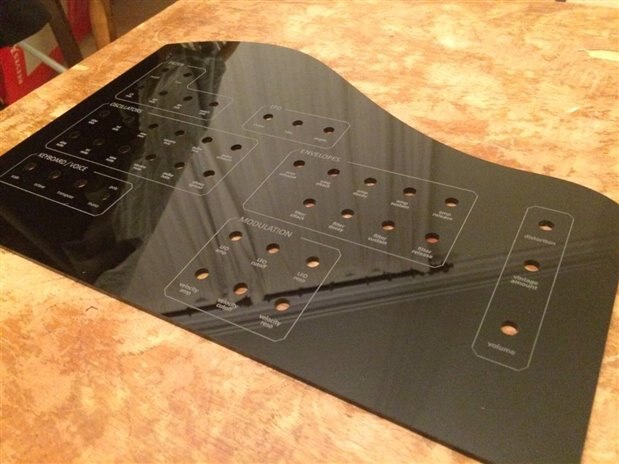
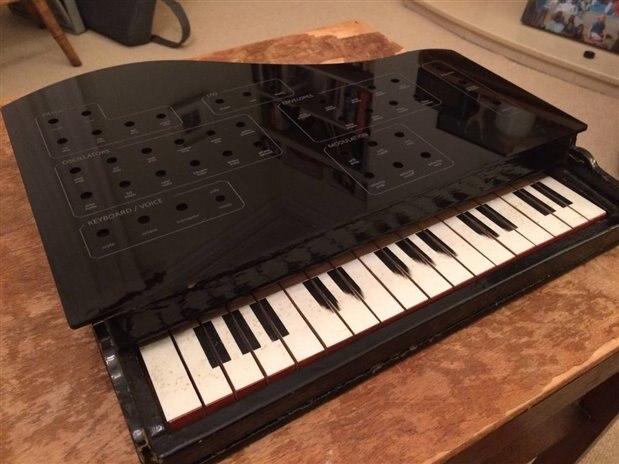
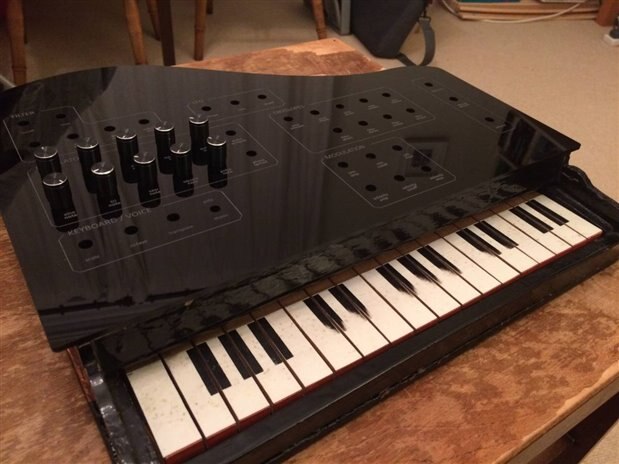
Photos of the gloss black acrylic panel
While I was initially concerned that using acrylic instead of wood would ruin the aesthetics of the vintage toy piano, it turned out to not look too different from the original panel. Hopefully this is the final panel design and construction, and now all I need to do is attach all the controls and get them talking to the BeagleBone Black!
Top Comments