In my application to the layer-n design challenge, I had proposed I would utilize the wired smart temperature probe (SP-005-01) to measure the ambient air temperature in our attic. This is only one of the many thousands of potential temperature measurement applications the SP-005 probe could serve. I also wanted to experiment with the power over ethernet capabilities of the layer-n gateway, so I thought attempting to mount it in the attic would be a great test use case. With a gateway already being in the attic using one of Omega's wired smart probes plugged into the gateway would be an easy solution to measuring the ambient air temperature in the attic. Here is a block diagram of the attic temperature sensing portion of my design challenge project:

There are few steps required, in order to get the SP-005-01 to report temperature data into the layer-n cloud. The first step is choose a temperature sensor. For my project I opted to try and construct my own 1kOhm RTD air temperature sensor. I choose this route for the personal challenge and interest in attempting a DIY solution. I will note that as a result of going the DIY route, I loose all warranties, guarantees, of measurement performance. So, in a commercial application sourcing a warrantied and guaranteed temperature probe from the omega catalog, would be the sensible approach.
I purchased some miniature Platinum Thin Film (PTF) Temperature Elements from TE CONNECTIVITY:

The specific model I selected was the 1 kOhm lowest accuracy (class c):

I used a USB cable as a 4-wire hookup cable to the RTD. After cutting and striping the USB cable I tined the ends of the wires:

I slide two pieces of heat shrink tubing on the two pairs of leads before soldering the RTD element to the wires:

To connect the hookup wires of the temperature sensor (RTD or Thermocouple) to the SP-005, I made uses of the M12-4 terminal connector and cable gland:

I following the wiring instructions in the SP-005 manual for a 4-wire RTD hookup as:

Note the yellow, is actually the white wire in my hookup cable.
I then attached both the M12 terminal connector and USB interface probe to the SP-005.

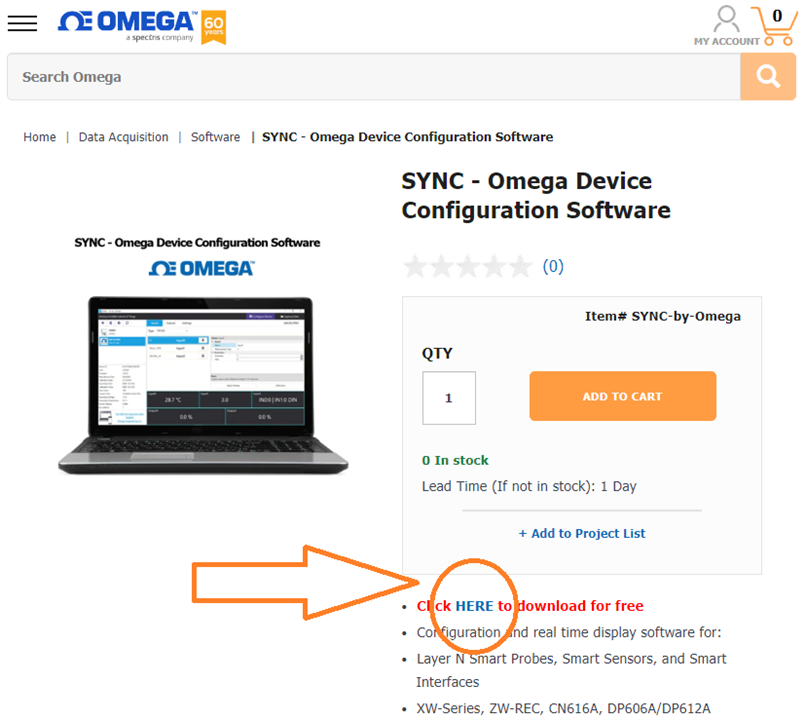
Before attempting to connect the SP-005 to the Layer-N gateway, you have to configure the SP-005 with the Omega Sync PC application.

After downloading and installing the Omega sync application, I connected the USB probe interface to my PC and launched the Sync application. The SP-005 is automatically discovered:


Selected the type of RTD as 1 kOhm, 3850 ppm/degC:

Selected a 4-wire hookup configuration:

If you have a suitable breakout connector to access the IO pins on the M12-8 connector:

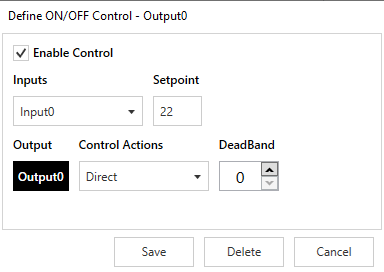
You can configure the SP-005 to output a ON/OFF or PWM output on the open-collector IO pins:

I don't currently understand the control actions terminology. It appears to be similar to deciding output polarity.

The device settings tab offers the following options:

In the capture data tab, you can record the output of the SP-005 with a graph that updates in real-time.

The data export feature only appears to work with the sample buffer internal to the SP-005. I wasn't able to save any of the live data plots to csv. So, if you want to be able to export temperature plots from omega sync, you need to have the internal sample buffer enabled and choose an appropriate sample rate (the maximum is 1 Sa/s).
Advanced Users
If like me you would ever like to interface with the SP-005 temperature probe to a PC application like Matlab or Python. You are in luck too! The USB probe interface has a basic ASCII command protocol as described here: removed link
Opening a serial port terminal and selecting the correct COM port you can type '?<enter key>' to see the help menu:

Reading the temperature output of the SP-005 is accomplished by sending the following command sequence:
R 0x3C 1f.2The IF-001 reads 4 bytes from address 0x3C and displays the output as a floating point value with 2 decimal digits

Connecting to the Layer-N Cloud
With the SP-005 now all setup, I inserted the probe interface's USB connector into the one of the gateway's USB ports. In a web browser you must connect to the gateway over your local network:

Select add new device:

Select an SPX probe with a USB connection:

The device should now be listed as a connected device:

The SP-005 should now automatically appear on your Layer-N dashboard:

Summary
With so many temperature sensors to choose from, it can be a bit daunting trying to decide on one for a given application. There must be 1000's of different products skews on the omega website for thermocouples and RTD temperature sensors. Which is great in that they have a sensor for every application, but, a bit overwhelming trying to pick just one.
Once you have decided on a temperature sensor, setup of the SP-005 was a breeze. Within a matter of minutes, I had real-time temperature data being displayed in the Omega Sync application.
Stay tuned for the next blog, where I will experiment with the power over ethernet capabilities of the wireless gateway.
Thanks for reading :)
