


Introduction
The is the last part of my training before building my own project. It blogs all PetaLinux training labs (Lab 1 to Lab 6). The first lab gave me a lot of headache. After a couple of issues being sorted out, the rest of this lab went smoothly. In the second lab, I built my own image but it doesn't work. I have to use the provided solution. I also doubt that there might be missing step(s) in the lab instructions. Lab 3 is about Wifi setup for Ultra96 and the lab instruction is very detailed. Lab 4 is about remotely debugging Linux application. Lab 5 is about building an IoT application. Last but not least, Lab 6 is about integrating a user application into rootfs. It may not be very useful for a system booting from a SD card, but it could be very useful for system booting from flash memory such as NAND, NOR or eMMMC.
Lab 1 - A Couple of Lessons Learned
The first lab is supposed to be a relative simple experiment creating a minimal PetaLinux on the Ultra96 platform, but it caused me a lot of trouble:
1. After I created a PetaLinux project and configured the system, unexpected error messages showed up (shown below). At first, no clue on what went wrong, so posted a question. While waiting for someone's help, I started browsing the project folder and found a couple of log files under the build folder: config.log and build.log. Both file told me my default python version is v3.x not v2.7.x which is required by PetaLinux tools. I changed the default python to v2.7.x but it still showed the similar issue.
$petalinux-config --get-hw-description=../
INFO: Getting hardware description...
INFO: Rename design_1_wrapper.hdf to system.hdf
[INFO] generating Kconfig for project
[INFO] menuconfig project
configuration written to /media/sf_shared/Xilinx/petalinux/2018_3/support_documents/v2/lab1_example/project-spec/configs/config
*** End of the configuration.
*** Execute 'make' to start the build or try 'make help'.
[INFO] sourcing bitbake
ERROR: Failed to source bitbake
ERROR: Failed to config project.
ERROR: Get hw description Failed!.
$ petalinux-build
[INFO] building project
[INFO] sourcing bitbake
ERROR: Failed to source bitbake
ERROR: Failed to build project
2. Did some google search and found this post which reported the same problem. Basically, creating PetaLinux project in VM shared folder doesn't work. I have to use VM local folder. I didn't give the VM a whole of disk space, that's why I was trying to create all projects in the VM shared folders. Vivado and SDK don't have any problem, but PetaLinux tools don't like the shared folders. Then I created the project in VM local drive and everything worked fine. However, as the lab instruction suggests, I probably need to remove the folder after the project is done because the project takes too much disk space (8.9GB for Lab 1).

I don't quite understand the warning message and don't know its impact to the generated image either. If somebody has any knowledge about this warning message, please share the info in the comment area.
WARNING: petalinux-user-image-1.0-r0 do_rootfs: [log_check] petalinux-user-image: found 1 warning message in the logfile:
[log_check] warning: %post(sysvinit-inittab-2.88dsf-r10.plnx_zynqmp) scriptlet failed, exit status 1
I used the built image and the system did boot up. I was able to login as root user.
Lab 2 - Redundant Constrain Files & Possible Missing Steps in Lab Instruction
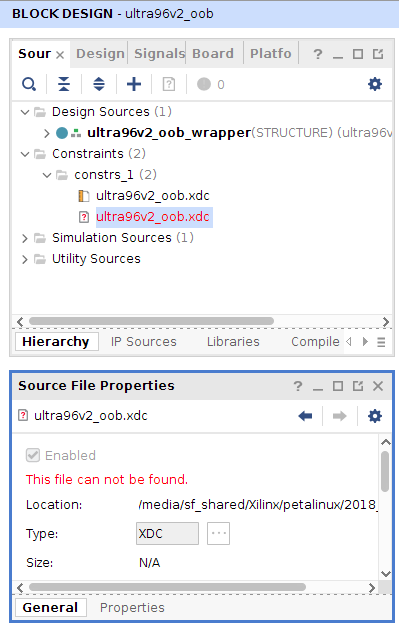
Using Vivado to open the block design in the provided hardware project, it gave a critical warning message. The lab instruction says "Please ignore any warnings when opening the design". It seems the warning can be easily eliminated by removing the redundant constrain file shown below. Anyhow, the lab doesn't require regenerate the HDF file, so it doesn't matter fix the critical warning or not.

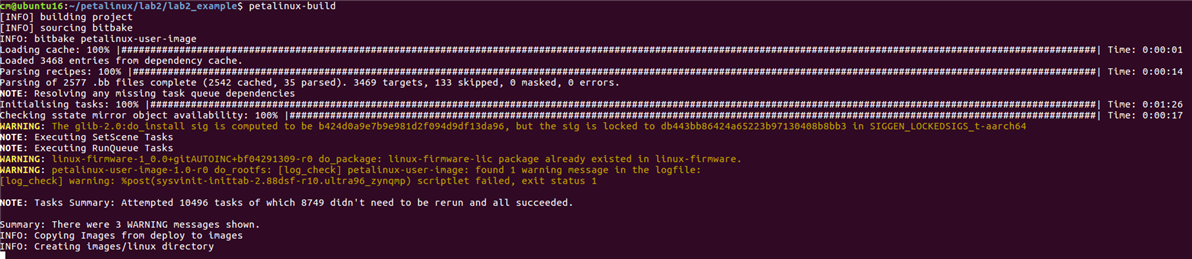
I followed the lab instructions and built my own image. It downloaded lots of files (shows 3501 files) when execute petalinux-build command. It took more than an hour to complete the build. It takes 34.5GB disk space in total.

The build spit out a few warnings, but it seems successful.
After creating the SD card, the first boot failed because of kernel crash (see the last line of the following screenshot). After going through the console message, I realized I didn't issue command
$sudo sync
and didn't wait long enough before ejecting the SD card.
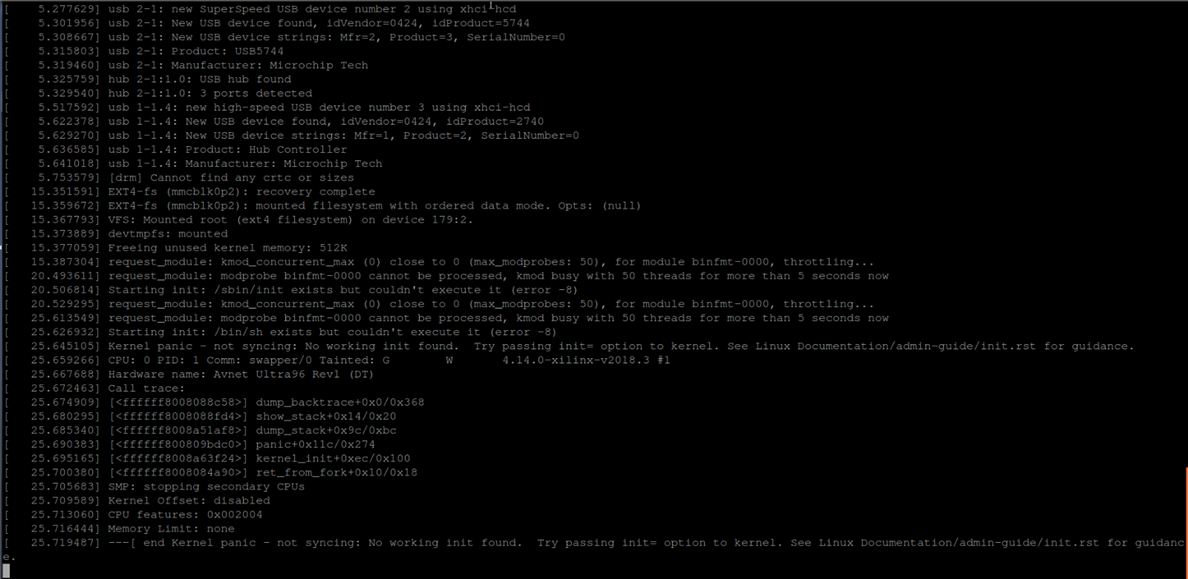
After recreating the SD card, the boot still failed (it didn't show the login prompt no matter how many times I stroke Enter key).
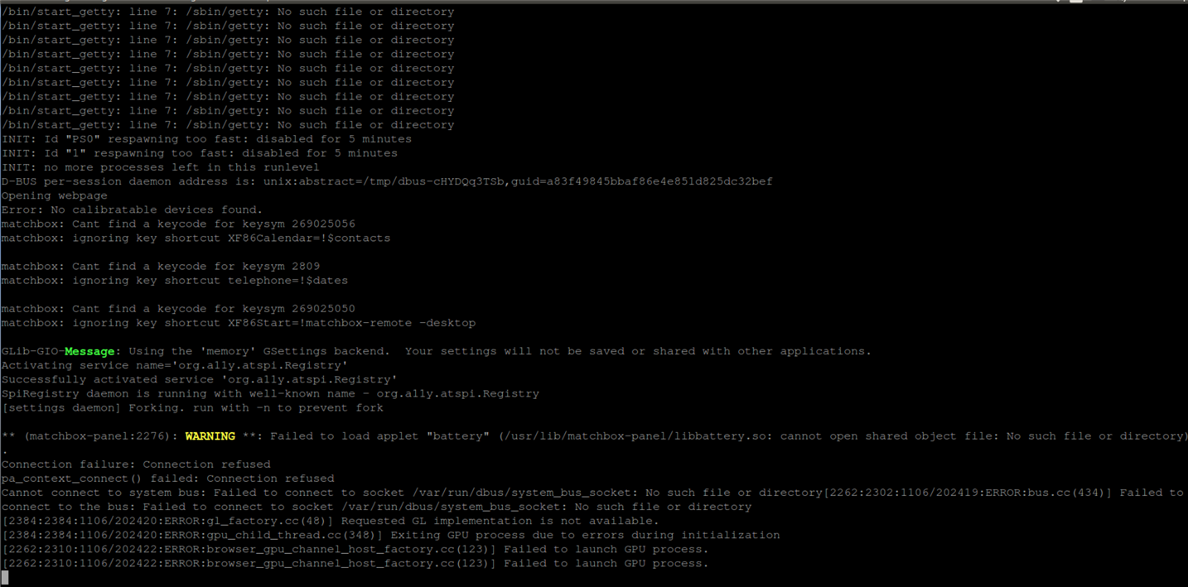
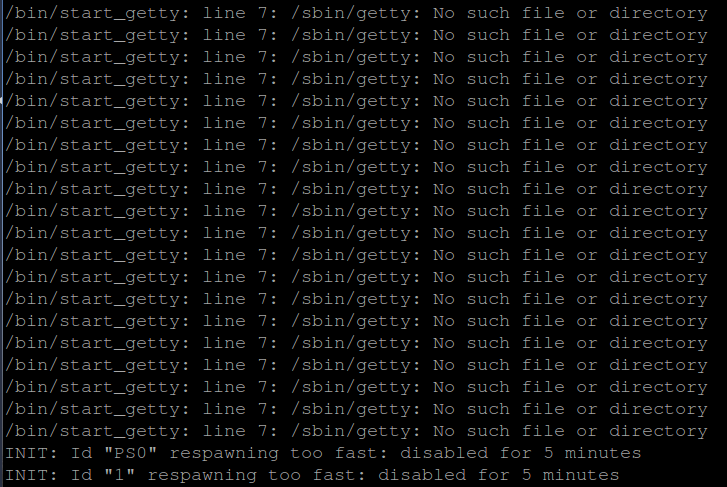
Then the console spit out the following block of messages again and again. Based on the message, it seems my built image doesn't contain getty utility.
The getty should be part of busybox as shown below (captured from the provided solution). I suspect we need a specific configuration for busybox to include getty, but the lab instruction missed that part. I don't have much time to dig deep into it now, but maybe later.

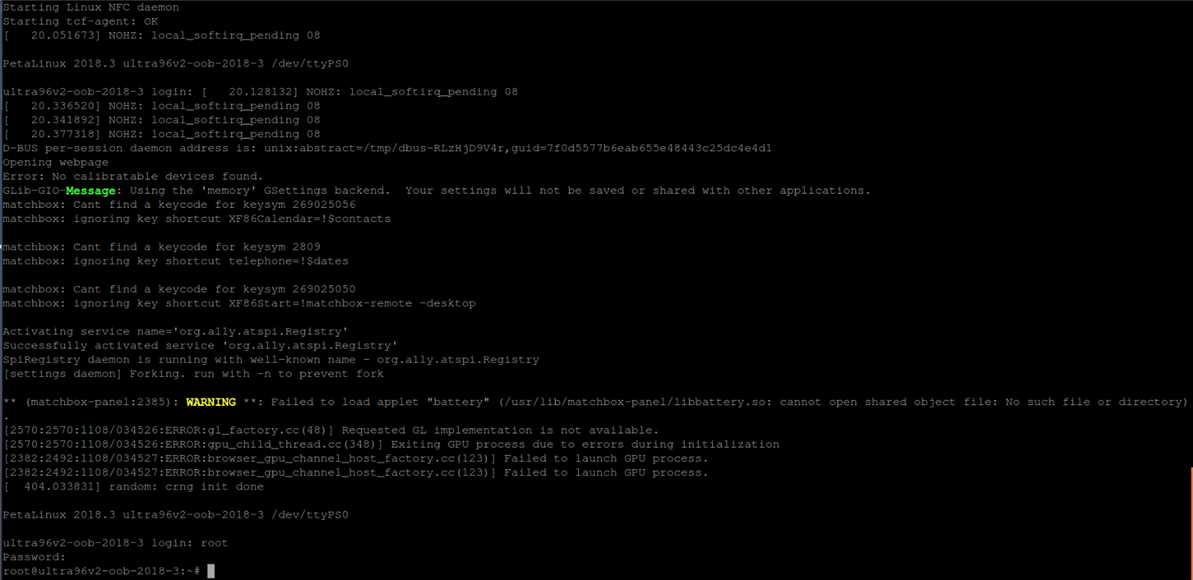
The provided solution seems working fine, but the login prompt didn't automatically show up at the end of the booting process. I had to type Enter before I can see the login prompt.
Lab 3 - Wifi Setup & Network/Internet Access
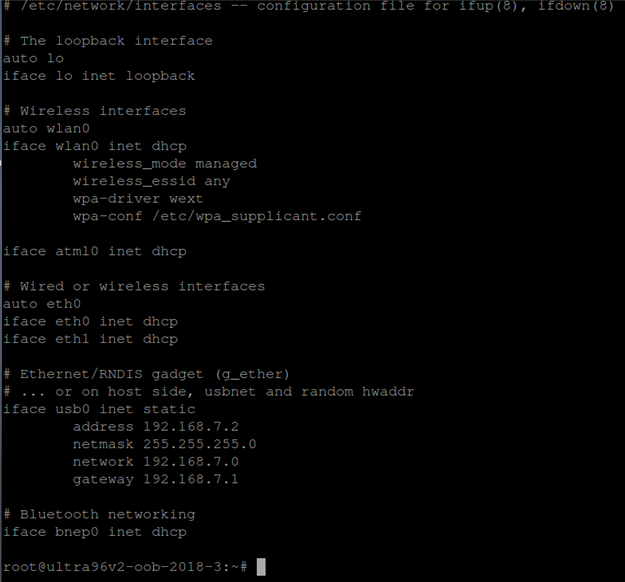
This lab is pretty straightforward. I followed the instructions and everything went smoothly. Some people reported having difficulty to connect Ultra96's AP(P2P: WiFi Driver issue ), but I didn't observe the problem. As shown in the following screenshot, my system used wpa-driver wext.
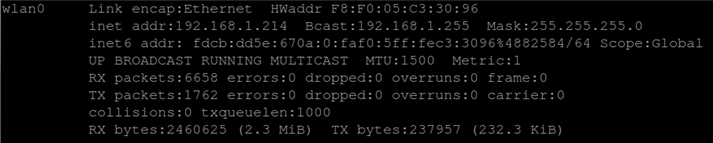
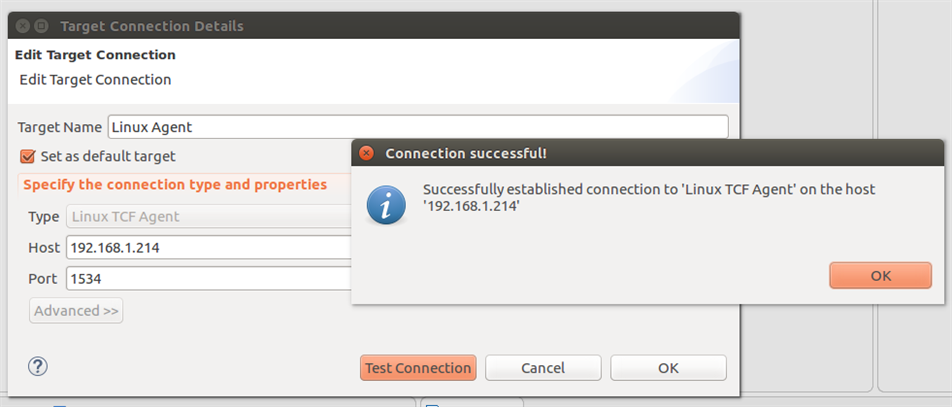
I was able to set up Ultra96 Wifi using my home network. It was assigned IP address 192.168.1.214.
Lab 4 - Remote Debug Linux Application
I followed the lab instructions, but I noticed my compiled binary code size is greater than the size shown in the lab instruction. My version
shows 3169 bytes in total.

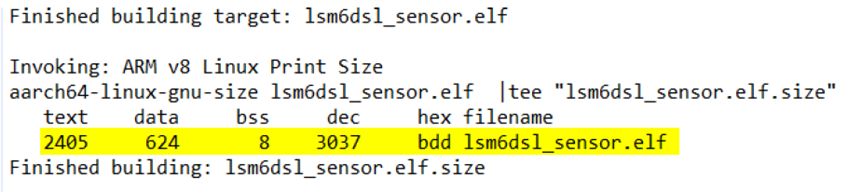
On the other hand, the size in lab instruction shows 3037 bytes in total. Even though the size difference, my version seems working fine.
I was able to make remote debug connection through Wifi network. Below shows the successful connection.
Regarding the release version of the same application, its size is reduced to 2917 bytes from 3169 bytes of debug version.
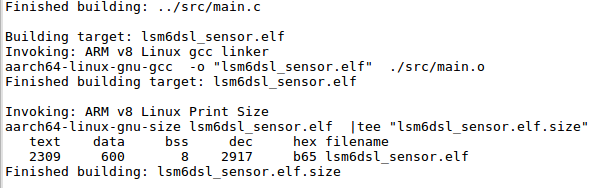
The .elf files for the debug and the release versions are different too. Their sizes are much greater than their corresponding code sizes as shown in the following two screenshots.


Lab 5 - IoT Application
This lab exercises an IoT application which logs temperature sensor data to IBM Bluemix server. Like the situation in the last lab, my version has different code size than that in the lab instruction. However, unlike in the last lab, my code size is actually smaller than that in the lab instruction. Really don't why they have different sizes even though we are using the same version of SDK. Maybe because we have different Linux minor versions?


The following screenshot shows my Ultra96 has a successful connection to IBM Bluemix.
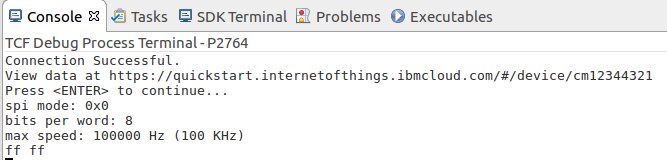
Since my board was running for a while, the temperature was pretty stable and graph shows as a line. To avoid ESD discharge, I didn't touch the temperature sensor using my hand like others reported. ESD voltage is pretty high in winter time.

Answer to the question at the end of Lab 5: line 176 creating the string data to send to the IBM Bluemix server using MQTT protocol. Line 177 sends that data.

Lab 6 - Discrepancies in Lab Instructions
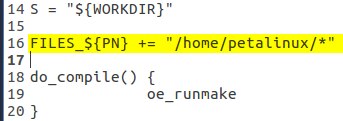
Lab 6 instruction is pretty clear but there are a couple of discrepancies really confusing people. First, in lsm6dsl-sensor.bb file, the instruction says add a line, but in its screenshot, that line becomes a comment line (as shown in the following screenshot). What is the point of adding a comment line in an instruction step?
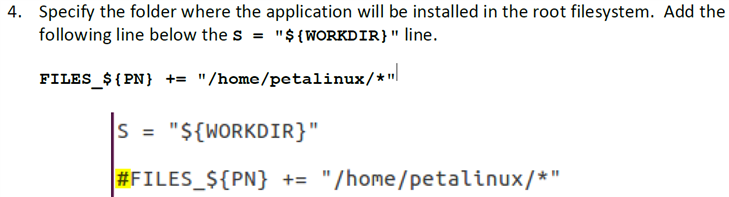
Thus, in my opinion, the instruction is correct and the screenshot is incorrect. However, the provided solution also shows as a comment line. That's really confusing.
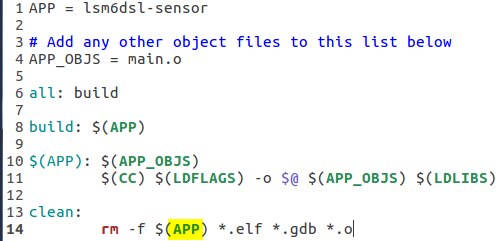
The other discrepancy I found is in the make file: the lab instruction uses variable APP while the screenshot shows variable app. The variable should be case-sensitive so the screenshot is incorrect again.
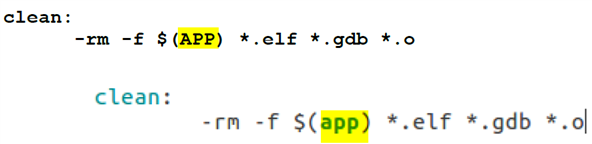
The correct make file content should look like this:
Conclusion
Thanks to our sponsors Avnet & Xilinx for providing training materials. Also thanks to Randall (rscasny) for organizing this great training. I learned a lot from this training. Through this training, I feel much more comfortable using Zynq UltraScale+ MPSoC devices. I know I just touched the tip of the iceberg. There's still a lot to learn in the future, but at least, I know where to start and where to dig deep into.
As an introductory course, the training material is adequate. The lab instructions are very detailed and easy to follow. I really recommend this course to anyone who wants to learn the Zynq UltraScale+ MPSoC devices. However, the material isn't perfect either. There are some typos and mistakes (please see my blogs for details).
