


This is my second blog post in a series that cover my experience going through the training courses of the Path to Programmable 3 challenge. The first blog post, has covered the beginning of participating in this challenge and my learning experience from going through Lab0 to Lab 2. Now I am starting Lab3.
Lab3 was a little “boring” since it was mostly informative and did not create or run any project. The main focus was on teaching how to generate a standalone BSP, which stands for board support package. The BSP is a collection of libraries and drivers that make the lowest layer of the software application.
For me, with my limited knowledge of software, the instructions in Lab 3 were quite confusing. I had two choices to go through this lab: Choice 1 was to fully understand every detail and concept, which required me to look for additional explanations on the Internet since the level of abstraction in the Lab instructions was above my level of understanding. Choice 2 was to follow the Lab 3 steps without fully understanding the concepts only to get some kind of “rough” idea of what is going on. I started with Choice 1 but gradually as going through the Lab instructions I ended up to switching to Choice 2
Experiment 1 started with creating a new folder for Lab 3 and coping the .xsa file from lab2 or from the solutions folder. Next, the import to Eclipse Workspace or zip file did not work for me. What I found in the folder was different than instructions and also there was no zip file in there. Later in this training I figured out how to import a workspace, but that time on Lab3 the instructions were confusing and not detailed enough for me to be successful. So I decided to work on Lab2 folder.

The rest of Experiment 1 went smoothly as I could access the documentation, and I could reconfigure the UART stdin/stdout to ps7_uart_1.
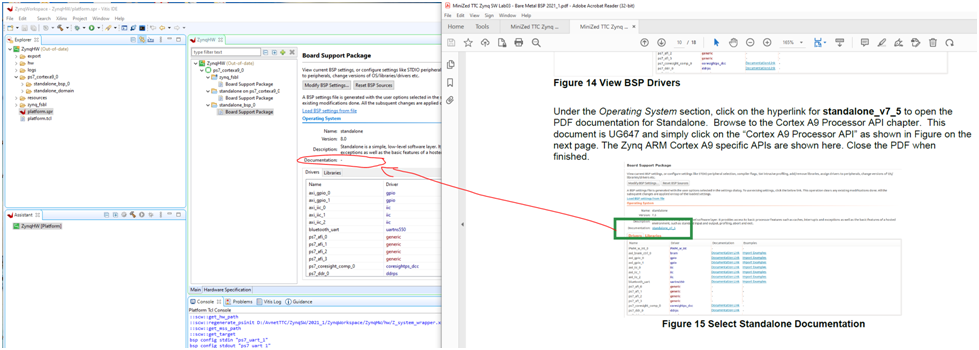
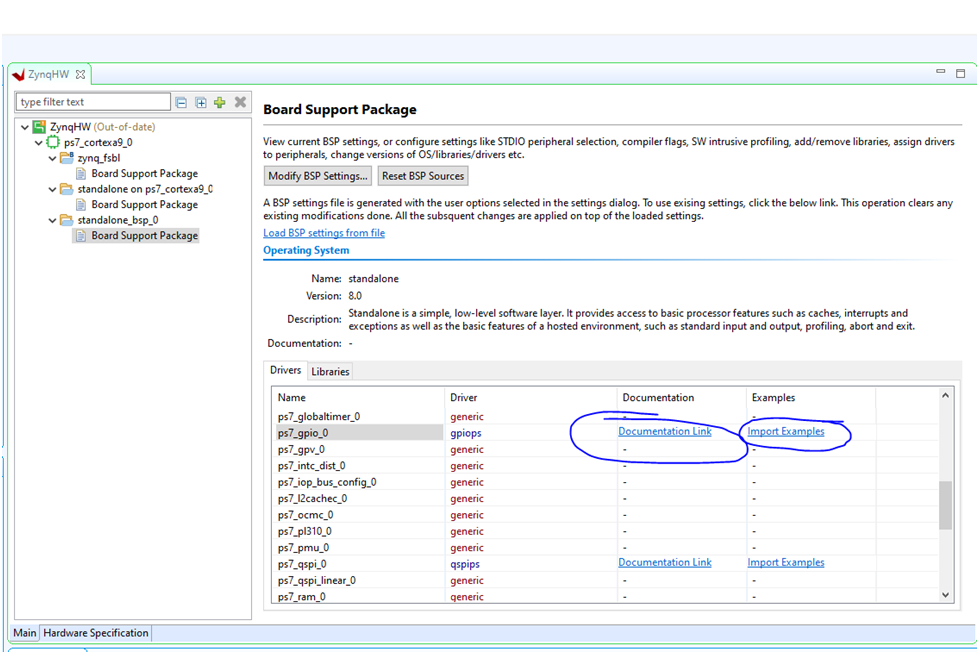
Experiment 2 has focused on exploring the newly generated BSP. This part was fully informational, and it is good for a beginner like me to learn where to find information when needed.
I find the links in Vitis to drivers' documentation and for importing examples useful for developing projects.
That was pretty much all I have gained from Lab 3.
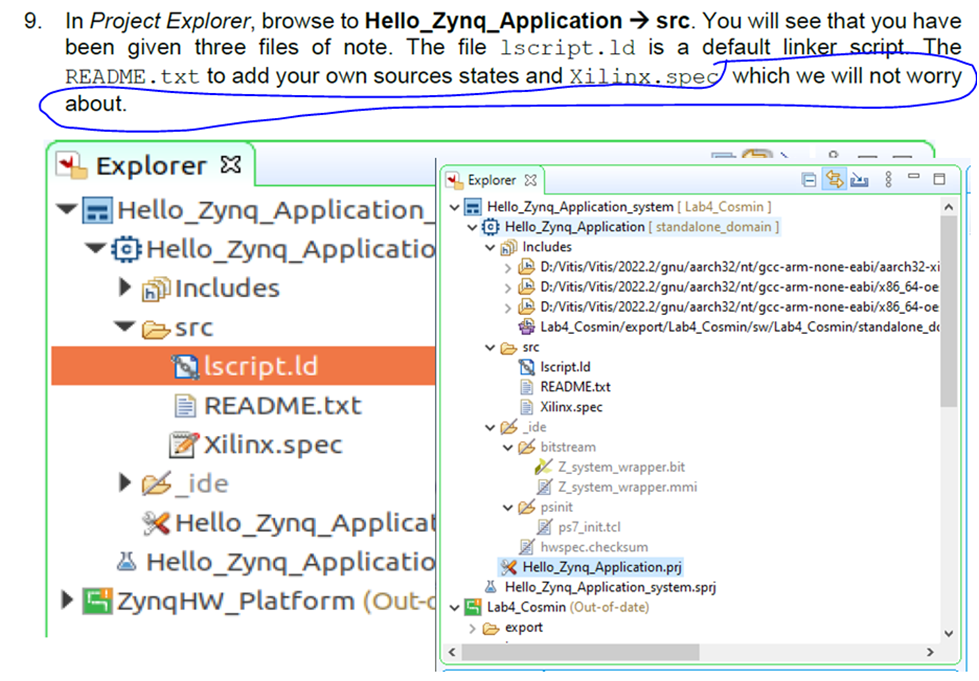
Lab 4 was a lot more interesting, as I started to build things by developing a new software application in Vitis. The lab took me step by step to creating this new software application and through adding an example code for a “Hello World” application.
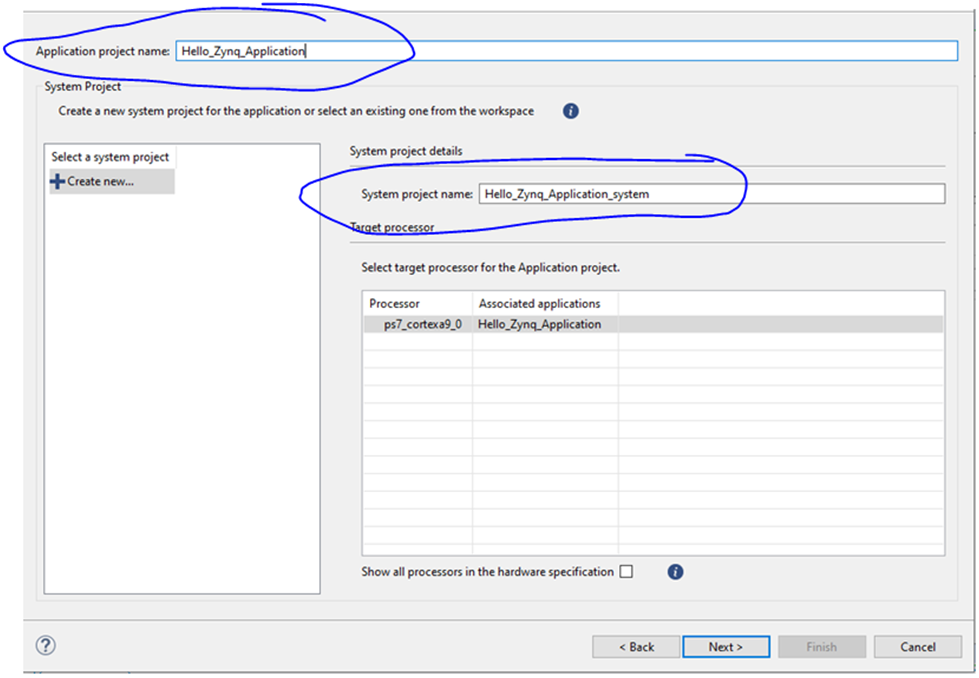
At the time I went through the lab I was quite confused of the project structure in Vitis, confusion that got clarified later as I went through the successive labs 5 – 11. One of the confusions I had was caused by not having a clear image of what “application project name” refers to compared to “system project mane”. It looked like once I select a name for the application project that name is then automatically ported to system project and the word “_system” is automatically appended to the application project name. I believe Lab 4 instructions could add a bit more details about this.
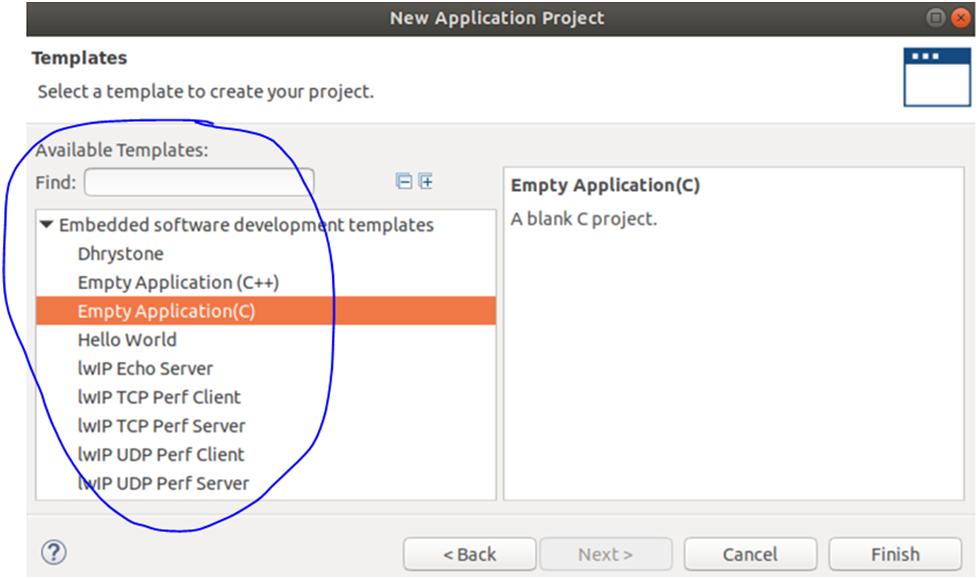
The creation of the software application went through a few steps that also I would have liked to be more detailed in the Lab instructions. Particularly I wanted to know why is each step necessary and how does it build the structure of the software application. When there were multiple templates available, I would like to see a more detailed description of the templates to learn how to use them in future projects.
I think the lab 4 instructions can benefit from a full revision. Some of the wording in the instructions is far from the typical language used in teaching materials, like the example below:
On the same topic, in Lab 4 at the “build the project” section there was no instruction on what to do if the step of building the software application fails. The Lab instructions assumes that the application will build without error at all times. Well, for me it didn’t build, and I would have liked to have some instructions on what to do if I get a build error.
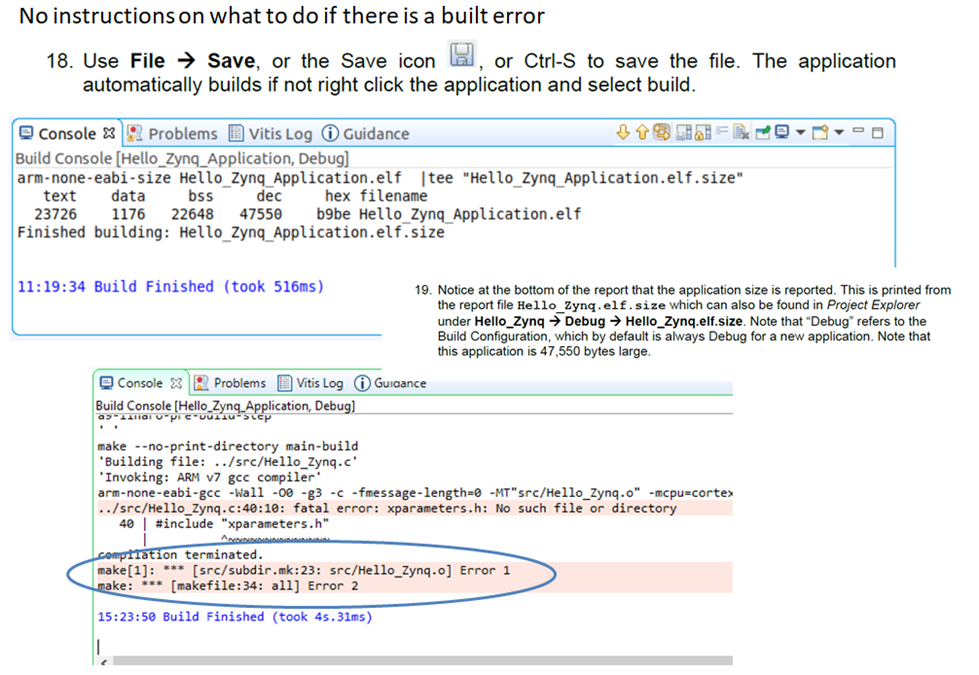
So I started to debug the error myself. From the datalog it looks like there was something related to the “xparameters.h” file. So I looked for that file but I didn’t see it in the examples folder:
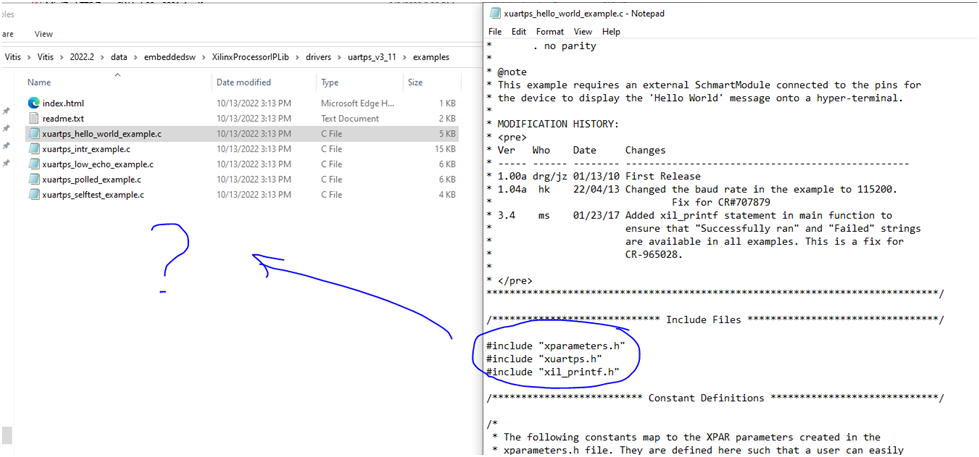
Poking around I have found this comment about the xparameters.h file: “The following constants map to the XPAR parameters created in the xprameters.h file. They are defined here such that a user can easily change all the needed parameters in one place”.
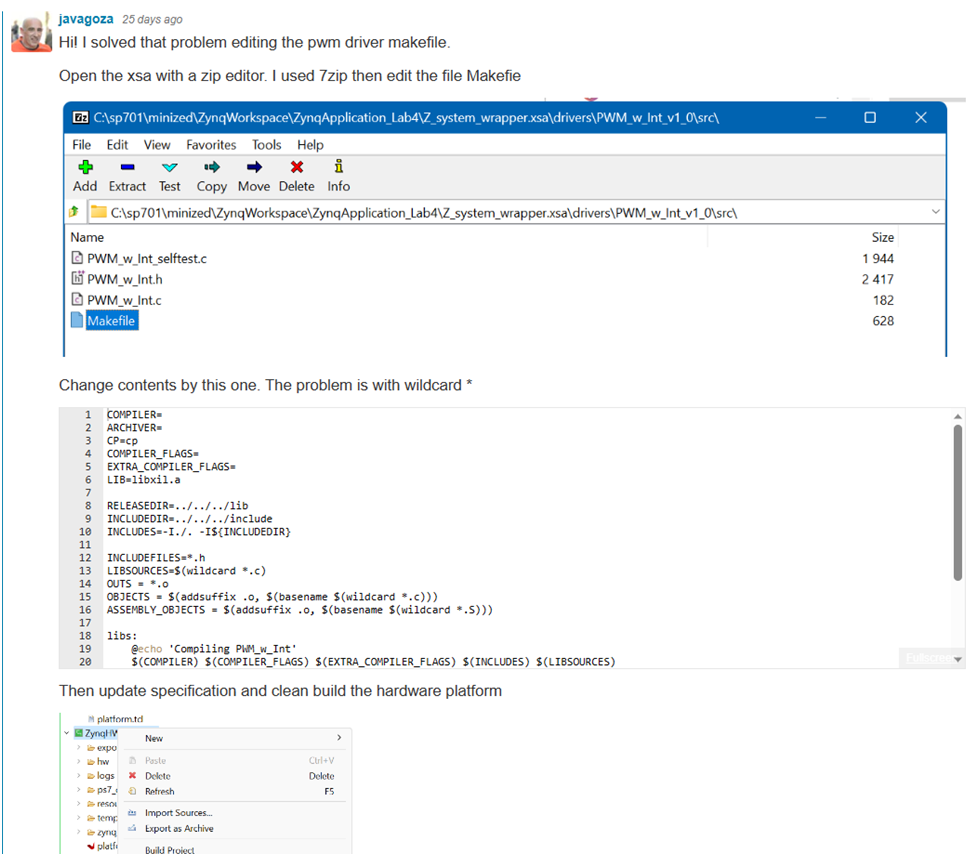
After some more effort for debugging this issue I decided to ask a question on Element 14 forum. That was a great idea as in a short time I have received an answer with the solution to fixing this problem. The forum on Element 14 is an awesome source of information and problem solving advice, and I would like to thank all participating members for your contributions.
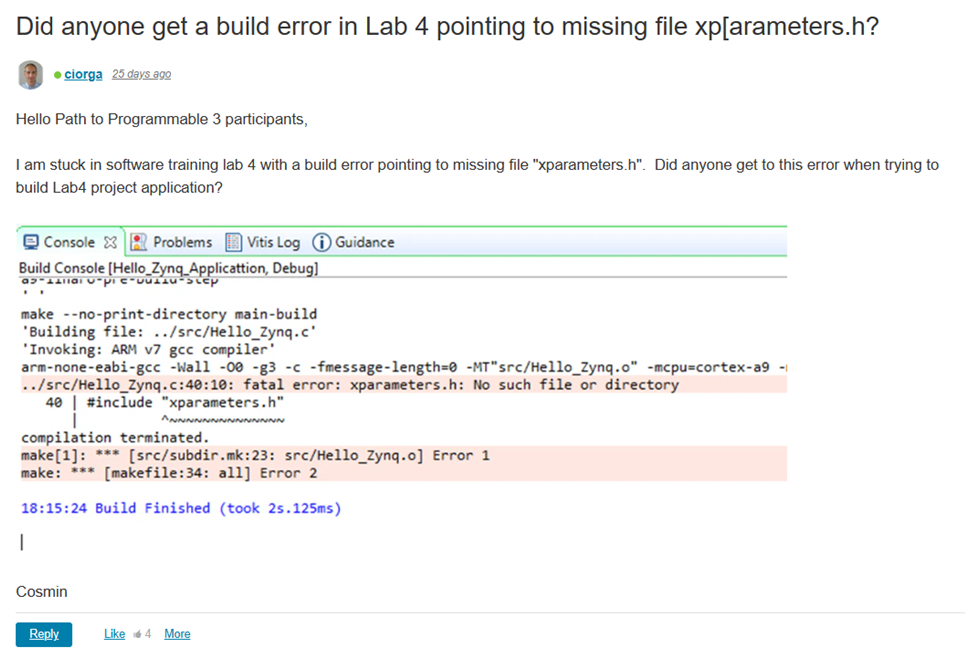
And the reply that showed me how to solve the problem:
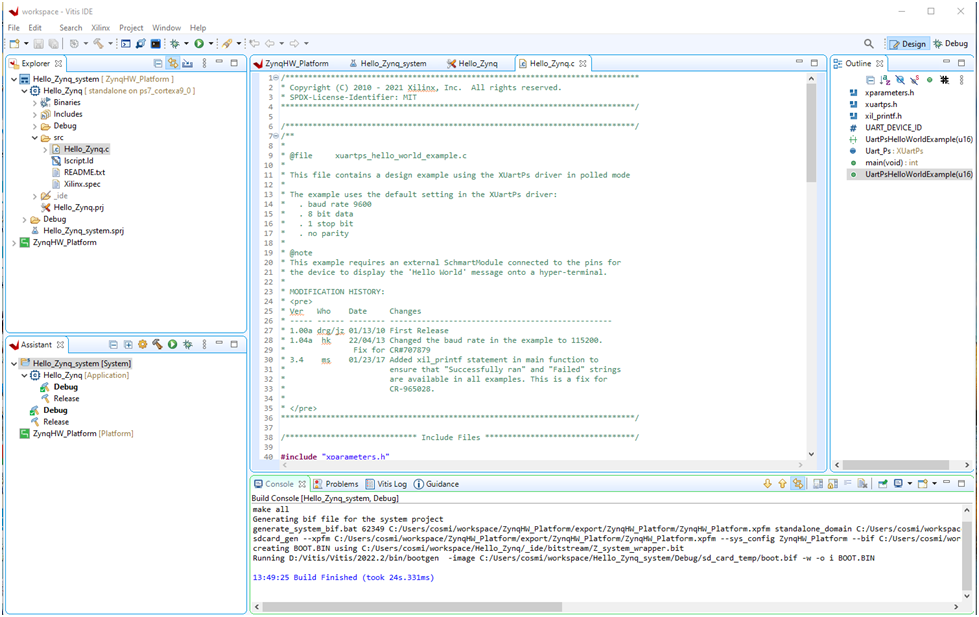
The project could be built then without errors:
The rest of Lab 4 went on smoothly without any issue. Following the instructions, I have created two software applications using the available templates, one for memory test and one for peripheral test. In the end I also learned how to identify the application code size and how to modify the linker script to change the target memory location.
This concludes my experience working on Lab 4 and the second blog post in this series. I will come back with additional blog posts as I advance more through the Path to Programmable 3 tutorials. Until then, all best wishes to the readers and the rest of participants!