In this blog post, we will set up the Vitis IDE, where we will walk through the process of creating a workspace, configuring a Platform project, and creating an Application project.
The final stage in the hardware export process within Vivado results in the creation of a file named "design1_wrapper.xsa." This file can be opened using a zip viewer and contains the following set of files:
| Psu_init.c | C code file defining all the register settings to properly initialize the ARM processing system. Used to create the First Stage Boot Loader (FSBL) executable. |
| Psu_init.h | Header file used with ps7_init.c which is also used in the creation of the FSBL. |
| Fpsu_init.html | Information file that describes how the ARM processing system is configured in this hardware platform and what all the register settings are. This is the best file for a software engineer to first examine as it is the ‘datasheet’ for the hardware platform. |
| psu_init.tcl | This is the equivalent of ps7_init.c, but in TCL format. This is located in the Driver folder This file performs the ARM initialization when using Vitis in JTAG mode, such as when debugging. |
| psu_init_gpl.c | Identical to ps7_init.c, with the exception of the header which highlights the GNU General Public License |
| psu_init_gpl.h | Identical to ps7_init.h, with the exception of the header which highlights the GNU General Public License |
| drivers | This folder contains TCL file for generating parameters for the custom IP driver |
| sysdef.xml | System Definition XML, containing parameter definitions for each file contained within the archive |
| design_1.hwh | Hardware Hand-off file |
| design_1 _bd.tcl | TCL file to re-create the Zynq PS7 Block Design |
| design_1_wrapper.bit (<project>_wrapper.bit) | This is the PL configuration bitstream. This file is used to configure the PL, which gives the PL its function and identity. ‘Z_system_wrapper’ is the name of the top-level HDL file that the hardware designer used. |
| design_1.mmi | BRAM Memory Map Info file |
Hardware System Block Diagram
Setting up a Platform project on Vitis
Launch the Vitis IDE and Create a "Vitis" folder while specifying the Workspace directory.

Create a new platform project by selecting File > New > Platform Project. Name the Platform as “Ultra96_V2_Platform” and click Next.

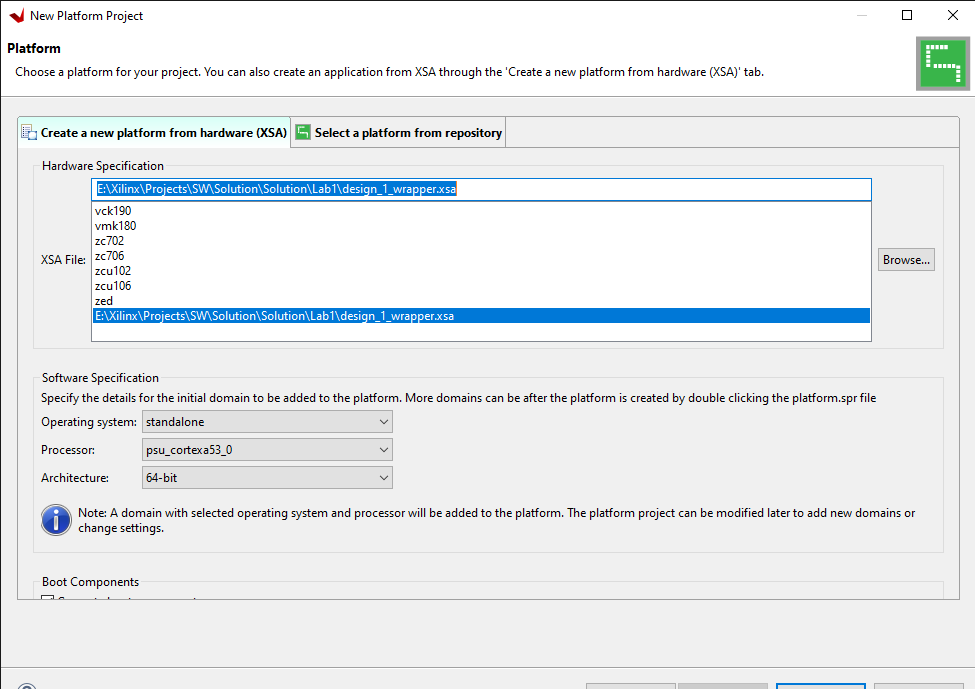
Click Browse and select the design_1_wrapper.xsa file located in the Vivado project and click Next.

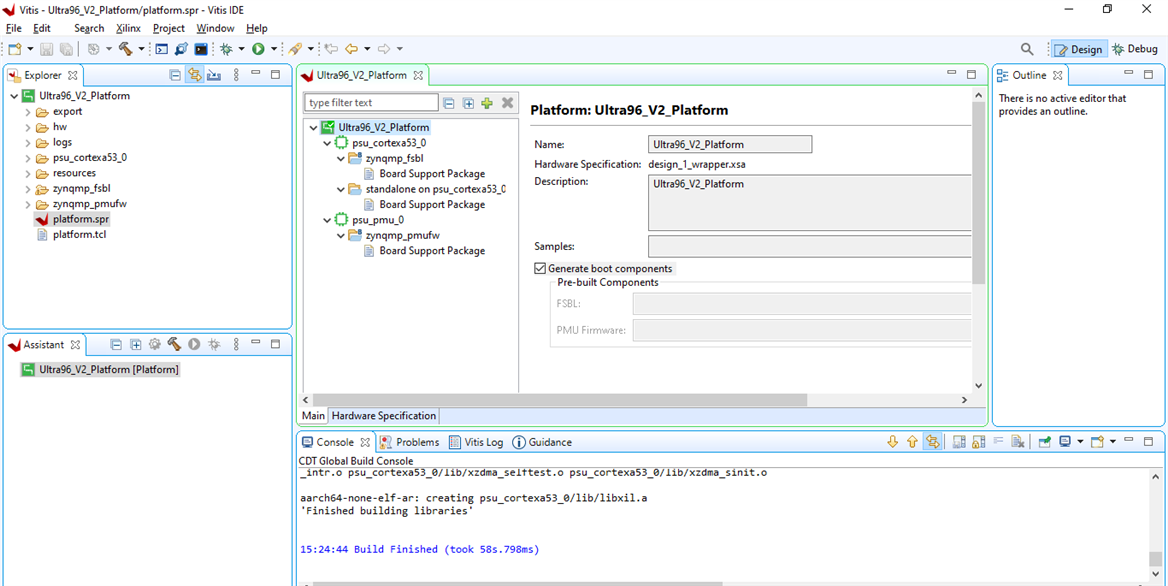
We have successfully created a platform project for the Ultra96 V2 hardware.

Setting up an Application project on Vitis
Double-click on "platform.spr" in the Project Explorer within the "Ultra96_V2_Platform" directory. Click on the Modify BSP option for "psu_cortex53." Choose the "standalone" option from the available selections. Configure the standard input (stdin) and standard output (stdout) to use psu_uart_1. Confirm your settings by clicking the "Ok" button.

Build the project with CTRL-B to prepare it for execution or deployment and identify any code errors.
| {gallery} |
|---|
|
|
|
|
The Standalone BSP can be constructed using components from the Xilinx software library collection, which includes:
• Libmetal – Libmetal Library
• Lwip202 -- An open source light-weight TCP/IP networking library
• openamp – OpenAmp Library
• xilffs – Generic Fat File System library
• xilflash – A library that provides read/write/erase/lock/unlock and device-specific functionalities for parallel flash devices
• xilisf – In-System-Flash library that supports the Xilinx In-System Flash hardware
• xilmfs – A Memory File system
• xilpm – Power Management API Library for Zynq
• xilrsa – Xilinx RSA library
• xilskey – Secure Key library
We've successfully configured the platform project for Ultra96 V2 hardware, and we're now prepared to build a new application project.


