Welcome to my first blog on the Path Programmable III contest. Since other challengers had made awesome blogs on how to set up the IDE & troubleshoot, I'll be writing about my journey in making a Bottle Cap Inspection experiment with the Xilinx Ultra-96 v2. Here's the list of upcoming blogs that will be posted.
- Blog 1: Taking the first steps - Xilinx Ultra96-V2 Training
- Blog 2: Basic Testing from Training & Experiment Introduction
- Blog 3: Image Processing Algorithms for Bottle Cap Inspection
- Blog 4: Hardware Connections
- Blog 5: System Integration
- Blog 6: Demonstration and Outcome
Thanks to Element14 and AMD Xilinx for this awesome kit and for selecting me as one of the challengers. Unlike the contests, PP3 has offered a free FPGA SoC training program which paves the way into FGPA for beginners.
Hardware Overview:
The Ultra96-V2 is a development board based on the Xilinx Zynq UltraScale+ MPSoC architecture. It combines the programmable logic capabilities of an FPGA with the processing power of an Arm Cortex-A53 processor. With its rich set of peripherals and high-performance computing capabilities, the Ultra96-V2 is an excellent choice for our machine vision application.
| {gallery} |
|---|
|
|
|
|
|
|
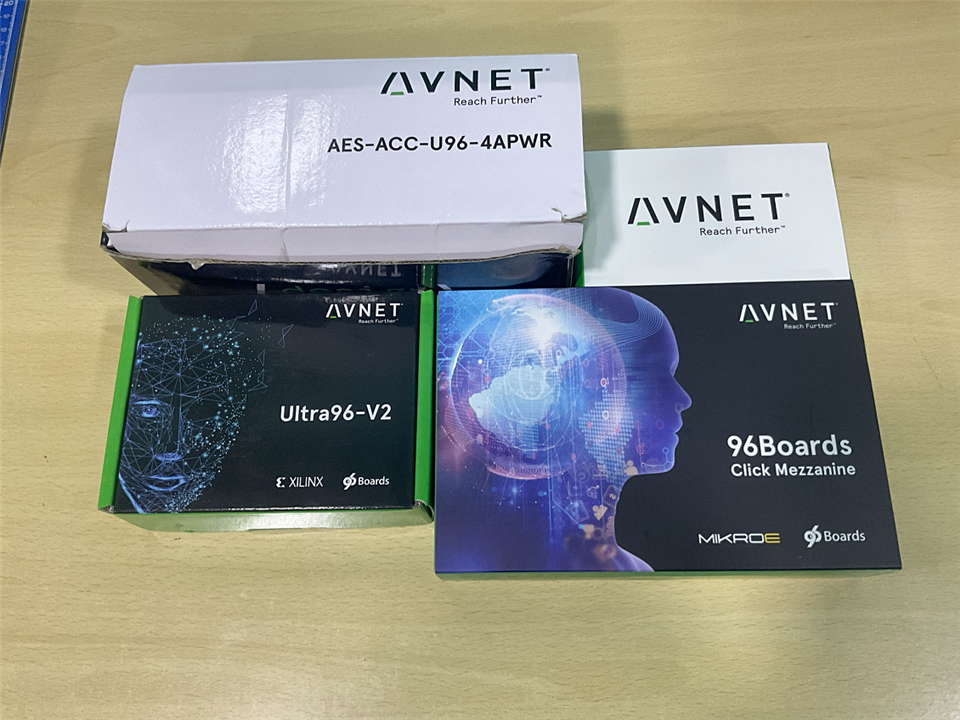
To my surprise, I've got the 96Boards Click Mezzanine kit from Mikroe. These will be used to interface with the machine. We'll be using a compact raspberry pi camera module as our image source for capturing bottle cap images. The camera offers high-resolution imaging capabilities, along with features like auto-focus, low-light performance, and video recording.
Xilinx Vivado IDE Installation
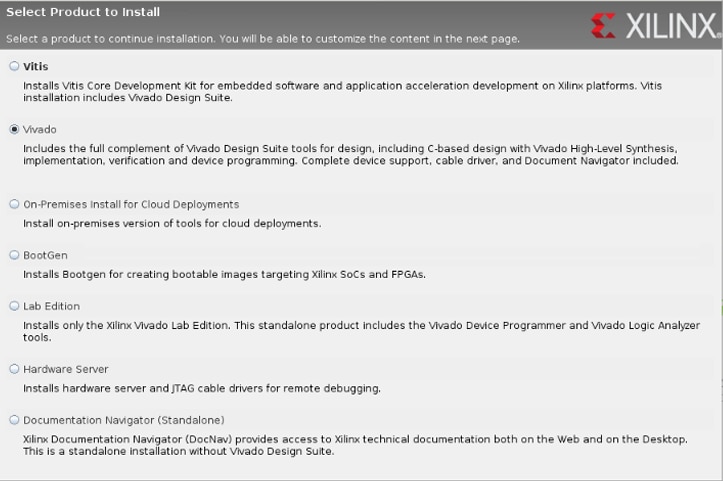
After tireless hours of downloading, we installed the AMD Vivado 2022.2 ML edition.
- Go to the Xilinx Downloads Website.
- Click an installation file to download it. Xilinx Unified Installer 2022.2: Windows Self-Extracting Web Installer
- Select a product to install
You'll require a minimum of 300GB of free space and 8GB RAM for the installation. It took me more than 14 hours to install Vivado 2022.2. so I recommend you be patient.
Now we have successfully set up both Vivado & Vitis on your device. Download the Ultra96-oob image file from here.

We've now flashed the ultra96-oob Linux image to the SD card.
Powering the hardware
Insert the SD card and Connect the power supply to the Ultra96-V2, the green LED D17 will illuminate.

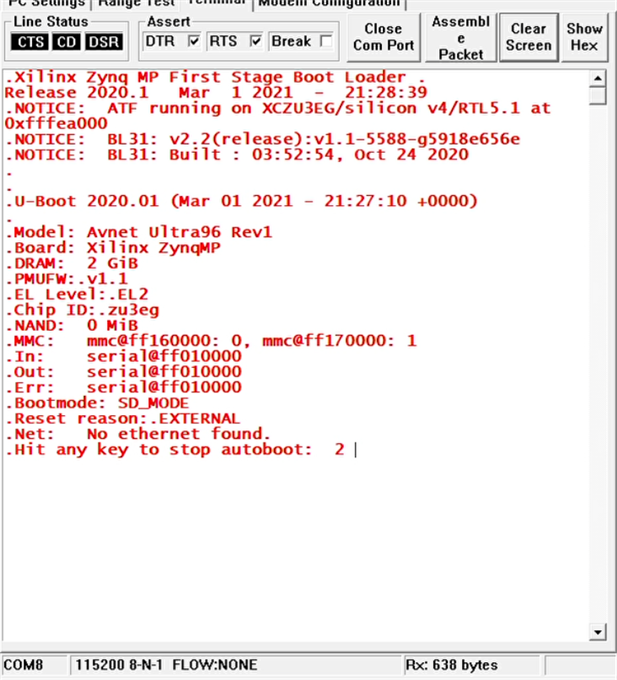
You can connect the USB to UART and JTAG Adaptor Board to the Ultra96-v2. Connect the Serial port with 115200 baud to debug.

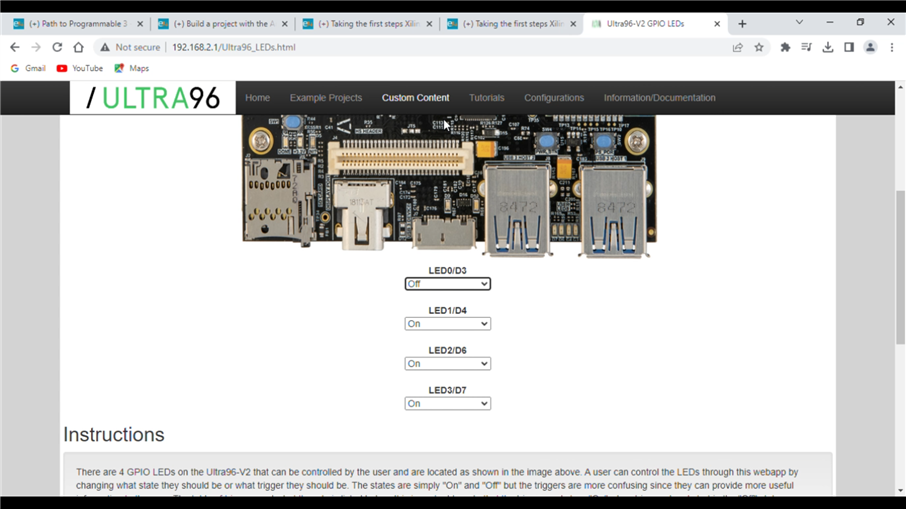
From a browser, go to http://192.168.2.1 to launch Ultra96v2’s homepage.
Powering Xilinx Ultra96-V2
Learning from Ultra96 Training Courses
The Ultra96-V2 Training Courses 2021.2 tutorials teach you how to develop software and hardware for the Zynq Ultrascale+ MPSoC platform. The courses cover a wide range of topics, from the basics of FPGAs to advanced concepts like Tcl scripting and custom IP creation. I found the courses to be very informative and beginner friendly. The lessons were crisp and easy to follow, and the exercises helped me a lot. I prefer hands-on courses, and this allowed me to get practical experience with the Ultra96-V2 development board.
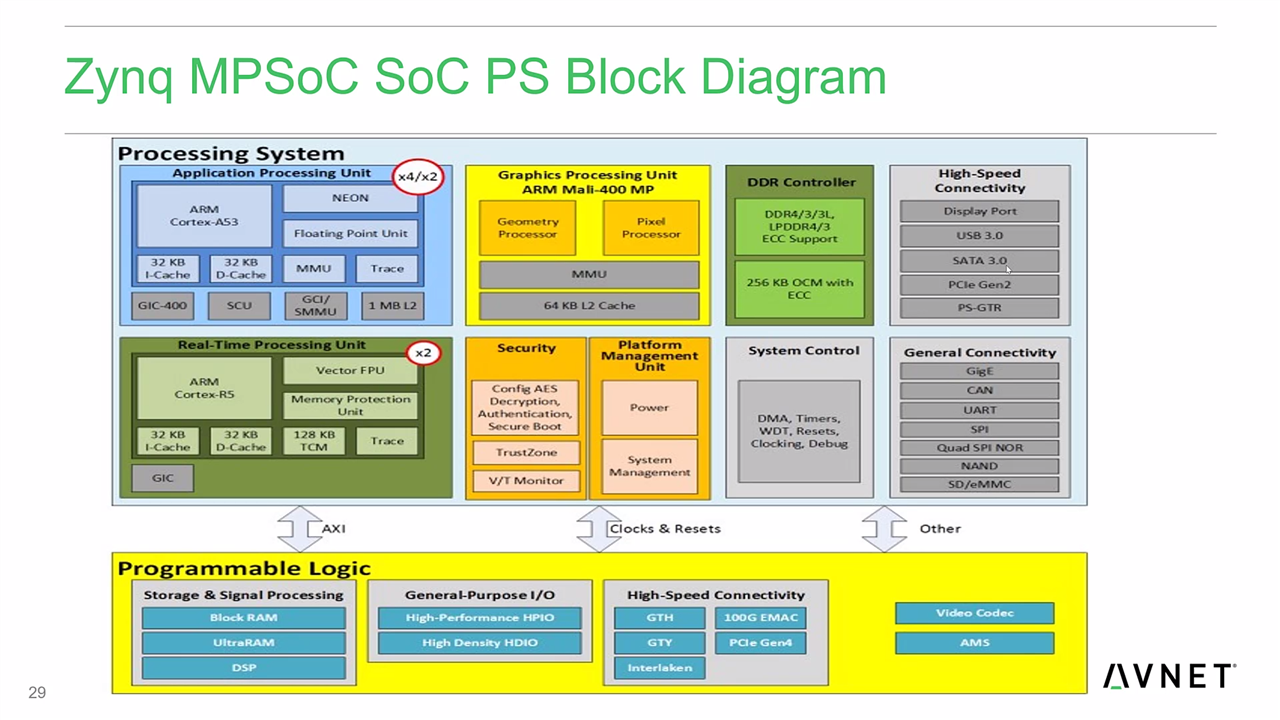
One of the most valuable things I learned from the courses was how to use Xilinx Vivado, the software development environment for FPGAs. Vivado is a powerful tool, but it can be daunting to learn. The courses provided me with a solid foundation in Vivado, which gave me the confidence to start developing my own projects. I learned a lot of technical terms from the courses, including Zynq Ultrascale+ MPSoC, FPGA, Tcl, Vivado, Processing Subsystem (PS), Programmable Logic (PL), DMA Controller, Custom IP, and Hardware Manager.
Overall, I found the Ultra96-V2 Training Courses 2021.2 to be an excellent resource for learning about FPGAs and Xilinx Vivado.
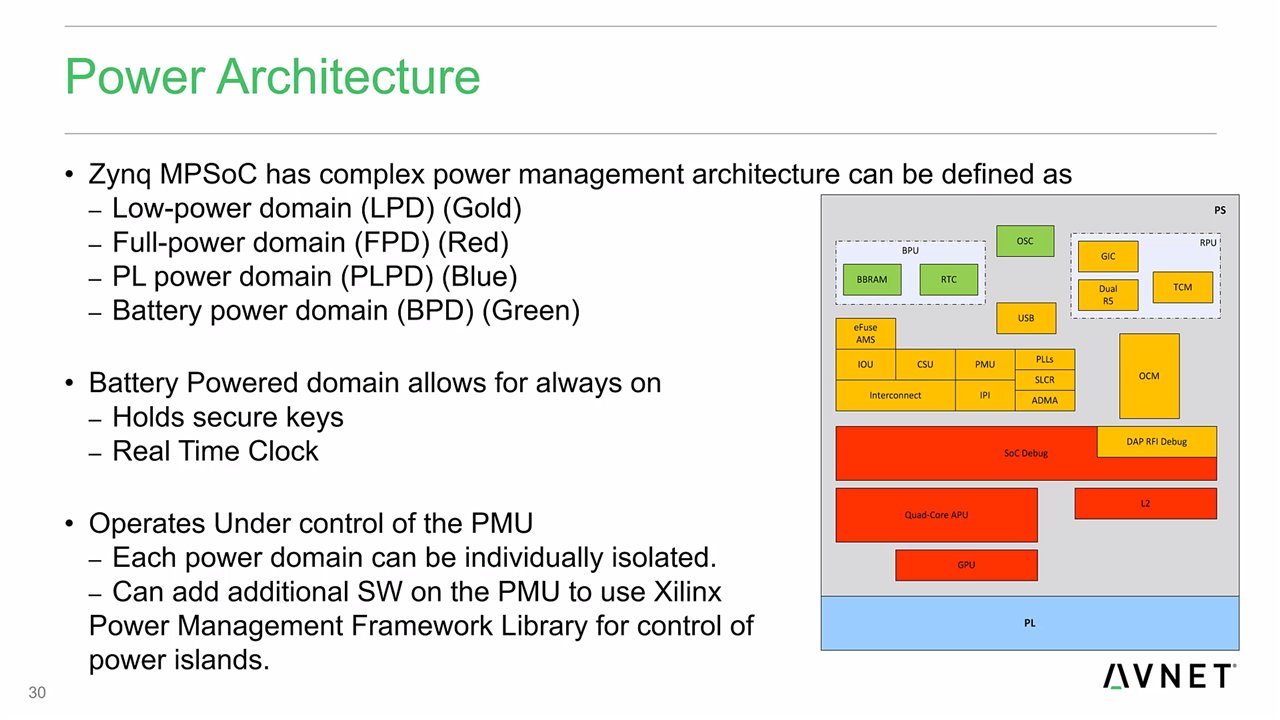
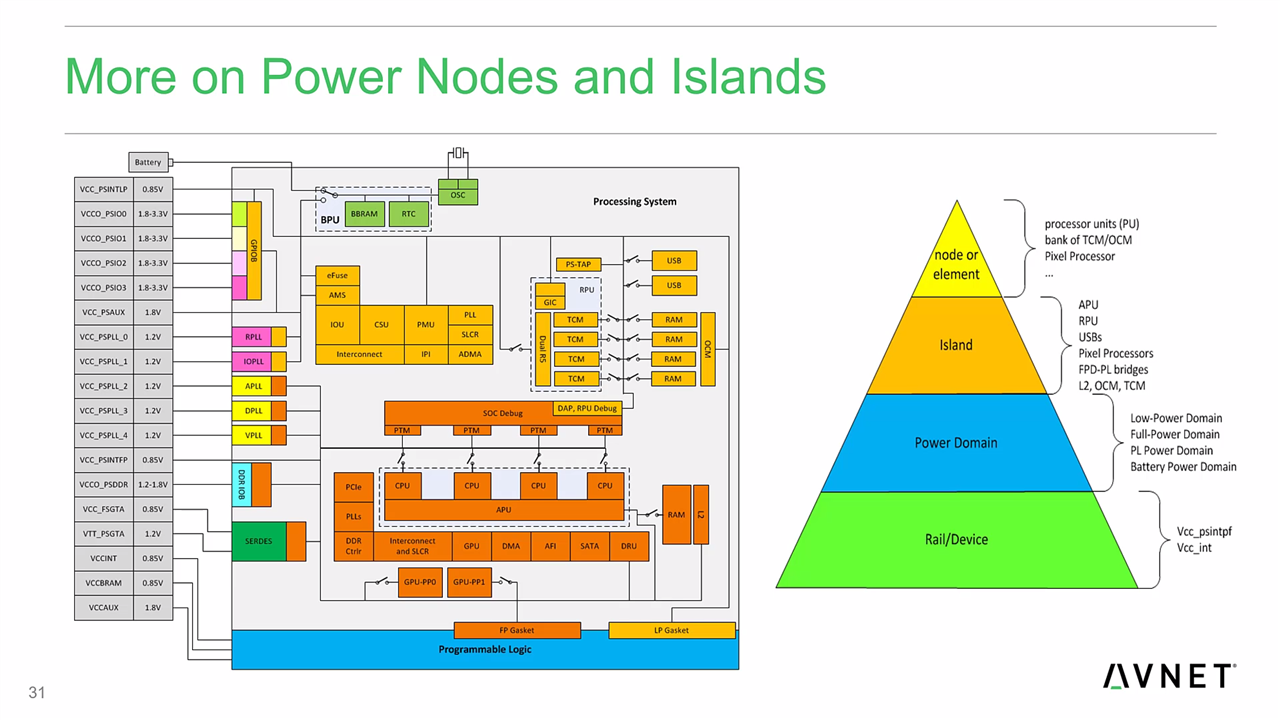
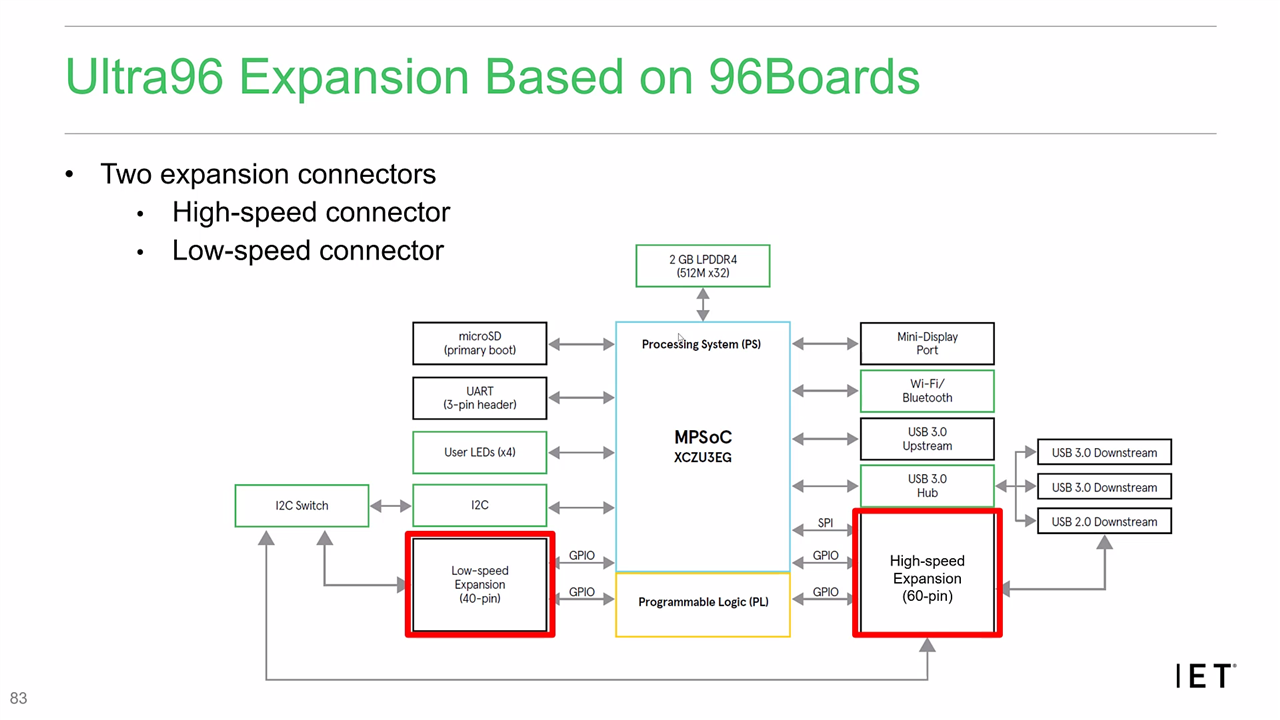
These were some of the basic slides from the Ultra96 Training that I would recommend to beginners.
| {gallery}Ultra96 Training Courses |
|---|
|
|
|
 |
What's next?
We will be implementing the project concepts from the training module into practice, following a step-by-step approach. I'll also be covering the project experiment and its implementation in brief. I hope that you find this interesting. Follow the upcoming posts to know more about the project. Thanks for reading!


