element14 Community
element14 Community
    Register Log In
  • Site
  • Search
  • Log In Register
  • Community Hub
    Community Hub
    • What's New on element14
    • Feedback and Support
    • Benefits of Membership
    • Personal Blogs
    • Members Area
    • Achievement Levels
  • Learn
    Learn
    • Ask an Expert
    • eBooks
    • element14 presents
    • Learning Center
    • Tech Spotlight
    • STEM Academy
    • Webinars, Training and Events
    • Learning Groups
  • Technologies
    Technologies
    • 3D Printing
    • FPGA
    • Industrial Automation
    • Internet of Things
    • Power & Energy
    • Sensors
    • Technology Groups
  • Challenges & Projects
    Challenges & Projects
    • Design Challenges
    • element14 presents Projects
    • Project14
    • Arduino Projects
    • Raspberry Pi Projects
    • Project Groups
  • Products
    Products
    • Arduino
    • Avnet & Tria Boards Community
    • Dev Tools
    • Manufacturers
    • Multicomp Pro
    • Product Groups
    • Raspberry Pi
    • RoadTests & Reviews
  • About Us
  • Store
    Store
    • Visit Your Store
    • Choose another store...
      • Europe
      •  Austria (German)
      •  Belgium (Dutch, French)
      •  Bulgaria (Bulgarian)
      •  Czech Republic (Czech)
      •  Denmark (Danish)
      •  Estonia (Estonian)
      •  Finland (Finnish)
      •  France (French)
      •  Germany (German)
      •  Hungary (Hungarian)
      •  Ireland
      •  Israel
      •  Italy (Italian)
      •  Latvia (Latvian)
      •  
      •  Lithuania (Lithuanian)
      •  Netherlands (Dutch)
      •  Norway (Norwegian)
      •  Poland (Polish)
      •  Portugal (Portuguese)
      •  Romania (Romanian)
      •  Russia (Russian)
      •  Slovakia (Slovak)
      •  Slovenia (Slovenian)
      •  Spain (Spanish)
      •  Sweden (Swedish)
      •  Switzerland(German, French)
      •  Turkey (Turkish)
      •  United Kingdom
      • Asia Pacific
      •  Australia
      •  China
      •  Hong Kong
      •  India
      • Japan
      •  Korea (Korean)
      •  Malaysia
      •  New Zealand
      •  Philippines
      •  Singapore
      •  Taiwan
      •  Thailand (Thai)
      • Vietnam
      • Americas
      •  Brazil (Portuguese)
      •  Canada
      •  Mexico (Spanish)
      •  United States
      Can't find the country/region you're looking for? Visit our export site or find a local distributor.
  • Translate
  • Profile
  • Settings
Path to Programmable
  • Challenges & Projects
  • Design Challenges
  • Path to Programmable
  • More
  • Cancel
Path to Programmable
Blog [PP-15] Lab 5 - connecting SDK to board
  • Blog
  • Forum
  • Documents
  • Polls
  • Files
  • Events
  • Mentions
  • Sub-Groups
  • Tags
  • More
  • Cancel
  • New
  • Share
  • More
  • Cancel
Group Actions
  • Group RSS
  • More
  • Cancel
Engagement
  • Author Author: kk99
  • Date Created: 12 Jan 2019 12:58 PM Date Created
  • Views 404 views
  • Likes 2 likes
  • Comments 0 comments
  • path to programmable
  • xilinx
  • fpga
  • avnet minized
  • minized
Related
Recommended

[PP-15] Lab 5 - connecting SDK to board

kk99
kk99
12 Jan 2019

The purpose of this lab is to upload a example application from the SDK to the hardware through a JTAG connection (This part is similar to the laboratory number two from first module). Additionally we will get familiar with software debugging.


1. Configure the SoC PL with bitstream

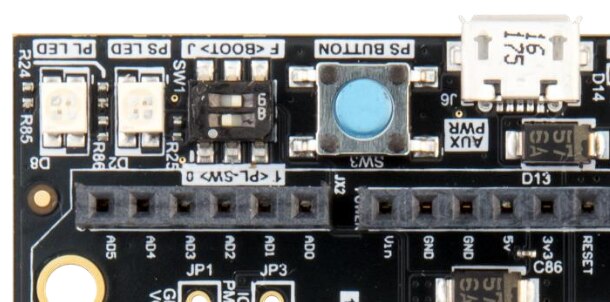
At the beginning we need to configure a hardware and set proper boot mode. We need to enable JTAG boot. We need to enable JTAG boot. It could be done by setting dip switch to position J. Here is picture of this dip switch.

image

After that we need to connect board via USB cable to PC. On board we need to use USB with label USB JTAG/UART. On PC we need to check if JTAG/UART were properly detected. We need to check the information about USB serial port.

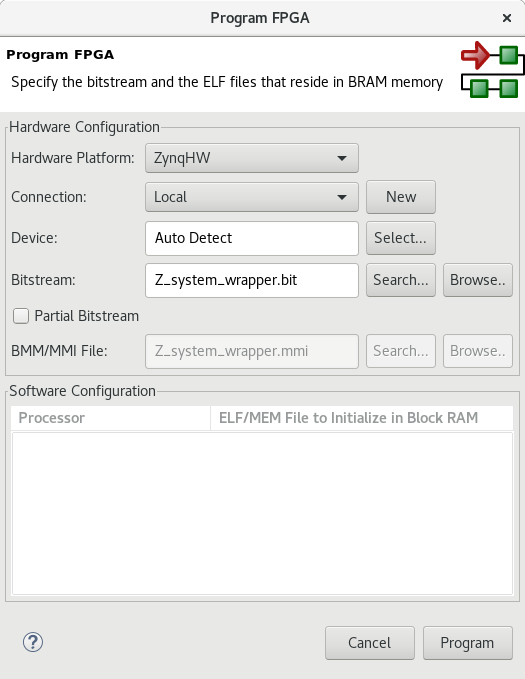
Now we could program FPGA by choosing following option: Xilinx Tools -> Program FPGA.

image

When it finish the blue LED (D3) on MiniZed should light up. In the SDK should be the message that FPGA was configured successfully.

2. Running the application

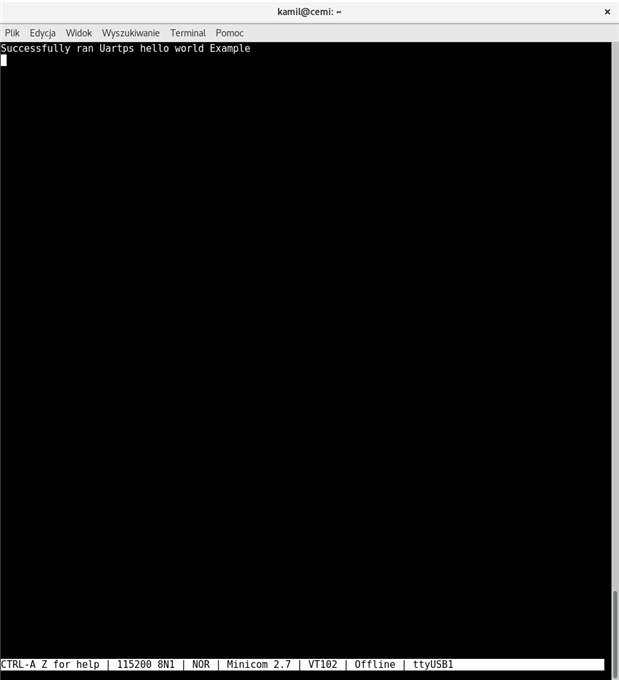
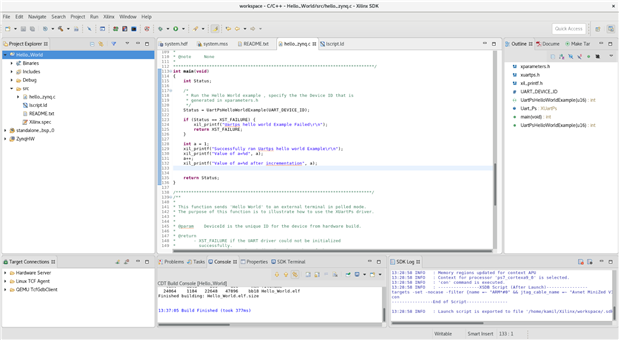
To run application please choose option Run As ->Launch on Hardware (System Debugger) from Project Explorer. After that SDK will download the Hello_World ELF to the on-chip RAM and begin executing the code.

You could see output in serial terminal:

image

3. Debugging an application

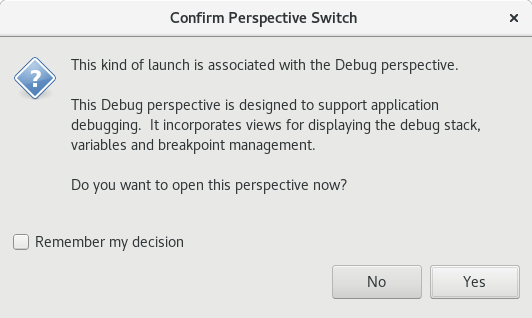
To run application please choose option Debug As ->Launch on Hardware (System Debugger) from Project Explorer. The code will be downloaded to the target memory. We will be switched to the Debug perspective.

image

In this perspective we have all debugging options like: Run Code or Step Run etc.

image

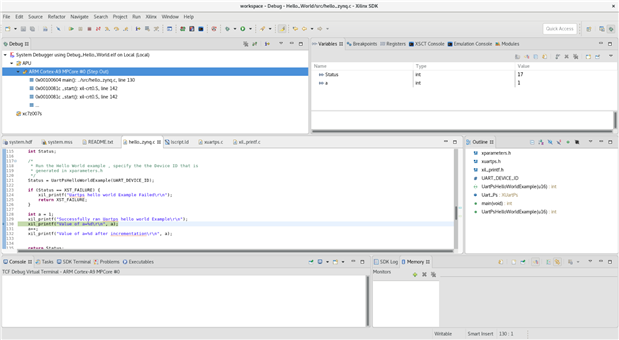
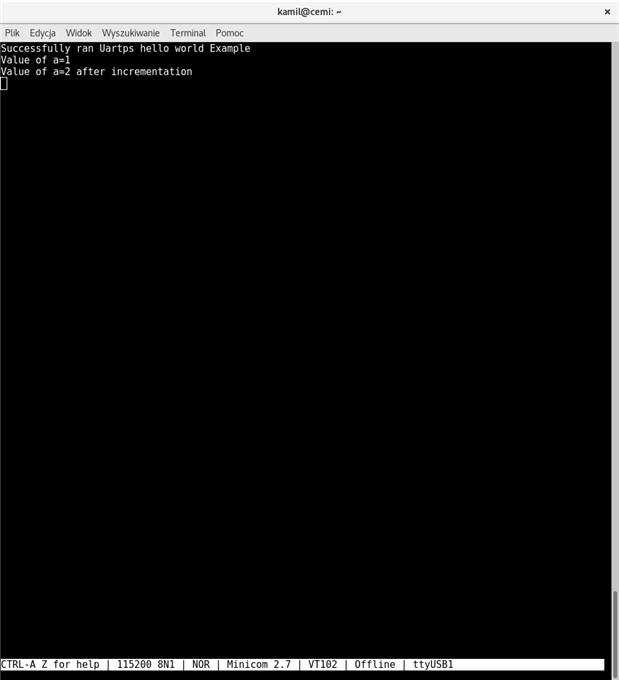
I have added to this example code a variable called a with its incrementation.

image

I have added a three breakpoint in lines 128, 131, 132. So, we could easily debug incrementation of variable.

image

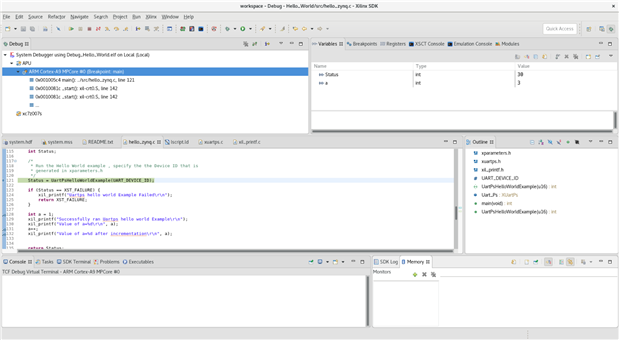
On the top right screen we could see a current value of variables in scope. Here is output from serial console:

image

  • Sign in to reply
element14 Community

element14 is the first online community specifically for engineers. Connect with your peers and get expert answers to your questions.

  • Members
  • Learn
  • Technologies
  • Challenges & Projects
  • Products
  • Store
  • About Us
  • Feedback & Support
  • FAQs
  • Terms of Use
  • Privacy Policy
  • Legal and Copyright Notices
  • Sitemap
  • Cookies

An Avnet Company © 2025 Premier Farnell Limited. All Rights Reserved.

Premier Farnell Ltd, registered in England and Wales (no 00876412), registered office: Farnell House, Forge Lane, Leeds LS12 2NE.

ICP 备案号 10220084.

Follow element14

  • X
  • Facebook
  • linkedin
  • YouTube