


All my previous blogs can be read in detail here Path to Programmable
This lab was very special and interesting. It involved creating a custom ip block (partly in VHDL and partly in GUI) and adding it to the existing previous vivado design with the BRAM memory. In this lab we actually did some VHDL programming. In this lab one can see that the ip creation in VHDL itself is quite some work and understanding of the input; output signals in the ip block is necessary.
Lab 7 Overview and Objectives
Xilinx IP catalog can be used to connect many of the common interfaces to the design. This lab provides step-by-step instruction on how to create custom IP, add it to the IP catalog, and then connect it into the design.
When you have completed Lab 7, you will know how to do the following:
- Create a new IP project
- Customize the IP
- Add it to the Vivado IP Catalog
- Add this custom IP to your project
- Add an interrupt to the Zynq PS and connect to the custom IP
- Test the custom IP with a custom software application
Creating a new IP in Vivado
Custom IPs are user written hardware. It can be in VHDL or Verilog. These ips can be created separately and re-used in the projects as needed. Such as there can be some standard communication ips which should be customized for a project. This idea is time saving as it reduces redundancy in copying pasting the VHDL code again and again. Also the development of ips cores can be independent to a particular project.
In this project we created a PWM with Interrupt option ip called PWM_w_Int.This peripheral is simple and does not require much bandwidth, thus an AXI-Lite interface is acceptable. This will also be a slave device with the PS as the Master.
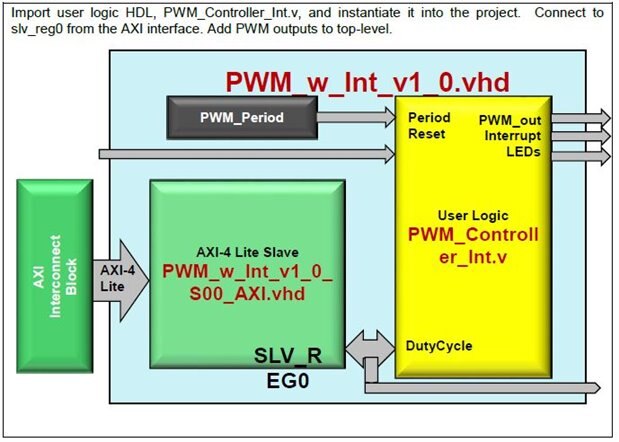
How the custom ip is linked to the main project
Setting up the custom ip block in vivado
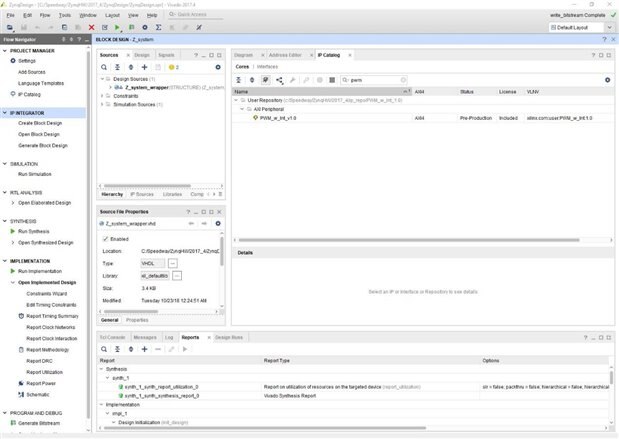
The ip is added to the IP catalog here and can be searched in the window.
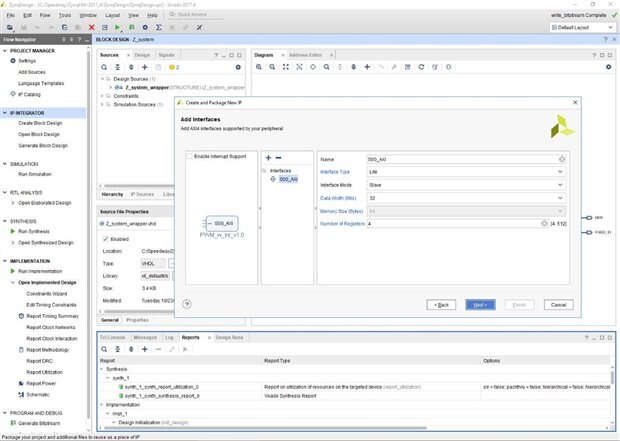
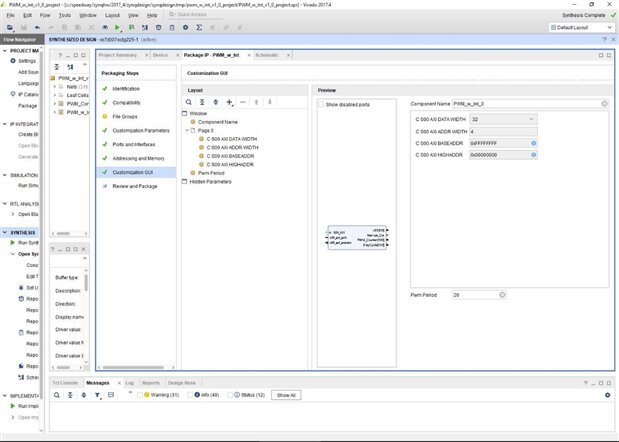
Customize the IP and add it to Vivado
After creating the ip core it can be packaged in the flow navigator and the compatibility of the ip can be set to multiple fpgas such as zynq and artix. And also the life cycle of the ip can be chosen as to be in pre-production or beta. Customization Parameters should also be set in the customization GUI. After the ip core is done it should be reviewed and packaged using the Re-package IP button. This will create the new ip core.
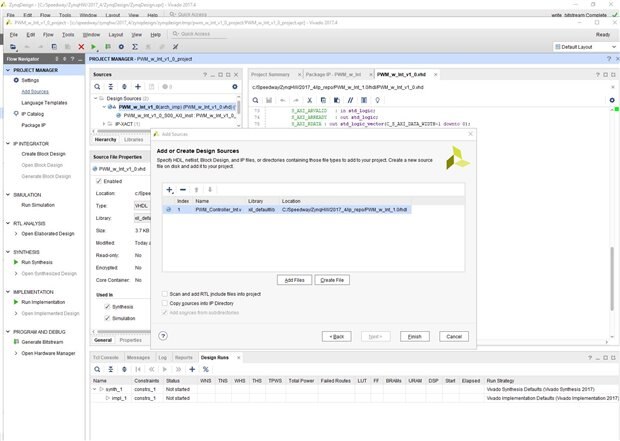
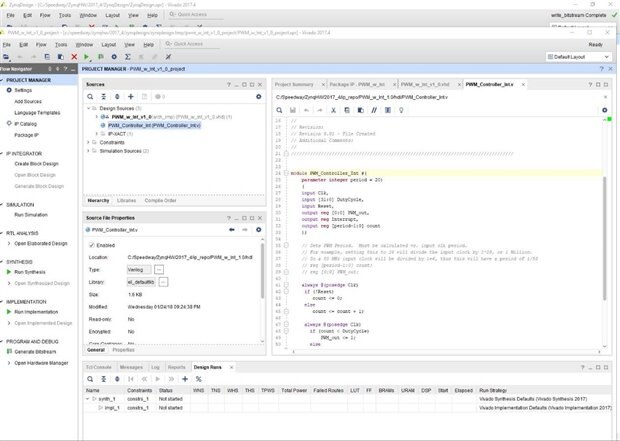
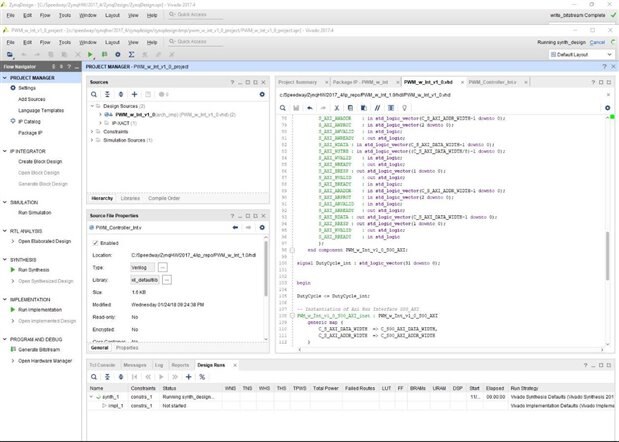
Modifying the VHDL code of the ip core to adjust to the project.
The long process of reviewing and packaging the PWM ip core.
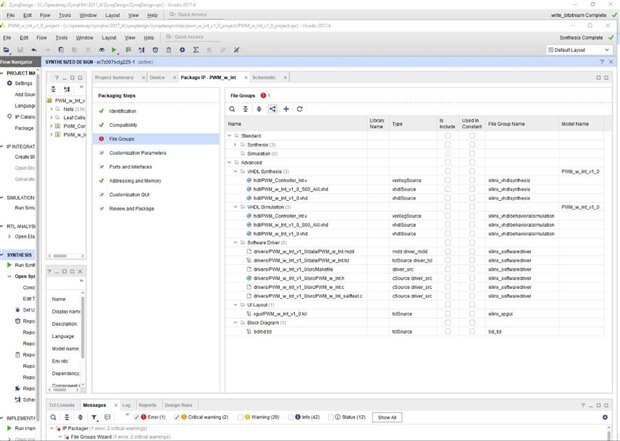
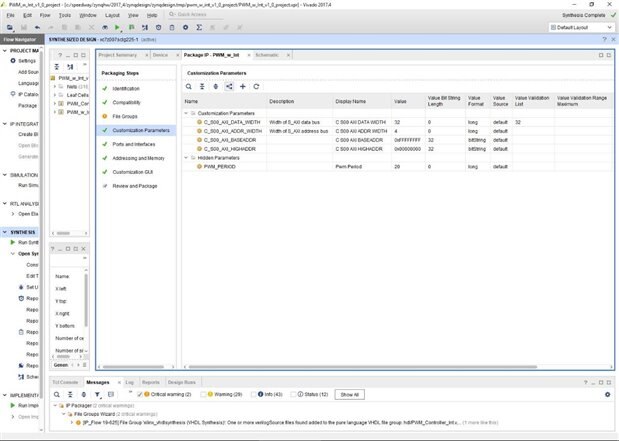

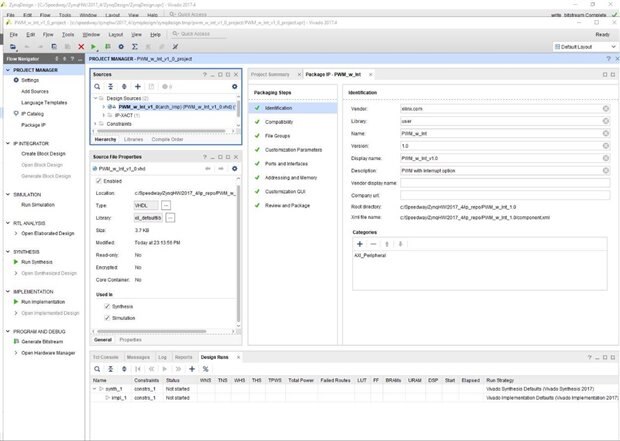
After the customizations are done the ip core should be packaged and all the check marks set to OK.
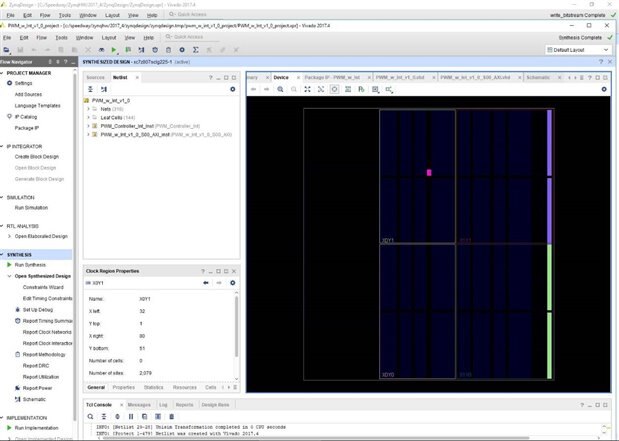
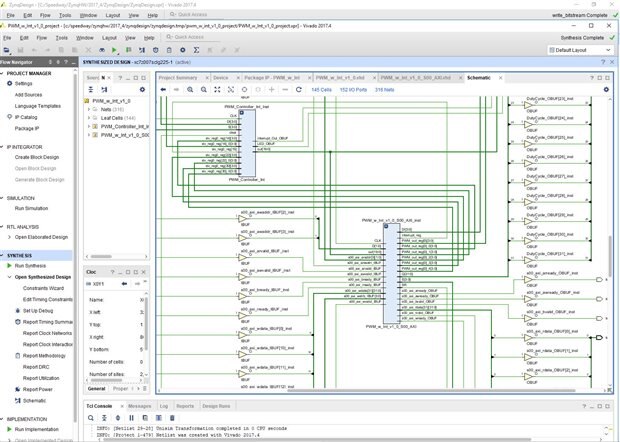
Compilation and the looking into the Schematic
Below are some pictures how the device design must look like once the ip core is integrated in the vivado project.
Exp 4: Add IP to Project
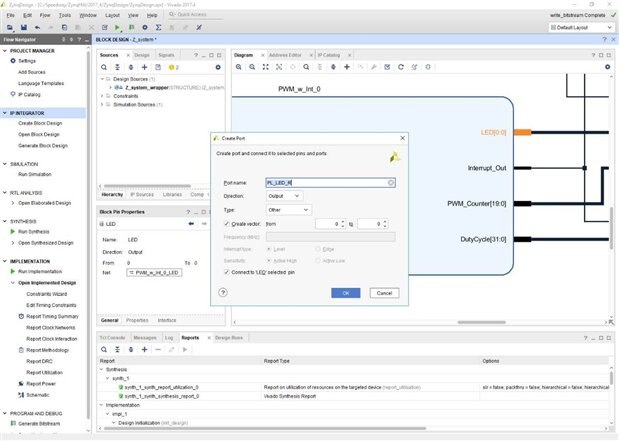
Here I added the ip core into the existing vivado project and and re-run the connection wizard. Later I also regenerated the layout to fit to the block diagram window. The interrupts in the ZYNQ7 Processing System IP block should be turned on and connected to the interrupt of the PWM_w_Int IP. Later I also added the inbuilt logic analyzer ILA for tests and configured the ILA wizard in the design.
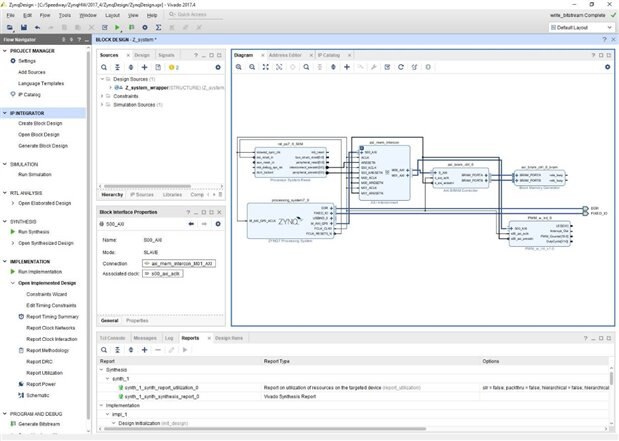
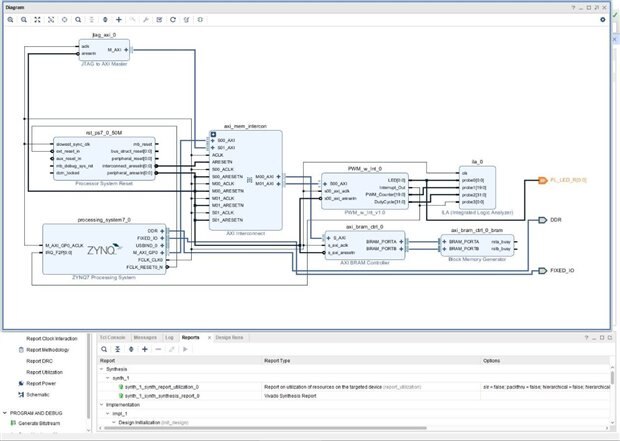
The full design of the Block Diagram
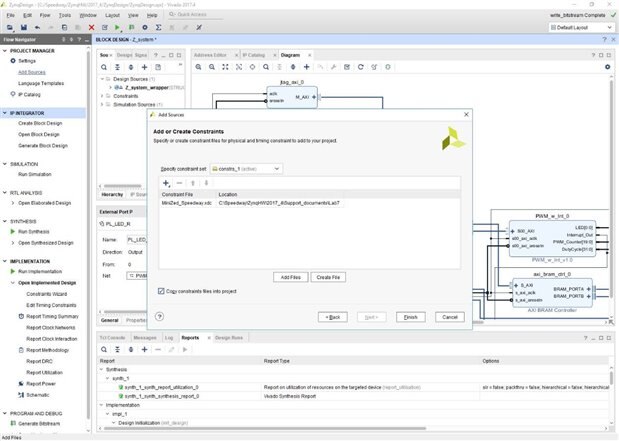
The pre-defined constraints file is also added to the design which sets constraints to all the input/output ports and clocks in the project. This MiniZed_Speedway.xdc file is pre-defined and was sent to us. Later the whole project need to be re-synthesized again and Bitstream should be re-generated.
Conclusion
There were many learnings in this lab exercise and creation of new ips can be a bit daunting if you are a beginner. The process to make new cores in vivado is completely different from what it used to be in ISE. Each step in the process must be closely evaluated as there is a ton of code which gets generated in the background by click of a button. Nevertheless once the process is done the ip- core is a fantastic piece of hardware which can be easily maintained and re-used when needed.

