


My friends where over this friday, and as I was demoing to them the parts/spokes of the project and showing them Home Assistant UI features, one of them said "Won't it be awesome! if there could be music playing out of the Hub"  , which meant I got to work on Saturday morning trying to install Mopidy, which i have used before with the Pi.. Now, since Home Assistant uses python 3 and Mopidy use an older version of python , I had to look for a work around. This meant that we will have to install Home Assistant in a virtual environment, which means the python packages you install for Home Assistant won’t interact with the rest of your system and vice-versa, when compared to straight forward installation in the previous blog post - Pi Control Hub: Setting up Home Assistant+Controlling Philips hue
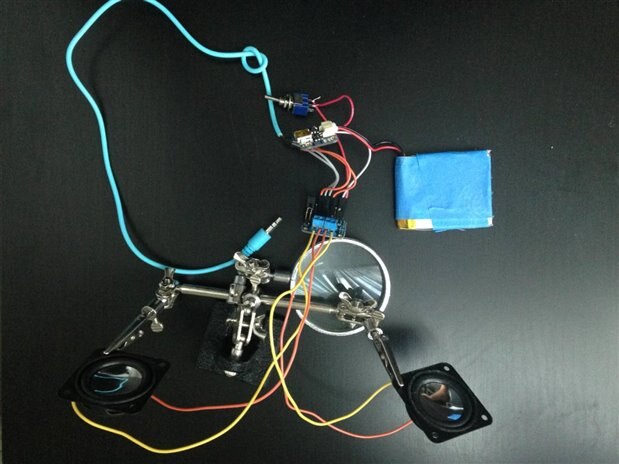
In addition to complete the build we will use Adafruits Stereo 3.7W Class D Audio Amplifier - MAX98306 and hook them up to a couple of speakers 2W 8 Ohms speakers as show in the picture below, but you could also connect to your speaker system at home using an audio jack..
Here are the steps to follow to complete the setup
#1 Setup the Virtual Environment and setup up Home Assistant
Follow details steps at https://home-assistant.io/getting-started/installation-virtualenv/
And also setup home assistant to start at every boot , follow commands at https://home-assistant.io/getting-started/autostart-systemd/ , here remember to replace pi user with hass , which you created as part of setting up the virtual enviroment and install of Home Assistant.
#2 Update your configuration.yaml file
follow the previous blog post to setup configration.yaml file with Sensors and the Philips Hue bulbs, but since we have installed Home Assistant in virtual environment, we will have to follow the commands below to edit the file in the nano editor
sudo su -s /bin/bash hass
cd ~/.homeassistant
nano configuration.yaml
exit
And then to test the changes stop and start Home Assistant using
sudo systemctl stop home-assistant@hass
sudo systemctl start home-assistant@hass

#3 Now lets install Mopidy
run the following command
sudo apt-get install mopidy
Once installed to check out all the extensions that you install with mopidy run
apt-cache search mopidy
for more info check out the documentation at - Installation — Mopidy 2.0.1 documentation
#4 Installing extension, in my case I am using soundcloud
sudo apt-get install mopidy-soundcloud

if you have a spotify premium account , you can also install it using - sudo apt-get install mopidy-spotify
#5 Ensure that volume is outputed from the audio jack and not the HDMI
sudo amixer cset numid=3 1
#6 Now modify the mopidy.conf to enable the HTTP and MPD
sudo nano /etc/mopidy/mopidy.conf
un-comment the http and mpd section and change the hostname section from 127.0.0.1 to 0.0.0.0 , this will allow you top open mopidy on your browser

Also un-comment out the souncloud section , if you have installed soundclound and add the API key which you will have to create an app for in the soundcloud developer console.
#7 Installing web extension to use with Mopidy
check out the link and choose the web extension - Web extensions — Mopidy 2.0.1 documentation
My favorite ones are Mopidy-Mobile and Mopidy-Simple-Webclient, ideal if you are using a tablet/mobile
sudo pip install Mopidy-Mobile
sudo pip install Mopidy-Simple-Webclient
We are going to use Mopidy-Mobile with Home Assistant as a web panel, in you can create playlist and browse your Pi and Soundclound as shown in the video above.
And you can use Mopidy-Simple-Webclient ,to give your house guest a link , which will allow them to play your curated playlist , instead of them playing random stuff  ..
..
#8 To run mopidy on boot run
sudo systemctl enable mopidy
and then reboot your Pi, and to check the status of you install run .And then open url in your browser http://IpAddressOfPi:6680/, you should see the web clients installed.
sudo service mopidy status

If you have to stop and start the service , in case you FTP/load mp3 files to your Pi
sudo systemctl stop mopidy
sudo mopidyctl local scan
sudo systemctl stop mopidy
In addition, click the mobile link in the browser and create playlist, which you can then use with the simple-webclient
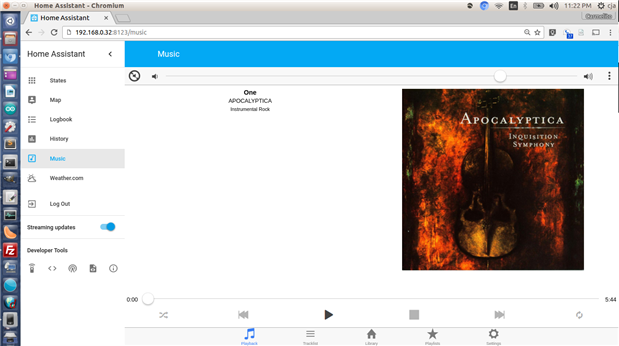
#9 Creating a web panel in Home Assistant to display the Mopidy mobile web client
Modify the configuration.yaml file to add
panel_iframe:
  music:
    title: 'Music'
    icon: 'mdi:music-box-outline'
    url: 'http://192.168.0.32:6680/mobile/index.html#/playback'
modify the ip address of your Pi, here is how the web panel should look
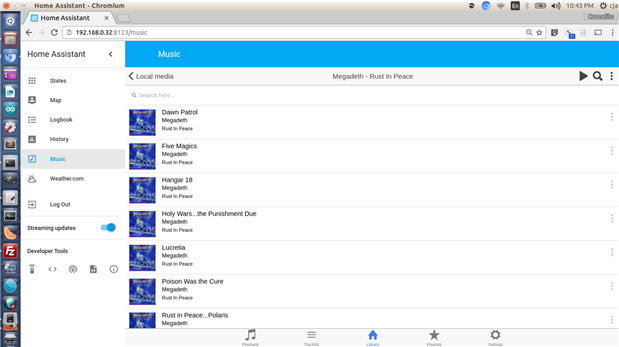
this means you can now create and manage your music inside Home Assistant ..
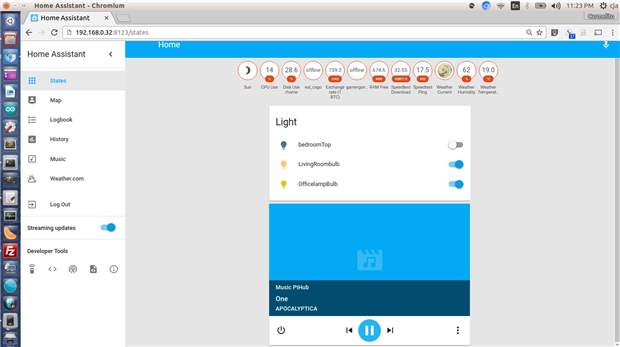
#10 Setting up Music Player daemon(MPD)
Now if you want to save a couple of clicks  , instead of going to newly created music tab , you can setup MPD, which will show up in the status tab , and will allow you play your songs from the track list and control their volume. Add the following to the configuration.yaml file
#mopidy installed on the Pi
media_player:
  platform: mpd
  server: 127.0.0.1
  port: 6600
  location: Music PiHub

#11 Soldering and connecting audio jack to Audio Amplifier and Lipo battery
As part of the final setup, the idea is to have the speaker and Pi run on Lipo's, which means we will need a Lipo charger and an On/Off switch.
| {gallery} Circuit to connect the Pi to Speakers |
|---|
Circuit |
Stereo 3.7W Class D Audio Amplifier - MAX98306 (https://www.adafruit.com/products/987) |
Adafruit Mini Lipo w/Mini-B USB Jack(https://www.adafruit.com/products/1905) or you can use the micro charges as well |
Running Mopidy from Home Assistant |
Tab setup as panel_iframe in the Home-Assistant configuration.yaml file |
Music Player Daemon (MPD) setup |
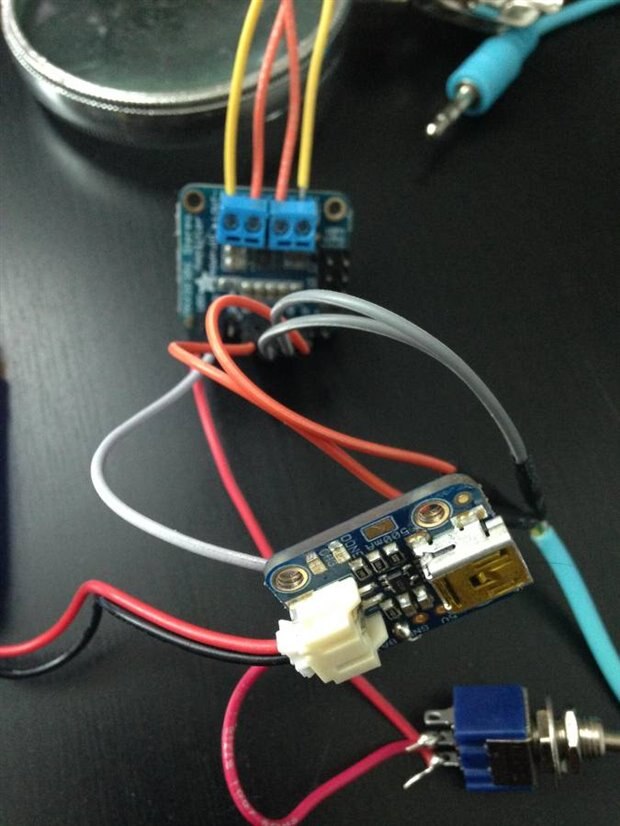
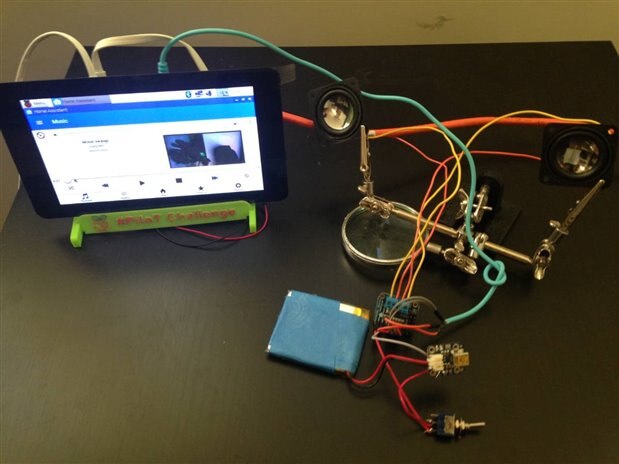
Cut off one end of of female to female jumper and then solder to GND pin on Adafruit Mini Lipo w/Mini-B USB Jack. Then connect the BAT pin to one end of the switch using using bread boarding wire and the other end to female jumper wire.
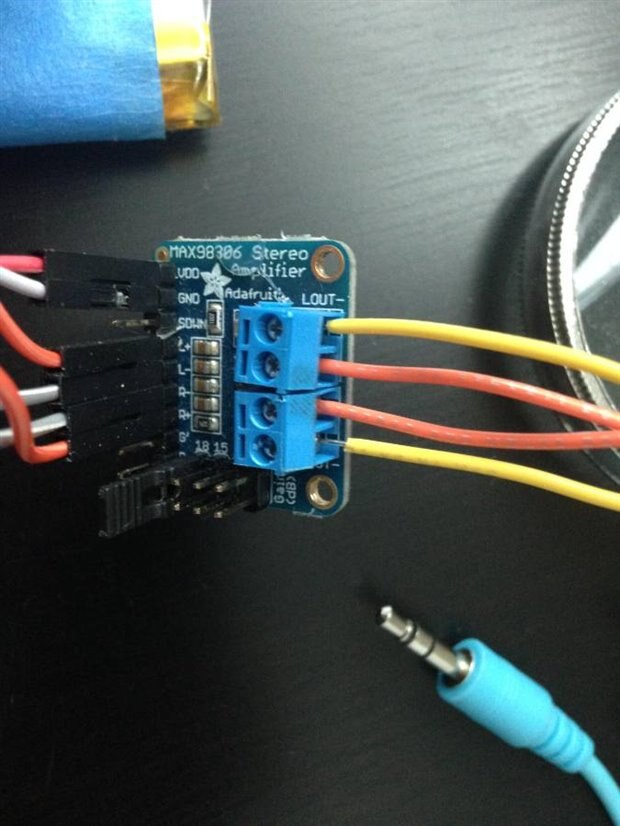
Now cut the end of your audio cable and connect 2 female jumper wires to the white line and one wire to Left side and the other to the right side.
And then connect negative wire from the Mini Lipo w/Mini-B USB Jack to GND and the positive wire to VDD, as shown in the picture above.
Once you are done with the connections, screw down the speaker in the blue terminal blocks
Now connect the lipo battery and turn on the speakers and connect the audio jack to the phone to test it out..
Also test that your lipo is charging and wait for the lipo to completely charge.