element14 Community
element14 Community
    Register Log In
  • Site
  • Search
  • Log In Register
  • Community Hub
    Community Hub
    • What's New on element14
    • Feedback and Support
    • Benefits of Membership
    • Personal Blogs
    • Members Area
    • Achievement Levels
  • Learn
    Learn
    • Ask an Expert
    • eBooks
    • element14 presents
    • Learning Center
    • Tech Spotlight
    • STEM Academy
    • Webinars, Training and Events
    • Learning Groups
  • Technologies
    Technologies
    • 3D Printing
    • FPGA
    • Industrial Automation
    • Internet of Things
    • Power & Energy
    • Sensors
    • Technology Groups
  • Challenges & Projects
    Challenges & Projects
    • Design Challenges
    • element14 presents Projects
    • Project14
    • Arduino Projects
    • Raspberry Pi Projects
    • Project Groups
  • Products
    Products
    • Arduino
    • Avnet & Tria Boards Community
    • Dev Tools
    • Manufacturers
    • Multicomp Pro
    • Product Groups
    • Raspberry Pi
    • RoadTests & Reviews
  • About Us
    About the element14 Community
  • Store
    Store
    • Visit Your Store
    • Choose another store...
      • Europe
      •  Austria (German)
      •  Belgium (Dutch, French)
      •  Bulgaria (Bulgarian)
      •  Czech Republic (Czech)
      •  Denmark (Danish)
      •  Estonia (Estonian)
      •  Finland (Finnish)
      •  France (French)
      •  Germany (German)
      •  Hungary (Hungarian)
      •  Ireland
      •  Israel
      •  Italy (Italian)
      •  Latvia (Latvian)
      •  
      •  Lithuania (Lithuanian)
      •  Netherlands (Dutch)
      •  Norway (Norwegian)
      •  Poland (Polish)
      •  Portugal (Portuguese)
      •  Romania (Romanian)
      •  Russia (Russian)
      •  Slovakia (Slovak)
      •  Slovenia (Slovenian)
      •  Spain (Spanish)
      •  Sweden (Swedish)
      •  Switzerland(German, French)
      •  Turkey (Turkish)
      •  United Kingdom
      • Asia Pacific
      •  Australia
      •  China
      •  Hong Kong
      •  India
      •  Japan
      •  Korea (Korean)
      •  Malaysia
      •  New Zealand
      •  Philippines
      •  Singapore
      •  Taiwan
      •  Thailand (Thai)
      •  Vietnam
      • Americas
      •  Brazil (Portuguese)
      •  Canada
      •  Mexico (Spanish)
      •  United States
      Can't find the country/region you're looking for? Visit our export site or find a local distributor.
  • Translate
  • Profile
  • Settings
PiCasso Design Challenge
  • Challenges & Projects
  • Design Challenges
  • PiCasso Design Challenge
  • More
  • Cancel
PiCasso Design Challenge
Blog AI powered CNC Painting Machine - Blog #3 - Raspberry Pi: Camera + Style Transfer
  • Blog
  • Forum
  • Documents
  • Polls
  • Files
  • Events
  • Mentions
  • Sub-Groups
  • Tags
  • More
  • Cancel
  • New
  • Share
  • More
  • Cancel
Group Actions
  • Group RSS
  • More
  • Cancel
Engagement
  • Author Author: Attila Tőkés
  • Date Created: 2 May 2019 12:37 PM Date Created
  • Views 608 views
  • Likes 5 likes
  • Comments 1 comment
Related
Recommended

AI powered CNC Painting Machine - Blog #3 - Raspberry Pi: Camera + Style Transfer

Attila Tőkés
Attila Tőkés
2 May 2019

Hi,


After some troubles, finally I got the Image Stylization / Style Transfer presented in the Blog #2 running on the Raspberry Pi.


The first challenge was to install Torch and TorchVision on the Raspberry Pi. Looks like the binaries are not built for the armv7l architecture, so simply running

$ pip3 install torch torchvision

does not works.


Instead, the Torch and TorchVision need to build from source. I found a great article describing how to do this for Torch:

How to install PyTorch v4.0+ on Raspberry Pi-3B+, Odroids, and other ARM-based devices


Torch can built and installed as:

$ sudo apt install libopenblas-dev libblas-dev m4 cmake cython python3-dev python3-yaml python3-setuptools


$ mkdir pytorch_install && cd pytorch_install


$ git clone --recursive https://github.com/pytorch/pytorch


$ cd pytorch


$ export NO_DISTRIBUTED=1

$ export NO_MKLDNN=1

$ export NO_NNPACK=1

$ export NO_QNNPACK=1


$ python3 setup.py build


$ sudo -E python3 setup.py install

Note: the build step takes about 12 hours and needs about 2 GB of additional swap space as the RPi is little bit low on RAM.


TorchVision can build similarly:

$ sudo apt-get install libjpeg-dev zlib1g-dev


$ git clone --recursive https://github.com/pytorch/vision


$ sudo apt-get install libjpeg-dev zlib1g-dev

After this the fast neural style example from pytorch / examples works, but because of the limited amount of RAM of the Rpi it works only for smaller resolution images.

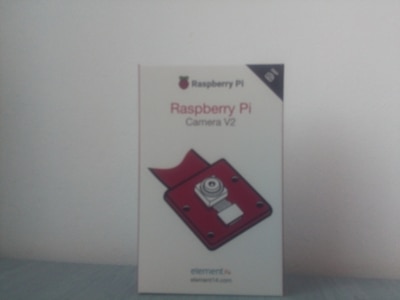
Here is candy model applied to an image taken with RaspiCam, and down-scaled to 400x300:
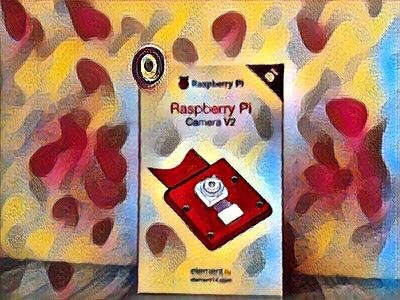
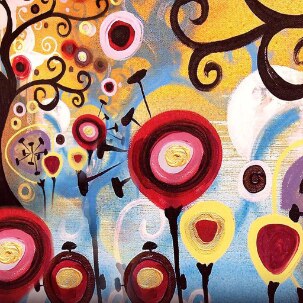
imageimage

model image:

image

The transformation takes about 1 minute on the Rpi.


Cheers,

Attila

  • Sign in to reply

Top Comments

  • dubbie
    dubbie over 6 years ago +2
    Attila, Looks like an interesting effect. Dubbie
  • dubbie
    dubbie over 6 years ago

    Attila,


    Looks like an interesting effect.


    Dubbie

    • Cancel
    • Vote Up +2 Vote Down
    • Sign in to reply
    • More
    • Cancel
element14 Community

element14 is the first online community specifically for engineers. Connect with your peers and get expert answers to your questions.

  • Members
  • Learn
  • Technologies
  • Challenges & Projects
  • Products
  • Store
  • About Us
  • Feedback & Support
  • FAQs
  • Terms of Use
  • Privacy Policy
  • Legal and Copyright Notices
  • Sitemap
  • Cookies

An Avnet Company © 2026 Premier Farnell Limited. All Rights Reserved.

Premier Farnell Ltd, registered in England and Wales (no 00876412), registered office: Farnell House, Forge Lane, Leeds LS12 2NE.

ICP 备案号 10220084.

Follow element14

  • X
  • Facebook
  • linkedin
  • YouTube