


I t has been very disappointing that the cameras I ordered have not arrived. However I need to at least find out if the system works before tomorrow's deadline, so I have hooked up some ancient webcams to see it the whole system works.
These webcams have the wrong field of view and are both different and they have significantly different sensitivities, so these tests will not be using the final geometry. I just want to see if a drawing program can be controlled by webcams detecting a pointer.
For the first test I just had the webcams off to the side to see if waving a pointer in front of them would make the paint program cursor move, and it does. That was a nice moment.
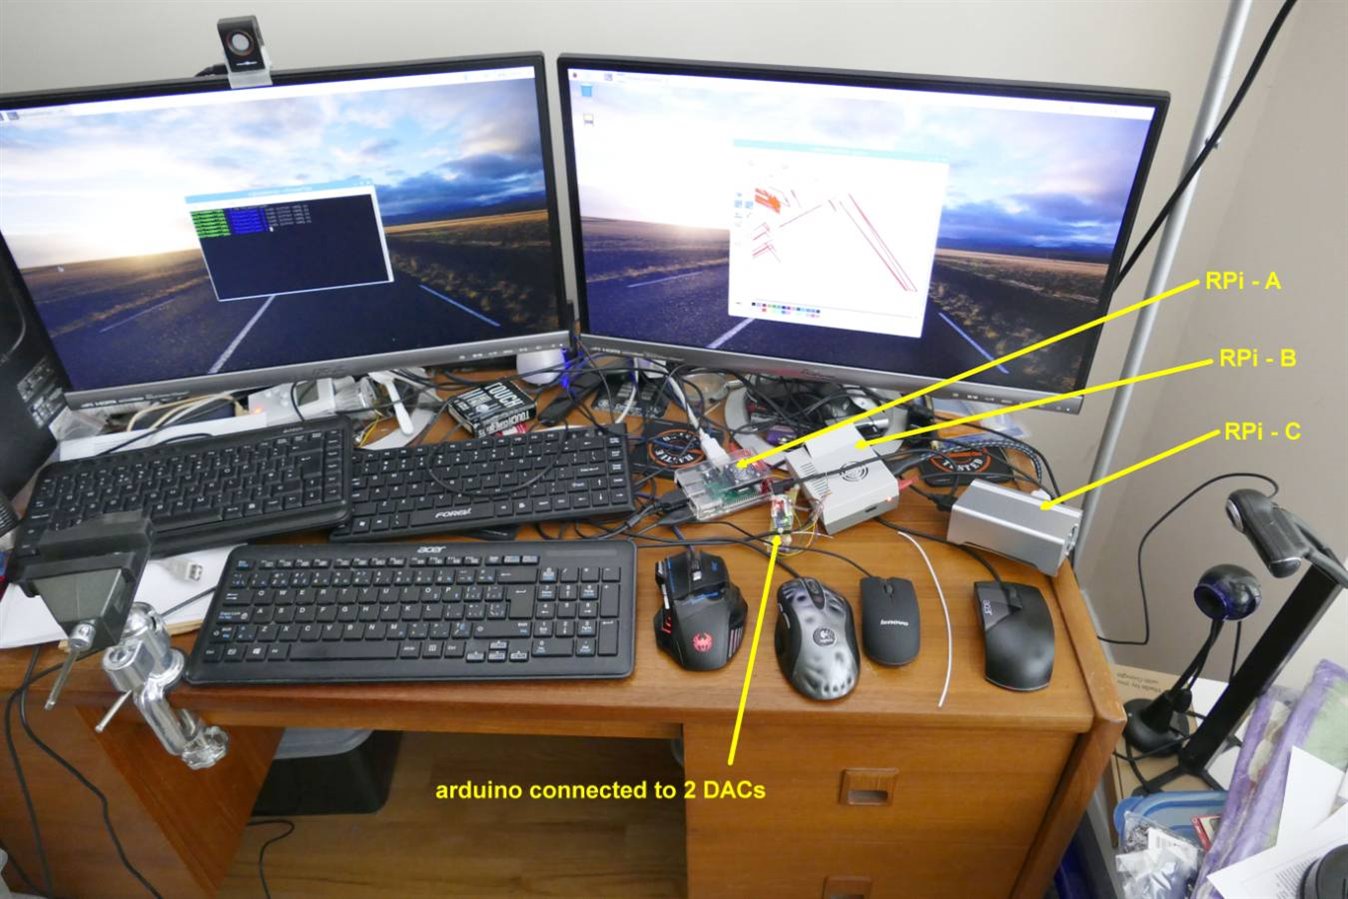
You can see in this picture that there are 3 Raspberry Pi computers. They are all 3B+ versions even though the cases are all different.
The three mice on the right are for the 3 Pi's. The other mouse and its adjacent keyboard are for a PC which is used for arduino development and can display on both monitors.
The monitor on the right has 3 selectable inputs:
- PC
- RPi B
- RPi C
The monitor on the left has 2 selectable inputs:
- PC
- RPi A
The two other keyboards are connected to RPi A and RPi B.
The arduino is connected to RPi C via USB and acts as a HID mouse.
It is also connected to 2 DACs, being fed camera positions by RPi A and RPi B.
The 2 webcams are connected to RPi A and RPi B.
If this all looks confusing, you should try developing software on 5 different computers at the same time - it is something else.
You have to think twice to even figure out which keyboard or mouse to use, assuming you can figure out which program needs to be altered and which monitor is displaying which computer output.
One keyboard is not even in the picture.
The power supplies are also pretty serious, especially when trying to do a properly controlled shutdown of all systems simultaneously.
I didn't really appreciate how confusing it would get when I was planning the project. Just scrounging enough cables, keyboards and mice was a bigger exercise than I expected. I had envisioned the two camera RPis as having no keyboard or mouse, just a camera. (completely ignoring the fact that the software would need troubleshooting and adjustment.)
However it was all just manageable and the entire system did function. Unfortunately, the cameras I had planned on didn't arrive, so the system is not seamlessly installed around a big display.
The test setup looked like this:
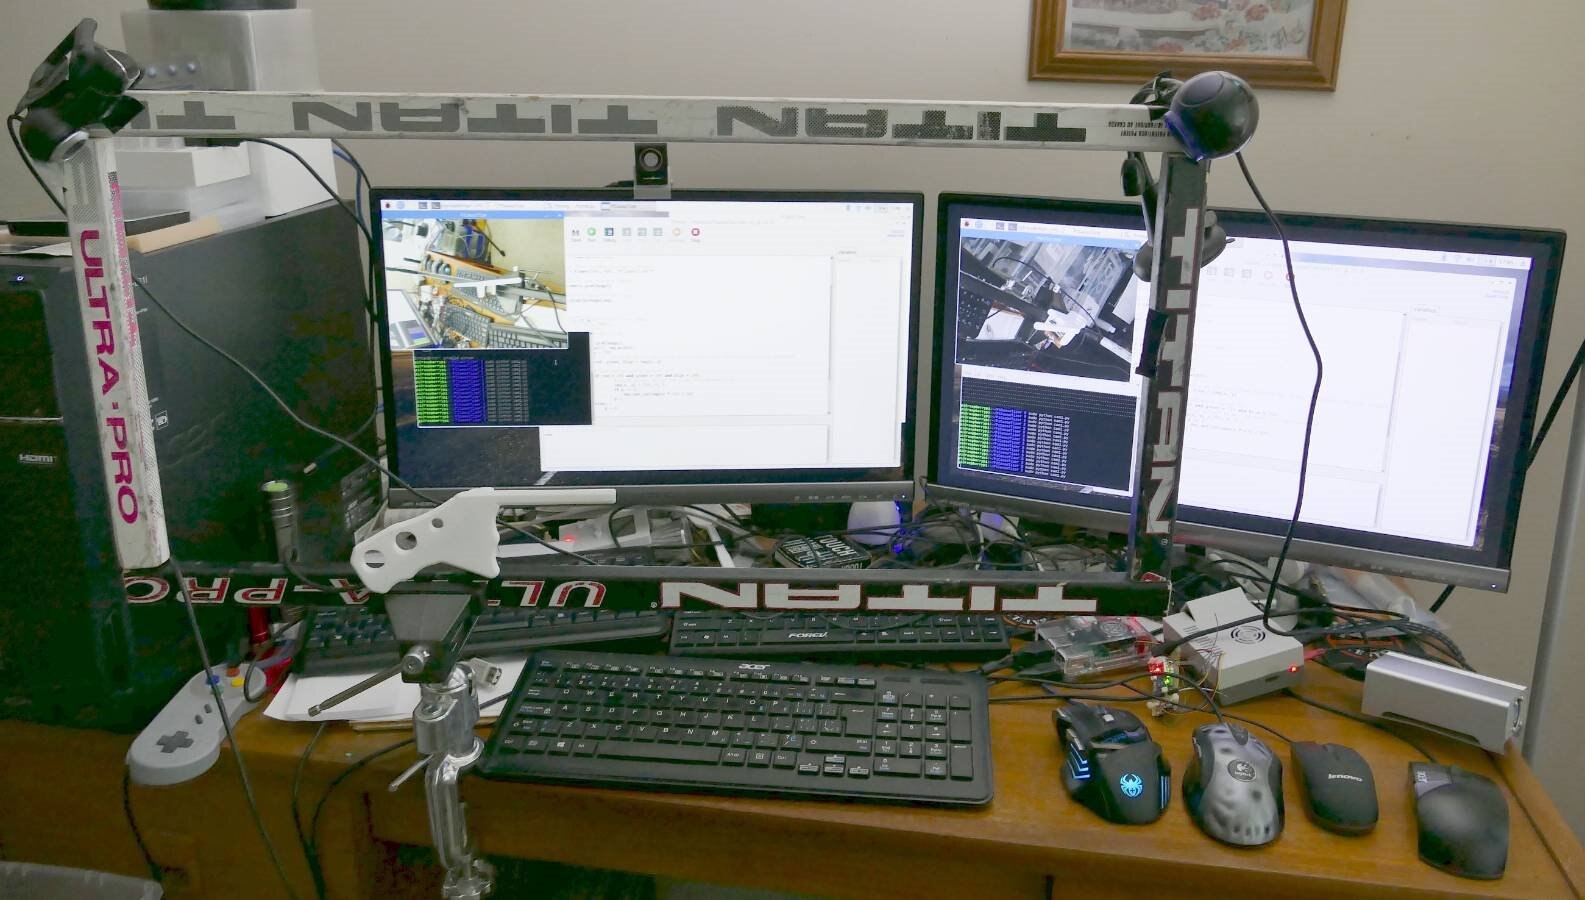
The camera frame is made from old hockey sticks and clamped in a vise. the cameras are mounted on the top corners of the frame and angled to see as much of the frame as possible. This frame is smaller than the final frame, but I didn't want to cut the final frame without measuring the final camera field of view, because I don't have enough material to make a mistake.
The camera views are showing in the upper left corner of each monitor. They can both see the pointer which was propped on the vise just to get it in the picture.
The cursor was jumping around quite a bit due to random reflective speckles in the image, so I attempted to put a black background in the area of interest:
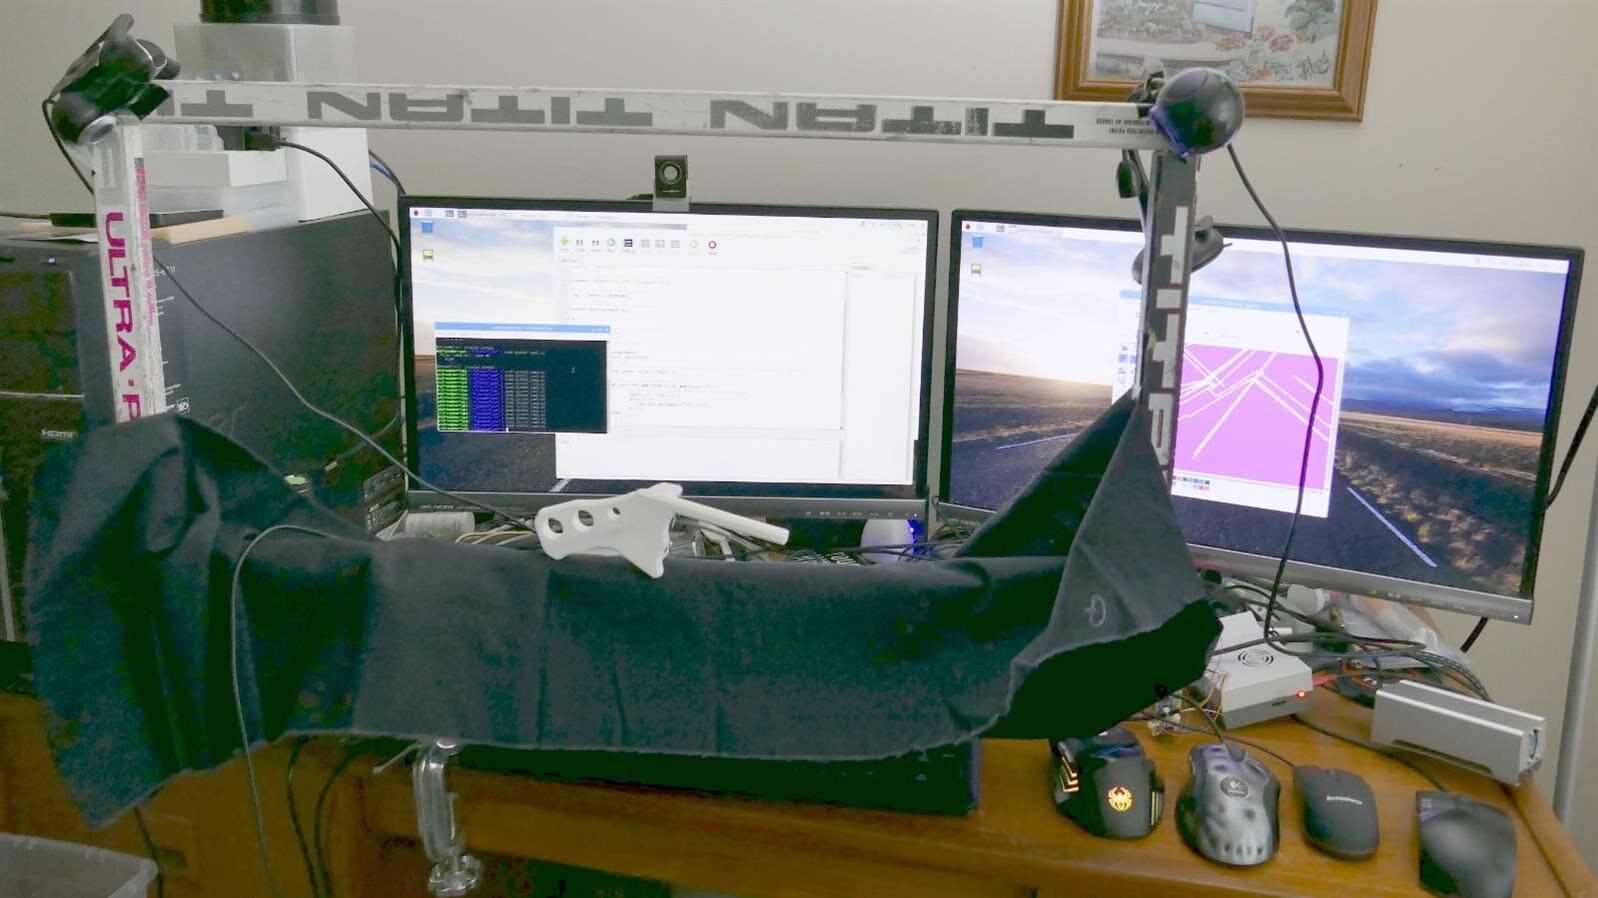
This helped, but there is still more work to do to filter out noise.
It worked just well enough to understand that operating on a big screen allows finer control of drawing details than you can get using a finger on a small tablet.
The system is not quite stable enough to make a drawing yet without having the cursor jump unexpectedly, usually just before you are about to complete an action and release the mouse button.
On the positive side, the debounced mouse button on the pointer was a big success - it worked flawlessly.
The deadline is just hours away, but I will generate at least one more blog to summarize the project and all the lessons learned.
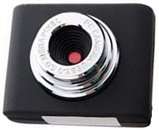
To answer a question from the comments below .... Here is a picture of the low-cost webcams I ordered - they are 4 cm x 3 cm x 2.5 cm:
Relevant links:
PiCassoTizer - Introduction - blog 1
PiCassoTizer - Electronic Parts - Blog 2
PiCassoTizer - Finger Detection Image Processing - Blog 3
PiCassoTizer - Absolute Mouse Position - HID Simulation - Blog 4
PiCassoTizer - The Snowman Smiles - Blog 5
PiCassoTizer - Pi Expanse - blog 6
PiCassoTizer - The Wand - Blog 7
Top Comments
-

dwinhold
-
Cancel
-
Vote Up
+2
Vote Down
-
-
Sign in to reply
-
More
-
Cancel
Comment-

dwinhold
-
Cancel
-
Vote Up
+2
Vote Down
-
-
Sign in to reply
-
More
-
Cancel
Children