element14 Community
element14 Community
    Register Log In
  • Site
  • Search
  • Log In Register
  • Community Hub
    Community Hub
    • What's New on element14
    • Feedback and Support
    • Benefits of Membership
    • Personal Blogs
    • Members Area
    • Achievement Levels
  • Learn
    Learn
    • Ask an Expert
    • eBooks
    • element14 presents
    • Learning Center
    • Tech Spotlight
    • STEM Academy
    • Webinars, Training and Events
    • Learning Groups
  • Technologies
    Technologies
    • 3D Printing
    • FPGA
    • Industrial Automation
    • Internet of Things
    • Power & Energy
    • Sensors
    • Technology Groups
  • Challenges & Projects
    Challenges & Projects
    • Design Challenges
    • element14 presents Projects
    • Project14
    • Arduino Projects
    • Raspberry Pi Projects
    • Project Groups
  • Products
    Products
    • Arduino
    • Avnet & Tria Boards Community
    • Dev Tools
    • Manufacturers
    • Multicomp Pro
    • Product Groups
    • Raspberry Pi
    • RoadTests & Reviews
  • About Us
  • Store
    Store
    • Visit Your Store
    • Choose another store...
      • Europe
      •  Austria (German)
      •  Belgium (Dutch, French)
      •  Bulgaria (Bulgarian)
      •  Czech Republic (Czech)
      •  Denmark (Danish)
      •  Estonia (Estonian)
      •  Finland (Finnish)
      •  France (French)
      •  Germany (German)
      •  Hungary (Hungarian)
      •  Ireland
      •  Israel
      •  Italy (Italian)
      •  Latvia (Latvian)
      •  
      •  Lithuania (Lithuanian)
      •  Netherlands (Dutch)
      •  Norway (Norwegian)
      •  Poland (Polish)
      •  Portugal (Portuguese)
      •  Romania (Romanian)
      •  Russia (Russian)
      •  Slovakia (Slovak)
      •  Slovenia (Slovenian)
      •  Spain (Spanish)
      •  Sweden (Swedish)
      •  Switzerland(German, French)
      •  Turkey (Turkish)
      •  United Kingdom
      • Asia Pacific
      •  Australia
      •  China
      •  Hong Kong
      •  India
      • Japan
      •  Korea (Korean)
      •  Malaysia
      •  New Zealand
      •  Philippines
      •  Singapore
      •  Taiwan
      •  Thailand (Thai)
      • Vietnam
      • Americas
      •  Brazil (Portuguese)
      •  Canada
      •  Mexico (Spanish)
      •  United States
      Can't find the country/region you're looking for? Visit our export site or find a local distributor.
  • Translate
  • Profile
  • Settings
Pi Chef Design Challenge
  • Challenges & Projects
  • Design Challenges
  • Pi Chef Design Challenge
  • More
  • Cancel
Pi Chef Design Challenge
Blog Bake Mate - Pi Chef Blog #3 - RPi3 setup & recipe JSON format
  • Blog
  • Forum
  • Documents
  • Polls
  • Files
  • Events
  • Mentions
  • Sub-Groups
  • Tags
  • More
  • Cancel
  • New
  • Share
  • More
  • Cancel
Group Actions
  • Group RSS
  • More
  • Cancel
Engagement
  • Author Author: avnrdf
  • Date Created: 3 Feb 2018 5:12 PM Date Created
  • Views 907 views
  • Likes 8 likes
  • Comments 5 comments
  • pi_chef
  • bakemate
  • python 3
  • pi chef - bake mate
  • raspberry pi3
  • pi chef design challenge
  • tkinter
  • pi chef
Related
Recommended

Bake Mate - Pi Chef Blog #3 - RPi3 setup & recipe JSON format

avnrdf
avnrdf
3 Feb 2018

Bake Mate - Pi Chef Blog #3 - RPi3 setup & recipe JSON format


Setting up the Raspberry Pi 3:


This part is easy:

  • Insert the microSD card that's been preinstalled with NOOBS
  • Plug in a USB mouse, USB keyboard and connect the Pi to a display via HDMI.
  • Connect the Power supply to the Raspberry Pi 3!


The Raspberry Pi 3 will boot NOOBS. I entered the credentials of my WiFi network, and NOOBS started the process of downloading Raspbian (which is around 3GB).

For some reason, the RPi hung a couple of times in the middle, which meant that I needed to restart the entire process.


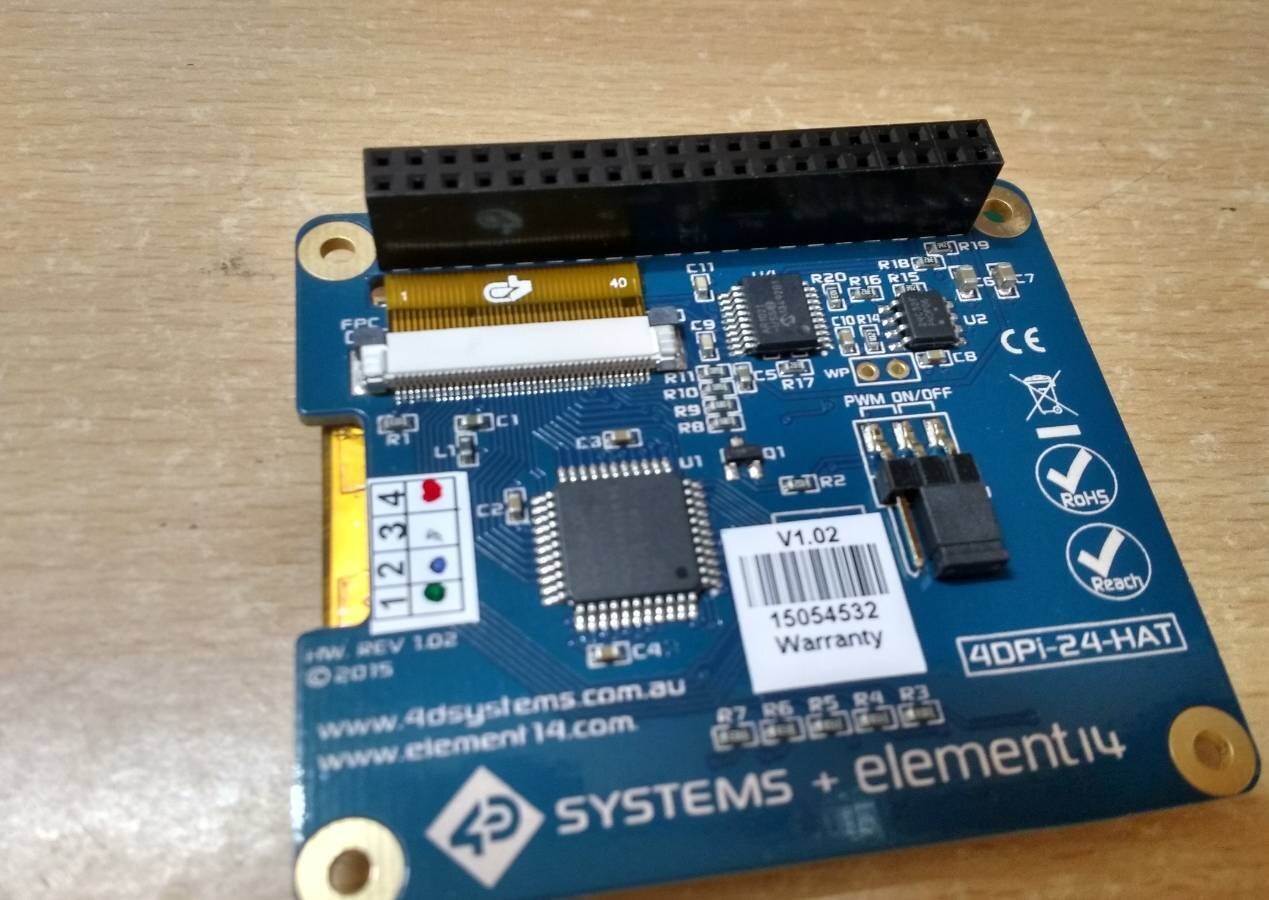
Once it got done, the next step was to setup the 4DPi-24-HAT.

This requires a few extra steps because this display HAT doesn't use the RPi's native display connector, but relies instead on a SPI connection (via the 40 pin GPIO connector).

Due to this, it requires a kernel patch (which is provided by the vendor).


I followed the instructions on the website because they seemed to be newer that the setup guide booklet that shipped with the display.


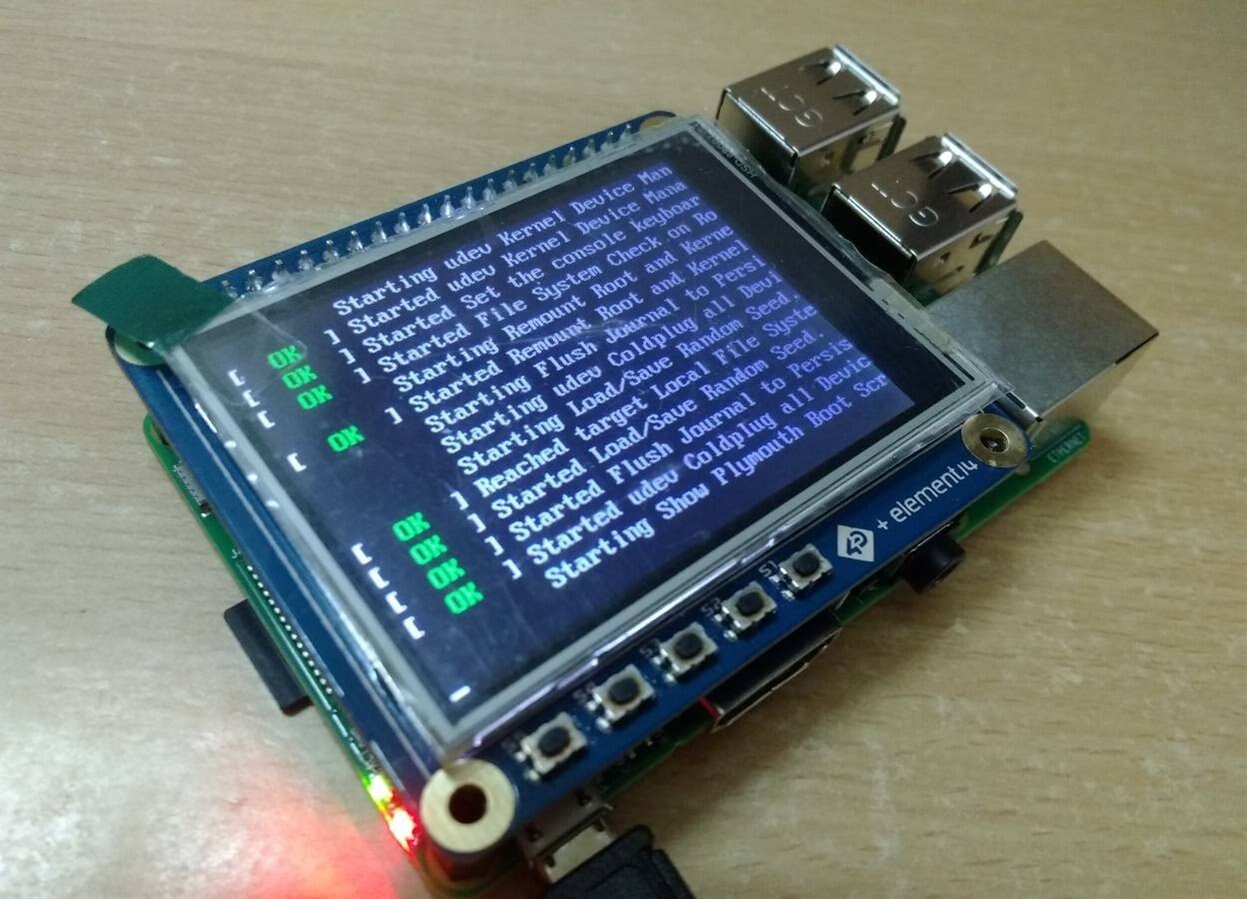
I plugged in the display, and nothing! After a little reading, it turns out you need to move the jumper that controls display PWM from the default shipping position of "PWM" to "ON".

There is a method of calibrating the touchscreen (which is required based on my experience with the display, but I haven't yet got down to doing that.

image

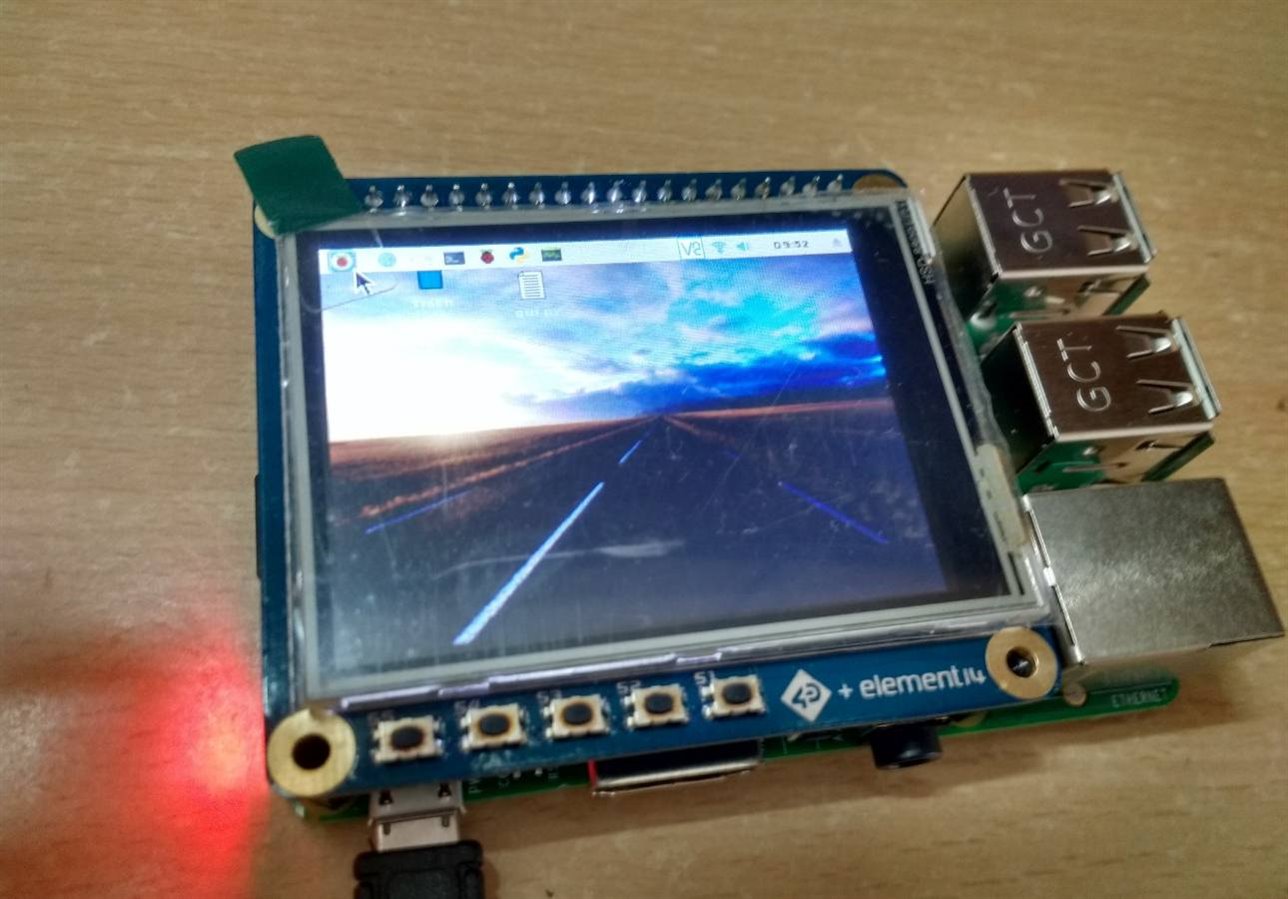
The display works well, but Raspbian isn't designed with such a low resolution in mind, which is why a lot simply gets displayed off-screen.

image

The user manual has a few tips on how to make it a little more usable, which involves decreasing the size of icons and fonts. However, most programs run at the native resolution, which makes them difficult to use since the "OK", "Apply" & "Cancel" buttons remain offscreen.

image

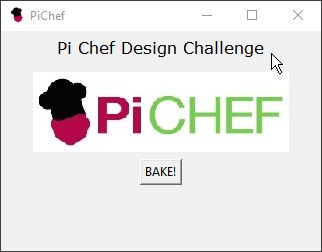
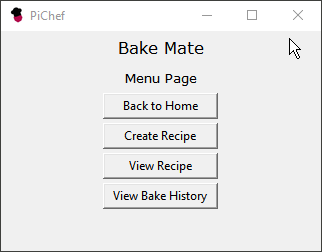
Keeping this in mind, I designed my Python GUI appropriately: the window resolution is capped to the resolution of the display:


I've been working on the GUI, and here are a few of the elements I've finished so far:

You don't have permission to edit metadata of this video.
Edit media
x
image
Upload Preview
image
imageimage


Recipe JSON format:


I designed the format based on several requirements; each recipe should have:


  • A name
  • A description
  • No. of servings
  • Cooking time
  • no. of Steps (initially added to make parsing easier, but I think I could get away without using this)
  • An array containing all the steps, where each step contains:
    • Sequence number
    • Text instruction (description)
    • Instruction type (different types include:)
      • A simple 'do': This type won't contain ingredient amounts because it is a simple instruction like "Stir" or "Melt chocolate"
      • Add measureable: This type will contain the ingredient, the amount and the unit. An instruction with this type of tag will cause the program to enable the weighing scale.
      • Add immeasurable: This is for ingredients that are too small to measure, or have no unit in general: a pinch of salt, a drop of flavouring etc. I've added this because they count as instructions and will need to be present in the final ingredient checklist.
      • Bake: This type will trigger the method that measures oven temperature and sets the timer.
    • Ingredient (name)
    • Unit of the ingredient: This will make it easier to automatically convert units
    • Value of the amount of the ingredient


For example,


{
     "name": "Easy Chocolate Fudge",
     "Description": "Quick & easy one bowl chocolate fudge",
     "Servings": "48",
     "CookTime": "3 hours",
     "nSteps": "6",
     "Steps":[
             {
                    "num": "1",
                    "txt": "Line a 8x8 dish with aluminum foil ",
                    "type": "do",
                    "ingr": "NA",
                    "ingrUnit": "NA",
                    "ingrValue": "0"
             },
             {
                    "num": "2",
                    "txt": "Add chopped chocolate",
                    "type": "addm",
                    "ingr": "Chocolate",
                    "ingrUnit": "gm",
                    "ingrValue": "450"
             },
             {
                    "num": "3",
                    "txt": "Add a tin of condensed milk",
                    "type": "addm",
                    "ingr": "Condensed Milk",
                    "ingrUnit": "oz",
                    "ingrValue": "14"
             },
             {
                    "num": "4",
                    "txt": "Heat till it melts",
                    "type": "do",
                    "ingr": "NA",
                    "ingrUnit": "NA",
                    "ingrValue": "0"
             },
             {
                    "num": "5",
                    "txt": "Add Vanilla",
                    "type": "addnm",
                    "ingr": "Vanilla Essence",
                    "ingrUnit": "NA",
                    "ingrValue": "0"
             },
             {
                    "num": "6",
                    "txt": "Add Walnuts",
                    "type": "addm",
                    "ingr": "Walnuts",
                    "ingrUnit": "gm",
                    "ingrValue": "180"
             }
             ]
}

The JSON format might change with time as I go over more recipes and encounter a step that cannot be covered using the existing format.


Status Update:


I didn't get any time to work on it during the week, but I did work on a few GUI elements today. I figured out how to populate the list of recipes by scanning JSON files in a directory and parsing the recipe name from each file.

I also did a little work on cleaning up some code and modularizing it:

When I started off, I was working on programs for parsing recipes and the the main GUI in parallel. I'm reaching the point where everything needs to be integrated, so I though that it was time that I tidy up my code so that it easier to integrate.

While this program isn't big by any means, I can tell that it will become too difficult to manage in a week or two if it's not sorted our and structured well.


I initially planned on learning advanced Python & tkinter before applying it, but have now decided to take a different approach: identify a problem, and figure out the solution.

Method 1 was ideal, but it takes too much time because I realised that I tend to get stuck reading books and tutorials instead of working on a set of problems. Method 2 is definitely more time-efficient.


The shipment containing the load cell for the weighing scale got delayed, but should get here sometime early next week.


Next on the list:


  • Sort out and clean up the code: create well defined functions and create modules that are easy to use.
  • Now that the main parts of the program are done, it's time to start working on the screens for the steps. I'll need to be careful because there are four types (depending on the step type), and they will need to be designed so that they're easy to reuse.
  • I'll also need to figure out a robust way of keeping track of the current step: it is very important to ensure that the application doesn't glitch, as suddenly losing your current progress in the middle of a recipe won't be fun.
  • I'll start work on the weighing scale and the code when the load cell gets here.
  • Sign in to reply

Top Comments

  • DAB
    DAB over 7 years ago +3
    Good start. Keep it simple until you get everything working, then you can add the bells and whistles. DAB
  • genebren
    genebren over 7 years ago +3
    Great progress. The menus seem to work well (nice video). I like your break down of steps and your usage of JSON for containing the data. Looking good. Gene
  • dixonselvan
    dixonselvan over 7 years ago +2
    Nice update avnrdf You seem to have made quite a huge progress on a day! I love your placement of buttons on a smaller resolution screen and they sure seem to be easy to use.
  • three-phase
    three-phase over 7 years ago

    Good update, nice to see things coming together.


    Kind regards

    • Cancel
    • Vote Up +1 Vote Down
    • Sign in to reply
    • More
    • Cancel
  • avnrdf
    avnrdf over 7 years ago in reply to dixonselvan

    dixonselvan genebren

    That's the first time I tried out the GUI on the display HAT because I've been developing it on a Windows 10 desktop.

    Bigger buttons do help, but I think I'll make them bigger and space them out a little more to minimize accidental touches and make it easier to use.


    I'm also considering linking some of the software buttons to hardware switches because hardware buttons are a lot easier to use than a small touchscreen.


    The touch screen needs calibration, but I'm avoiding changing any of those settings for now because if something goes wrong, I'll probably have to spend a day reinstalling Raspbian and the kernel patch for the display.

    • Cancel
    • Vote Up +2 Vote Down
    • Sign in to reply
    • More
    • Cancel
  • genebren
    genebren over 7 years ago

    Great progress.  The menus seem to work well (nice video).  I like your break down of steps and your usage of JSON for containing the data.  Looking good.

    Gene

    • Cancel
    • Vote Up +3 Vote Down
    • Sign in to reply
    • More
    • Cancel
  • DAB
    DAB over 7 years ago

    Good start.

    Keep it simple until you get everything working, then you can add the bells and whistles.


    DAB

    • Cancel
    • Vote Up +3 Vote Down
    • Sign in to reply
    • More
    • Cancel
  • dixonselvan
    dixonselvan over 7 years ago

    Nice update avnrdf You seem to have made quite a huge progress on a day! I love your placement of buttons on a smaller resolution screen and they sure seem to be easy to use.

    • Cancel
    • Vote Up +2 Vote Down
    • Sign in to reply
    • More
    • Cancel
element14 Community

element14 is the first online community specifically for engineers. Connect with your peers and get expert answers to your questions.

  • Members
  • Learn
  • Technologies
  • Challenges & Projects
  • Products
  • Store
  • About Us
  • Feedback & Support
  • FAQs
  • Terms of Use
  • Privacy Policy
  • Legal and Copyright Notices
  • Sitemap
  • Cookies

An Avnet Company © 2025 Premier Farnell Limited. All Rights Reserved.

Premier Farnell Ltd, registered in England and Wales (no 00876412), registered office: Farnell House, Forge Lane, Leeds LS12 2NE.

ICP 备案号 10220084.

Follow element14

  • X
  • Facebook
  • linkedin
  • YouTube