element14 Community
element14 Community
    Register Log In
  • Site
  • Search
  • Log In Register
  • Community Hub
    Community Hub
    • What's New on element14
    • Feedback and Support
    • Benefits of Membership
    • Personal Blogs
    • Members Area
    • Achievement Levels
  • Learn
    Learn
    • Ask an Expert
    • eBooks
    • element14 presents
    • Learning Center
    • Tech Spotlight
    • STEM Academy
    • Webinars, Training and Events
    • Learning Groups
  • Technologies
    Technologies
    • 3D Printing
    • FPGA
    • Industrial Automation
    • Internet of Things
    • Power & Energy
    • Sensors
    • Technology Groups
  • Challenges & Projects
    Challenges & Projects
    • Design Challenges
    • element14 presents Projects
    • Project14
    • Arduino Projects
    • Raspberry Pi Projects
    • Project Groups
  • Products
    Products
    • Arduino
    • Avnet & Tria Boards Community
    • Dev Tools
    • Manufacturers
    • Multicomp Pro
    • Product Groups
    • Raspberry Pi
    • RoadTests & Reviews
  • About Us
    About the element14 Community
  • Store
    Store
    • Visit Your Store
    • Choose another store...
      • Europe
      •  Austria (German)
      •  Belgium (Dutch, French)
      •  Bulgaria (Bulgarian)
      •  Czech Republic (Czech)
      •  Denmark (Danish)
      •  Estonia (Estonian)
      •  Finland (Finnish)
      •  France (French)
      •  Germany (German)
      •  Hungary (Hungarian)
      •  Ireland
      •  Israel
      •  Italy (Italian)
      •  Latvia (Latvian)
      •  
      •  Lithuania (Lithuanian)
      •  Netherlands (Dutch)
      •  Norway (Norwegian)
      •  Poland (Polish)
      •  Portugal (Portuguese)
      •  Romania (Romanian)
      •  Russia (Russian)
      •  Slovakia (Slovak)
      •  Slovenia (Slovenian)
      •  Spain (Spanish)
      •  Sweden (Swedish)
      •  Switzerland(German, French)
      •  Turkey (Turkish)
      •  United Kingdom
      • Asia Pacific
      •  Australia
      •  China
      •  Hong Kong
      •  India
      •  Japan
      •  Korea (Korean)
      •  Malaysia
      •  New Zealand
      •  Philippines
      •  Singapore
      •  Taiwan
      •  Thailand (Thai)
      •  Vietnam
      • Americas
      •  Brazil (Portuguese)
      •  Canada
      •  Mexico (Spanish)
      •  United States
      Can't find the country/region you're looking for? Visit our export site or find a local distributor.
  • Translate
  • Profile
  • Settings
Pi Chef Design Challenge
  • Challenges & Projects
  • Design Challenges
  • Pi Chef Design Challenge
  • More
  • Cancel
Pi Chef Design Challenge
Blog Stove Assistant - Bernhard - Pi Chef #2 - Unboxing and set up of Raspberry Pi
  • Blog
  • Forum
  • Documents
  • Polls
  • Files
  • Events
  • Mentions
  • Sub-Groups
  • Tags
  • More
  • Cancel
  • New
  • Share
  • More
  • Cancel
Group Actions
  • Group RSS
  • More
  • Cancel
Engagement
  • Author Author: bernhardmayer
  • Date Created: 6 Feb 2018 1:10 AM Date Created
  • Views 577 views
  • Likes 8 likes
  • Comments 4 comments
  • raspberrypicamera
  • opencv
  • v4l
  • raspberry_pi_design_challenge
  • pichef
Related
Recommended

Stove Assistant - Bernhard - Pi Chef #2 - Unboxing and set up of Raspberry Pi

bernhardmayer
bernhardmayer
6 Feb 2018

Stove Assistant - Unboxing


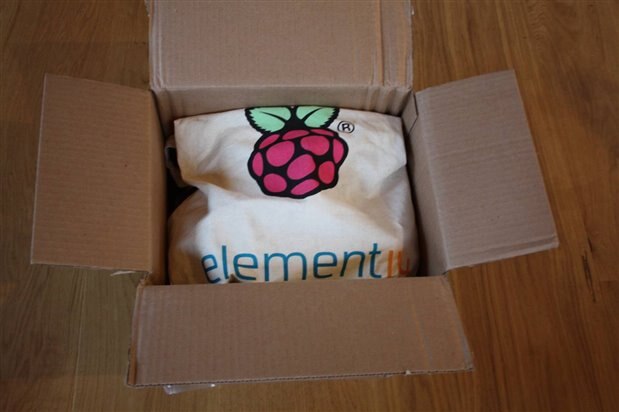
Last week I received a parcel from Newark element14. I opened it and found a very nice Raspberry Pi bag in it:
 

image

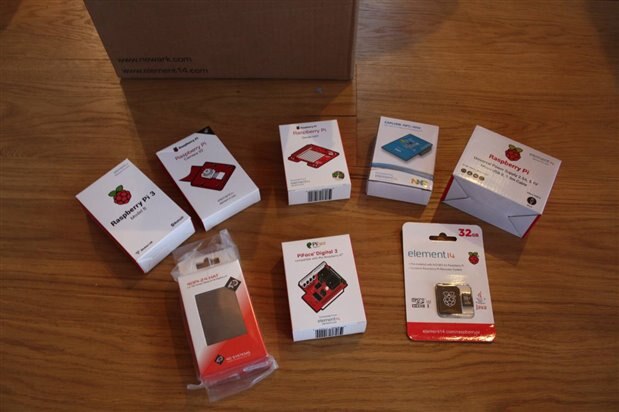
Fortunately the rest of the Challenger Kit was also in it:
image

So everything is there to start the challenge.

Setting up the system


Installation of the operating system


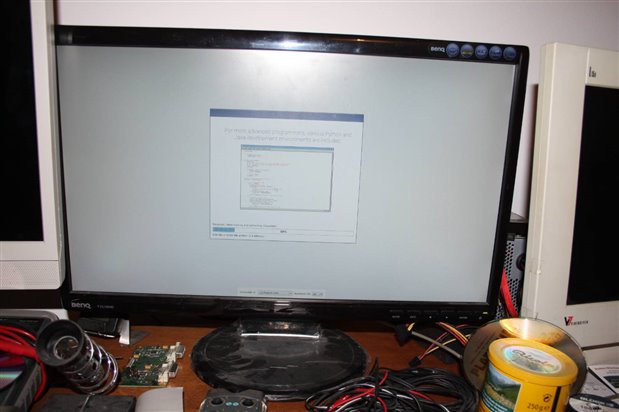
To start the development I first had to set up the system. So I took the Raspberry Pi 3, the Raspberry Pi camera, the power supply and the SD card with the NOOBS image and plugged it all together. I connected a USB keyboard, a USB mouse and a HDMI monitor and powered it up. The NOOBS system boots and asks which operating system to install. I decided to use Raspbian since it is based on debian and gives you the most freedom to install tools and make programs on your own. Furthermore there is a vivid community around who can help you with almost any problem. The raspbian is installed with a graphic user desktop. Maybe I wont need the desktop in the project, but it doesn't hurt at this time.
 

image


Configuration and additional tools


The raspbian system starts fully running but you may want to configure the system to your own needs or install additional tools. I love to have ssh running on the machine so that I can lie with my notebook on my couch and let the Raspberry Pi do some programming stuff in the workroom. ssh can be enabled with the raspi-config tool. If you log into your Raspbeery Pi with the '-X' option you enable the X11 forwarding. Then you have the graphic output of the programs on your Raspberry Pi on your local machine. The login works with this command:

ssh -X pi@ip_address_of_raspberry_pi


Additionally you have to enable the Raspberry Pi camera in raspi-config. You can test the camera with the following command:

raspistill -o test.jpg


This should display the output of the camera for 5 seconds on the screen and then save it to the file test.jpg. Unfortunately this doesn't work with X11 forwarding so you only see the output on the local screen of the Raspberry Pi. But I will fix this in the next chapter with OpenCV.


I also installed vim because I like this editor and I will do much of the programming with it. But working with the original vi is to hard for me!


OpenCV

OpenCV (Open Source Computer Vision) is a library of programming functions mainly aimed at real-time computer vision. I will use it to process the data (images) of the Raspberry Pi camera. OpenCV is written in C++ and I will write my program in C++ so this fits and I wont need any library wrapper.

First you need to install the OpenCV library:

sudo apt-get install libopencv-dev

This will install all the required packages and will take a little time.


OpenCV uses the Video4Linux API to capture data from the camera. Usually this is not enabled on the Raspberry Pi. So you first have to load the corresponding kernel module:

sudo modprobe bcm2835-v4l2


Then I will make the first demo program which will only open the camera and display the output on the screen. To simplify the compiling process I will use a makefile. Here is the content:

CXXFLAGS = -O2 -g -Wall -Wno-unused-result `pkg-config opencv --cflags `
OBJS = main.o 
LIBS = `pkg-config opencv --libs`
TARGET = main
$(TARGET):$(OBJS)
            $(CXX) -o $(TARGET) $(OBJS) $(LIBS)
all:$(TARGET)
    clean:
        rm -f $(OBJS) $(TARGET)


And here is the source code of the program:

#include 
#include 
#include 

int main(void)
{
    int end=1;  // variable to end program
    printf("Pi Chef Stove Assistant Demo\n");  // print start message

    cv::Mat inputImage(1024,1280,CV_8UC3);  // create opencv mat
    cv::VideoCapture cap;  // create camera input
    cap.open(0);  // open camera
    while(end==1)  // check end variable
    {
        cap >> inputImage;  // copy camera input to opencv mat
        cv::imshow("camera",inputImage);  // display mat on screen
        char key = cv::waitKey(20);  // check keys for input
        if(key=='e') end=0;  // end if e was pressed
    }
    printf("ended regularly!\n");  // print end message
    return 0;
}


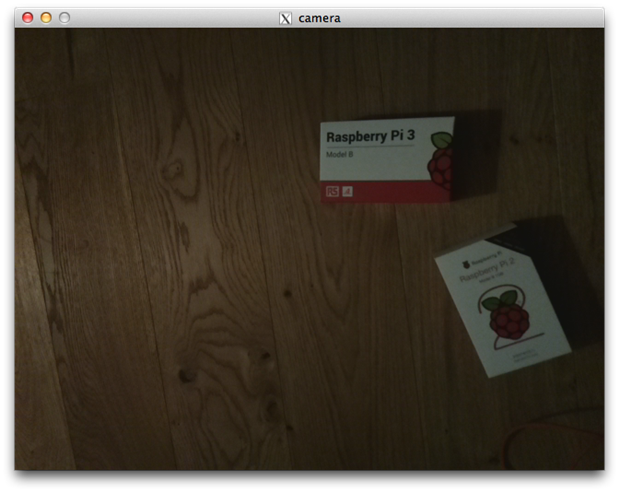
Luckily this also works with X11 forwarding so that I can stay on my couch.

Here is the first screenshot of the output (sorry for the bad quality but it was late with dimed lighting ;-) ):
image


What's next?

I hope that this week the grid-eye sensor arrives and I will connect it to the Raspberry Pi and read out the sensor values.

  • Sign in to reply

Top Comments

  • e14phil
    e14phil over 8 years ago +1
    Looking exciting! Glad to see the progress :-)
  • bernhardmayer
    bernhardmayer over 8 years ago in reply to justin.berger

    Hi Justin,

    it is quite simple. You copy your surce code in and then you select the whole code. Then you click at the top of the input box at the two arrows ">>". then a new box opens and there you select "syntax highlighting".

    I hope this helps you.

    Bernhard

    • Cancel
    • Vote Up 0 Vote Down
    • Sign in to reply
    • More
    • Cancel
  • justin.berger
    justin.berger over 8 years ago

    It's an interesting project! How are you made to include your code in a post?

    Thanks

    Justin

    • Cancel
    • Vote Up 0 Vote Down
    • Sign in to reply
    • More
    • Cancel
  • genebren
    genebren over 8 years ago

    Keep up the good work. Looking forward to see more of your progress.

    Gene

    • Cancel
    • Vote Up 0 Vote Down
    • Sign in to reply
    • More
    • Cancel
  • e14phil
    e14phil over 8 years ago

    Looking exciting! Glad to see the progress :-)

    • Cancel
    • Vote Up +1 Vote Down
    • Sign in to reply
    • More
    • Cancel
element14 Community

element14 is the first online community specifically for engineers. Connect with your peers and get expert answers to your questions.

  • Members
  • Learn
  • Technologies
  • Challenges & Projects
  • Products
  • Store
  • About Us
  • Feedback & Support
  • FAQs
  • Terms of Use
  • Privacy Policy
  • Legal and Copyright Notices
  • Sitemap
  • Cookies

An Avnet Company © 2026 Premier Farnell Limited. All Rights Reserved.

Premier Farnell Ltd, registered in England and Wales (no 00876412), registered office: Farnell House, Forge Lane, Leeds LS12 2NE.

Follow element14

  • X
  • Facebook
  • linkedin
  • YouTube